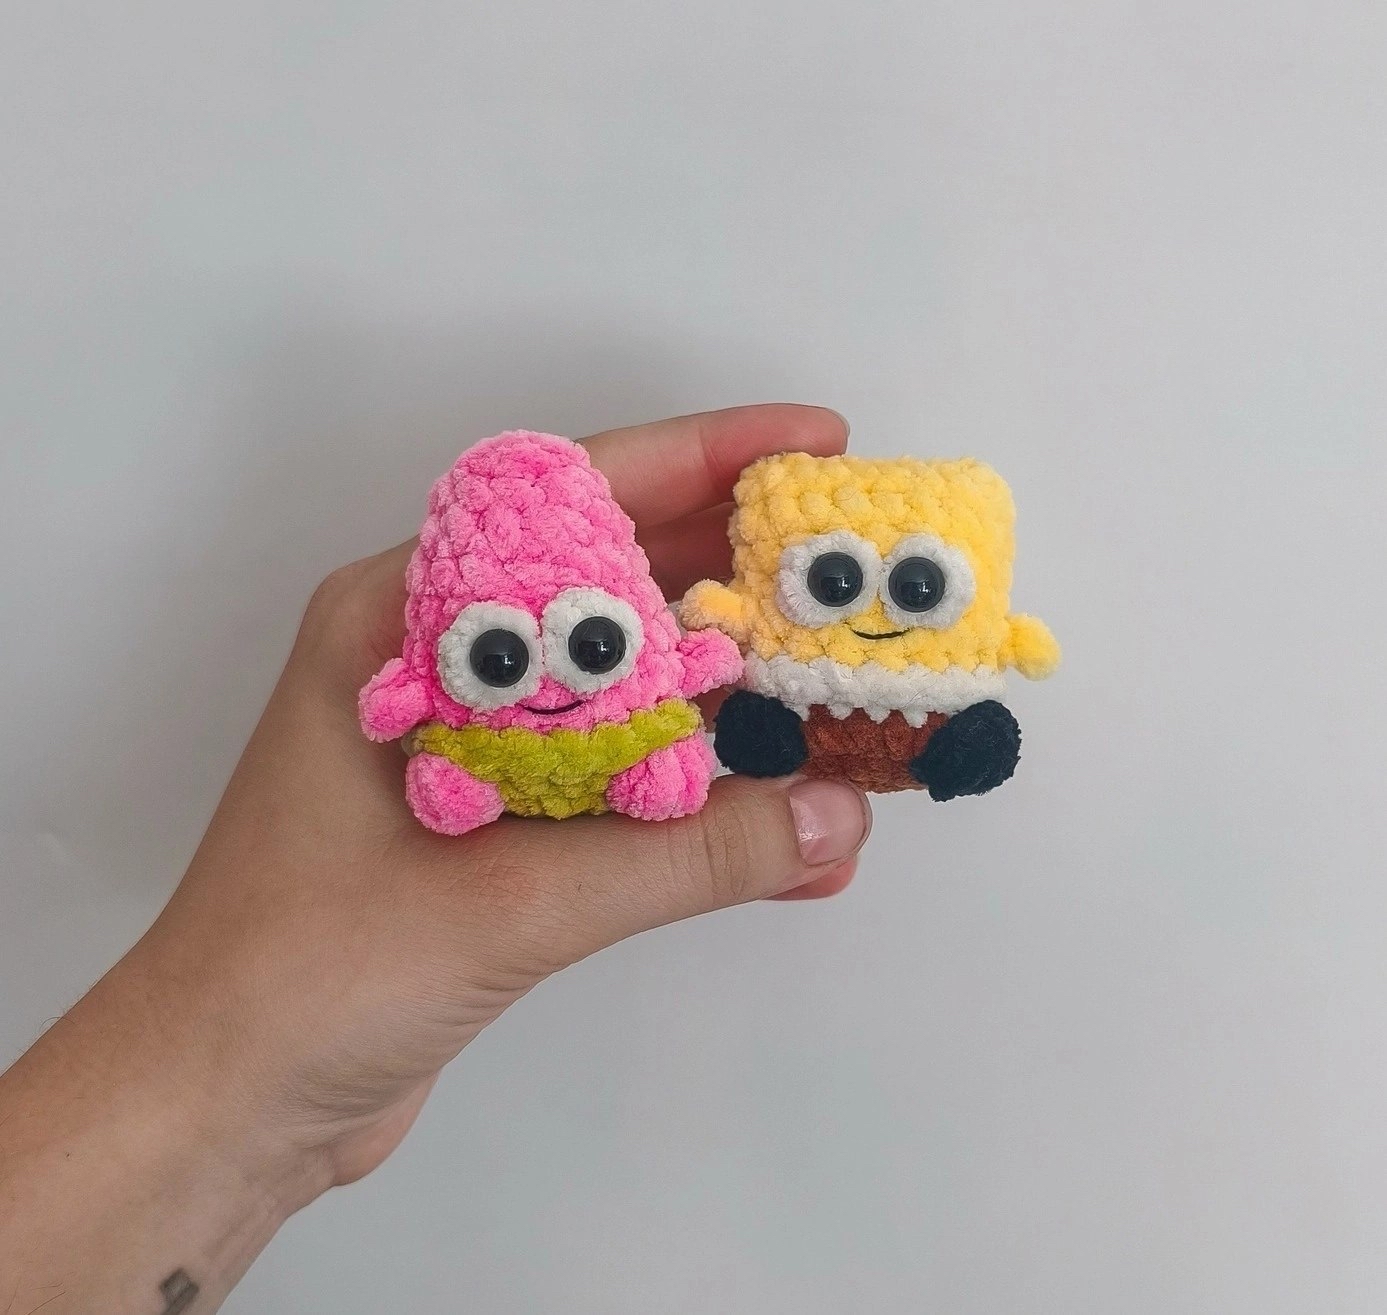
Easy Crochet SpongeBob and Patrick Amigurumi Pattern: A Step-by-Step Tutorial
Are you looking for a fun, quick, and adorable crochet project? Look no further! This tutorial will guide you through creating two of the most iconic characters from the deep blue sea: the lovable, yellow SpongeBob and the goofy, pink Patrick Star. These mini amigurumi characters are perfect for desk buddies, keychain charms, or even as tiny gifts for your crochet-loving friends.
This pattern is designed with a beginner-friendly approach, using chunky, soft yarn to create a “squishy” texture that is incredibly satisfying to hold. Whether you are a seasoned amigurumi artist or just starting your crochet journey, these little guys are a wonderful way to practice color changes and textured stitches like the bobble stitch. Let’s dive into Bikini Bottom and start crocheting!
Materials & Abbreviations
To ensure your characters look just like the photos, I recommend using a plush or chenille-style yarn. This gives them that extra soft, velvety feel. Because this is a mini pattern, you won’t need huge amounts of yarn, making it a very budget-friendly project.
Materials Needed
- Yarn: Plush/Chenille yarn in the following colors:
- SpongeBob: Brown, White, Yellow, Black, and a small amount of Red (optional for the tie).
- Patrick: Green, Pink, and White.
- Crochet Hook: A hook size suitable for your yarn (typically 3.5mm to 4.5mm for plush yarn).
- Safety Eyes: 9mm black safety eyes.
- Stuffing: Polyester fiberfill.
- Tools: Yarn needle, scissors, and stitch markers.
- Optional: Black embroidery thread for the mouth and purple thread for Patrick’s shorts.
US Crochet Abbreviations
Please note that this pattern uses US terms. Ensure you are using the correct terminology to avoid confusion!
- MR: Magic Ring
- sc: single crochet
- inc: increase (2 sc in the same stitch)
- dec: decrease (sc 2 stitches together)
- ch: chain
- dc: double crochet
- hdc: half double crochet
- sl st: slip stitch
- st(s): stitch(es)
- BLO: back loops only
- FLO: front loops only
- Bobble Stitch: Yarn over, insert hook, pull up a loop, yarn over, pull through 2 loops (repeat 5 times in the same stitch), yarn over, pull through all loops on hook.
Step-by-Step Instructions: SpongeBob
We will be working from the bottom up. Make sure to use a stitch marker to keep track of your rounds, as amigurumi is worked in a continuous spiral.
The Base (Brown)
Start with your brown yarn to create the bottom of the character.
- Round 1: 9 sc in a Magic Ring (9)
- Round 2: 9 inc (18)
- Round 3: 6 sc, Black Bobble Stitch (5 dc in one stitch), 5 sc, Black Bobble Stitch (5 dc in one stitch), 5 sc (18). Note: These bobbles act as his little legs.
Switch to White yarn.
- Round 4: 18 sc (18)
The Body (Yellow)
We will now create the main yellow body using a combination of front and back loop techniques to create texture and arms.
Note: We will perform two sets of “Round 5” to create the body shape.
Set 1: The Front
- Round 5.1 (FLO): Work 18 sc into the front loops only for 4 consecutive rounds. This creates the flat front of his body.
Switch to Yellow yarn.
Set 2: The Back and Arms
- Round 5.2 (BLO): Work into the back loops only: 6 sc, Arms (ch 2, hdc in the 2nd ch from hook, sl st back into the base of the arm), 8 sc, Arms (ch 2, hdc in the 2nd ch from hook, sl st back into the base of the arm), 4 sc (18).
- Round 6: 18 sc (18)
The Face (White and Yellow)
- Round 7: 9 sc, White Bobble Stitch (3 dc in one stitch), 1 sc, White Bobble Stitch (3 dc in one stitch), 6 sc (18). These bobbles serve as the base for his eyes.
- Rounds 8-10: 18 sc (3 rounds total).
To finish the shape, work additional single crochet stitches around the sides of the toy (approximately 6 sc per side) until the round is complete. Fasten off, leaving a long tail for sewing the top closed.
Step-by-Step Instructions: Patrick Star
Like SpongeBob, Patrick is worked from the bottom up. We begin with green for his shorts.
The Base (Green)
- Round 1: 9 sc in a Magic Ring (9)
- Round 2: 9 inc (18)
- Round 3: 6 sc, Pink Bobble Stitch (5 dc in one stitch), 5 sc, Pink Bobble Stitch (5 dc in one stitch), 5 sc (18).
Switch to Pink yarn.
Note: We will perform two sets of “Round 4” to create his body shape.
Set 1: The Front
- Round 4.1 (FLO): Work 18 sc into the front loops only for 3 consecutive rounds.
Set 2: The Back and Arms
- Round 4.2 (BLO): Work into the back loops only: 6 sc, Arms (ch 2, hdc in the 2nd ch from hook, sl st back into the base), 8 sc, Arms (ch 2, hdc in the 2nd ch from hook, sl st back into the base), 4 sc (18).
- Round 5: 18 sc (18)
The Face and Shaping
- Round 6: 9 sc, White Bobble Stitch (3 dc in one stitch), 1 sc, White Bobble Stitch (3 dc in one stitch), 6 sc (18).
- Round 7: (4 sc, dec) repeat 3 times (15)
- Round 8: 15 sc (15)
- Round 9: (3 sc, dec) repeat 3 times (12)
- Round 10: (2 sc, dec) repeat 3 times (9)
- Round 11: (1 sc, dec) repeat 3 times (6)
Fasten off and use your yarn needle to weave through the remaining stitches and close the hole securely.
Finishing & Assembly
Now for the best part—bringing your characters to life! This is where their personalities really shine.
Eyes and Face
- Safety Eyes: Take your 9mm safety eyes and secure them directly into the center of the white bobble stitches you created during the face rounds. This gives them that wide-eyed, cute look.
- Mouth: Using black embroidery thread or thin black yarn, stitch a small, simple smile or a slightly open mouth just below the eyes. This is optional, but it adds a wonderful touch!
Custom Details (Optional)
- SpongeBob’s Tie: For a classic look, use a small scrap of red yarn to embroider a tiny red tie on SpongeBob’s chest.
- Patrick’s Shorts: Use purple thread to stitch a small pattern or simple lines on Patrick’s green shorts to mimic his iconic look.
Stuffing Tips
When stuffing your amigurumi, be sure to go slowly. Use small clumps of fiberfill to avoid creating lumps. Make sure to stuff firmly enough so the shape holds, but not so tightly that it distorts the stitches or makes the piece hard. For SpongeBob, ensure you stuff the sides well so he remains a sturdy little rectangle.
Tips for Success
Crocheting with plush yarn can be a bit tricky because the stitches are harder to see. Here are a few tips to help you master this pattern:
- Use Stitch Markers: Because you are working in a continuous spiral, it is very easy to lose your place. Always use a marker at the start of your round.
- Master the Color Change: To get clean color changes, pull the new color through the very last loop of the stitch *before* the color change. This prevents gaps in your work.
- Mind Your Tension: If you find your stitches are too loose, try using a slightly smaller hook. If they are too tight, go up a size. You want the stuffing to be completely invisible through the stitches.
- Bobble Stitch Consistency: When making your bobbles (for the eyes and legs), try to use the same amount of tension so they are all roughly the same size. This makes the characters look more professional.
Happy crocheting! I can’t wait to see your amazing Bikini Bottom creations!