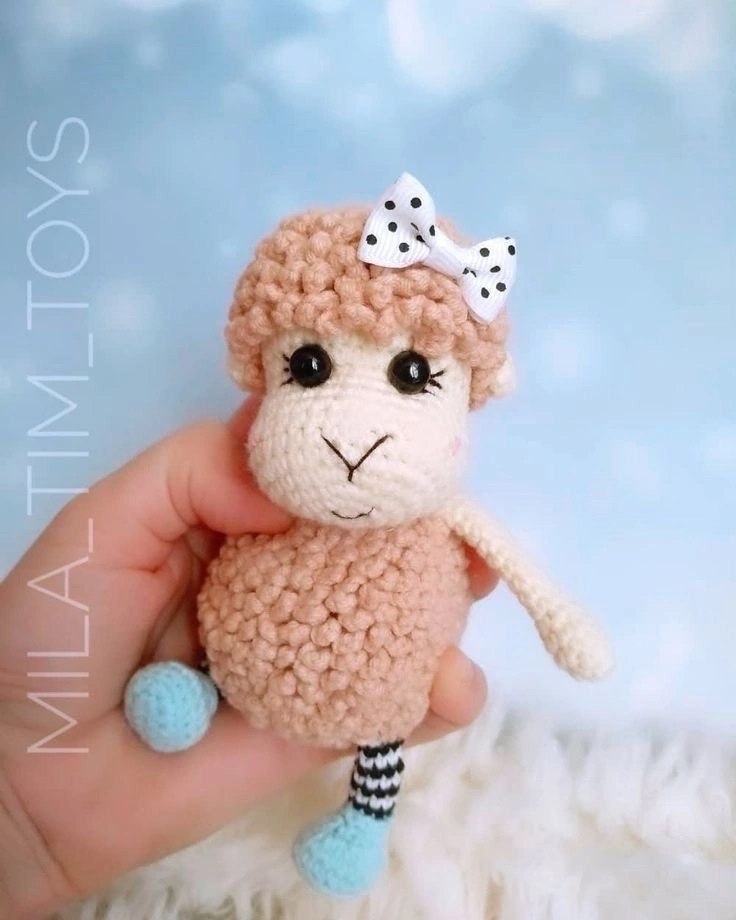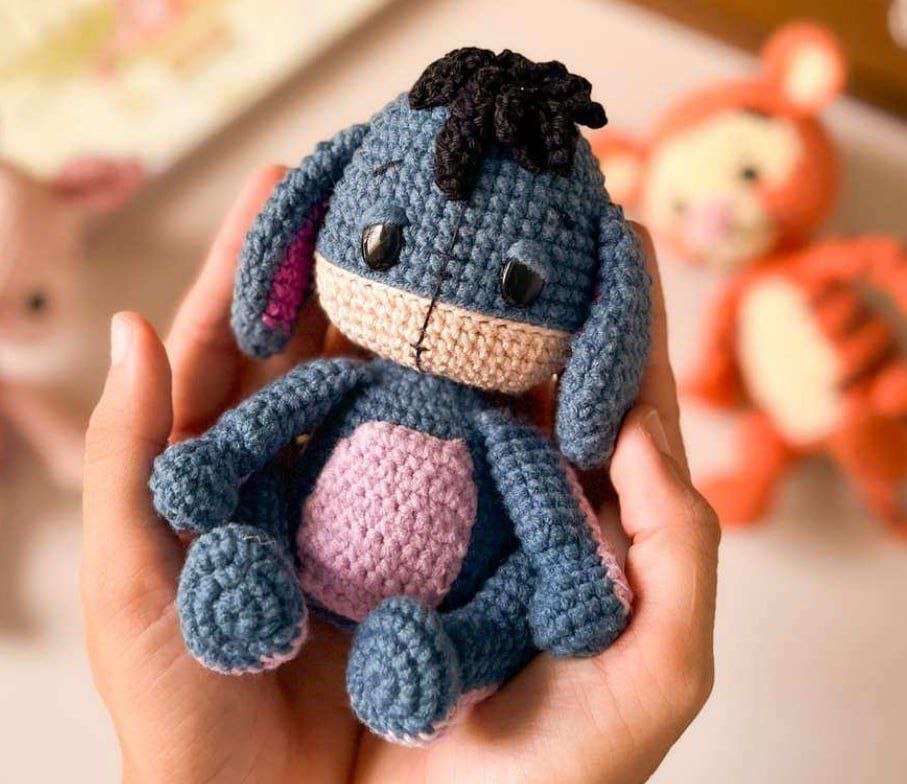
Cute Amigurumi Blue Donkey Crochet Pattern Tutorial
If you are looking for a heartwarming project to add to your crochet collection, you have come to the right place! This adorable blue donkey amigurumi is the perfect project for anyone wanting to create a cuddly, character-filled plushie. Whether you are making this as a gift for a child or adding a whimsical friend to your own shelf, this little donkey is sure to bring a smile to your face.
This pattern is designed with a beginner-friendly approach, making it an excellent way to practice color changes, working in rows, and assembling complex shapes. Follow this detailed guide to bring your very own little donkey to life!
Materials & Abbreviations
Before you pick up your hook, ensure you have all the necessary supplies ready. Since this is an amigurumi project, using a slightly smaller hook than recommended on your yarn label will help create tighter stitches, which prevents stuffing from peeking through.
Required Materials
- Yarn: Medium weight (worsted) yarn in Blue, Beige, Light Pink, Black, and a bright Pink for the bow.
- Hook: A crochet hook suitable for your yarn (typically 3.25mm or 3.5mm).
- Safety Eyes: Large black safety eyes for the head and smaller eyes to be used as leg hinges.
- Stuffing: High-quality polyester fiberfill.
- Embroidery Floss: Black or dark blue for the tail tassel.
- Tools: Tapestry needle for sewing, scissors, and stitch markers.
US Crochet Abbreviations
- MR: Magic Ring
- ch: Chain
- sc: Single crochet
- inc: Increase (2 sc in the same stitch)
- dec: Decrease (sc 2 together)
- dc: Double crochet
- hdc: Half double crochet
- sl st: Slip stitch
- st(s): Stitch(es)
- BLO: Back loops only
- FO: Fasten off
Step-by-Step Instructions
The Head
We begin the head using blue yarn. Work in continuous spirals.
- MR, 6 sc (6)
- 6 inc (12)
- (1 sc, 1 inc) x 6 (18)
- (2 sc, 1 inc) x 6 (24)
- (3 sc, 1 inc) x 6 (30)
- (4 sc, 1 inc) x 6 (36)
- 7-8. 36 sc (2 rows) (36)
- (5 sc, 1 inc) x 6 (42)
- 42 sc (42)
- (13 sc, 1 inc) x 3 (45)
- (14 sc, 1 inc) x 3 (48)
- 13-15. 48 sc (3 rows) (48)
- (15 sc, 1 inc) x 3 (51)
Color Change: Switch to beige yarn.
- 17-20. 51 sc (4 rows) (51)
Eye Placement: Insert your safety eyes between rounds 14 and 15. Place them at stitches 19 and 27.
- (15 sc, 1 dec) x 3 (48)
- (14 sc, 1 dec) x 3 (45)
- (13 sc, 1 dec) x 3 (42)
- (5 sc, 1 dec) x 6 (36)
- 18 dec (18)
- (1 sc, 1 dec) x 6 (12)
- 6 dec (6)
Fasten off, leaving a long tail for sewing the head to the body.
The Ears (Make 2)
Start with blue yarn.
- MR, 6 sc (6)
- (1 sc, 1 inc) x 3 (9)
Color Change: Switch to bright pink yarn.
- 4 sc, (2 sc in one stitch), 3 sc (9)
- 2 sc, 1 inc, 1 sc, (1 sc, 1 inc), 2 sc, 1 inc (12)
- 3 sc, 1 inc, 1 sc, (2 sc, 1 inc), 3 sc, 1 inc (15)
- 6-8. 6 sc, (4 sc in one stitch), 5 sc (3 rows) (15)
- 9. 3 sc, 1 dec, 1 sc, (2 sc, 1 dec), 3 sc, 1 dec (12)
- 10. 5 sc, (3 sc in one stitch), 4 sc (12)
- 11. 2 sc, 1 dec, 1 sc, (1 sc, 1 dec), 2 sc, 1 dec (9)
- 12-13. 4 sc, (2 sc in one stitch), 3 sc (9)
- 14. (2 sc, 1 dec) x 2, fold the ear in half and crochet 4 sc through both sides to close.
The Hair
Use black yarn to create the tuft of hair.
- Ch 16. In the 2nd ch from hook, work: 1 dc, 1 sc, 1 dc, 1 sc.
- Ch 4. In the 2nd ch from hook, work: 1 dc, 1 sc, 1 dc, skip 1 st, 1 sl st.
- Ch 7. In the 2nd ch from hook, work: 1 dc, 1 sc, 2 dc, 2 sc, skip 1 st, 1 sl st.
- Ch 5. In the 2nd ch from hook, work: 1 dc, 1 sc, 2 dc, skip 1 st, 1 sl st.
- Ch 6. In the 2nd ch from hook, work: 1 dc, 1 sc, 2 dc, 2 sc, skip 1 st, 1 sl st.
- 6-7. Ch 4. In the 2nd ch from hook, work: 1 dc, 1 sc, 1 dc, skip 1 st, 1 sl st.
- 8. Ch 3. In the 2nd ch from hook, work: 1 dc, 1 sc, skip 1 st, 1 sl st.
- 9. Ch 4. In the 2nd ch from hook, work: 1 dc, 1 sc, 1 dc, skip 1 st, 1 sl st.
- 10. Ch 5. In the 2nd ch from hook, work: 1 dc, 1 sc, 2 dc, skip 1 st, 1 sl st.
- 11. Ch 4. In the 2nd ch from hook, work: 1 dc, 1 sc, 1 dc, skip 1 st, 1 sl st.
- 12. Ch 3. In the 2nd ch from hook, work: 1 dc, 1 sc, skip 1 st, 1 sl st.
Add a slip stitch in the center of the piece to connect the ends. You can sew this to the head or glue it in place.
The Legs (Make 2)
Start with blue yarn.
- MR, 8 sc (8)
- 8 inc (16)
- 2 inc, 4 sc, 4 inc, 4 sc, 2 inc (24)
Color Change: Switch to light pink yarn.
- 4 sc, 16 sc, 4 sc (24)
- 4 sc, 4 sc, 4 dec, 4 sc, 4 sc (20)
- 4 sc, 2 sc, 4 dec, 2 sc, 4 sc (16)
- 2 sc, 1 dec, 2 sc, 2 dec, 2 sc, 1 dec, 2 sc (12)
- 3 sc, 2 sc, 2 inc, 2 sc, 3 sc (14)
- 3 sc, 3 sc, 1 inc, 1 sc, 1 inc, 2 sc, 3 sc (16)
- 3 sc, 3 sc, 1 dec, 1 sc, 1 dec, 2 sc, 3 sc (14)
- 3 sc, 8 sc, 2 sc, 1 inc (15)
- 3 sc, 3 sc, 1 inc, 1 sc, 1 inc, 2 sc, 4 sc (17)
- 3 sc, 4 sc, 1 inc, 2 sc, 1 inc, 2 sc, 4 sc (19)
- 3 sc, 3 sc, 4 dec, 3 sc, 2 sc, 1 dec (16)
Hinge Detail: Insert small safety eyes between rounds 19 and 20. These will act as the joints for the legs.
- 21. Fold the leg in half and crochet 6 sc through both sides to close.
The Body
Use blue yarn.
- MR, 8 sc (8)
- 8 inc (16)
- (1 sc, 1 inc) x 8 (24)
- (2 sc, 1 inc) x 8 (32)
- (3 sc, 1 inc) x 8 (40)
- 6-7. 40 sc (2 rows) (40)
- (4 sc, 1 inc) x 8 (48)
- 9-11. 48 sc (3 rows) (48)
- 12. 7 sc, 1 dec, 10 sc, 1 dec, 27 sc (46)
- 13. 22 sc, (4 sc, 1 dec) x 4 (42)
Leg Attachment: In round 9, attach the legs at stitches 5 and 26.
- 4 sc, 1 dec, 14 sc, 1 dec, 20 sc (40)
- 40 sc (40)
- 8 sc, 1 dec, 4 sc, 1 dec, 7 sc, 1 dec, (3 sc, 1 dec) x 3 (34)
- 17-19. 34 sc (3 rows) (34)
- 20. 3 sc, 4 sc (crochet these together with the arm), 9 sc, 4 sc (crochet these together with the arm), 14 sc (34)
- 21. 17 dec (17)
- 22. 17 sc (17)
Fasten off, leaving a tail for sewing.
The Belly
Worked in rows using light pink yarn.
- Ch 9. In 2nd ch from hook, 8 sc (8)
- 8 sc (8)
- 1 inc, 6 sc, 1 inc (10)
- 4-8. 10 sc (5 rows) (10)
- 9. 1 dec, 6 sc, 1 dec (8)
- 10. 8 sc (8)
- 11. 1 dec, 4 sc, 1 dec (6)
- 12. (2 sc, 1 inc) x 8 (32)
- 13. (3 sc, 1 inc) x 8 (40)
- 14. 40 sc (40)
- 15. (4 sc, 1 inc) x 8 (48)
- 16-18. 48 sc (3 rows) (48)
- 19. 7 sc, 1 dec, 10 sc, 1 dec, 27 sc (46)
- 20. 22 sc, (4 sc, 1 dec) x 4 (42)
The Tail & Bow
Tail
- Ch 14. In the 4th ch from hook, work: 3 sc, 3 dc, 3 sc, 2 ch, 1 sl st.
Tip: Create a small tassel from embroidery floss and attach it to the end of the tail.
Bow
- Ch 20.
- 2 ch height: 1 sc, 2 dc, 2 hdc, 2 dc, 4 sc, 2 dc, 2 hdc, 2 dc, 2 sc, 1 sl st.
Finishing
Now comes the fun part—assembly! Using your tapestry needle and the leftover yarn tails, carefully sew the ears and the hair onto the head. Position the head on top of the body, ensuring it is centered. Then, sew the belly piece onto the front of the body. Finally, attach the tail to the back and tie the pink bow around the base of the tail for that extra cute touch!
Tips for Success
- Tension is Key: Keep your stitches tight to ensure the stuffing stays inside the toy.
- Stitch Markers: Always use a stitch marker at the beginning of your rounds to avoid losing track, especially when working with increases and decreases.
- Assembly: When sewing the limbs, pin them in place first before sewing to ensure the donkey is balanced and sitting correctly.
- Safety First: If you are making this for a small child, consider embroidering the eyes instead of using plastic safety eyes to prevent choking hazards.