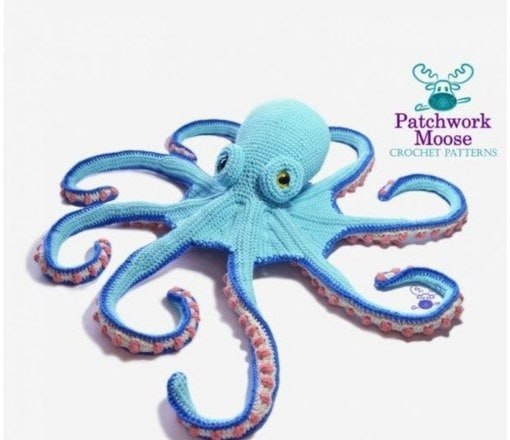
How to Crochet a Cute Amigurumi Octopus: A Step-by-Step Tutorial
Are you looking for a fun, squishy, and adorable project to add to your crochet collection? This amigurumi octopus is the perfect project! Whether you are making a nursery decoration, a gift for a little one, or a new friend for your own desk, this sea creature is sure to bring a smile to everyone’s face. This tutorial will guide you through every step, from the rounded head to the textured, suction-cup-covered tentacles.
This pattern is designed to be beginner-friendly, focusing on basic stitches and clear instructions. By the end of this guide, you’ll have a high-quality, professional-looking octopus that looks like it came straight from a boutique toy store!
Materials & Abbreviations
Before we dive into the stitches, let’s make sure you have everything you need on your crochet hook.
What You Will Need
- Yarn: Medium weight (worsted) yarn in three colors:
- Color A: Turquoise (for the head and base of the belly)
- Color B: Grey (for the middle of the belly)
- Color C: Apricot or Peach (for the suction cup details)
- Crochet Hook: A hook appropriate for your yarn weight (usually 3.5mm or 4.0mm).
- Stuffing: Polyester fiberfill to make your octopus plump and huggable.
- Safety Eyes: Small plastic safety eyes (or black yarn to embroider eyes).
- Tools: A tapestry needle for sewing, scissors, and stitch markers.
Abbreviations (US Terms)
- MR: Magic Ring
- ch: Chain
- sc: Single crochet
- inc: Increase (2 sc in the same stitch)
- dec: Decrease (2 sc worked together)
- hdc: Half double crochet
- dc: Double crochet
- sl st: Slip stitch
- BLO: Back loop only
- FLO: Front loop only
- st(s): Stitch(es)
- V: Increase (2 sc in one stitch)
- W: 3 sc in one stitch
Step-by-Step Instructions
The Head (Color A: Turquoise)
We will begin by working in continuous spirals. Use a stitch marker to keep track of the beginning of each round.
Round 1: Create a MR and work 6 sc into the ring. (6 sts)
Round 2: 6 inc. (12 sts)
Round 3: (1 sc, inc) repeat 6 times. (18 sts)
Round 4: (2 sc, inc) repeat 6 times. (24 sts)
Round 5: (3 sc, inc) repeat 6 times. (30 sts)
Round 6: (4 sc, inc) repeat 6 times. (36 sts)
Round 7: (5 sc, inc) repeat 6 times. (42 sts)
Round 8: (6 sc, inc) repeat 6 times. (48 sts)
Round 9: (7 sc, inc) repeat 6 times. (54 sts)
Round 10: 1 sc, inc, (5 sc, inc) repeat 5 times, 22 sc. (60 sts)
Round 11: (inc, 9 sc) repeat 6 times. (66 sts)
Round 12: 2 sc, inc, (7 sc, inc) repeat 5 times, 23 sc. (72 sts)
Rounds 13-22: sc in each st throughout for 10 rounds. (72 sts)
Shaping the Head Base
Now we will begin to decrease to close the bottom of the head.
Round 23: 3 sc, dec, 7 sc, dec, 25 sc, (dec, 7 sc) repeat 3 times, dec, 4 sc. (66 sts)
Rounds 24-25: sc in each st throughout. (66 sts)
Round 26: (dec, 9 sc) repeat 6 times. (60 sts)
Rounds 27-28: sc in each st throughout. (60 sts)
Round 29: 3 sc, dec, 6 sc, dec, 18 sc, (dec, 6 sc) repeat 3 times, dec, 3 sc. (54 sts)
Rounds 30-31: sc in each st throughout. (54 sts).
Stop here to begin stuffing the head firmly with fiberfill.
Round 32: (dec, 7 sc) repeat 6 times. (48 sts)
Rounds 33-34: sc in each st throughout. (48 sts)
Round 35: 4 sc, dec, 5 sc, dec, 11 sc, (dec, 5 sc) repeat 3 times, dec, 1 sc. (42 sts)
Round 36: sc in each st throughout. Important: Mark the 17th stitch from the start; this is the center of your head and will help you place the eyes symmetrically. (42 sts)
Round 37: (dec, 5 sc) repeat 6 times. (36 sts)
Round 38: 1 sc, inc, 5 sc, (dec, 4 sc) repeat 3 times, inc, 5 sc, inc, 4 sc. (36 sts)
Round 39: 2 sc, inc, 4 sc, (dec, 4 sc) repeat 3 times, inc, 5 sc, inc, 4 sc. (36 sts)
Round 40: 3 sc, inc, 4 sc, (dec, 3 sc) repeat 3 times, 1 sc, inc, 7 sc, inc, 3 sc. (36 sts)
Round 41: (8 sc, inc) repeat 4 times. (40 sts)
Round 42: sc in each st throughout. (40 sts)
Attaching the Tentacles (to the Head)
These tentacles are worked directly onto the head. You will make 8 tentacles in total.
Round 43: (3 sc on the head, ch 31, skip 1 ch to create Loop A, 1 sc in the 2nd ch from hook, 29 sc, 2 sc on the head) repeat 8 times. (Each tentacle will have 66 stitches including the loop).
Round 44: (3 sc on head, 30 sc along tentacle, 1 sc in Loop A, ch 51, skip 1 ch to create Loop B, 1 sc in the 2nd ch from hook, 49 sc, 1 sc in Loop A, 30 sc along tentacle, 2 sc on head) repeat 8 times. (Each tentacle will have 168 stitches including the loop).
Round 45: Mark the start of each tentacle. (1 sc, dec, 62 sc along tentacle, (2 sc, inc) repeat 6 times, 1 sc, inc in Loop B, 1 sc, (inc, 2 sc) repeat 6 times, 62 sc along tentacle, dec on head) repeat 8 times. (Each tentacle will have 179 stitches).
The Belly (Multi-Color)
Belly Base (Color A: Turquoise)
Round 1: Create a MR and work 6 sc into the ring. Leave a ~4-inch tail for sewing later. (6 sts)
Round 2: 6 inc. (12 sts)
Round 3: (1 sc, inc) repeat 6 times. (18 sts)
Belly Middle (Color B: Grey)
Join Grey yarn at the end of Round 3.
Round 4: 18 sl st in the BLO (Back Loops Only). (18 sts)
Round 5: (2 sc, inc) repeat 6 times in the FLO (Front Loops Only). (24 sts)
Round 6: (3 sc, inc) repeat 6 times. (30 sts)
Round 7: (4 sc, inc) repeat 6 times. (36 sts)
Round 8: (8 sc, inc) repeat 4 times. (40 sts)
Round 9: 40 sc. (40 sts)
Belly Tentacles & Suction Cups
Round 10 (Tentacles): [3 sc on belly, ch 31, skip 1 ch to create Loop A, 1 sc in the 2nd ch from hook, 29 sc, 2 sc on belly] repeat 8 times. (66 sts per tentacle).
Round 11 (Suction Cups – Color C: Apricot): Join Apricot yarn.
[3 sc on belly, V (3 sc, 4 dc) repeat 7 times, W, 2 sc, 1 sc in Loop A, ch 31, skip 1 ch to create Loop B, 1 sc in the 2nd ch from hook, 1 sc, V (4 dc, 3 sc) repeat 7 times, 1 sc in Loop A, (4 dc, 3 sc) repeat 8 times] repeat 8 times throughout. (128 sts per tentacle).
Round 12 (Finishing Suction Cups – Color C): [1 sc, dec, 61 sc, 1 sc in Loop B, ch 26, 1 hdc in the 1st ch from hook, V (3 dc, 3 sc) repeat 6 times, 3 dc, W, 1 sc in Loop B, 61 sc, dec] repeat 8 times throughout. (179 sts per tentacle).
Tentacle Inserts (Make 8 pieces)
To add volume to the tentacles, crochet 8 small inserts and sew them inside. Work these in rows.
Row 1: ch 5, skip 1 ch (Loop A), sc in the 2nd ch from hook, 3 sc. (4 sts)
Row 2: sl st, inc in 1st sc, 3 sc, 1 sc in Loop A, ch 5, skip 1 ch (Loop B), 1 sc in the 2nd ch from hook, 3 sc, 1 sc in Loop A, 3 sc, inc. (21 sts)
Row 3: sl st, inc, 9 sc, 1 sc in Loop B, ch 5, skip 1 ch (Loop C), 1 sc in the 2nd ch from hook, 3 sc, 1 sc in Loop B, 9 sc, inc. (33 sts)
Row 4: sl st, inc, 15 sc, 1 sc in Loop C, 15 sc, inc. (35 sts).
Do not cut the yarn yet! Leave a long tail to sew the insert into the tentacle.
Finishing
Now comes the best part—bringing your octopus to life!
- Eyes: Using the marker you placed in Round 36 as a guide, sew your safety eyes or embroider eyes on the head. Ensure they are even and centered.
- Stuffing: If you haven’t already, stuff the head and the belly firmly. You can also lightly stuff the tentacles/inserts for a more structured look.
- Assembly: Using your tapestry needle and the tail from the belly, sew the belly piece onto the bottom of the head. Make sure it is centered.
- Details: Secure any loose ends with a needle and hide them inside the body.
Tips for Success
Keep Tension Consistent: Amigurumi relies on tight, consistent stitches so that the stuffing doesn’t show through. If your stitches feel loose, try using a slightly smaller hook.
Use Stitch Markers: Working in continuous spirals can be tricky. Always use a marker to identify the start of your rounds to avoid accidental increases or decreases.
Color Changes: When changing colors (like moving from Turquoise to Grey on the belly), work the last stitch of the old color before joining the new color to ensure a clean transition.
Scaling Your Project: If you want to make a giant octopus, simply use thicker yarn and a larger hook. If you want a tiny keychain version, use embroidery floss and a very small hook!