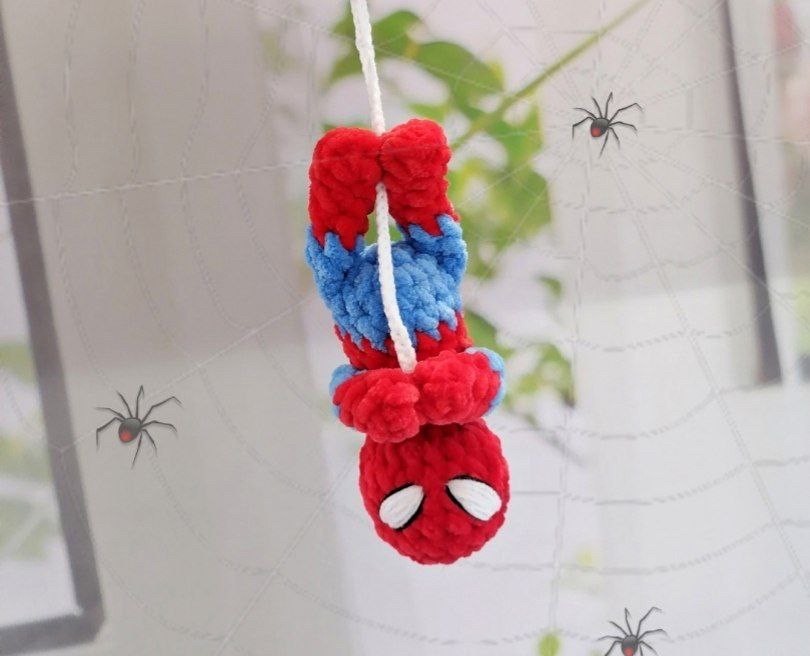
DIY Crochet Spider Hero Amigurumi Keychain Pattern: A Step-by-Step Tutorial
Are you looking for a quick, adorable, and fun crochet project that your little ones (or even the adults!) will absolutely love? This Spider Hero amigurumi keychain is the perfect solution. It is small enough to be a wonderful “scrap yarn” project, yet detailed enough to look like a professional handmade gift. Whether you are looking to stock up on small items for a craft fair or simply want to create a custom accessory for a backpack, this little hero is ready to swing into action!
In this tutorial, we will walk you through the process of creating a mini superhero keychain using plush yarn. This specific style uses “chenille” or “velvet” style yarn, which gives the character a soft, squishy, and high-quality feel. Don’t worry if you are a beginner; we have broken down every step to ensure you can follow along with ease. Grab your hook and let’s get started!
Materials & Abbreviations
Before we dive into the stitches, let’s make sure you have everything you need on your crochet table. Because this is a miniature project, you won’t need much yarn, but having the right weight is key to getting that signature “chunky” look.
What You Will Need
- Plush/Velvet Yarn: You will need a soft, bulky plush yarn (approximately 100g/120m per skein). For one keychain, you will need about 15g of Red yarn and approximately 5g of Blue yarn.
- Embroidery Yarn: A small amount of thin white and black yarn (such as YarnArt Dolce Baby) to embroider the eyes and the web details.
- Crochet Hook: A 3.75mm hook is recommended for the plush yarn. For the embroidery work, you may want a smaller 2.5mm to 3mm hook.
- Stuffing: Polyester fiberfill to make your hero plump and sturdy.
- Keychain Ring: A standard metal ring to attach your creation to keys or bags.
- Sewing Tools: A tapestry needle for assembly, scissors, and sewing thread to secure the limbs.
- Optional: A small piece of white felt and super glue if you prefer to glue on eyes instead of embroidering them.
US Crochet Abbreviations
This pattern uses standard US terminology. If you are used to UK terms, please keep in mind the differences in stitch names!
- MR: Magic Ring (also known as Magic Circle)
- sc: Single crochet
- inc: Increase (2 sc in the same stitch)
- dec: Decrease (sc 2 together)
- BLO: Back Loop Only
- FLO: Front Loop Only
- ch: Chain
- (numbers): The final stitch count at the end of the round
Step-by-Step Instructions
When working with plush yarn, it can sometimes be difficult to see your stitches. I highly recommend using a stitch marker to keep track of the start of each round, especially when working in the dark colors of the blue or red sections.
The Arms
Note: Do not stuff the arms. We will be attaching them to the body later.
Start with Red yarn:
- Round 1: 5 sc in a MR (5)
- Rounds 2–4: 5 sc in each round (5)
At the end of Round 4, perform a color change to Blue. Fasten off the red yarn securely.
- Rounds 5–6: 5 sc in each round (5)
To finish the arms, fold the piece in half so the open ends meet. Using your crochet hook, work 2 sc through both layers at once to close the end. Fasten off and leave a small tail for sewing.
The Legs
Note: Do not stuff the legs.
Start with Red yarn:
- Round 1: 6 sc in a MR (6)
- Round 2: 6 sc in BLO (6)
- Round 3: 2 sc, 1 dec, 2 sc (5)
- Rounds 4–5: 5 sc in each round (5)
At the end of Round 5, change to Blue yarn. Fasten off the red yarn.
- Rounds 6–7: 5 sc in each round (5). Add 1 additional sc to the total count in the final round (making it 6 sc).
Fold the legs in half and work 2 sc through both layers to close the ends. Fasten off, leaving a tail for sewing.
The Body and Head
This section is worked in one continuous piece to create the torso and the head. Start with Blue yarn and use a stitch marker on the back side of the piece.
- Round 1: 7 sc in a MR (7)
- Round 2: 7 inc (14)
- Round 3: 2 sc, 2 sc worked into the left leg connection, 6 sc, 2 sc worked into the right leg connection, 2 sc (14). (Tip: This integrates the legs into the base of the body.)
- Round 4: 14 sc (14). At the end of this round, change to Red yarn. Fasten off the blue.
- Rounds 5–7: 14 sc in each round (14)
- Round 8: 3 sc, 2 sc worked into the left arm connection, 5 sc, 2 sc worked into the right arm connection, 2 sc (14). (Check for symmetry here to ensure the arms are even!)
Stop here to stuff the body! Make sure to fill the lower body and the neck area firmly so the head stays upright.
- Round 9: 7 dec (7)
- Round 10: 7 sc (7)
- Round 11: 7 inc (14)
- Round 12: (3 sc, 1 inc, 2 sc, 1 inc) repeat twice (18)
- Rounds 13–16: 18 sc in each round (18)
Continue stuffing the head and neck area very well. You want a nice, rounded shape for the hero’s mask.
- Round 17: (1 sc, 1 dec) repeat 6 times (12)
- Round 18: 6 dec (6)
Fasten off, leaving a long tail. Pull the tail through the remaining hole to close the head completely.
Finishing
This is where the magic happens! The details will bring your little superhero to life.
Adding the Face
You have two options for the iconic eyes:
- Embroidery Method: Using your white embroidery yarn, stitch two large almond shapes onto the red face. Once the white is in place, use the black embroidery yarn to outline the eyes and add the web pattern to the face.
- Felt Method: If you prefer a cleaner look or find embroidery difficult, cut two eye shapes out of white felt and use a tiny amount of super glue to attach them to the face.
The Final Touches
- Emblem: Use your black embroidery yarn to stitch a small spider emblem onto the center of the blue chest area.
- Keychain Attachment: Crochet a small chain (ch) or a thin cord using your white yarn. Attach this to the top of the head, and then loop it through your metal keychain ring.
- Assembly: Use your tapestry needle and sewing thread to securely attach the arms and legs to the body, ensuring they are positioned symmetrically.
Tips for Success
Crocheting with plush yarn can be a bit different than standard cotton or acrylic. Here are a few professional tips to help you get the best results:
Mastering the Color Change
When changing from red to blue (or vice versa), always perform your color change on the last pull-through of the final stitch of the previous color. This creates a much cleaner transition between the colors.
Managing Symmetry
Because we are attaching limbs directly into the body rounds (Rounds 3 and 8), it is very easy for one side to end up higher than the other. Periodically hold your piece up to a mirror or check the stitch count on both sides to ensure your hero isn’t leaning to one side!
Stuffing Techniques
For amigurumi, “more is more” when it comes to stuffing. If the stuffing is too loose, the character will look floppy and lose its shape. Use your finger or a crochet hook to push the stuffing deep into the corners, especially in the head and the “neck” area, to prevent any lumps from showing through the plush yarn.
Happy Crocheting! You’ve just created your very own mini superhero!