DIY Adorable Crochet Forest Spirit: A Step-by-Step Amigurumi Pattern Tutorial
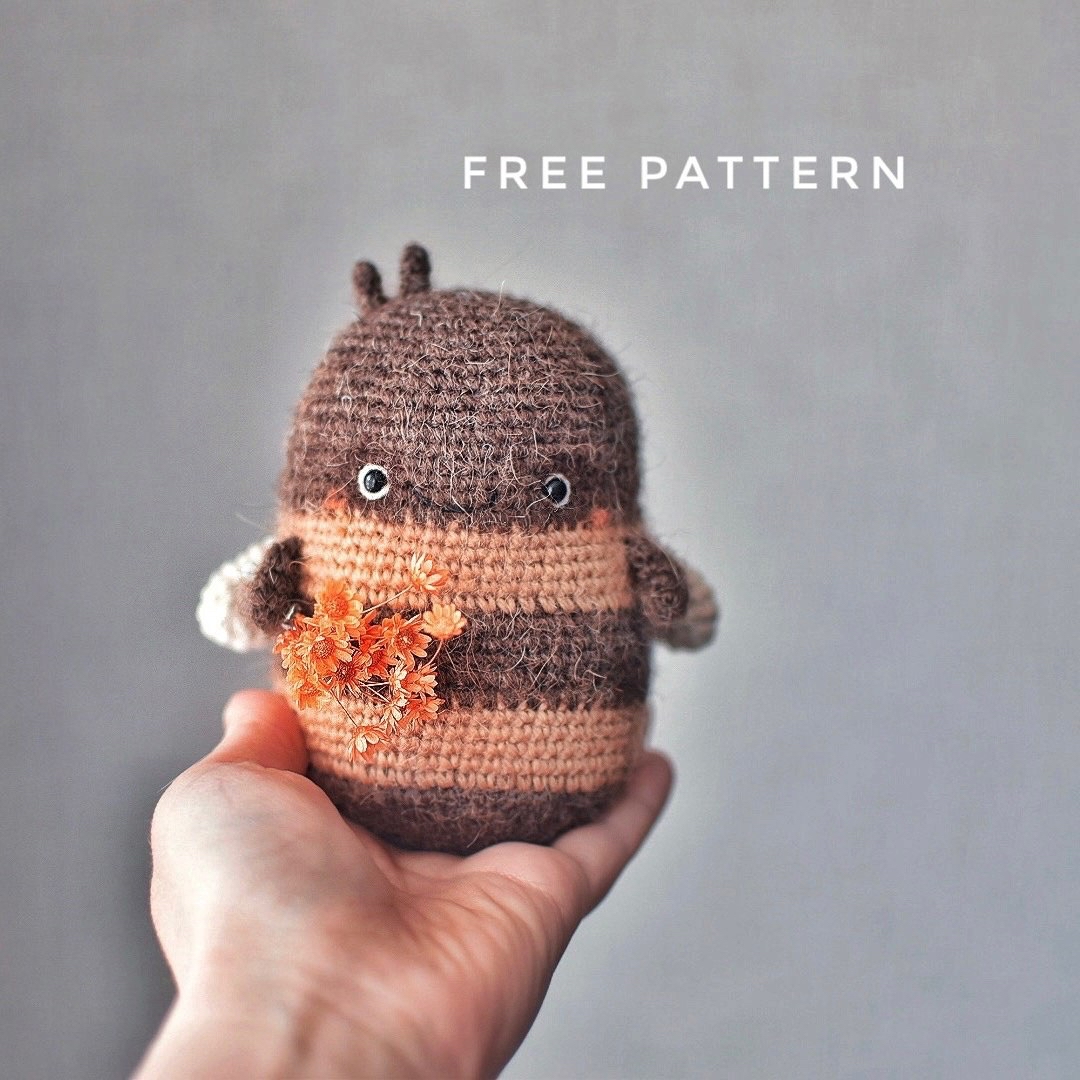
There is something incredibly magical about creating tiny, whimsical creatures with just a hook and some yarn. If you are looking for your next crochet project, look no further! This adorable, fuzzy little forest spirit is the perfect addition to your amigurumi collection. With its soft textures, charming stripes, and tiny little wings, this little guy is as cute as can be.
This pattern is designed to be a relaxing, medium-paced project that results in a wonderful handmade gift or a delightful desk companion. Whether you are looking to clear out your scrap yarn stash or want to practice color changes, this tutorial will guide you through every single stitch. Let’s dive in and bring this little woodland friend to life!
Introduction
This amigurumi project focuses on creating a rounded, organic shape using standard single crochet techniques. The character features a striped body, small dainty limbs, and delicate wings. Because of the small size and the specific yarn textures used in the inspiration, this project is excellent for practicing tension control and seamless color transitions. While the pattern is beginner-friendly, you will want to ensure your tension is relatively tight to keep the stuffing from peeking through the stitches.
Materials & Abbreviations
Materials Needed
To achieve the look seen in the photos, I recommend using high-quality, soft yarns. However, you can substitute these with any yarn of a similar weight that you have on hand.
- Main Body Yarn: A soft, textured yarn like a Mongolian Camel blend (approximately 328 yards / 300 meters per 100g).
- Wing Yarn: A light, smooth yarn such as YarnArt Jeans or a similar DK/Sport weight (approximately 175 yards / 160 meters per 50g) in white or off-white.
- Stripe Yarn: A warm yellow or tan yarn (approximately 273 yards / 250 meters per 100g).
- Crochet Hook: A very small hook, ideally 1.15mm (though you may use a size that feels comfortable for your tension).
- Safety Eyes: 4mm black safety eyes.
- Stuffing: High-quality polyester fiberfill (polyfill).
- Sewing Tools: A large tapestry needle for assembly, sharp scissors, and stitch markers.
- Extras: Pins to hold pieces in place and some brown and pink pastel (or eye shadow) for facial detailing and blushing.
Crochet Abbreviations
All measurements and terms used in this pattern are in US Crochet terms:
- MR: Magic Ring
- sc: Single crochet
- inc: Increase (2 sc in the same stitch)
- dec: Decrease (invisible decrease recommended for amigurumi)
Step-by-Step Instructions
The Body
We will begin by working with your main body color. Remember to use a stitch marker to keep track of the beginning of each round.
- Round 1: Create a Magic Ring and work 6 sc into it. (6)
- Round 2: 6 inc. (12)
- Round 3: (1 sc, inc) repeat 6 times. (18)
- Round 4: (2 sc, inc) repeat 6 times. (24)
- Round 5: (3 sc, inc) repeat 6 times. (30)
- Round 6: (4 sc, inc) repeat 6 times. (36)
- Round 7: (5 sc, inc) repeat 6 times. (42)
- Round 8: (6 sc, inc) repeat 6 times. (48)
- Round 9: (7 sc, inc) repeat 6 times. (54)
- Rounds 10–11: sc in each stitch around. (54)
Now, change your yarn to the yellow/stripe color.
- Rounds 11–15: sc in each stitch around (5 rounds total). (54)
Change back to your main body color.
- Rounds 16–20: sc in each stitch around (5 rounds total). (54)
Change back to the yellow/stripe color.
- Rounds 21–25: sc in each stitch around (5 rounds total). (54)
Change back to the main body color one last time.
- Rounds 26–34: sc in each stitch around (9 rounds total). (54)
- Round 35: (7 sc, dec) repeat 6 times. (48)
- Round 36: sc in each stitch around. (48)
- Round 37: (6 sc, dec) repeat 6 times. (42)
- Round 38: (5 sc, dec) repeat 6 times. (36)
- Round 39: (4 sc, dec) repeat 6 times. (30)
- Round 40: (3 sc, dec) repeat 6 times. (24)
- Round 41: (2 sc, dec) repeat 6 times. (18)
Stop here and begin stuffing the body firmly with fiberfill.
- Round 42: (1 sc, dec) repeat 6 times. (12)
- Round 43: 6 dec. (6)
Fasten off, leaving a long tail. Thread the tail through the remaining stitches to close the hole, then weave the end into the inside of the body.
The Little Arms
Work these using your main body color. You will make two arms.
- Round 1: Create a Magic Ring and work 4 sc into it. (4)
- Round 2: (1 sc, inc) repeat 2 times. (6)
- Round 3: (2 sc, inc) repeat 2 times. (8)
- Round 4: sc in each stitch around. (8)
To flatten the arm, fold it in half so the open ends meet. Using your crochet hook and the main color, crochet 3 or 4 sc through both layers of the arm to seal it shut. Leave a tail for sewing. Repeat for the second arm.
The Wings
Work these using your white/wing yarn. You will make two wings.
- Round 1: Create a Magic Ring and work 6 sc into it. (6)
- Round 2: 6 inc. (12)
- Rounds 3–4: sc in each stitch around (2 rounds). (12)
- Round 5: (dec, 4 sc) repeat 2 times. (10)
- Rounds 6–7: sc in each stitch around (2 rounds). (10)
- Round 8: (dec, 3 sc) repeat 2 times. (8)
- Round 9: sc in each stitch around. (8)
- Round 10: (dec, 2 sc) repeat 2 times. (6)
Fold the wing in half to flatten it and crochet 2 or 3 sc through both sides to close the shape. Leave a long tail for sewing. Repeat for the second wing.
The Antennae
For a slightly thicker look, hold two strands of your main color yarn together while working these.
- Round 1: Create a Magic Ring and work 5 sc into it. (5)
- Rounds 2–4: sc in each stitch around (3 rounds). (5)
Fasten off, leaving a tail for sewing. Make two antennae.
Finishing
Now comes the fun part—assembly! Use pins to position the pieces before sewing them on permanently to ensure everything is symmetrical.
- Attach the Wings: Pin and sew the wings to the sides of the body between rounds 22 and 25.
- Attach the Arms: Pin and sew the arms to the sides between rounds 22 and 24.
- Set the Eyes: Insert the 4mm safety eyes between rounds 27 and 28. To give them that cute “sparkle,” use a piece of white embroidery thread to stitch a small vertical line or dot onto the eye.
- Add the Mouth: Using your main color or a slightly darker thread, embroider a small, simple curved line for a smile between rounds 26 and 27.
- Add the Antennae: Sew the antennae to the very top of the head.
- Final Details: For a professional, “store-bought” look, use a little bit of brown pastel to shade very lightly around the eyes. You can also use a pink pastel to add a tiny bit of blush to the cheeks!
Tips
Mastering Tiny Hooks: Working with a 1.15mm hook can be tricky! If you find it difficult to see your stitches, try using a bright-colored stitch marker and working in a well-lit area. If your tension is too loose, the stuffing will show; if it is too tight, it will be hard to insert your hook. Practice makes perfect!
Perfect Color Changes: To make your stripes look clean, always change color on the last pull-through of the stitch before the new color starts. This ensures a seamless transition between the main color and the yellow stripes.
The Secret to Cute Faces: The “soul” of an amigurumi is in the eyes. Don’t be afraid to experiment with where you place the eyes and the mouth. Moving the eyes just a few millimeters can completely change the expression from “surprised” to “sleepy” or “happy.”