How to Crochet Adorable Amigurumi Mushroom Friends: A Beginner-Friendly Pattern
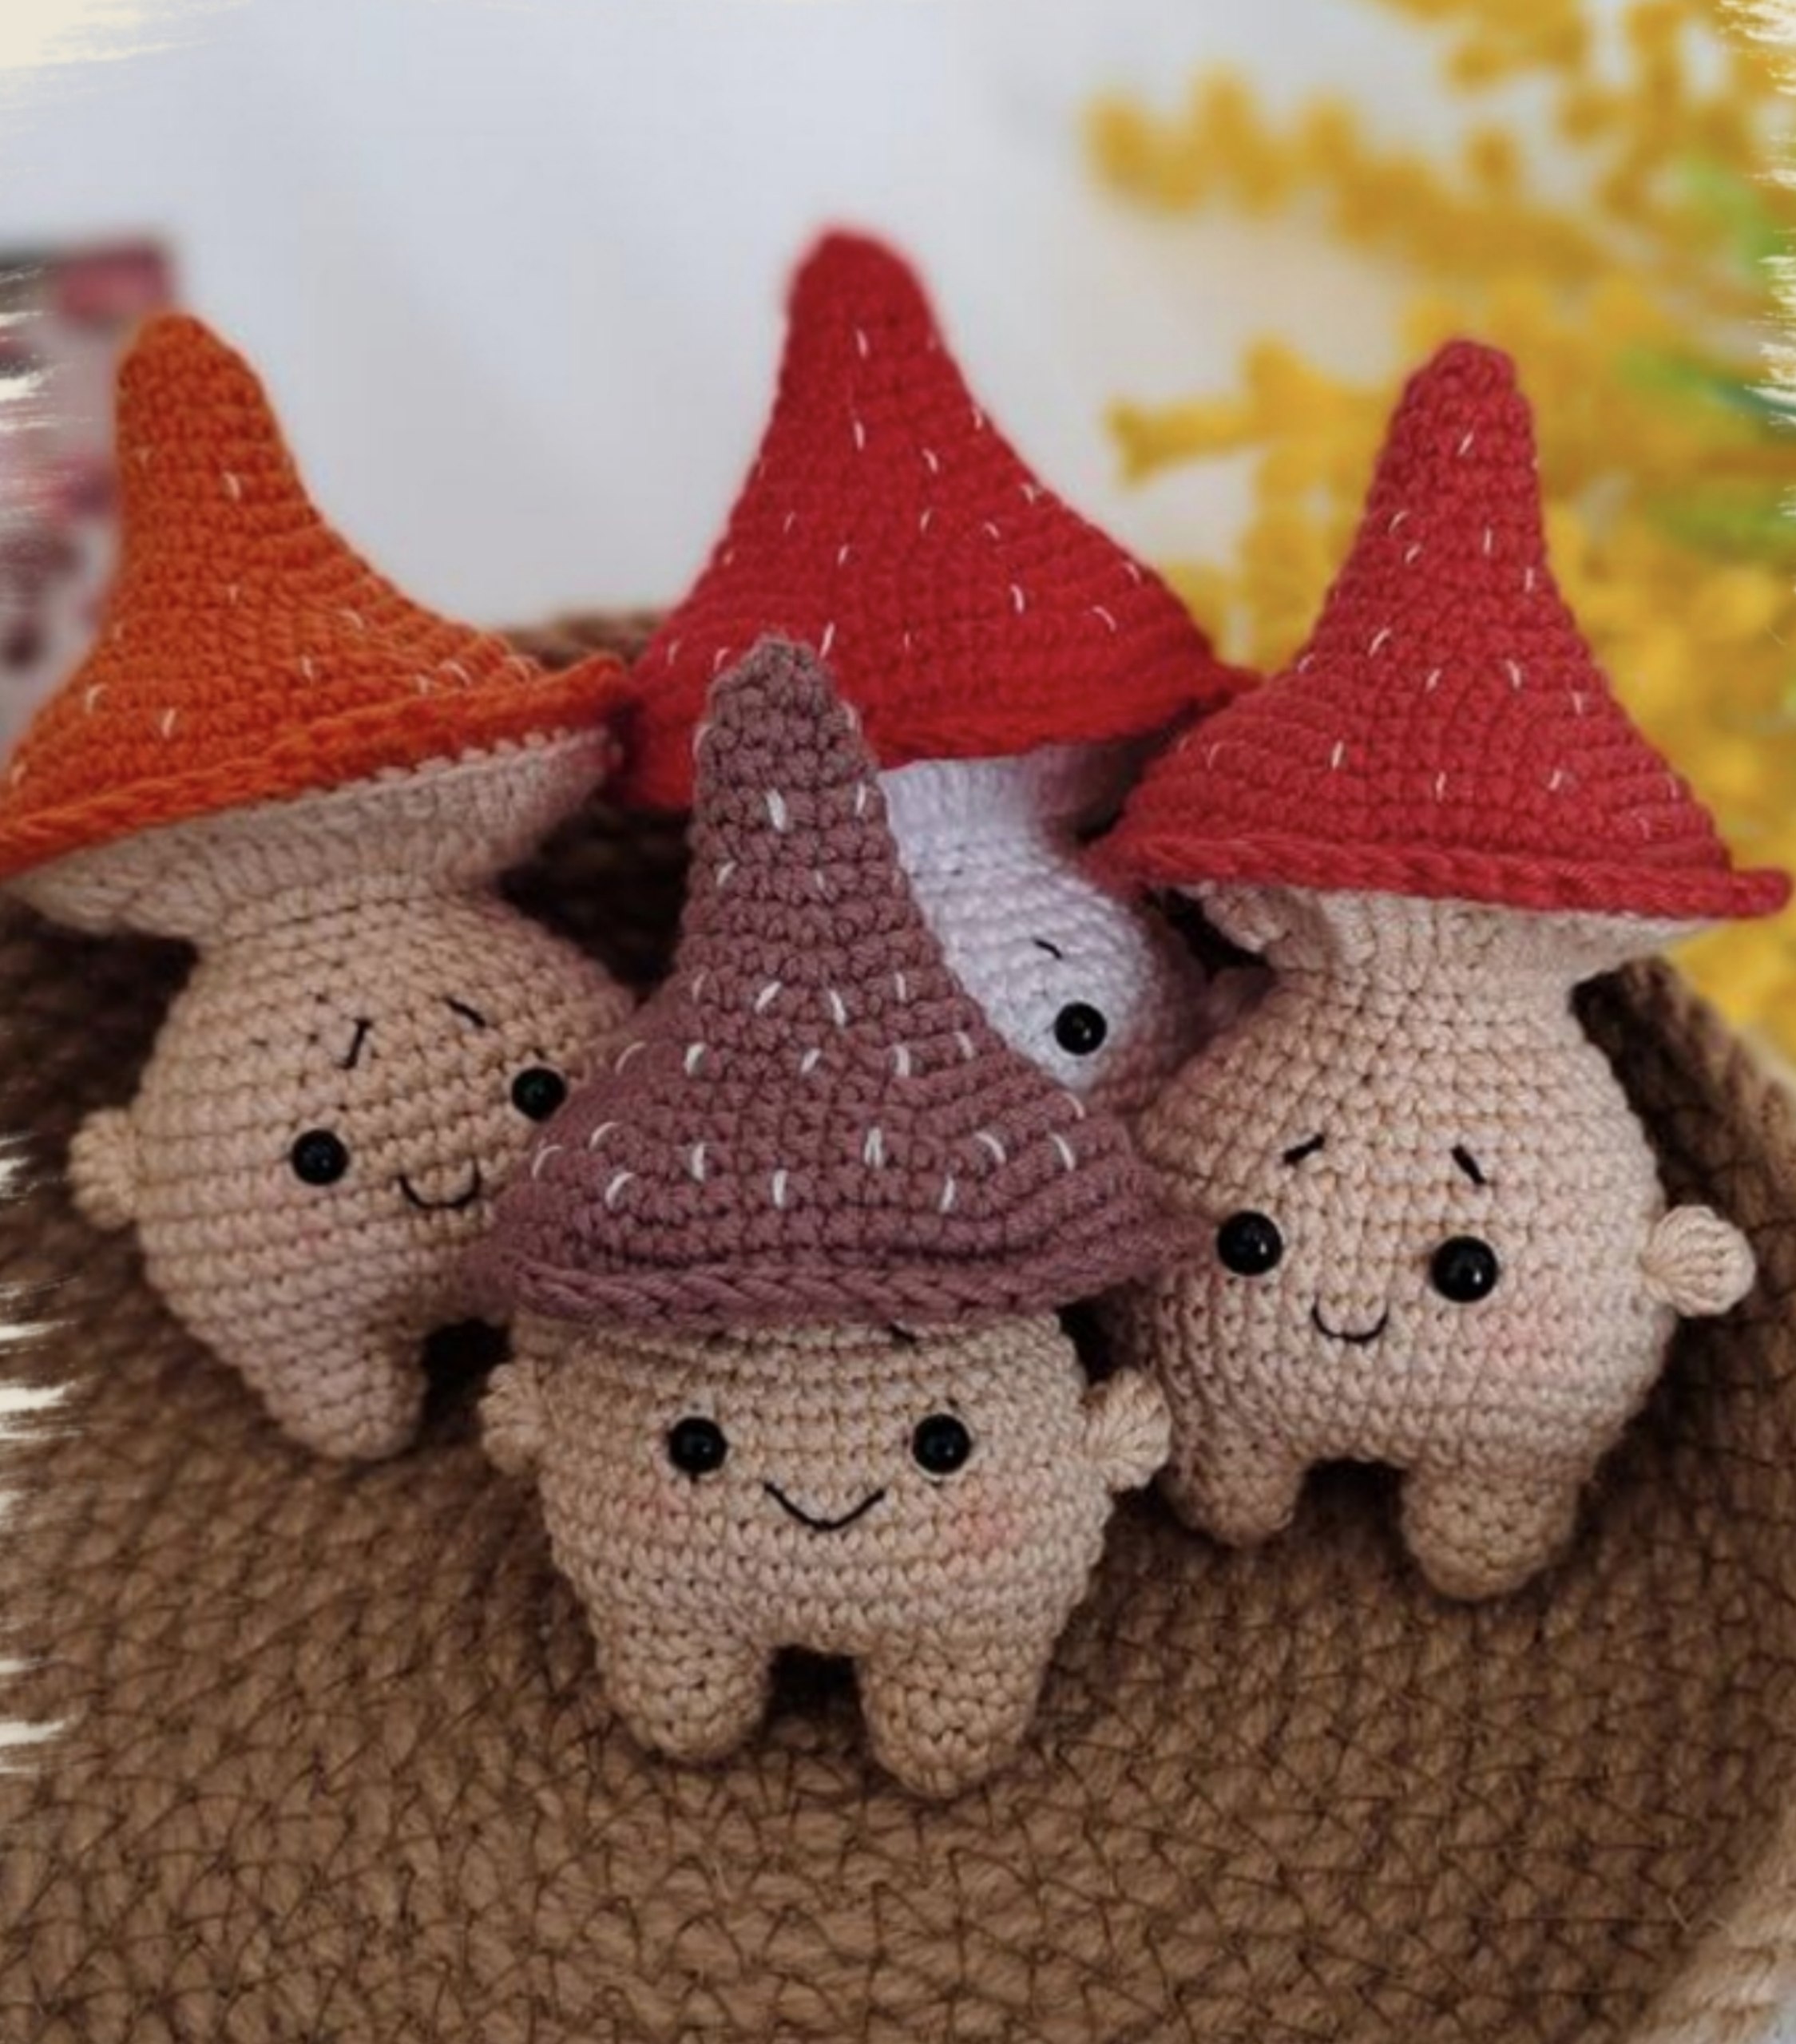
There is something undeniably magical about the forest, and nothing captures that whimsical, “cottagecore” aesthetic quite like mushrooms. If you are looking for a cozy new project to add to your crochet collection, these adorable Amigurumi Mushroom Friends are the perfect solution. These tiny, sentient fungi make for wonderful nursery decor, unique gifts for woodland lovers, or even charming companions for your desk.
This tutorial is designed with beginners in mind. We will guide you through creating a plump, little body, tiny arms, and a perfectly shaped mushroom cap. By the end of this project, you will have a collection of little characters that look like they just stepped out of a fairytale. Grab your hook, find your favorite cotton yarn, and let’s get started on these forest friends!
Materials & Abbreviations
Before we dive into the stitches, let’s make sure you have everything you need on your table. Because these characters are quite small and detailed, using a fine-gauge hook and smooth cotton yarn is essential for achieving that professional, tight amigurumi look.
Materials
- Yarn (Body/Legs): A fine weight cotton yarn in beige, white, or milky cream.
- Yarn (Cap): Any color of your choice! Popular options include coffee brown, classic bright red, or a warm pumpkin orange.
- Crochet Hook: 1.5 mm (this small hook ensures your stuffing won’t peek through the stitches).
- Safety Eyes: 4 mm or 5 mm safety eyes with locking backs.
- Embroidery Thread: Black thread for the facial features.
- Stuffing: Polyester fiberfill or polyfill.
- Notions: A tapestry needle (for sewing and hiding ends), scissors, and a stitch marker.
Abbreviations
All measurements and terms used in this pattern follow standard US crochet terminology. Please ensure you are familiar with these before beginning.
- MR: Magic Ring (or Magic Circle)
- ch: Chain
- sc: Single crochet
- dc: Double crochet
- sl st: Slip stitch
- inc: Increase (2 single crochets in the same stitch)
- dec: Decrease (sc 2 stitches together)
- BLO: Back loop only
- (…) : The number in parentheses indicates the total stitch count at the end of the round.
Step-by-Step Instructions
We will build our mushroom friend in four main stages: the legs/body, the tiny arms, the mushroom cap, and finally, the assembly.
Making the Mushroom Body & Legs
Unlike many amigurumi projects that start with a simple sphere, our mushroom friends have little legs that form the base of the body. We will start by making two separate leg pieces and then joining them together to create the torso.
The First Leg
- Start with a MR and work 6 sc into the ring (6).
- (1 sc, inc) repeat 3 times (9).
- 9 sc (9).
- After completing the 9 stitches, work 3 additional sc in the same round to extend the leg.
- Fasten off the yarn and leave a tail for sewing.
The Second Leg
- Start with a MR and work 6 sc into the ring (6).
- (1 sc, inc) repeat 3 times (9).
- 9 sc (9).
- Do not fasten off this leg! We will use it to connect to the first leg.
- Work 1 additional sc on this leg, then ch 3.
- Insert your hook into the first leg to join the pieces.
Building the Torso (Working in a Spiral)
Now that our legs are connected, we will work in a continuous spiral to build the body. Use a stitch marker to keep track of your rounds.
- Round 1: 9 sc along the first leg, 3 sc into the chain loop, 9 sc along the second leg, 3 sc into the chain loop (24).
- Round 2: (3 sc, inc) repeat 6 times (30).
- Round 3: (4 sc, inc) repeat 6 times (36).
- Round 4: (5 sc, inc) repeat 6 times (42).
- Rounds 5–8: 42 sc (4 rounds total).
Eye Placement: Between Round 8 and Round 9, insert your safety eyes. They should be placed approximately 6 stitches apart from each other to give your mushroom a cute, wide-eyed expression.
- Round 9: (5 sc, dec) repeat 6 times (36).
- Round 10: 36 sc (36).
- Round 11: (4 sc, dec) repeat 6 times (30).
- Round 12: 30 sc (30).
- Round 13: (3 sc, dec) repeat 6 times (24).
Stop here to stuff the body firmly with your fiberfill.
- Round 14: (2 sc, dec) repeat 6 times (18).
- Round 15: 18 sc (18).
- Round 16: (inc) repeat 18 times (36), then sl st to finish the round.
- Round 17 (The Neck Flare): ch 3 (this counts as your first stitch), 4 dc in the same stitch, inc, (5 dc, inc) repeat 5 times (42). Close the round with a sl st into the 3rd chain of your initial ch-3.
- Round 18 (Final Flare): ch 3 (counts as 1st stitch), 5 dc in the same stitch, inc, (6 dc, inc) repeat 5 times (48). Close the round with a sl st into the 3rd chain of your initial ch-3.
Fasten off and weave in your ends securely.
Creating the Tiny Arms
We will make two identical arms. These are worked directly onto the body to ensure they are sturdy.
- Insert your hook into the side of the body, one row below the eye level.
- ch 3.
- In that same starting stitch, work 4 dc. This creates a little nub that serves as the arm.
- Pull all loops through the starting stitch to secure it.
- ch 1, then sl st to secure the arm.
- Pull the yarn through to the back of the mushroom to hide it.
- Repeat this process on the opposite side for the second arm.
Crafting the Mushroom Cap
The cap is what gives your character its personality. You can use any color here!
- Round 1: 6 sc in a MR (6).
- Round 2: (1 sc, inc) repeat 3 times (9).
- Round 3: 9 sc (9).
- Round 4: (2 sc, inc) repeat 3 times (12).
- Round 5: 12 sc (12).
- Round 6: (3 sc, inc) repeat 3 times (15).
- Round 7: (4 sc, inc) repeat 3 times (18).
- Round 8: (5 sc, inc) repeat 3 times (21).
- Round 9: (6 sc, inc) repeat 3 times (24).
- Round 10: (7 sc, inc) repeat 3 times (27).
- Round 11: (8 sc, inc) repeat 3 times (30).
- Round 12: (4 sc, inc) repeat 6 times (36).
- Round 13: (5 sc, inc) repeat 6 times (42).
- Round 14: (6 sc, inc) repeat 6 times (48).
- Round 15: (7 sc, inc) repeat 6 times (54).
- Round 16: (8 sc, inc) repeat 6 times (60).
Joining the Body and the Cap
This is a special step where we join the two pieces together to create a seamless look.
- We will use Round 17 of the Cap to join.
- Round 17: (3 sc, dec) repeat 12 times (48).
- How to join: Insert your hook through both loops of the cap AND the front loop of the very last stitch of the body (from Round 18).
- Work 1 sc, then 2 more sc.
- Perform a decrease that captures two front loops of the cap and one front loop of the body.
- Repeat this around the entire circumference.
Note: As the opening narrows, lightly stuff the very tip of the cap with a small amount of fiberfill to give it a nice shape.
Finishing
Now for the fun part—bringing your mushroom to life with its face and decorations!
- The Face: Using black embroidery thread, stitch a small, cute mouth. A simple curved line about 4 stitches wide works perfectly. You can also add two tiny, thin eyebrows just above the eyes for extra character.
- Cap Decorations: To give your mushroom that classic “spotted” or textured look, use a contrasting color (like white or milk). Using a tapestry needle, embroider small stitches or dots randomly around the edge of the cap. You can use a single strand of thread or double it up for more visibility.
Tips for Success
- Tension is Key: Since amigurumi is worked in rounds, try to keep your tension consistent. If your stitches are too loose, the stuffing will show through. If they are too tight, it may be difficult to work the later rounds.
- The Magic Ring: If you are new to amigurumi, practicing the Magic Ring is essential. It allows you to pull the center of your work completely closed, leaving no unsightly hole at the top of your mushroom.
- Customization: Don’t be afraid to get creative! You can make “Giant” mushrooms by using thicker yarn and a larger hook, or create a whole family of different colors and sizes.
- Hiding Ends: Always weave your ends in thoroughly. Use your tapestry needle to weave the tail through the surrounding stitches several times so the yarn doesn’t pop out later.