Adorable Plush Loaf Cat Crochet Pattern: A Beginner-Friendly Tutorial
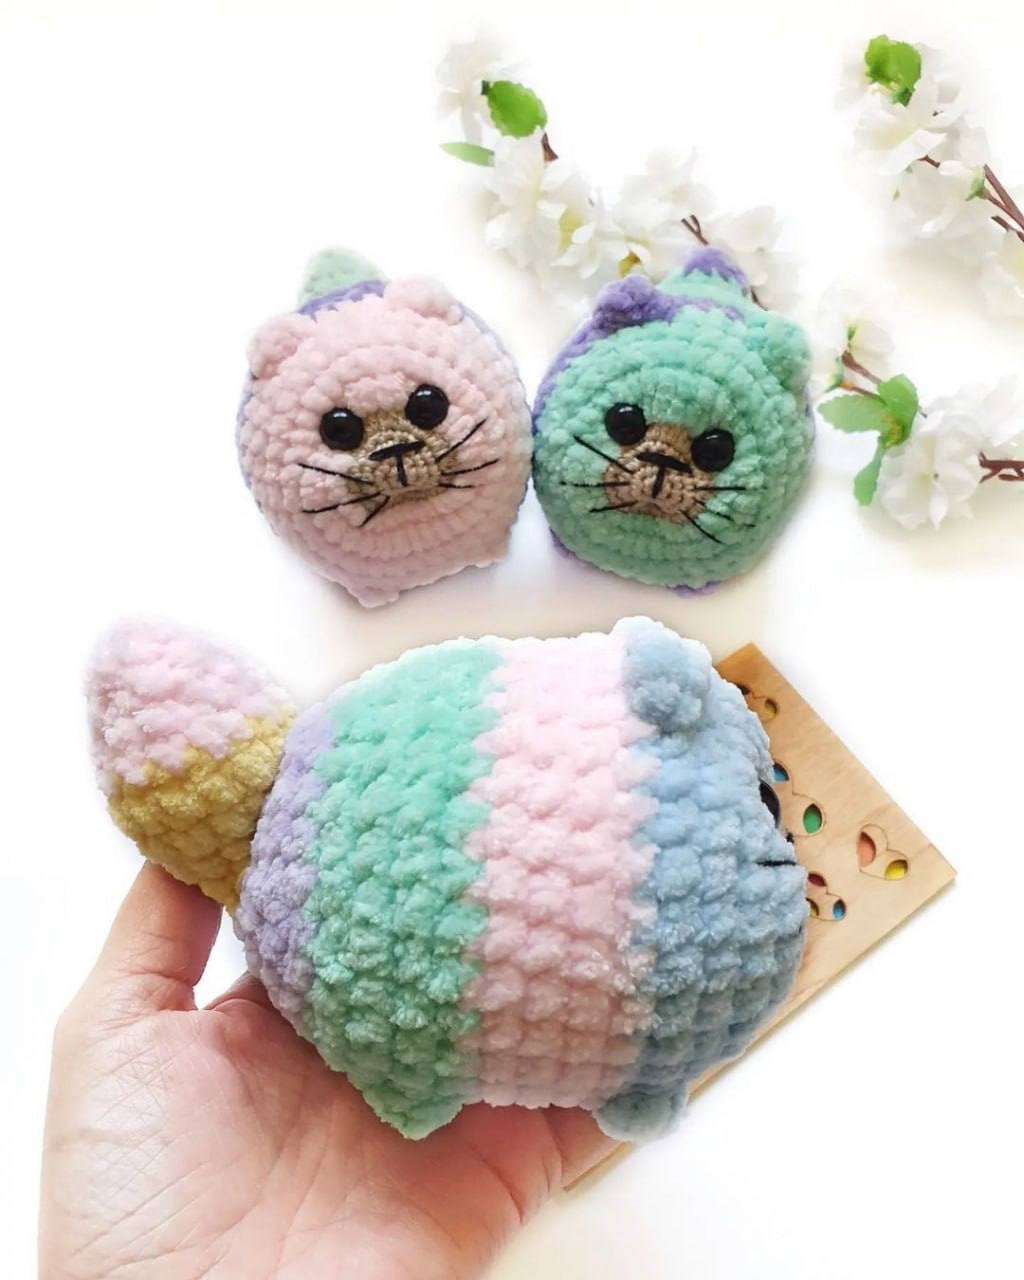
If you are looking for a quick, cuddly, and absolutely precious project, look no further! Today, we are diving into the creation of the Plush Loaf Cat. These little round kitties are the perfect blend of a “loaf” shape and a plush toy, making them irresistible to hold. Whether you are making a gift for a friend or adding to your own amigurumi collection, this pattern is designed to be accessible for beginners while producing a professional, high-quality result.
The secret to the “squish” factor in this project is the use of chenille or plush yarn. This type of yarn works up quickly and hides stitches well, which is great for beginners. We will also be using a small amount of standard acrylic or cotton yarn to create a detailed muzzle, giving our kitty a sweet, defined face.
Materials & Abbreviations
Before we get started, gather your supplies. To get the look seen in the photos, I recommend a high-quality polyester plush yarn in your favorite color.
Supplies Needed
- Plush Yarn: Approximately 2.5 oz (about 70-80 yards) of chenille or velvet yarn in any color.
- Muzzle Yarn: A small amount of white acrylic or cotton blend yarn.
- Embroidery Thread: Black yarn or embroidery floss for the nose and whiskers.
- Crochet Hooks: One 4.0 mm (G) hook for the plush body and one 2.0 mm hook for the muzzle.
- Safety Eyes: Two 10 mm safety eyes.
- Stuffing: Polyfill fiberfill.
- Tools: Yarn needle, scissors, and stitch markers.
US Crochet Terms & Abbreviations
- MR: Magic Ring
- ch: Chain
- sc: Single Crochet
- inc: Increase (2 sc in the same stitch)
- dec: Decrease (sc 2 together)
- hdc: Half Double Crochet
- dc: Double Crochet
- sl st: Slip Stitch
- FLO: Front Loop Only
- BLO: Back Loop Only
- Puff St: Puff Stitch (used for the paws)
Step-by-Step Instructions
This project is worked as one continuous piece, starting from the muzzle and moving into the body and tail. This minimizes the need for sewing!
The Muzzle
Use the white acrylic/cotton yarn and the 2.0 mm hook.
- Round 1: 6 sc in MR (6)
- Round 2: 6 inc (12)
- Round 3: (1 sc, inc) repeat 6 times (18)
- Round 4: (2 sc, inc) repeat 6 times (24)
- Round 5: ch 1, work 8 hdc increases (2 hdc in each stitch) for 8 stitches. Now, switch to your plush yarn (still using the 2.0 mm hook) and work 16 sc. (Total: 32 stitches)
The Body
Switch to the 4.0 mm hook for the remainder of the body.
- Round 6: 16 hdc, 1 sc, then switch to the 4.0 mm hook and work 15 sc. (32)
- Rounds 7-9: sc in each stitch around (32)
Shaping the Ears and Front Paws
Round 10: This round creates the cute little details on the face.
- Work 6 sc.
- Ear 1: 1 sc, then in the next stitch work (1 hdc, 1 dc, 1 hdc) all into the FLO, then 1 sc.
- Work 2 sc.
- Ear 2: 1 sc, then in the next stitch work (1 hdc, 1 dc, 1 hdc) all into the FLO, then 1 sc.
- Work 9 sc.
- Paw 1: Work a Puff Stitch into the next stitch (yarn over, insert hook, pull up a loop; repeat 3 times in one stitch, then crochet through all loops).
- Work 4 sc.
- Paw 2: Work a Puff Stitch into the next stitch.
- Work 3 sc. (Total: 32)
Round 11: 7 sc, 1 sc in the BLO (this goes behind the first ear), 4 sc, 1 sc in the BLO (behind the second ear), 19 sc. (32)
Eye Placement: Now is the time to insert your safety eyes! Place them in the first plush row after the hdc increases from the muzzle. Leave a gap of two stitches between the eyes to keep them centered and cute.
- Rounds 12-15: sc in each stitch around (32)
- Round 16 (Back Paws): 24 sc, Puff Stitch (back paw), 4 sc, Puff Stitch (back paw), 2 sc. (32)
- Round 17: sc in each stitch around (32)
Closing the Body
Now we will taper the body to create that round loaf shape.
- Round 18: (6 sc, dec) repeat 4 times (28)
- Round 19: (5 sc, dec) repeat 4 times (24)
- Round 20: (4 sc, dec) repeat 4 times (20)
- Round 21: (3 sc, dec) repeat 4 times (16)
- Round 22: 8 dec (8)
- Rounds 23-24: sc in each stitch around (8)
The Tail
We will now expand the work slightly to create the tail.
- Round 25: (1 sc, inc) repeat 4 times (12)
- Round 26: (2 sc, inc) repeat 4 times (16)
- Round 27: sc in each stitch around (16)
- Round 28: (2 sc, dec) repeat 4 times (12)
- Round 29: sc in each stitch around (12)
- Round 30: (1 sc, dec) repeat 4 times (8)
- Round 31: sc in each stitch around (8)
- Round 32: 4 dec (4)
Finishing Your Loaf Cat
Fasten off the yarn, leaving a long tail for sewing. Using your yarn needle, weave the end through the remaining 4 stitches to close the tail tightly. Stuff the body and tail firmly with polyfill as you go, ensuring the head is well-stuffed to maintain its round shape.
Assembly and Details
- The Tail: Sew the tail to the back of the body. For the classic “loaf” look, sew it so it sits vertically or slightly curved against the back.
- The Face: Use your black embroidery thread to sew a small “V” or “T” shape for the nose on the white muzzle. Add three small straight stitches on each side of the muzzle for whiskers.
- Sculpting: To give the cat a more realistic face, use your needle and a piece of strong thread to create “tensions.” Pull the thread from the eye area down toward the chin and tie it tight. This pushes the muzzle forward and creates a cute dip between the eyes and the nose.
Tips for Success
Working with plush yarn can sometimes be tricky because the stitches are harder to see. Here are a few tips to make your experience smoother:
- Use Stitch Markers: Since the stitches blend together, always mark the first stitch of every round. This prevents you from accidentally adding or losing stitches.
- Feel the Stitches: Instead of relying only on your eyes, use your fingers to feel for the “V” of the stitch to ensure you are inserting your hook into the correct spot.
- Don’t Overstuff: While we want a plump cat, overstuffing plush yarn can cause the stuffing to peek through the holes. Stuff firmly but stop when the piece holds its shape.
- Tension Control: When working the muzzle with the smaller hook, keep your tension loose enough so that it doesn’t curl too tightly, but tight enough that the stuffing doesn’t show.