Easy Crochet Granny Square Bag Pattern: A Step-by-Step Tutorial
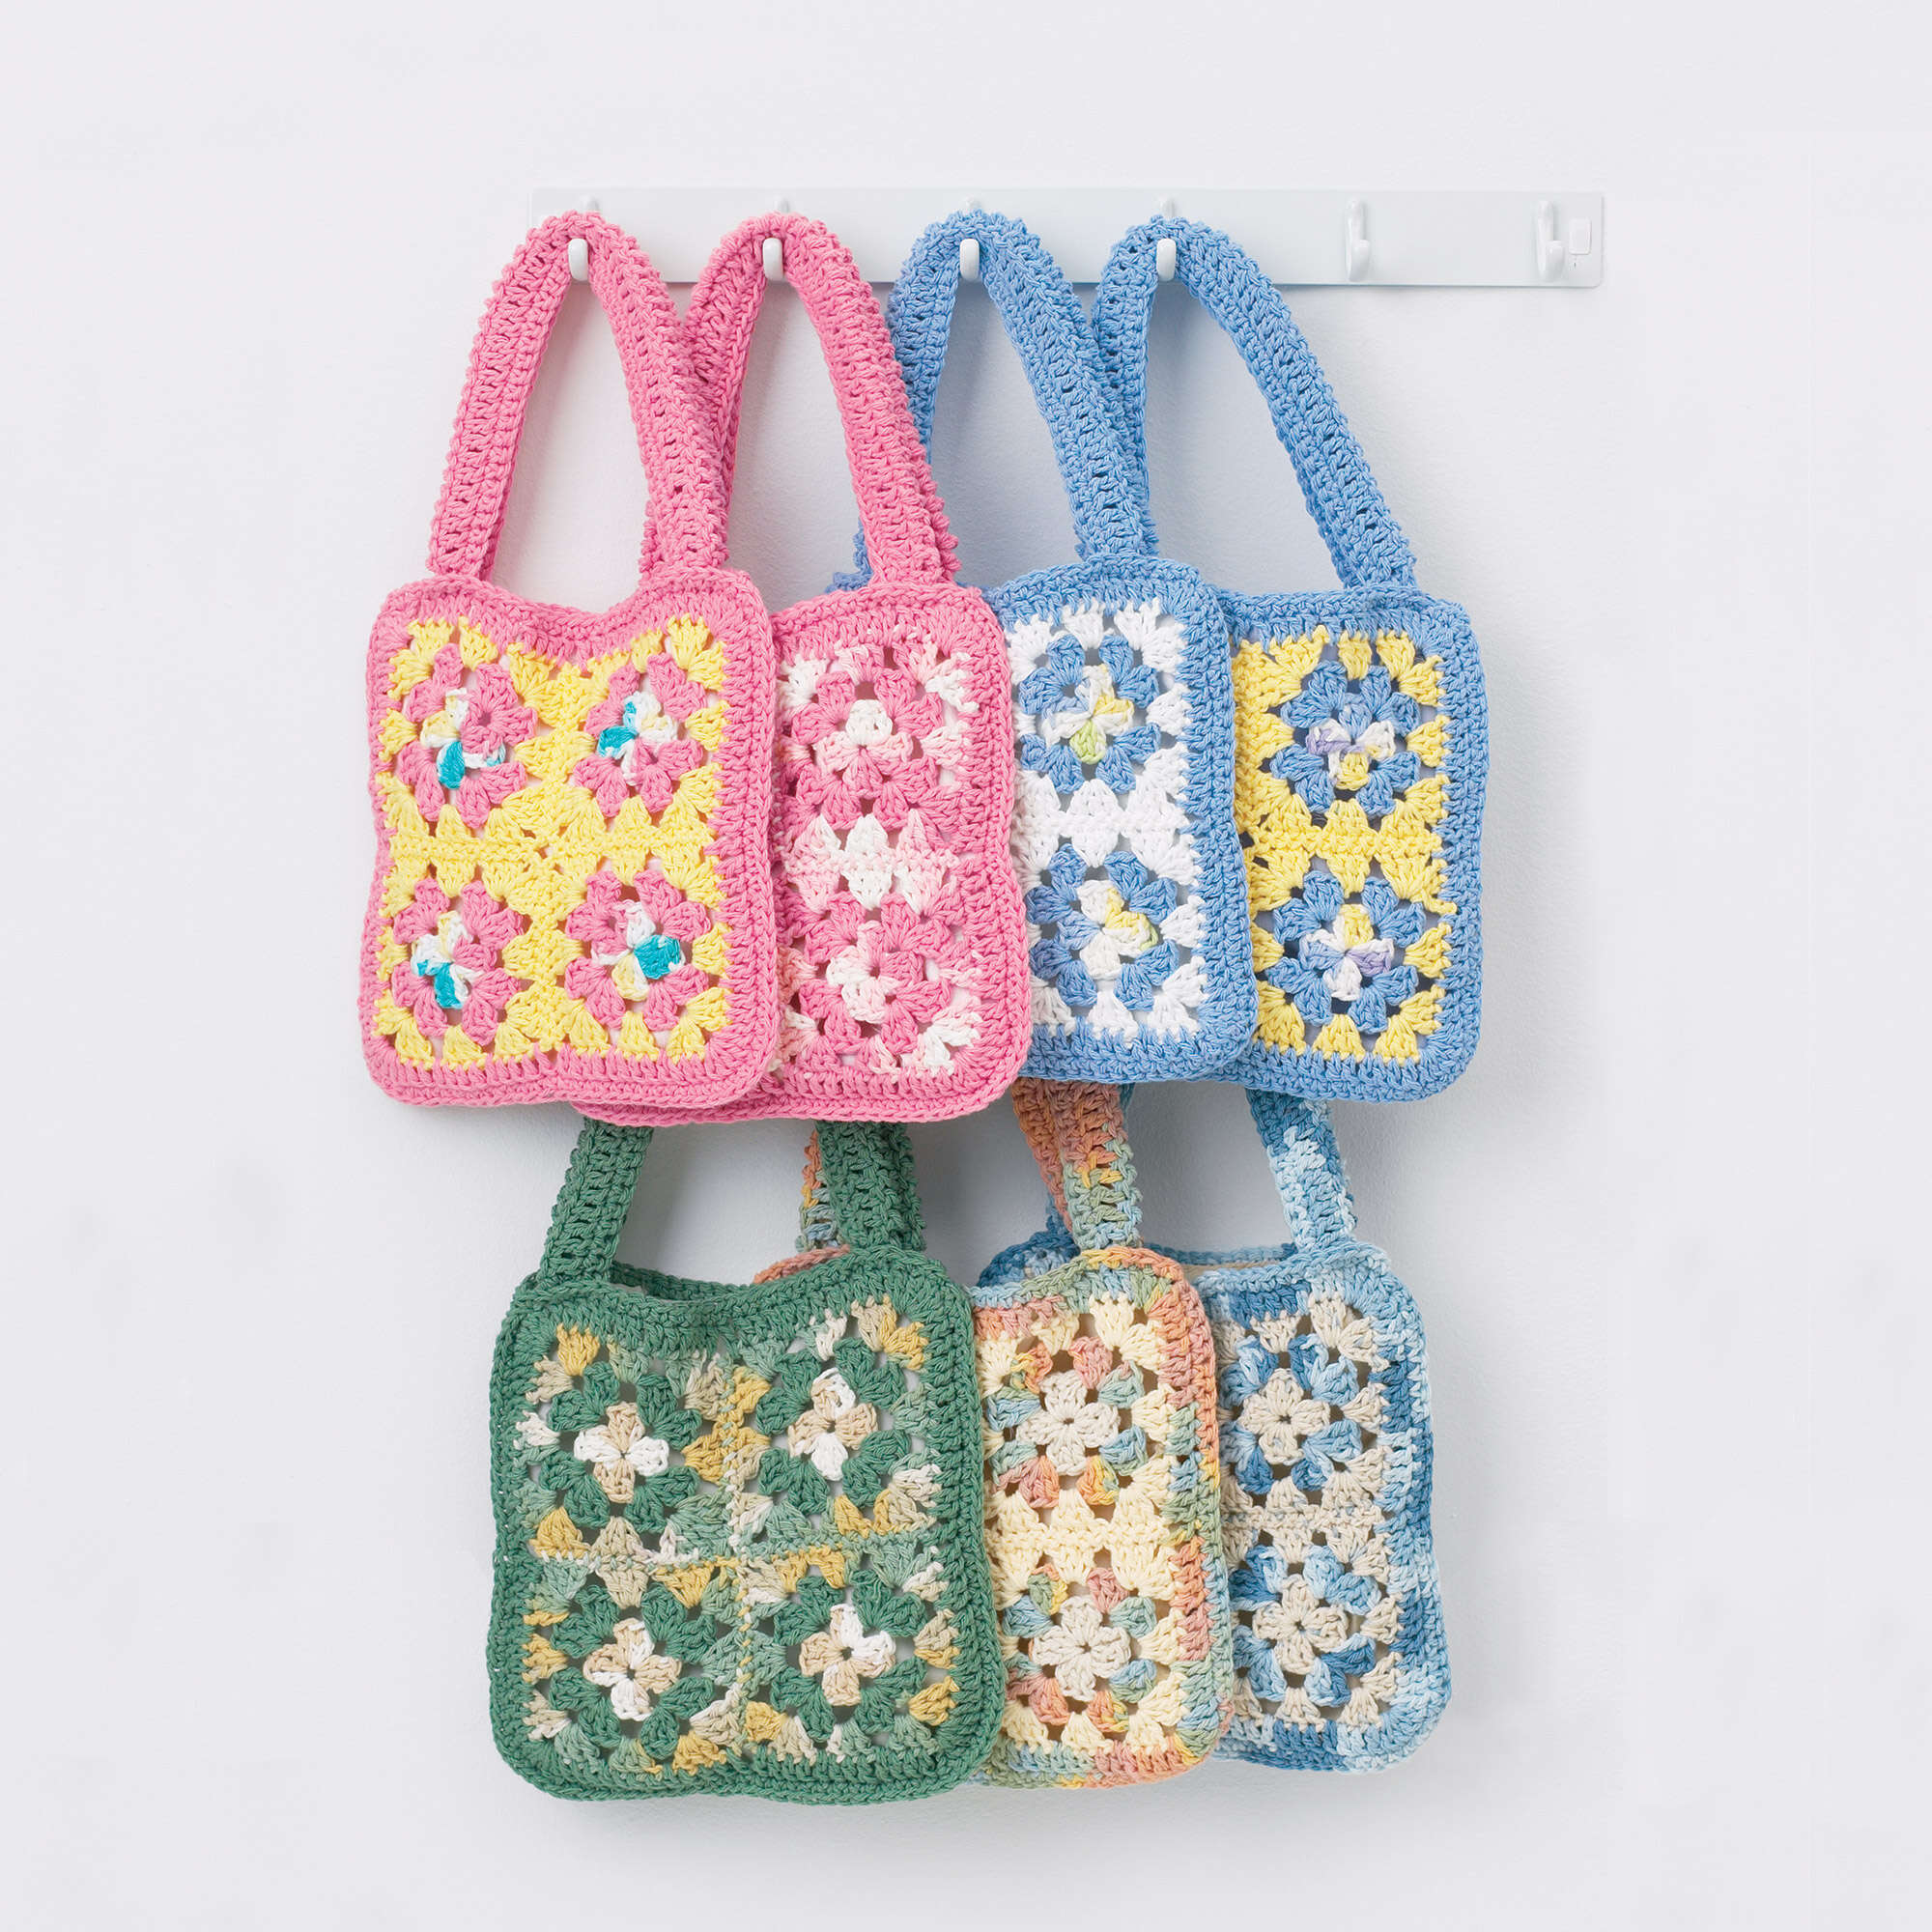
There is something timeless and cozy about a granny square. While they are often associated with blankets and cardigans, these iconic motifs are actually the perfect building blocks for a stylish, sturdy accessory. In this tutorial, we will show you how to create a beautiful Granny Square Bag that is both functional and fashionable.
This project is ideal for beginner to intermediate crocheters. Because the bag is constructed from individual squares, it is a great way to practice your tension and color changes without feeling overwhelmed by a massive project. Using a durable cotton yarn ensures your bag will hold its shape and stand up to daily use, making it perfect for a farmer’s market trip, a beach day, or just carrying your essentials around the house.
Materials & Abbreviations
Before you pick up your hook, gather your supplies. For this project, we recommend a medium-weight cotton yarn, as it provides the structure needed for a bag and is less prone to stretching than acrylic.
Supplies Needed
- Yarn: Worsted weight cotton yarn.
- For the 3-Color Version: 2 balls of Main Color (MC), 1 ball of Contrast Color A, and 1 ball of Contrast Color B.
- For the 2-Color Version: 2 balls of Main Color (MC) and 1 ball of Contrast Color A.
- Crochet Hook: 4.50 mm (US size 7) or a size that allows you to maintain the correct gauge.
- Other Tools: Yarn needle for weaving in ends, scissors, and stitch markers.
Gauge
One completed square motif should measure approximately 3.5 inches by 3.5 inches. If your square is too large, try a smaller hook; if it is too small, try a larger one.
Abbreviations (US Terms)
- ch: chain
- st(s): stitch(es)
- sl st: slip stitch
- sc: single crochet
- dc: double crochet
- sp: space
- RS: right side
- WS: wrong side
Step-by-Step Instructions
The bag consists of 8 identical granny squares: 4 for the front panel and 4 for the back panel. You can choose between a three-color design for a traditional look or a two-color design for something more modern.
The Granny Square Motif (Make 8)
Round 1: Using Color B (or Contrast Color A for the 2-color version), chain 5. Join with a slip stitch to the first chain to create a ring. Chain 3 (this counts as your first double crochet). Work 2 dc into the ring. (Chain 2, work 3 dc into the ring) 3 times. Chain 2 and join with a slip stitch to the top of the starting chain 3. Fasten off.
Round 2: Join your Main Color (MC) with a slip stitch to any chain-2 corner space. Chain 3. In the same space, work 2 dc, ch 2, and 3 dc. [Chain 1. In the next corner ch-2 space, work 3 dc, ch 2, 3 dc] 3 times. Chain 1 and join with a slip stitch to the top of the starting chain 3. Fasten off.
Round 3: Join Contrast Color A with a slip stitch to any corner ch-2 space. Chain 3. In the same space, work 2 dc, ch 2, 3 dc. [Chain 1. Work 3 dc in the next ch-1 space. Chain 1. In the next corner ch-2 space, work 3 dc, ch 2, 3 dc] 3 times. Chain 1. Work 3 dc in the final ch-1 space. Chain 1 and join with a slip stitch to the top of the starting chain 3. Fasten off.
Note for 2-Color Version: Simply follow the instructions above, but substitute Color A for Color B in the first round to maintain a two-tone palette.
Finishing the Bag
Now that you have your 8 motifs, it is time to turn those squares into a functional bag.
Assembling the Panels
Lay out your squares in two grids of four (two squares across and two squares down). Sew the squares together using a yarn needle and your Main Color, creating one large square for the front and one for the back. Each finished panel should be approximately 9 inches square.
Adding the Decorative Edging
Join the Main Color with a slip stitch to any corner ch-2 space of the assembled bag. Chain 3 and work 4 dc into the same space.
Following the perimeter: Work 1 dc in each of the next 3 dc, then 1 dc into the next ch-1 space. Repeat this sequence twice. Work 1 dc in each of the next 3 dc, then 1 dc into the space where the two motifs meet. Again, work (1 dc in each of the next 3 dc and 1 dc in the next ch-1 space) twice. Work 1 dc in each of the next 3 dc, then work 5 dc into the next corner space. Repeat this pattern around the bag, joining with a slip stitch to the top of the starting chain 3. Fasten off.
Joining the Sides
Place the front and back panels together with the wrong sides (WS) facing each other. Join the Main Color at the top left corner. Work one row of single crochet (sc) around the opposite corner, sewing the two panels together along the bottom and the two sides. This creates the pocket of your bag.
Top Edging
With the right side (RS) of the bag facing you, join the Main Color at the seam of the top opening. Work one round of single crochet (sc) evenly around the top opening of the bag. Join with a slip stitch to the first sc and fasten off.
Creating the Handles (Make 2)
With the Main Color, chain 49.
- Row 1 (RS): Work 1 dc in the 4th chain from the hook. Work 1 dc in each remaining chain across. (Total: 47 dc). Turn.
- Row 2: Chain 3 (counts as first dc). Work 1 dc in each dc across the row. Turn.
- Row 3: Repeat Row 2. Do not turn.
Fold the handle in half lengthwise. Work one row of single crochet through both the remaining loop of the foundation chain and the corresponding stitch of the last row, joining the edges together. Fasten off.
Sew the handles securely to the inside of the top edging of the bag using a yarn needle.
Tips for Success
To make your crochet bag look professional and last longer, keep these tips in mind:
- Consistent Tension: Granny squares can vary in size if your tension changes. Try to keep your stitches consistent so that the squares line up perfectly when sewing them together.
- Weave in Ends as You Go: Because this pattern involves multiple color changes, you will have many yarn tails. Weave these in immediately after finishing each square to avoid a tangled mess at the end.
- Blocking: If your squares look slightly skewed, “block” them before sewing. Lightly steam them with an iron or pin them to a blocking board and spray them with water, then let them dry. This ensures perfectly square motifs.
- Customizing Colors: Don’t be afraid to experiment! While the pattern suggests specific versions, you can use variegated yarn for the main color to add depth, or a bright neon contrast color for a pop of energy.