Adorable Crochet Duckling Pattern: A Beginner-Friendly Amigurumi Tutorial
Are you looking for a quick, cute, and satisfying crochet project? Look no further! This adorable little crochet duckling is the perfect project for both beginners and seasoned amigurumi enthusiasts. Because it is a small-scale project, it is incredibly fast to whip up, making it an ideal choice for handmade gifts, Easter basket fillers, or even charming desk decor.
Amigurumi—the Japanese art of knitting or crocheting small, stuffed yarn creatures—is all about character and texture. This duckling pattern focuses on simple shaping and a few specialized stitches that will help you practice your tension and stitch placement. By the time you finish, you’ll have a tiny, cheerful companion that looks much more complex than it actually is!
Materials You Will Need
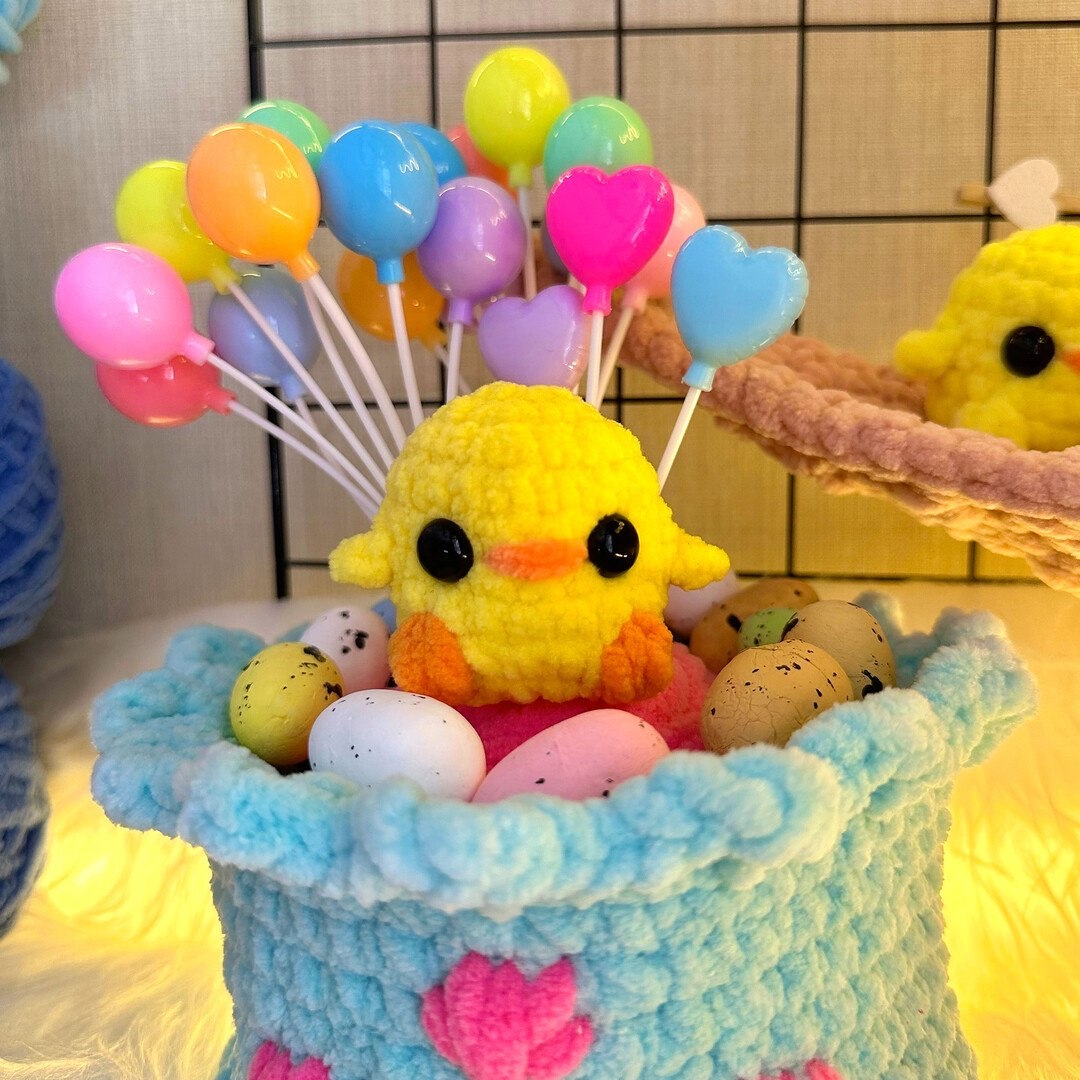
To ensure your duckling turns out looking just like the pictures, I recommend using medium-weight yarn and a slightly smaller hook than usual. This keeps your stitches tight so that the stuffing doesn’t peek through the gaps.
- Yarn: You will need approximately 10 grams of worsted weight (Category 4) yarn. A bright yellow is classic for a duckling, but you will also need a small scrap of orange or peach yarn for the beak.
- Crochet Hook: A 4.5 mm (approximately H-8) crochet hook is recommended to maintain a firm fabric.
- Safety Eyes: 10 mm black safety eyes. If you are making this for a very young child, please consider embroidering the eyes with black yarn instead for safety.
- Stuffing: High-quality polyester fiberfill to give your duckling its round, plump shape.
- Tools: A pair of sharp scissors, a plastic yarn needle (for sewing and weaving in ends), and a small amount of craft glue (such as B-7000) if you prefer gluing the eyes rather than using safety backs.
Crochet Abbreviations (US Terms)
This pattern is written using standard United States crochet terminology. Please ensure you are familiar with these terms before beginning:
- MR: Magic Ring (also known as a magic circle)
- ch: Chain
- sc: Single crochet
- hdc: Half double crochet
- dc: Double crochet
- sl st: Slip stitch
- inc: Increase (working two stitches into the same stitch)
- dec: Decrease (joining two stitches into one)
- st(s): Stitch(es)
Note: The number in parentheses at the end of a row indicates the total number of stitches you should have at the end of that round.
Step-by-Step Instructions
The Foundation and Body Shaping
We begin by creating the base of the duckling using a magic ring. This ensures there is no hole at the very top of the head.
Round 1: Create a magic ring and work 6 sc into the ring. Pull the tail tightly to close the center. (6 sc)
Round 2: Work an increase in every stitch around. (12 sc)
Round 3: (1 sc, 1 inc) repeat 6 times around. (18 sc)
Round 4: Work 1 sc in each stitch around. This round helps stabilize the shape of the head. (18 sc)
Adding the Wings
The wings are worked directly into the body during Round 5. This is a great way to learn how to attach decorative elements to your amigurumi without having to sew them on later.
Round 5: This round involves some specialized shaping. Follow these steps carefully:
- Work 5 sc.
- First Wing: Chain 2. In the second chain from your hook, work 1 hdc. Then, work the second hdc into the same single crochet base that you used for the chain.
- Work 9 sc.
- Second Wing: Chain 2. In the second chain from your hook, work 1 hdc. Then, work the second hdc into the same single crochet base that you used for the chain.
- Work the remaining 4 sc. (18 sc total)
Rounds 6 and 7: Work 1 sc in each stitch around for both rounds. (18 sc)
Adding the Little Legs
In Round 8, we will add the “bobble” style legs. These give the duckling its cute, chunky appearance.
Round 8: This round requires creating two small bumps (bobbles) for the legs:
- Work 7 sc.
- First Leg: In the next stitch, work a bobble stitch. To do this, work 3 or 4 dc into the same stitch, then yarn over and pull through all the loops on your hook. This creates a small, raised “cone” or bump.
- Work 4 sc.
- Second Leg: In the next stitch, work another bobble stitch (3 or 4 dc in the same stitch, pull through all loops).
- Work the remaining 5 sc. (18 sc total)
Eye Placement and Closing the Body
Before you close the duckling, you must place the eyes. This is the most important step for giving your character “life.”
Eye Placement: Locate the space between Round 5 and Round 6. Place the safety eyes approximately 2 stitches apart. If you are using glue, apply a tiny amount to the back of the eye and press it into place. If using safety eyes, insert the post through the fabric and snap the washer on the inside.
Round 9: (1 sc, 1 dec) repeat 6 times around. (12 sc)
Stop here to stuff your duckling! Use your fiberfill to make the body firm and rounded. Make sure you stuff the area around the legs and wings so they don’t collapse.
Round 10: Work 6 dec to close the bottom of the duckling. (6 sc)
Finishing
Once you have stuffed the duckling, it is time to seal it up. Use your slip stitch (sl st) to join the final stitches, then use your plastic needle to weave the remaining yarn tail through the stitches and into the center of the body. Leave a small tail to help you with the beak.
To create the beak, use your orange yarn and the plastic needle. You can either embroider a small triangle shape onto the front of the face or use a tiny bit of glue to attach a small felt triangle. Finally, weave in all your loose ends securely so they are hidden inside the body.
Tips for Success
If this is your first time making amigurumi, don’t get discouraged! Here are a few expert tips to help you achieve a professional look:
- Watch Your Tension: Amigurumi should be worked slightly tighter than standard clothing. If you see light peeking through your stitches, try using a smaller hook.
- Use Stitch Markers: When working in continuous rounds, it is very easy to lose count. Always use a stitch marker in the first stitch of every round to stay on track.
- Stuffing Technique: Don’t just shove a large clump of stuffing into the duckling. Instead, pull small pieces of fiberfill off and push them in with your crochet hook. This prevents lumps and helps the duckling maintain a smooth, spherical shape.
- Perfecting the Bobble: If your legs look uneven, practice your bobble stitch on a scrap piece of yarn first. The key is to ensure you are working the exact same number of double crochets into the same stitch every time.