DIY Cute Crochet Duckling Pattern: A Beginner-Friendly Amigurumi Tutorial
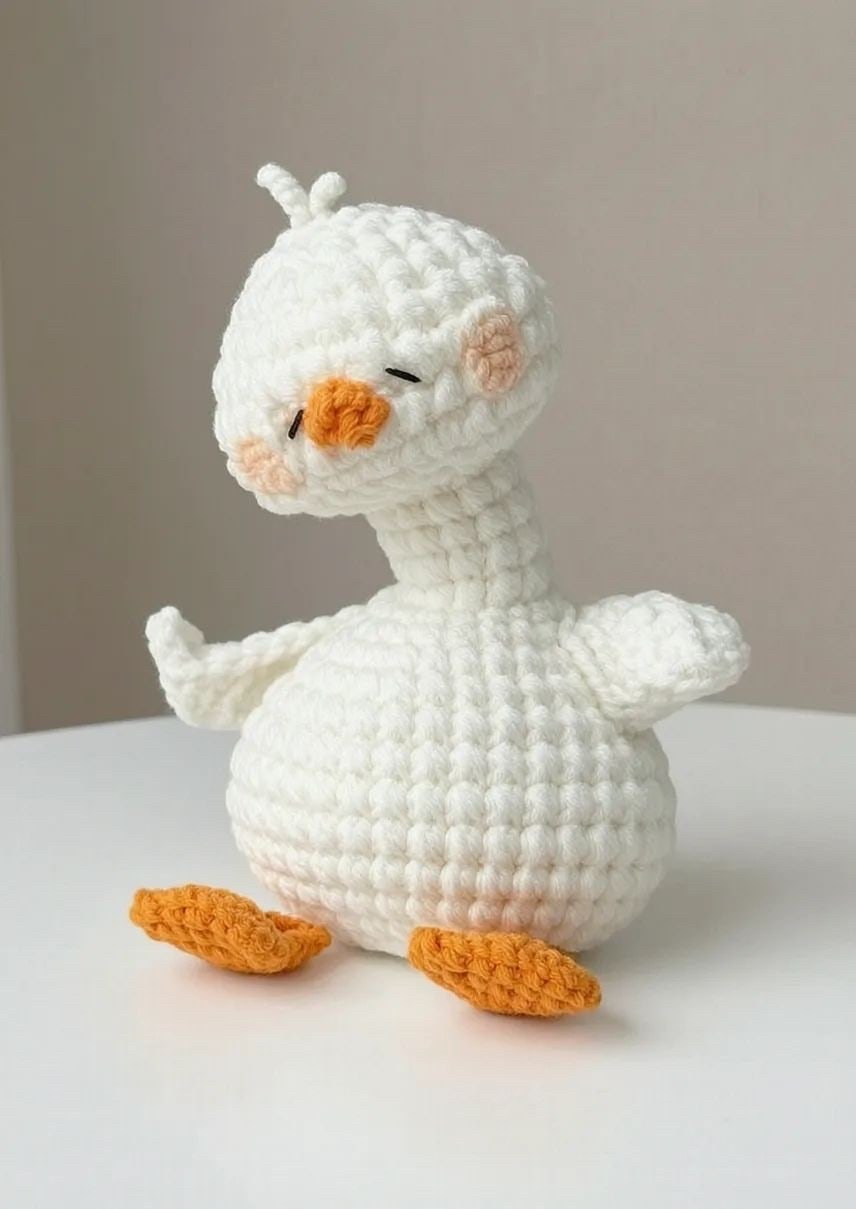
Have you ever wanted to crochet something so adorable that it practically jumps off the hook? If you are looking for your next amigurumi project, look no further! This tiny, chubby, and incredibly cute crochet duckling is the perfect project for makers of all skill levels. Whether you want to create a new nursery friend, a desk companion, or a thoughtful handmade gift, this duckling is sure to bring a smile to anyone’s face.
What makes this pattern so special is its clever design. Most amigurumi patterns require you to crochet dozens of tiny pieces and sew them all together, which can be quite a headache. However, this duckling is designed with efficiency in mind. The head and the body are worked as one continuous piece, meaning less time spent sewing and more time enjoying the process of creating something wonderful.
Materials & Supplies
To ensure your duckling turns out as professional and cute as the one in the photos, I recommend using high-quality materials. Since amigurumi is worked in tight stitches, you want a yarn that holds its shape well.
- Yarn: Medium weight (Category 4) cotton or acrylic yarn. You will need a large amount of white for the body and a small amount of bright orange or yellow for the beak and feet.
- Crochet Hook: A 3.5mm (E) or 4.0mm (G) hook. Using a slightly smaller hook than the yarn suggests helps keep the stitches tight so that the stuffing doesn’t peek through.
- Stuffing: High-quality polyester fiberfill.
- Safety Eyes or Embroidery Thread: You can use small black safety eyes (around 6mm-8mm) or simply embroider the eyes with black thread for a softer, more “kawaii” look.
- Tapestry Needle: A blunt-tipped needle for sewing the pieces together and weaving in ends.
- Optional – Craft Wire: If you want your duckling to have a poseable neck, you can insert a small piece of floral or craft wire during the neck section.
- Optional – Pink Blush/Makeup: A tiny bit of pink eyeshadow or felt can be used to add those adorable rosy cheeks seen in the photo.
Crochet Abbreviations
This pattern uses standard US crochet terms. Please ensure you are using the US definitions to avoid confusion with UK terminology.
- MR: Magic Ring (or Magic Circle)
- ch: Chain
- sc: Single crochet
- inc: Increase (2 sc in the same stitch)
- dec: Decrease (invisible decrease is recommended for amigurumi)
- hdc: Half double crochet
- dc: Double crochet
- sl st: Slip stitch
- FLO: Front Loop Only
- sts: Stitches
Step-by-Step Instructions
The Head and Body (Worked in One Piece)
This is the heart of your duckling. We will start by creating the head, then transition into the neck, and finally expand into the body. Make sure to keep your tension even to ensure a smooth shape.
The Head Section
Start with a Magic Ring (MR).
- Round 1: 6 sc in the MR (6)
- Round 2: 6 inc (12)
- Round 3: (1 sc, inc) repeat 6 times (18)
- Round 4: 18 sc (18)
- Round 5: 1 sc, inc, 1 sc, 4 inc, 4 sc, 4 inc, 1 sc, inc, 1 sc (28)
- Rounds 6–8: 28 sc in each round (28)
- Round 9: 1 sc, dec, 1 sc, 4 dec, 4 sc, 4 dec, 1 sc, dec, 1 sc (18)
- Round 10: 9 dec (9)
The Neck Section
Now, we will work only through the front loops to create the neck. This creates a natural “seam” that helps define the head from the neck.
- Round 11: Working in FLO (Front Loop Only): (1 sc, inc, 1 sc) repeat 3 times (12)
- Rounds 12–16: 12 sc in each round (12)
Pro-Tip: If you want your duckling to be able to “look around,” this is the perfect time to insert a piece of craft wire into the center of the neck.
The Body Section
Now we expand the piece to create the plump, adorable belly.
- Round 17: (1 sc, inc) repeat 6 times (18)
- Round 18: (1 sc, inc, 1 sc) repeat 6 times (24)
- Round 19: 24 sc (24)
- Round 20: (3 sc, inc) repeat 6 times (30)
- Round 21: (2 sc, inc, 2 sc) repeat 6 times (36)
- Round 22: (5 sc, inc) repeat 6 times (42)
- Rounds 23–25: 42 sc in each round (42)
- Round 26: (5 sc, dec) repeat 6 times (36)
- Round 27: 18 dec (18)
- Round 28: 9 dec (9)
Fasten off, leaving a long tail for sewing. Stuff the head and body firmly with your polyester fiberfill before closing the hole completely.
The Tiny Beak
The beak is a small but vital detail. To get the best look, I recommend using a thinner yarn than your main body yarn, or simply splitting your orange yarn into individual strands to work with a much smaller hook.
- Round 1: 5 sc (5)
- Round 2: 3 inc. Do not work into the remaining stitches; instead, simply shape the piece with your fingers to give it a slight point.
The Wings
You will need to make two wings—one for each side of the duckling.
- Chain 8.
- Turn your work. Starting from the 2nd chain from your hook, work the following: 1 sc, 1 hdc, 5 dc.
- Fasten off, leaving a long tail for sewing.
The Feet
Make two feet to give your duckling a sturdy base.
- Chain 4.
- Turn your work. Starting from the 2nd chain from your hook, work 1 sl st.
- Continue by working: (2 ch, turn, 1 sl st) repeat 2 times.
- Then, work a slip stitch back to the starting point to help shape the foot into a small, rounded pad.
- Fasten off, leaving a long tail for sewing.
Finishing & Assembly
Now comes the most rewarding part: bringing your duckling to life! Follow these steps for a polished look:
- Attach the Beak: Using your tapestry needle, sew the beak to the center of the face, just below the eyes.
- Attach the Wings: Sew the wings to the sides of the body, roughly at the level where the neck meets the body.
- Attach the Feet: Sew the feet to the bottom of the body. Since the body is quite round, you may need to “tilt” them slightly outward so the duckling can sit upright.
- Face Details: If you didn’t use safety eyes, embroider two small black lines or dots for the eyes. For that extra touch of cuteness, use a little bit of pink blush or embroidery thread to add small circles just below the eyes to represent blushing cheeks.
Tips for Success
As with any amigurumi project, practice makes perfect! Here are a few extra tips to help you along:
- Use Stitch Markers: Because amigurumi is worked in continuous spirals, it is incredibly easy to lose track of your starting stitch. Always use a stitch marker to keep your place.
- The “Invisible Decrease”: When working on the decreasing rounds (like Rounds 9, 10, 26, 27, and 28), use the invisible decrease method. Instead of inserting your hook into the top loops, insert it into the front loops only of the next two stitches. This prevents unsightly gaps in your work.
- Don’t Skimp on Stuffing: To get that “chubby” look, make sure you stuff the duckling firmly, especially in the head and the bottom of the body. However, be careful not to overstuff the neck area, or the head might tilt awkwardly.
- Yarn Choice Matters: If you are a beginner, avoid “fuzzy” or “eyelash” yarns. They make it very difficult to see where your stitches are. A smooth cotton or acrylic yarn is your best friend!
Happy crocheting! We can’t wait to see your adorable little duckling creations!