Adorable Mini Fluffy Sheep Crochet Pattern: Step-by-Step Tutorial
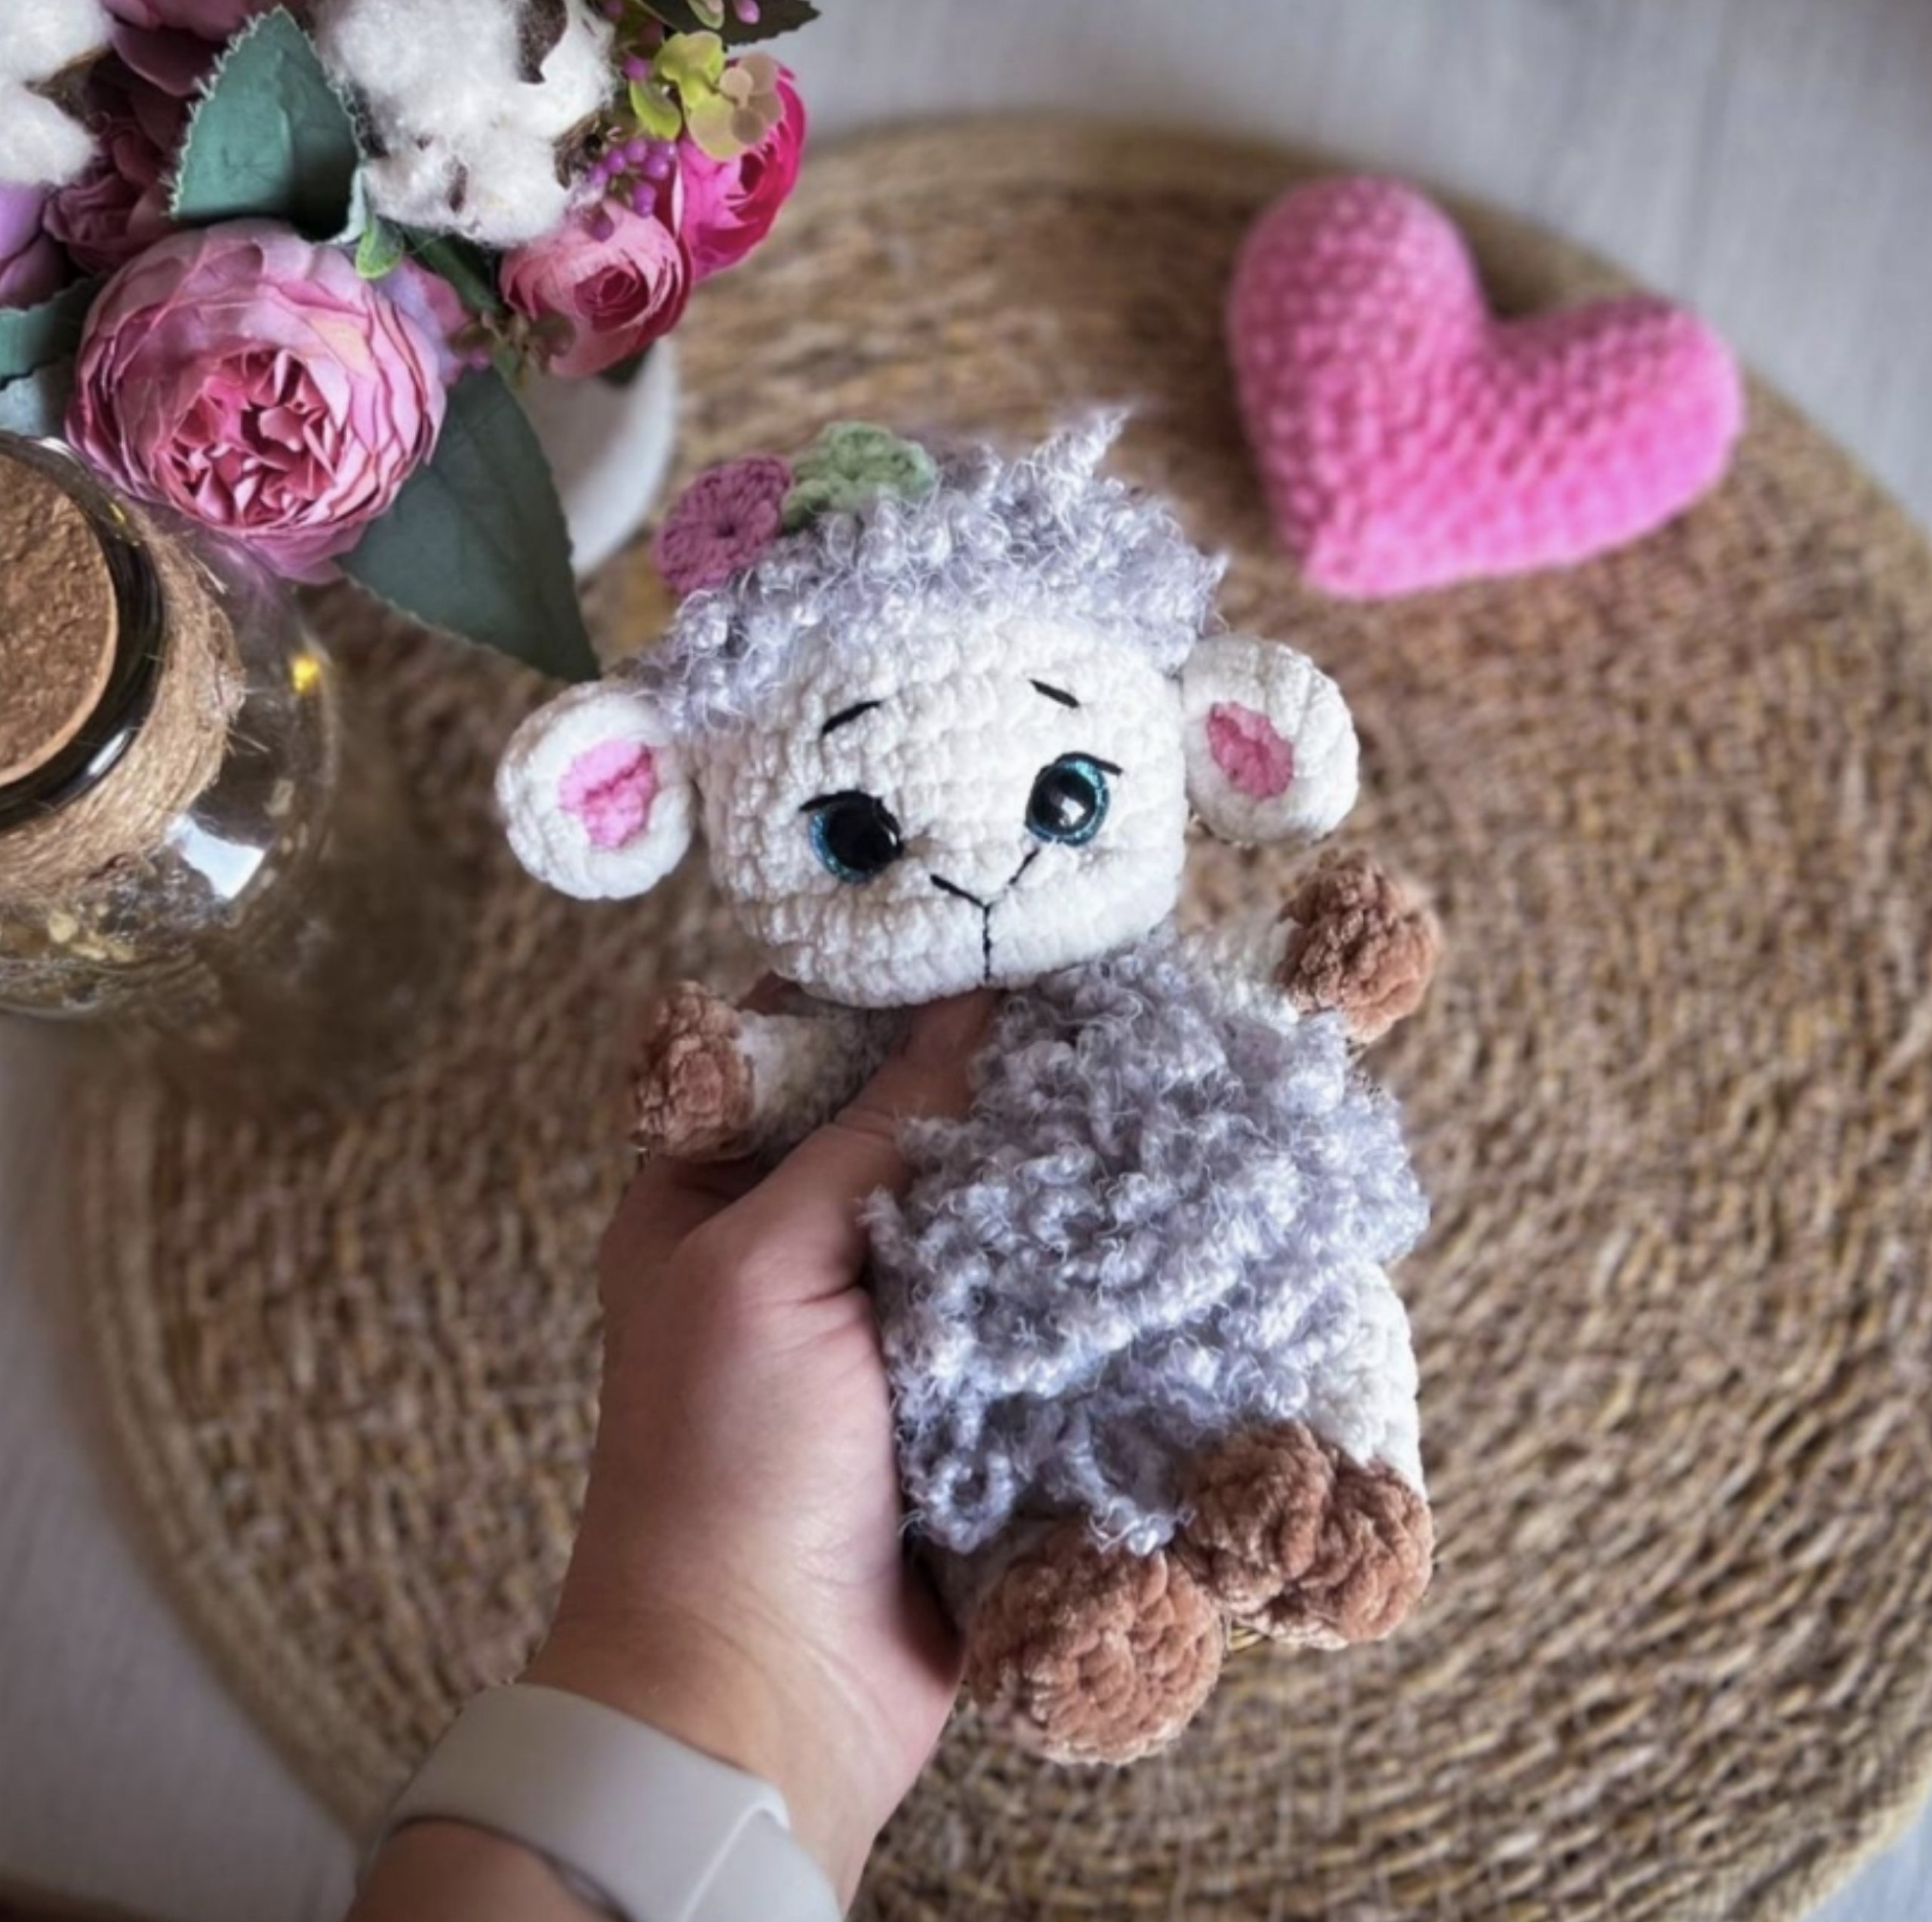
If you are looking for a project that is equal parts cuddly and cute, look no further than this Mini Fluffy Sheep! This little lamb is the perfect introduction to working with chenille or velvet yarn, which gives the finished plushie an irresistible, squishy texture. Standing at approximately 6 to 7 inches tall, this amigurumi sheep makes a wonderful gift, a cute desk companion, or a cozy addition to a nursery.
This tutorial is designed to be beginner-friendly, though you should have a basic grasp of how to crochet and how to join pieces together. We will be using US crochet terms and imperial measurements to ensure everything is clear and easy to follow. Let’s get started on creating your own little woolly friend!
Materials & Abbreviations
To achieve that ultra-soft look, we recommend using a plush chenille or velvet yarn. If you can’t find the specific brands mentioned, any “super bulky” or “chenille” yarn will work perfectly.
Materials Needed:
- Main Color: Approximately 50-60 yards of white or cream chenille/velvet yarn.
- Accent Colors: Small amounts of pink (for the inner ears) and brown or grey (for the hooves).
- Texture Yarn: A small amount of “grass” or “eyelash” yarn to create the curly wool on the head and body.
- Crochet Hook: 4.0mm (G) hook.
- Safety Eyes: Two 14mm plastic safety eyes.
- Embroidery Thread: Black yarn or embroidery floss for the nose and eyelashes.
- Stuffing: High-quality polyester fiberfill.
- Tools: A yarn needle, strong sewing thread, and scissors.
Abbreviations (US Terms):
- MR: Magic Ring
- sc: Single Crochet
- inc: Increase (2 sc in one stitch)
- dec: Decrease (sc 2 together)
- ch: Chain
- sl st: Slip Stitch
- hdc: Half Double Crochet
- dc: Double Crochet
- bo: Bobble Stitch
- (…) : Total number of stitches at the end of the round
- *6 : Repeat the instruction inside the parentheses 6 times
Step-by-Step Instructions
The Legs (Make 2)
Start with your brown or grey yarn. As you work, begin stuffing the leg, but keep the stuffing light toward the top to allow for easier assembly.
Round 1: Ch 5. Starting in the 2nd chain from the hook: 3 sc, 3 sc in the last chain. Working along the opposite side of the chain: 2 sc, 1 inc (10)
Round 2: 1 inc, 2 sc, 3 inc, 2 sc, 2 inc (16)
Round 3: 16 sc (16)
Round 4: 4 sc, 4 dec, 4 sc (12). Fasten off and secure the yarn.
Switch to your skin-colored (white/cream) yarn.
Round 5: 3 sc, 3 dec, 3 sc (9)
Rounds 6-9: 9 sc (9) — Total of 4 rounds.
To finish the leg, flatten the opening and work 4 sc across both sides to close the tube. Leave a long tail for sewing.
The Arms (Make 2)
Start with the brown or grey yarn. Stuff as you go, leaving the top loosely stuffed.
Round 1: 6 sc in MR (6)
Round 2: (1 sc, 1 inc) * 3 (9)
Round 3: 9 sc (9)
Round 4: 1 sc, 3 dec, 2 sc (6). Fasten off and secure.
Switch to your skin-colored yarn.
Rounds 5-8: 6 sc (6) — Total of 4 rounds.
Flatten the opening and work 3 sc across both sides to close. Leave a long tail for sewing.
The Body and Head
This piece is worked as one continuous unit from the bottom up. Use your skin-colored yarn and stuff firmly as you progress.
Round 1: 6 sc in MR (6)
Round 2: 6 inc (12)
Round 3: (1 sc, 1 inc) * 6 (18)
Round 4: 1 sc, 1 inc, (2 sc, 1 inc) * 5, 1 sc (24)
Round 5: 24 sc (24)
Round 6: (3 sc, 1 inc) * 6 (30)
Round 7 (Tail & Leg Attachment): 1 sc, ch 3, work 2 sc back down the chain and 1 sc into the base of the chain to create a tiny tail. Now, 5 sc, 4 sc worked together with the first leg, 11 sc, 4 sc worked together with the second leg, 5 sc (30). Note: In the next round, work 1 sc directly over the tail.
Rounds 8-9: 30 sc (30) — Total of 2 rounds.
Round 10: (3 sc, 1 dec) * 6 (24)
Round 11: 24 sc (24)
Round 12: (2 sc, 1 dec) * 6 (18)
Round 13: 18 sc (18)
Round 14: (1 sc, 1 dec) * 6 (12)
Round 15 (Arm Attachment): 2 sc, 3 sc worked together with the first arm, 3 sc, 3 sc worked together with the second arm, 1 sc (12). Ensure arms are positioned directly above the legs.
Round 16: 12 sc (12)
Round 17: 12 inc (24)
Round 18: (3 sc, 1 inc) * 6 (30)
Round 19: (9 sc, 1 inc) * 3 (33)
Rounds 20-22: 33 sc (33) — Total of 3 rounds.
Round 23: (9 sc, 1 dec) * 3 (30)
Rounds 24-25: 30 sc (30) — Total of 2 rounds.
Eye Placement: Insert your safety eyes between rounds 22 and 23, leaving 3 sc between the eyes.
Round 26: (3 sc, 1 dec) * 6 (24)
Round 27: (2 sc, 1 dec) * 6 (18)
Round 28: (1 sc, 1 dec) * 6 (12)
Round 29: 6 dec (6). Fasten off and sew the remaining hole closed.
The Ears (Make 2)
For each ear, you will make two small discs: one in pink and one in white/cream.
Round 1: 6 sc in MR (6)
Round 2: 6 inc (12)
For the pink disc, fasten off here. For the white disc, do not fasten off.
Place the two discs together (wrong sides facing each other, pink side facing you). Work 12 sc around the edges to join them. Skip 3 sc, then work a sl st into the 4th stitch to create a small indentation. Leave a tail for sewing.
Finishing & Detailing
Now it is time to give your sheep some personality!
Sculpting the Face
To give the sheep a sweeter expression, we will “indent” the eyes. Using a long needle and strong thread, insert the needle between rounds 16 and 17 at the center of the face. Bring it out just under the first eye. Pull tight and anchor it. Repeat this for the second eye, leaving 1 sc of space between the two anchor points. Pull both threads evenly to pull the eyes inward, tie a secure knot, and hide the ends inside the head.
Embroidery
- Nose: Using black yarn, embroider a small “V” or “Y” shape between the eyes to create a cute little nose.
- Lashes & Brows: Add a few small straight stitches at the outer corners of the eyes for eyelashes and two small arched lines above the eyes for eyebrows.
Final Assembly
Sew the ears to the head. The bottom edge of the ear should align with the bottom of the eyebrows, placed about 4 sc away from the center of the face.
Optional Curls: Using your textured “grass” yarn, crochet small loops or clusters on the top of the head and across the back to mimic curly wool.
Bonus: The Tiny Romper Outfit
Want to dress up your lamb? This cute romper is worked in rows (back and forth).
Setup: Ch 31. Starting in the 2nd chain from hook: 30 sc. Turn.
Row 2: Ch 6 (button loop), (4 hdc, 1 inc) * 6 (36). Turn.
Note: At the start of every following row, ch 2 (this does not count as a stitch).
Row 3: (5 hdc, 1 inc) * 6 (42). Turn.
Row 4 (Armholes): 6 hdc, ch 8 (skip 8 sts), 14 hdc, ch 8 (skip 8 sts), 6 hdc (42). Turn.
Row 5: 3 hdc, 1 inc, (6 hdc, 1 inc) * 5, 3 hdc (48). Turn.
Row 6: (7 hdc, 1 inc) * 6 (54). Turn.
Row 7: 2 hdc, 1 bo, (5 hdc, 1 bo) * 8, 3 hdc (54). Turn.
Row 8: Ch 6 (button loop), 54 hdc (54). Turn.
Row 9: 4 hdc, 1 inc, (8 hdc, 1 inc) * 6, 4 hdc (60). Turn.
Row 10: (9 hdc, 1 inc) * 6 (66). Turn.
Row 11: (5 hdc, 1 bo) * 10, 6 hdc (66). Turn.
Rows 12-14: 66 hdc (66). Turn.
Row 15: 2 hdc, 1 bo, (5 hdc, 1 bo) * 10, 3 hdc (66). Turn.
Rows 16-18: 66 hdc (66). Turn.
Row 19: (5 hdc, 1 bo) * 10, 6 hdc (66). Turn.
Row 20: 66 hdc (66).
Legs: Divide the remaining stitches into two groups of 25. Work 2 rows of 25 hdc for each leg. Sew the center gap between the legs closed with a needle. Finally, add a decorative edge to the armholes by working 3 dc into a single stitch around the rim.
Tips for a Perfect Plushie
- Consistent Tension: When working with chenille yarn, try not to pull too tight, as the yarn can sometimes “snap” or create gaps where the stuffing shows through.
- Stuffing Strategy: Stuff the head and body firmly, but leave the limbs slightly softer. This allows the sheep to be more poseable and prevents the head from becoming too heavy for the body.
- Customization: Feel free to change the colors! A pastel pink or blue sheep is just as cute, and you can use different colored yarns for the romper to match the season.