Adorable Amigurumi Koala Crochet Pattern: A Step-by-Step Guide
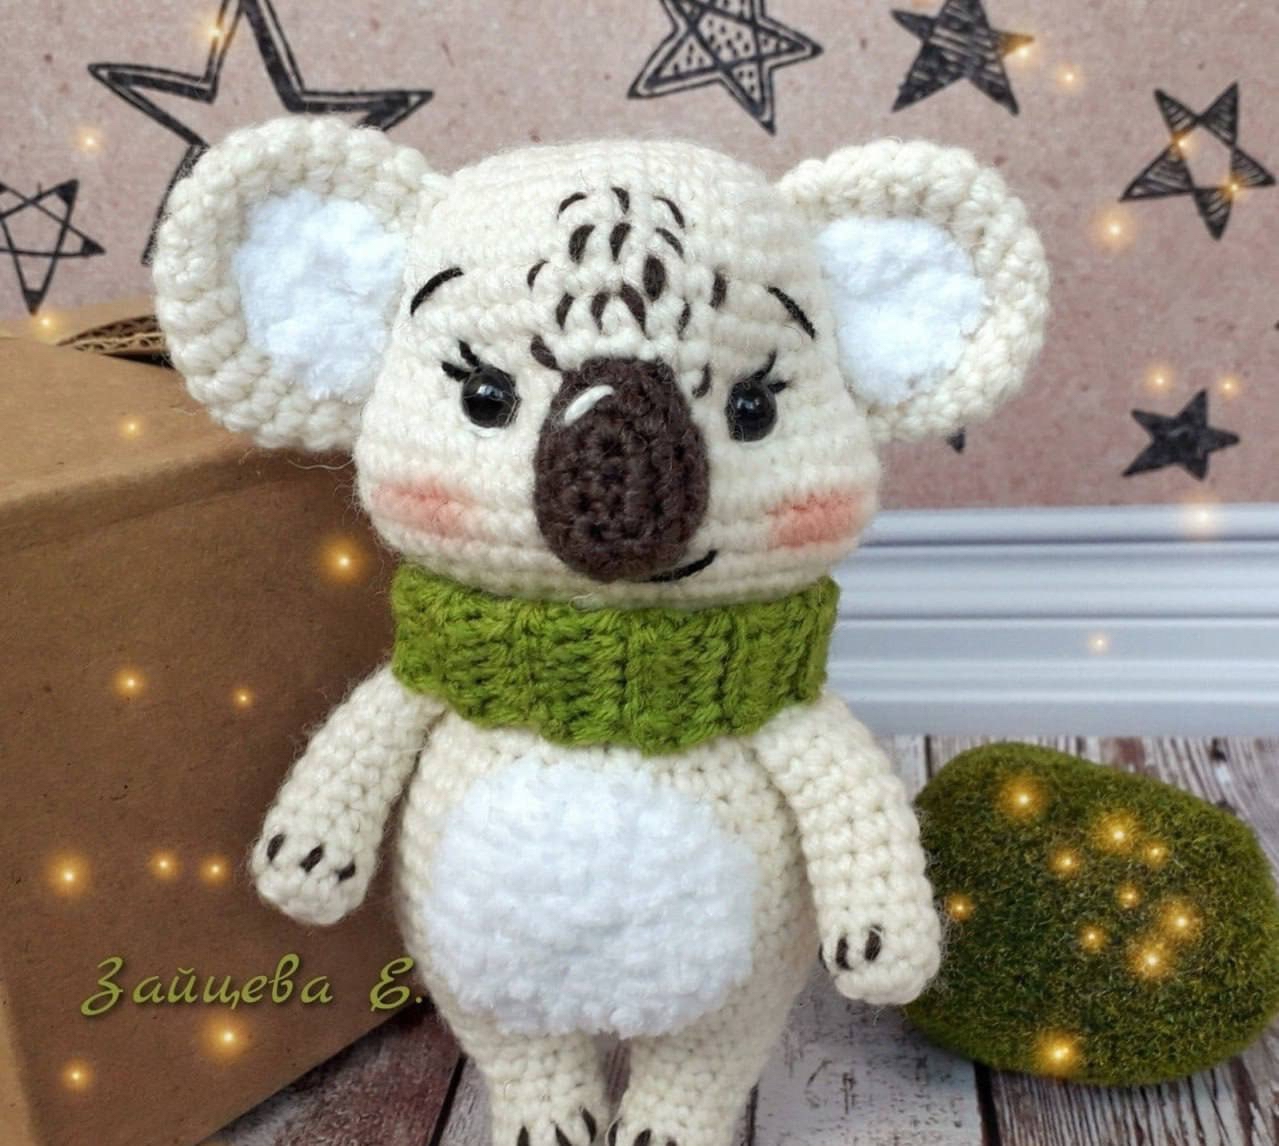
Are you looking for a new, heartwarming project to add to your crochet collection? There is nothing quite as charming as a little amigurumi animal, and this adorable koala is no exception! With its big ears, tiny nose, and even a little scarf, this koala is the perfect companion for a nursery, a desk buddy, or a thoughtful handmade gift for a loved one.
This tutorial is designed to be beginner-friendly. While it involves several different parts, the shapes are simple, and the process is very rewarding. By the time you finish, you will have a soft, cuddly little koala that looks professional and sweet. Grab your favorite hook, find a cozy spot, and let’s start stitching!
Materials and Abbreviations
Before we dive into the stitches, let’s make sure you have everything you need on your crafting table. To achieve the best results, I recommend using a medium-weight yarn and a hook size that creates tight, dense stitches so that your stuffing doesn’t peek through.
What You’ll Need:
- Main Color Yarn: Approximately 100 yards of medium-weight yarn (cotton or acrylic works well).
- Dark Color Yarn: A small amount for the nose.
- White Plush/Chenille Yarn: A small amount of very soft, fluffy yarn for the belly and the inside of the ears.
- Accent Color Yarn: Any color you like for the tiny scarf!
- Safety Eyes: 6 mm safety eyes (or small black beads).
- Crochet Hook: A size suitable for your yarn (typically 3.25mm to 4.0mm).
- Other Tools: Fiberfill stuffing, scissors, a yarn needle, and stitch markers.
Abbreviations (US Terms):
- MR: Magic Ring
- ch: Chain
- sc: Single crochet
- inc: Increase (2 sc in one stitch)
- dec: Decrease (sc 2 together)
- hdc: Half double crochet
- sl st: Slip stitch
- st(s): Stitch(es)
- BLO: Back loops only
- […] * n: Repeat the instructions inside the brackets n times.
Step-by-Step Crochet Instructions
The Head
Working in the main color. We will work in continuous rounds. Do not join at the end of each round unless specified.
- Make a 6 ch foundation chain. Starting in the second ch from the hook, work 4 sc down one side of the chain. In the very last ch, work 3 sc. Now, work to the other side of the chain (the bottom) and work 3 sc. In the final ch, work an inc. (12)
- inc, 3 sc, inc * 3, 3 sc, inc * 2 (18)
- (2 sc, inc) * 6 (24)
- (3 sc, inc) * 6 (30)
- (4 sc, inc) * 6 (36)
- Rounds 6-10: sc in each st around (36)
- 8 sc, inc, 1 sc, inc, 1 sc, inc, 10 sc, inc, 1 sc, inc, 1 sc, inc, 8 sc (42)
- 10 sc, inc, 2 sc, inc, 14 sc, inc, 2 sc, inc, 10 sc (46)
- Rounds 13-15: sc in each st around (46)
- Sl st to shift the start of the round. 8 sc, dec * 5, 10 sc, dec * 5, 8 sc (36)
- (4 sc, dec) * 6 (30)
- (3 sc, dec) * 6 (24)
Fasten off, leaving a tail. Stuff the head firmly.
Note: If you are using safety eyes, attach them approximately around Round 12.
The Legs (Make 2)
Working in the main color.
- 6 sc in a MR (6)
- inc * 6 (12)
- 12 sc (12)
- 3 sc, dec * 3, 3 sc (9)
- 9 sc (9)
- (2 sc, inc) * 3 (12)
- 12 sc (12)
- (3 sc, inc) * 3 (15)
- 15 sc (15)
- 8 sc, inc, 1 sc, inc, 1 sc, inc, 10 sc, inc, 1 sc, inc, 1 sc, inc, 8 sc (42)
- 10 sc, inc, 2 sc, inc, 14 sc, inc, 2 sc, inc, 10 sc (46)
- Rounds 13-15: sc in each st around (46)
- 8 sc, dec * 5, 10 sc, dec * 5, 8 sc (36)
- (4 sc, dec) * 6 (30)
- (3 sc, dec) * 6 (24)
Fasten off the first leg. For the second leg, do not fasten off; you will continue directly into the body.
The Body
We will now join the two legs together to form the body. Work in the main color.
- Working into the second leg: 5 sc. Then, working into the first leg: 15 sc (tip: start at the 11th stitch from the end of the first leg to ensure the legs face slightly inward). Then, 10 sc into the second leg. (30)
- (4 sc, inc) * 6 (36)
- (5 sc, inc) * 6 (42)
- Rounds 4-9: sc in each st around (42)
- (12 sc, dec) * 3 (39)
- (11 sc, dec) * 3 (36)
- 36 sc (36)
- (4 sc, dec) * 6 (30)
- 30 sc (30)
- (3 sc, dec) * 6 (24)
- 24 sc (24)
Sl st to end the round, fasten off, and leave a long tail for sewing the body to the head.
The Arms (Make 2)
Working in the main color.
- 5 sc in a MR (5)
- inc * 5 (10)
- 10 sc (10)
- (3 sc, dec) * 2 (8)
- Rounds 5-6: sc in each st around (8)
- inc, 7 sc (9)
- 9 sc (9)
- inc, 8 sc (10)
- Rounds 10-11: sc in each st around (10)
Sl st to end the round. Stuff only the bottom half of the arm. Fold the arm in half and sc through both sides for 5 sc. Fasten off, leaving a long tail for sewing.
The Tail
Working in the main color.
- 6 sc in a MR (6)
- inc * 6 (12)
- 12 sc (12)
Fasten off, leaving a tail. Stuff while sewing to the body.
The Ears (Make 2 Outer, 2 Inner)
Outer Ears (Main Color)
- 6 sc in a MR (6)
- inc * 6 (12)
- (1 sc, inc) * 6 (18)
- (2 sc, inc) * 6 (24)
- Rounds 5-6: sc in each st around (24)
- (6 sc, dec) * 3 (21)
- (5 sc, dec) * 3 (18)
Do not stuff. Fold the ear in half and sc through both sides for 9 sc. Fasten off, leaving a tail.
Inner Ears (White Plush Yarn)
- 4 sc in a MR (4)
- ch 1, turn. inc * 4 (8)
Fasten off, leaving a tail. If you want larger ears, you can add one more round of increases.
The Nose
Working in the dark color.
- 5 ch. Starting in the second ch from the hook: 3 sc, 3 sc in the last ch. Working on the other side of the chain: 2 sc, inc in the last ch. (10)
- inc, 2 sc, (inc in hdc) * 3, 2 sc, inc * 2 (16)
- 16 sc (16)
Fasten off, leaving a long tail for sewing to the head.
The Belly
Working in white plush yarn.
- 6 sc in a MR (6)
- inc * 6 (12)
- (1 sc, inc) * 6 (18)
- (2 sc, inc) * 6 (24)
Fasten off, leaving a tail for sewing.
The Cozy Scarf
Working in your accent color.
- Make a 9 ch foundation chain. Starting in the second ch from the hook, work 8 sc.
- ch 1, turn. Work 8 sc in the BLO (Back Loops Only).
- Repeat these two rounds until the scarf reaches your desired length (approximately 25 rows).
Fold the edges of the scarf inward and sc through both sides to create a finished look. Fasten off.
Finishing
Now comes the fun part—bringing your koala to life! Use your yarn needle and the tails you left during the process to assemble the pieces.
- The Head & Body: Sew the head onto the top of the body. Make sure it is secure and centered.
- The Ears: Sew the white inner ear pieces into the center of the outer ear pieces. Then, sew the ears to the top of the head.
- The Face: Sew the nose onto the center of the head. If you didn’t use safety eyes, now is the time to place them. You can also use embroidery to add little eyelashes or eyebrows for extra character!
- The Limbs: Sew the arms to the sides of the body and the legs to the bottom. Make sure the arms are positioned so the increases face backward.
- The Belly & Tail: Sew the white plush belly onto the front of the body and the tail to the back.
- The Scarf: Wrap the scarf around the neck and secure it.
Tips
To ensure your amigurumi looks its best, keep these expert tips in mind:
Tension is Key
Try to keep your tension consistent. If you crochet too loosely, the stuffing will show through the holes. If you find this happening, try using a slightly smaller hook.
Stuffing Wisely
When stuffing the head and body, use small clumps of fiberfill at a time. This helps you avoid lumps and ensures the shape remains smooth and round. Don’t be afraid to stuff the head firmly!
The Magic of Embroidery
Small details make a big difference. Using a needle and a bit of dark yarn to add little “blush” marks under the eyes or tiny details on the paws can make your koala look incredibly professional and adorable.
Working with Plush Yarn
When working with the white fluffy yarn for the belly and ears, it can be a little harder to see your stitches. Use stitch markers religiously so you don’t lose track of your rounds!