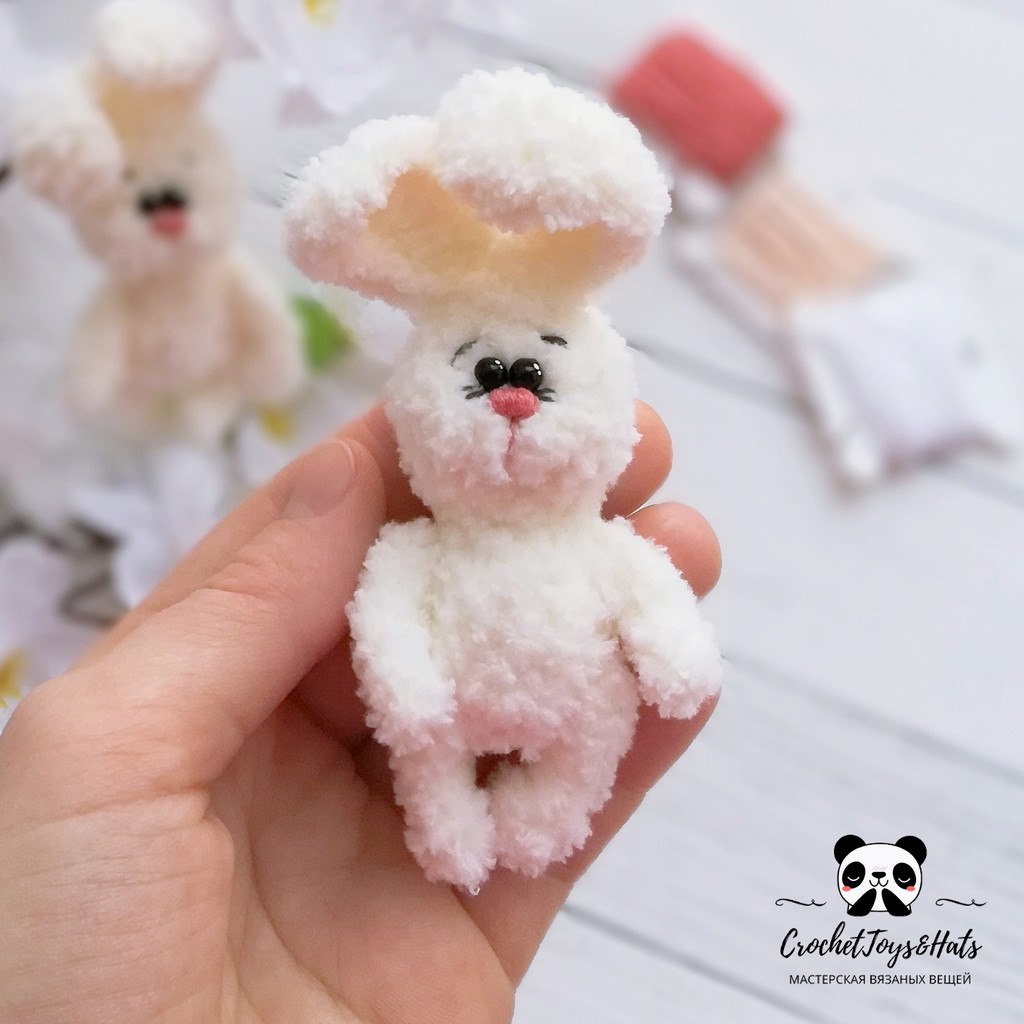
How to Crochet a Mini Plush Bunny: Easy Amigurumi Pattern for Beginners
Looking for a quick, adorable, and cuddly crochet project? This mini plush bunny is the perfect choice! Whether you are looking to make a sweet gift for a loved one, a companion for a handmade doll, or just want to practice your amigurumi skills, this little rabbit is bound to bring a smile to anyone’s face. Because we are using a plush chenille yarn, the result is an incredibly soft, velvety toy that feels professional and high-end.
This pattern is designed to be beginner-friendly. We will be working in a continuous spiral, meaning you won’t have to worry about joining rounds with slip stitches until the very end. Grab your hook and some fuzzy yarn, and let’s get started!
Materials & Abbreviations
To achieve the look and feel of the bunny in the photos, you’ll want to use a “plush” or “chenille” style yarn. These yarns are thicker and fuzzier than standard acrylic, which gives the bunny its signature cuddly texture.
Materials Needed:
- Yarn: Approximately 50-100 yards of plush chenille yarn (such as Alize Softy or a similar velvet yarn) in white or cream.
- Crochet Hook: 1.6mm hook (you may go up to a 2.0mm if you prefer a slightly looser tension, but a smaller hook prevents the stuffing from showing through the plush yarn).
- Stuffing: High-quality polyester fiberfill.
- Eyes: 4mm black beads or half-beads.
- Face Details: Pink and black embroidery floss.
- Adhesive: Clear craft glue or a strong jewelry glue for the eyes.
- Internal Support: A small piece of plastic tubing or a marker cap to act as a neck support (this helps the head stay upright).
- Tools: Yarn needle, scissors, and stitch markers.
Abbreviations (US Terms):
- MR: Magic Ring (Amigurumi ring)
- sc: Single crochet
- inc: Increase (two single crochets in one stitch)
- dec: Decrease (crochet two stitches together)
- ch: Chain
- sl st: Slip stitch
- hdc: Half double crochet
- dc: Double crochet
- tr: Treble crochet
- st: Stitch
Note: Numbers in parentheses ( ) at the end of each row indicate the total stitch count for that round.
Step-by-Step Instructions
The bunny is worked from the bottom up, combining the body and head into one single piece to minimize sewing.
The Body and Head
Start at the bottom of the bunny. We will work in a continuous spiral. If you find it hard to see your stitches due to the plush yarn, we highly recommend using a stitch marker in the first stitch of every round.
- Round 1: Create a MR and work 8 sc into the ring. (8)
- Round 2: Inc in every stitch around. (16)
- Round 3-5: sc in each stitch around for three rounds. (16)
- Round 6: (6 sc, dec) repeat 2 times. (14)
- Round 7: sc in each stitch around. (14)
- Round 8: (5 sc, dec) repeat 2 times. (12)
- Stuffing: Lightly stuff the bottom portion of the body with fiberfill.
- Round 9: (1 sc, dec) repeat 4 times. (8)
- Round 10: sc in each stitch around. (8)
- Round 11: Inc in every stitch around. (16)
- Round 12: (inc, 1 sc) repeat 8 times. (24)
- Round 13-16: sc in each stitch around for four rounds. (24)
Adding Support: Before continuing to the head, insert your plastic neck support (marker cap or tubing) into the center of the neck area. Add a bit more stuffing to the body to make it firm, but leave a little room in the neck for the support. Now, begin stuffing the head as you continue to crochet.
- Round 17: (2 sc, dec) repeat 6 times. (18)
- Round 18: (1 sc, dec) repeat 6 times. (12)
- Round 19: dec 6 times. (6)
Fasten off and weave in your ends. Use your yarn needle to sew the remaining 6 stitches closed tightly.
The Ears (Make 2)
The ears are worked in rows rather than rounds to create a flat, elongated shape.
- Foundation: Chain 12. Start working in the 3rd chain from the hook (the turning chain counts as the first stitch).
- Row 1: 1 dc, 5 tr, 1 dc, 1 hdc, 2 sc. Turn.
- Row 2: ch 1, 10 sc, inc 4 times, 11 sc.
Fasten off, leaving a long tail of yarn for sewing the ears to the head.
The Paws (Make 4)
The paws are simple rectangles that are partially closed to create a rounded look.
- Foundation: Chain 10. Start working in the 3rd chain from the hook.
- Row 1: 7 sc across. Turn.
- Row 2: ch 1, 7 sc across. Turn.
- Row 3: Join the first and second rows together by working 5 sl st.
Fasten off, leaving a long tail for sewing. Do not stuff the paws. The remaining open edge is where the paw will be attached to the body.
Finishing and Assembly
This is where your bunny truly comes to life! The “sculpting” process is what gives the bunny its cute, expressive face.
Sculpting the Face
To create a defined muzzle, use a yarn needle and a piece of matching white yarn. Insert the needle from the top of the head down toward the nose area and pull gently to create a small indentation. Repeat this a few times vertically to “pinch” the face into a more animal-like shape.
Embroidering the Nose and Mouth
Using pink embroidery floss, make 2-3 small horizontal stitches where the nose should be. To give the nose volume, take the thread and wrap it tightly around those horizontal stitches, going back and forth. Don’t pull too tight, or you’ll crush the head; just create a small, plump ball of thread. Once you have the desired size, secure the thread. Use the same pink thread to stitch a small vertical line down from the nose to the mouth, and then stitch a tiny, sweet smile.
Eyes and Final Details
- Eyes: Glue your 4mm black beads just above the nose. If you prefer not to use glue, you can sew them on with black thread.
- Eyelashes: Using black embroidery floss, add a few tiny diagonal stitches extending from the outer corners of the eyes for an adorable, feminine look.
- Brows: Add two tiny black stitches above the eyes to give the bunny some character.
- Assembly: Sew the ears to the top of the head. Attach two paws to the upper body as arms and two to the lower body as feet.
- The Tail: Using the same wrapping technique you used for the nose, create a small, fluffy pom-pom tail on the back of the bunny.
Tips for Success
Working with Plush Yarn: Chenille yarn can be slippery, and the stitches can be hard to see. If you lose your place, use a toothpick or a needle to gently pull the plush fibers apart to reveal the “V” of the stitch underneath.
Tension Control: Be careful not to over-tighten your decreases, as this can cause the fabric to pucker. Conversely, ensure your increases are snug so that the stuffing doesn’t leak out.
Customization: While this pattern is for a white bunny, you can use any color of plush yarn! A light grey or soft peach also works beautifully for this design. You can also add a tiny ribbon bow around the neck for an extra touch of cuteness.
Your mini plush bunny should now be about 3.5 to 4 inches tall. Enjoy your new handmade friend!