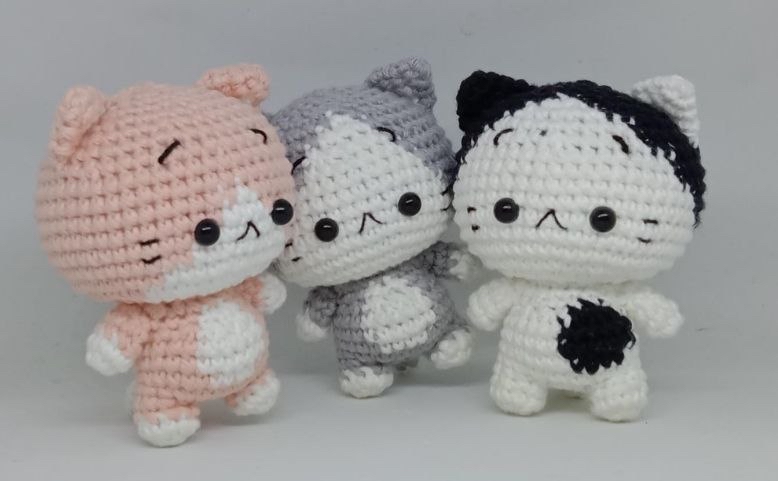
Adorable Amigurumi Kitty Cat Crochet Pattern: A Step-by-Step Tutorial
Are you looking for your next cozy crochet project? There is nothing quite as charming as a tiny, squishy amigurumi! In this tutorial, I am going to walk you through the process of creating an adorable kitty cat amigurumi. These little feline friends are approximately 3.5 inches tall, making them the perfect size for desk companions, nursery decor, or even a sweet gift for a cat lover in your life.
This pattern is designed to be beginner-friendly, though you should be comfortable with basic amigurumi techniques like working in the magic ring and making color changes. The best part about this kitty is how customizable it is! You can make a classic gray and white kitty, a soft pink version, or even a bold black and white tuxedo cat just by swapping your yarn colors. Let’s grab our hooks and get started!
Materials and Abbreviations
Before we dive into the stitches, let’s make sure you have everything you need on your crochet table. To achieve that tight, professional amigurumi look, I recommend using cotton yarn, which holds its shape beautifully.
What You Will Need
- Yarn: Cotton yarn in your choice of colors (e.g., White, Gray, Pink, or Black).
- Crochet Hook: A 3.00 mm (roughly a D-size) crochet hook.
- Safety Eyes: 6 mm black glass or plastic safety eyes.
- Stuffing: Soft polyester fiberfill stuffing.
- Embroidery Thread: Black or dark brown thread for the facial details.
- Tools: A tapestry needle for sewing and a pair of scissors.
Abbreviations (US Terms)
Please ensure you are using US crochet terms for this pattern:
- ch: chain stitch
- sc: single crochet
- inc: increase (two single crochets in the same stitch)
- dec: decrease (joining two stitches into one)
- slst: slip stitch
- st(s): stitch(es)
- FLO: front loop only
- MR: magic ring
Step-by-Step Instructions
Note: To create the different color variations seen in the photos, simply follow the stitch counts provided but swap the yarn colors as desired. The instructions below focus on the construction of the shapes.
Making the Arms (Make 2)
The arms are small and simple, providing a cute little limb for your kitty to rest on.
- Row 1: Start with your primary color (e.g., White). Work 6 sc into a magic ring. (6 sts)
- Row 2: sc in each stitch around. (6 sts)
- Rows 3-4: Change to your secondary color (e.g., Gray). sc in each stitch around. (6 sts)
- Fasten off and weave in your ends.
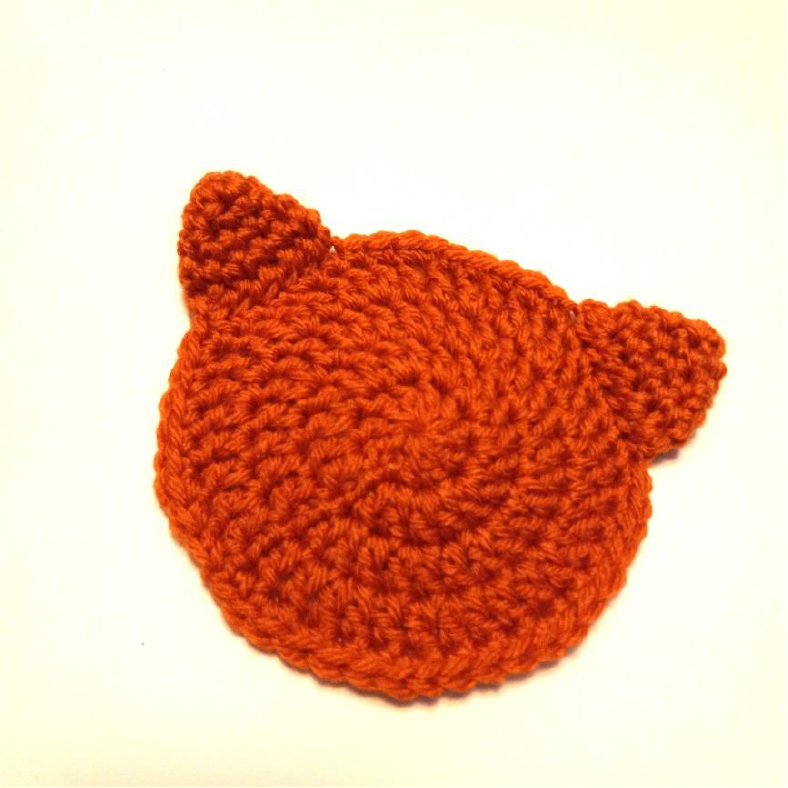
Making the Ears (Make 2)
These ears are worked in a single color to give them a nice definition.
- Row 1: Start with your secondary color (e.g., Gray). Work 4 sc into a magic ring. (4 sts)
- Row 2: (sc, inc) repeat twice. (6 sts)
- Row 3: sc, inc, (sc, inc) repeat twice. (9 sts)
- Row 4: sc, inc, sc, sc, inc, sc 2, inc, sc. (12 sts)
- Fasten off, leaving a long tail for sewing the ears to the head later.
Making the Tail
The tail is a small, tapered piece that adds a lot of character to your cat.
- Row 1: Start with White yarn. Work 6 sc into a magic ring. (6 sts)
- Row 2: sc in each stitch around. (6 sts)
- Rows 3-5: Change to your secondary color (e.g., Gray). sc in each stitch around. (6 sts)
- Fasten off, leaving a long tail for sewing.
The Body and Legs (Joined)
This is the most technical part of the pattern. We will crochet the legs and join them together to create the base of the body.
The Legs
First Leg:
- Row 1: Start with White yarn. Work 7 sc into a magic ring. (7 sts)
- Row 2: sc in each stitch around. (7 sts)
- Row 3: Change to Gray yarn. sc in each stitch around. (7 sts)
- Fasten off.
Second Leg:
- Repeat Rows 1-3 for the second leg, but do not cut the yarn.
- Chain 3 to join the two legs together.
Joining the Body:
- Row 4: Work in a continuous round around both legs and the chain: 7 sc around the first leg, 3 sc in the chain, 7 sc around the second leg, and 3 sc in the remaining chain. (20 sts)
- Row 5: sc 6, inc 5 times, sc 7, dec 1 time. (24 sts)
- Row 6: sc 9, sc 4 (in White), sc 11 (in Gray). Stuff the legs firmly at this stage. (24 sts)
- Row 7: sc 8, sc 6, sc 10. (24 sts)
- Row 8: sc 8, sc 6, sc 10. (24 sts)
- Row 9: sc 6, dec, dec 3 times, dec, sc 6, dec. (18 sts)
Adding the Arms
We will join the arms directly to the body using a decrease to ensure a seamless look.
- Row 10: sc 3, dec (insert hook into the body, then into the next arm stitch, and work a decrease), sc 5 (adding the first arm), sc 3, dec, sc, sc 3, sc 5 (adding the second arm), dec (join to the body), sc, dec, sc. (27 sts)
- Row 11: sc 2, dec 5 times, sc 4, dec 5 times. (16 sts) Stuff the body firmly.
- Row 12: (sc 2, dec) repeat 4 times. (12 sts)
The Head
The head is worked in rounds and includes a color-work section to create the facial patch.
- Row 13: Working in the front loops only (FLO), inc 3, inc 6, inc 3. (24 sts)
- Row 14: (sc, inc) repeat 3 times, (sc, inc) repeat 6 times, (sc, inc) repeat 3 times. (36 sts)
- Row 15: (sc 2, inc) repeat 3 times, sc 2, inc, (sc 2, inc) repeat 5 times, (sc 2, inc) repeat 3 times. (48 sts)
- Rows 16-22: Continue working in rounds, alternating colors to create the white face patch. The stitch counts should remain at 48 sts for these rows.
- Row 23: sc 3, dec, (sc 6, dec) repeat 2 times, sc 2, sc 4, dec, (sc 6, dec) repeat 2 times, sc 3. (42 sts)
- Row 24: sc 42. (42 sts)
- Row 25: (sc 5, dec) repeat 3 times, sc, sc, sc 3, dec, (sc 5, dec) repeat 2 times. (36 sts)
- Row 26: sc 2, dec, (sc 4, dec) repeat 5 times, sc 2. (30 sts)
- Row 27: (sc 3, dec) repeat 6 times. (24 sts)
- Row 28: sc, dec, (sc 2, dec) repeat 5 times, sc. Stuff the head firmly. (18 sts)
- Row 29: (sc, dec) repeat 6 times. (12 sts)
- Row 30: dec 6 times. (6 sts)
- Fasten off and weave in your ends.
Finishing
Now comes the most rewarding part—bringing your kitty to life!
Assembly
- Eyes: Place the 6mm safety eyes on the head. For a standard look, position them between rows 13 and 18, approximately 6 rows apart.
- Ears: Sew the ears onto the top of the head. Position them roughly 5 rows down from the very top center.
- Tail: Sew the tail to the back of the body, about 5 rows up from the bottom.
Face Details
Using your embroidery thread, carefully stitch the facial features. A simple “v” shape makes a cute little nose and mouth. You can also add small lines for whiskers to give your kitty even more personality!
Tips
To ensure your amigurumi turns out perfectly, keep these professional tips in mind:
- Tension is Key: Keep your stitches tight. This prevents the stuffing from peeking through the gaps in your work.
- Use Stitch Markers: When working in rounds, it is very easy to lose your place. Always use a stitch marker to identify the start of your round.
- Stuffing Technique: When stuffing, push the fiberfill into the corners and extremities (like the legs and head) to avoid lumps.
- Color Changes: To make color changes look clean, pull the new color through the last two loops of the final stitch of the previous color.