Adorable Crochet Teddy Bear with Sweater Pattern
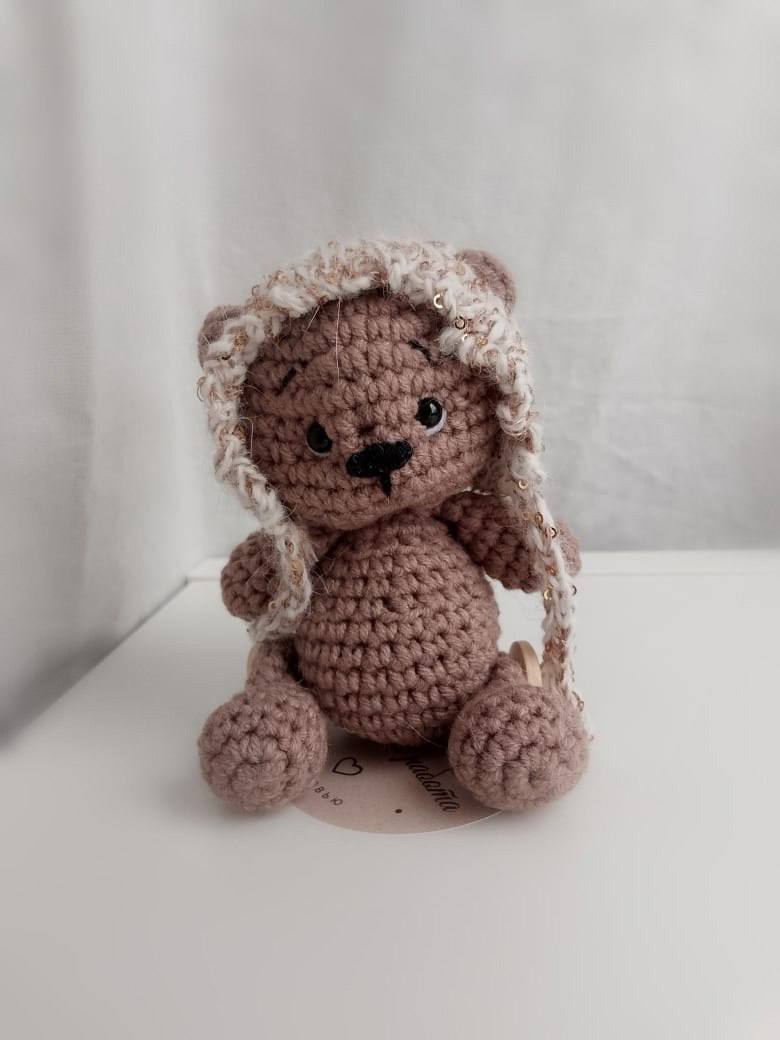
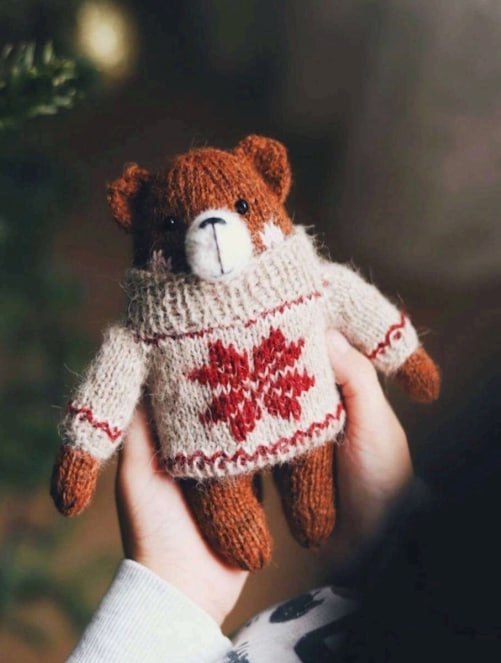
Looking for a cozy project to brighten up your home or create a heartfelt gift? This adorable crochet teddy bear is the perfect project for crafters of all levels. With his tiny sweater and sweet expression, this bear is designed to be a cuddly companion that looks professional but is beginner-friendly to make.
In this tutorial, we will guide you through creating a fully stuffed amigurumi bear from head to toe, including a custom-fit miniature sweater. Whether you are a seasoned pro or just picking up a hook for the first time, this step-by-step guide will ensure your teddy bear turns out perfectly.
Materials & Abbreviations
Before we dive into the stitches, let’s gather all the necessary supplies. To get the best results, we recommend using a soft acrylic or alpaca-blend yarn to give your bear that fuzzy, huggable texture.
Materials Needed
- Yarn: Medium weight (4) yarn in Brown (for the bear), Cream (for the muzzle and sweater), and Red (for the sweater details).
- Crochet Hook: 3.25mm (D) or 3.5mm (E) hook for the bear; a 3.75mm or 4.0mm hook for the sweater to ensure a looser, more fabric-like fit.
- Safety Eyes: 8mm or 10mm black safety eyes.
- Stuffing: High-quality polyester fiberfill.
- Tools: Yarn needle, stitch markers, and scissors.
Abbreviations (US Terms)
- MR: Magic Ring
- Sc: Single Crochet
- Inc: Increase (2 sc in the same stitch)
- Dec: Decrease (sc 2 together)
- St(s): Stitch(es)
- BLO: Back Loop Only
- Sl st: Slip Stitch
Step-by-Step Instructions
The Body and Legs
We will start by creating the body, which will eventually be split to form the legs. This piece is worked in a continuous spiral, so using a stitch marker is highly recommended.
Round 1: Start with a MR and work 6 sc into the ring. (6 sts)
Round 2: Inc in every stitch around. (12 sts)
Round 3: (1 sc, inc) x 6. (18 sts)
Rounds 4-5: Sc in each stitch around. (18 sts)
Round 6: (2 sc, inc) x 6. (24 sts)
Rounds 7-8: Sc in each stitch around. (24 sts)
Round 9: (3 sc, inc) x 6. (30 sts)
Rounds 10-11: Sc in each stitch around. (30 sts)
Round 12: (4 sc, inc) x 6. (36 sts)
Rounds 13-14: Sc in each stitch around. (36 sts)
Round 15: (5 sc, inc) x 6. (42 sts)
Round 16: This is where we mark the eyes. Sc 16, place a marker, sc 10, place a marker, sc 16. (42 sts)
Rounds 17-55: Sc in each stitch around for 39 rounds. (42 sts)
Creating the Legs
Now, we will divide the remaining stitches to create two separate legs. Leave a long tail for sewing later.
Leg 1: Close the first 3 stitches of the round. Perform 1 dec, then sc in the next 14 stitches. (15 sts)
Gap: Skip and close the next 6 stitches to create the space between the legs.
Leg 2: Perform 1 dec, then sc in the next 14 stitches. Close the final 3 stitches of the round. (15 sts)
Working the Leg Shape: Working on one leg at a time in a spiral:
- Rounds 57-63: Sc in each stitch around. (15 sts)
- Round 64: (3 sc, dec) x 3. (12 sts)
- Rounds 65-67: Sc in each stitch around. (12 sts)
- Round 68: (2 sc, dec) x 3. (9 sts)
- Round 69: Sc in each stitch around. (9 sts)
Fasten off and weave in the ends. Repeat for the second leg. Stuff the legs and body firmly with fiberfill.
The Muzzle
The muzzle gives the bear its sweet expression. Use the cream-colored yarn for this part.
Round 1: MR 6 sc. (6 sts)
Round 2: Inc in every stitch around. (12 sts)
Round 3: (1 sc, inc) x 6. (18 sts)
Rounds 4-9: Sc in each stitch around. (18 sts)
Fasten off, leaving a long tail for sewing. Lightly stuff before attaching.
The Ears
Make two ears using the brown yarn.
Round 1: MR 6 sc. (6 sts)
Round 2: Inc in every stitch around. (12 sts)
Round 3: Sc in each stitch around. (12 sts)
Round 4: (1 sc, inc) x 6. (18 sts)
Rounds 5-6: Sc in each stitch around. (18 sts)
Fasten off, leaving a long tail for sewing. Do not stuff the ears too firmly; a slight fluff is enough.
The Arms
Make two arms using the brown yarn.
Round 1: MR 6 sc. (6 sts)
Round 2: Inc in every stitch around. (12 sts)
Rounds 3-27: Sc in each stitch around. (12 sts)
Fasten off, leaving a long tail. Stuff the arms lightly.
The Miniature Sweater
The sweater is worked using a slightly larger hook to create a softer drape. Use cream yarn for the main body.
The Collar: Chain 48. Work in rounds using a ribbing pattern: (1 sc, 1 sc in BLO) repeated around for 8 rounds. This creates the stretchy turtleneck look.
The Body (Raglan Style): To create the sweater’s shape, we will increase at four points around the collar. In each increase round, work a “Raglan Increase” (inc, sc in next 2 sts, inc). Follow this pattern for 8 rounds, alternating between cream and a decorative color if desired, until you reach 80 stitches.
The Torso: Once the increases are complete, place the sleeve stitches on a waste yarn holder. Work the remaining stitches around the torso for 9 rounds. Add a final 4 rounds of BLO ribbing at the bottom for a clean finish.
The Sleeves: Reattach the sleeve stitches and work 8 rounds of sc in brown or cream, finishing with 4 rounds of ribbing.
Finishing
Now it’s time to put your bear together!
- Eyes: Insert safety eyes into the markers you made on Round 16. Ensure they are symmetrical.
- Muzzle: Sew the muzzle to the center of the face. Embroider a small black “Y” shape for the nose and mouth.
- Ears & Arms: Sew the ears to the top of the head and the arms to the sides of the body.
- Details: Use red yarn to embroider a snowflake or a heart on the center of the sweater using a duplicate stitch (surface crochet).
Tips for Success
Tight Tension: When working on the body, keep your tension tight. This prevents the stuffing from showing through the stitches, which is the secret to a professional-looking amigurumi.
Stuffing Technique: Stuff your bear in small increments. Use a chopstick or a crochet hook to push the stuffing into the legs and arms to ensure there are no empty gaps.
Customizing: Feel free to change the colors! A grey bear with a blue sweater or a white polar bear with a red sweater are great variations for different seasons.
The Perfect Fit: If the sweater feels too tight, try going up one hook size for the garment. The goal is for the sweater to be slightly oversized for that “cozy” aesthetic.