Adorable Mini Crochet Monkey Pattern: Easy Amigurumi Tutorial
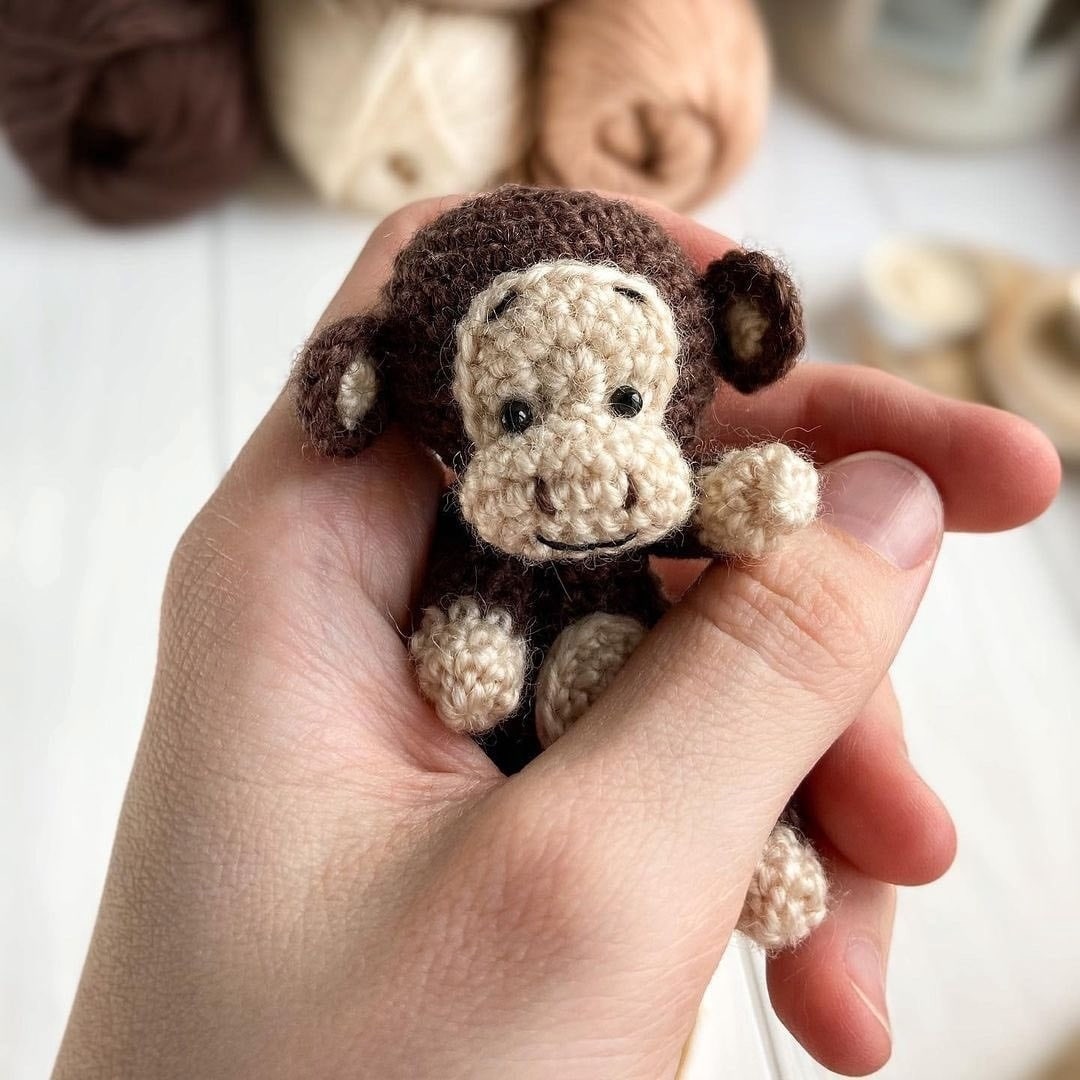
There is nothing quite as charming as a tiny amigurumi friend to keep on your desk or attach to your bag. This mini crochet monkey is the perfect project for those looking to practice their skills or for experienced crocheters who want a quick, satisfying make. At just over 3 inches tall, this little primate is small in size but big on personality!
In this detailed tutorial, we will walk you through every stitch needed to create your own little monkey. Whether you are a complete beginner or a seasoned pro, this pattern is designed to be accessible and easy to follow. Let’s grab our hooks and some yarn and get started!
Materials & Abbreviations
To ensure your monkey turns out as cute as possible, you will need a few specific supplies. Because this is a miniature project, using a smaller hook and thinner yarn is key to keeping the stitches tight so the stuffing doesn’t peek through.
Supplies Needed
- Yarn: Sport weight or Fingering weight yarn (approximately 400 yards per 100g). You will need two colors: Brown (main body) and Beige (face, belly, and paws).
- Crochet Hook: 1.5mm to 1.75mm.
- Safety Eyes: 3mm plastic safety eyes.
- Embroidery Thread: Thin black thread for the mouth, nostrils, and eyebrows.
- Stuffing: Polyester fiberfill or similar craft stuffing.
- Tools: Yarn needle, scissors, and stitch markers.
- Glue: A small amount of fabric glue or super glue for securing the eyes if needed.
US Crochet Terms & Abbreviations
- MR: Magic Ring (or Magic Circle)
- sc: Single Crochet
- inc: Increase (2 sc in one stitch)
- dec: Decrease (sc 2 stitches together)
- ch: Chain
- sl st: Slip Stitch
- st: Stitch
Step-by-Step Instructions
The Muzzle (Beige Yarn)
The muzzle is worked in two separate parts to create that characteristic monkey “pout.”
Part 1 (The Upper Muzzle)
This section is worked in rows rather than rounds. Chain 1 and turn at the end of each row.
- Row 1: 6 sc in MR. Ch 1, turn.
- Row 2: 6 inc. Ch 1, turn. (12 sts)
- Row 3: (3 sc, inc) x 3. (15 sts)
Fasten off, leaving a long tail for sewing.
Part 2 (The Lower Muzzle)
This part creates the rounded bottom of the face.
- Row 1: Ch 6. Starting in the 2nd ch from hook: inc, 3 sc, 3 sc in the last ch. Now, working along the opposite side of the foundation chain, 4 sc. (12 sts)
- Row 2: 2 inc, 3 sc, 3 inc, 3 sc, inc. (18 sts)
- Row 3: 18 sc. (18 sts)
- Row 4: (4 sc, dec) x 3. (15 sts)
Fasten off, leaving a long tail for sewing.
The Head (Brown Yarn)
The head is worked in continuous rounds. It is highly recommended to use a stitch marker to keep track of the start of each round.
- R1: 6 sc in MR (6)
- R2: 6 inc (12)
- R3: (1 sc, inc) x 6 (18)
- R4: (2 sc, inc) x 6 (24)
- R5: (3 sc, inc) x 6 (30)
- R6-11: 30 sc for 6 rounds (30)
- R12: (3 sc, dec) x 6 (24)
- R13: (2 sc, dec) x 6 (18)
- R14: (1 sc, dec) x 6 (12)
Fasten off and weave in the ends. Stuff the head firmly with fiberfill.
The Body (Brown Yarn)
- R1: 6 sc in MR (6)
- R2: 6 inc (12)
- R3: (1 sc, inc) x 6 (18)
- R4: (2 sc, inc) x 6 (24)
- R5-7: 24 sc for 3 rounds (24)
- R8: 6 dec, then (1 sc, dec) x 4 (14)
- R9-11: 14 sc for 3 rounds (14)
- R12: (5 sc, dec) x 2 (12)
- R13: 12 sc (12)
Fasten off, leaving a long tail for sewing. Stuff the body firmly.
The Belly (Beige Yarn)
- R1: 6 sc in MR (6)
- R2: (2 sc, 3 sc in 1 st) x 2 (10)
- R3: 3 sc, inc, 4 sc, inc, 1 sc, sl st.
Fasten off, leaving a tail for sewing.
The Ears (Make 2)
Each ear consists of two small circles joined together.
- Inner Ear (Beige): 6 sc in MR. Fasten off.
- Outer Ear (Brown): 6 sc in MR. Do not fasten off.
- Assembly: Place the beige circle on top of the brown circle. Working through both layers, crochet 6 inc around the edge to join the two pieces together.
Fasten off, leaving a tail for sewing.
The Arms and Legs (Make 4)
- Start with Beige:
- R1: 6 sc in MR (6)
- R2: (2 sc, inc) x 2 (8)
- R3-4: 8 sc for 2 rounds (8)
- Switch to Brown:
- R5-11: 8 sc for 7 rounds (8)
Fasten off. Stuff the limbs lightly, then sew the opening closed and weave in the ends.
The Tail (Brown Yarn)
- R1: Ch 20. Starting in the 2nd ch from hook, 19 sc.
Fasten off, leaving a tail for sewing.
Finishing & Assembly
Now comes the most exciting part: bringing your monkey to life! Follow these steps for a professional finish.
- Ears: Sew the ears to the sides of the head between rounds 7 and 9.
- Muzzle: Sew Part 1 of the muzzle to the head from rounds 6 to 10. Then, sew Part 2 of the muzzle on top of the first part. Stuff the muzzle slightly as you sew it to give the face a 3D look.
- Face Details: Place the 3mm safety eyes between rounds 2 and 3 of the muzzle. Use your black embroidery thread to stitch small eyebrows, two tiny dots for nostrils, and a gentle smile.
- Head & Body: Sew the head securely to the body.
- Arms: Attach the arms one round below the neck seam.
- Legs: Attach the legs to the sides of the body between rounds 4 and 5.
- Belly & Tail: Sew the beige belly patch to the front and the tail to the back of the body around round 5.
Tips for Success
To get the best results with your mini monkey, keep these expert tips in mind:
- Tension is Key: Amigurumi requires tight stitches. If you see holes in your work, try dropping down a half-size in your crochet hook.
- Use a Stitch Marker: Since we are working in continuous spirals, it is very easy to lose your place. A simple scrap of contrasting yarn or a plastic marker is a lifesaver.
- Stuffing Technique: When stuffing the head and body, use a chopstick or a knitting needle to push the fiberfill into the corners and small areas for a smooth, rounded shape.
- Invisible Decreases: For a cleaner look, use the “invisible decrease” method (working into the front loops only of the next two stitches) to avoid gaps in the fabric.