Adorable Crochet Pumpkin Doll Pattern: Free Step-by-Step Tutorial
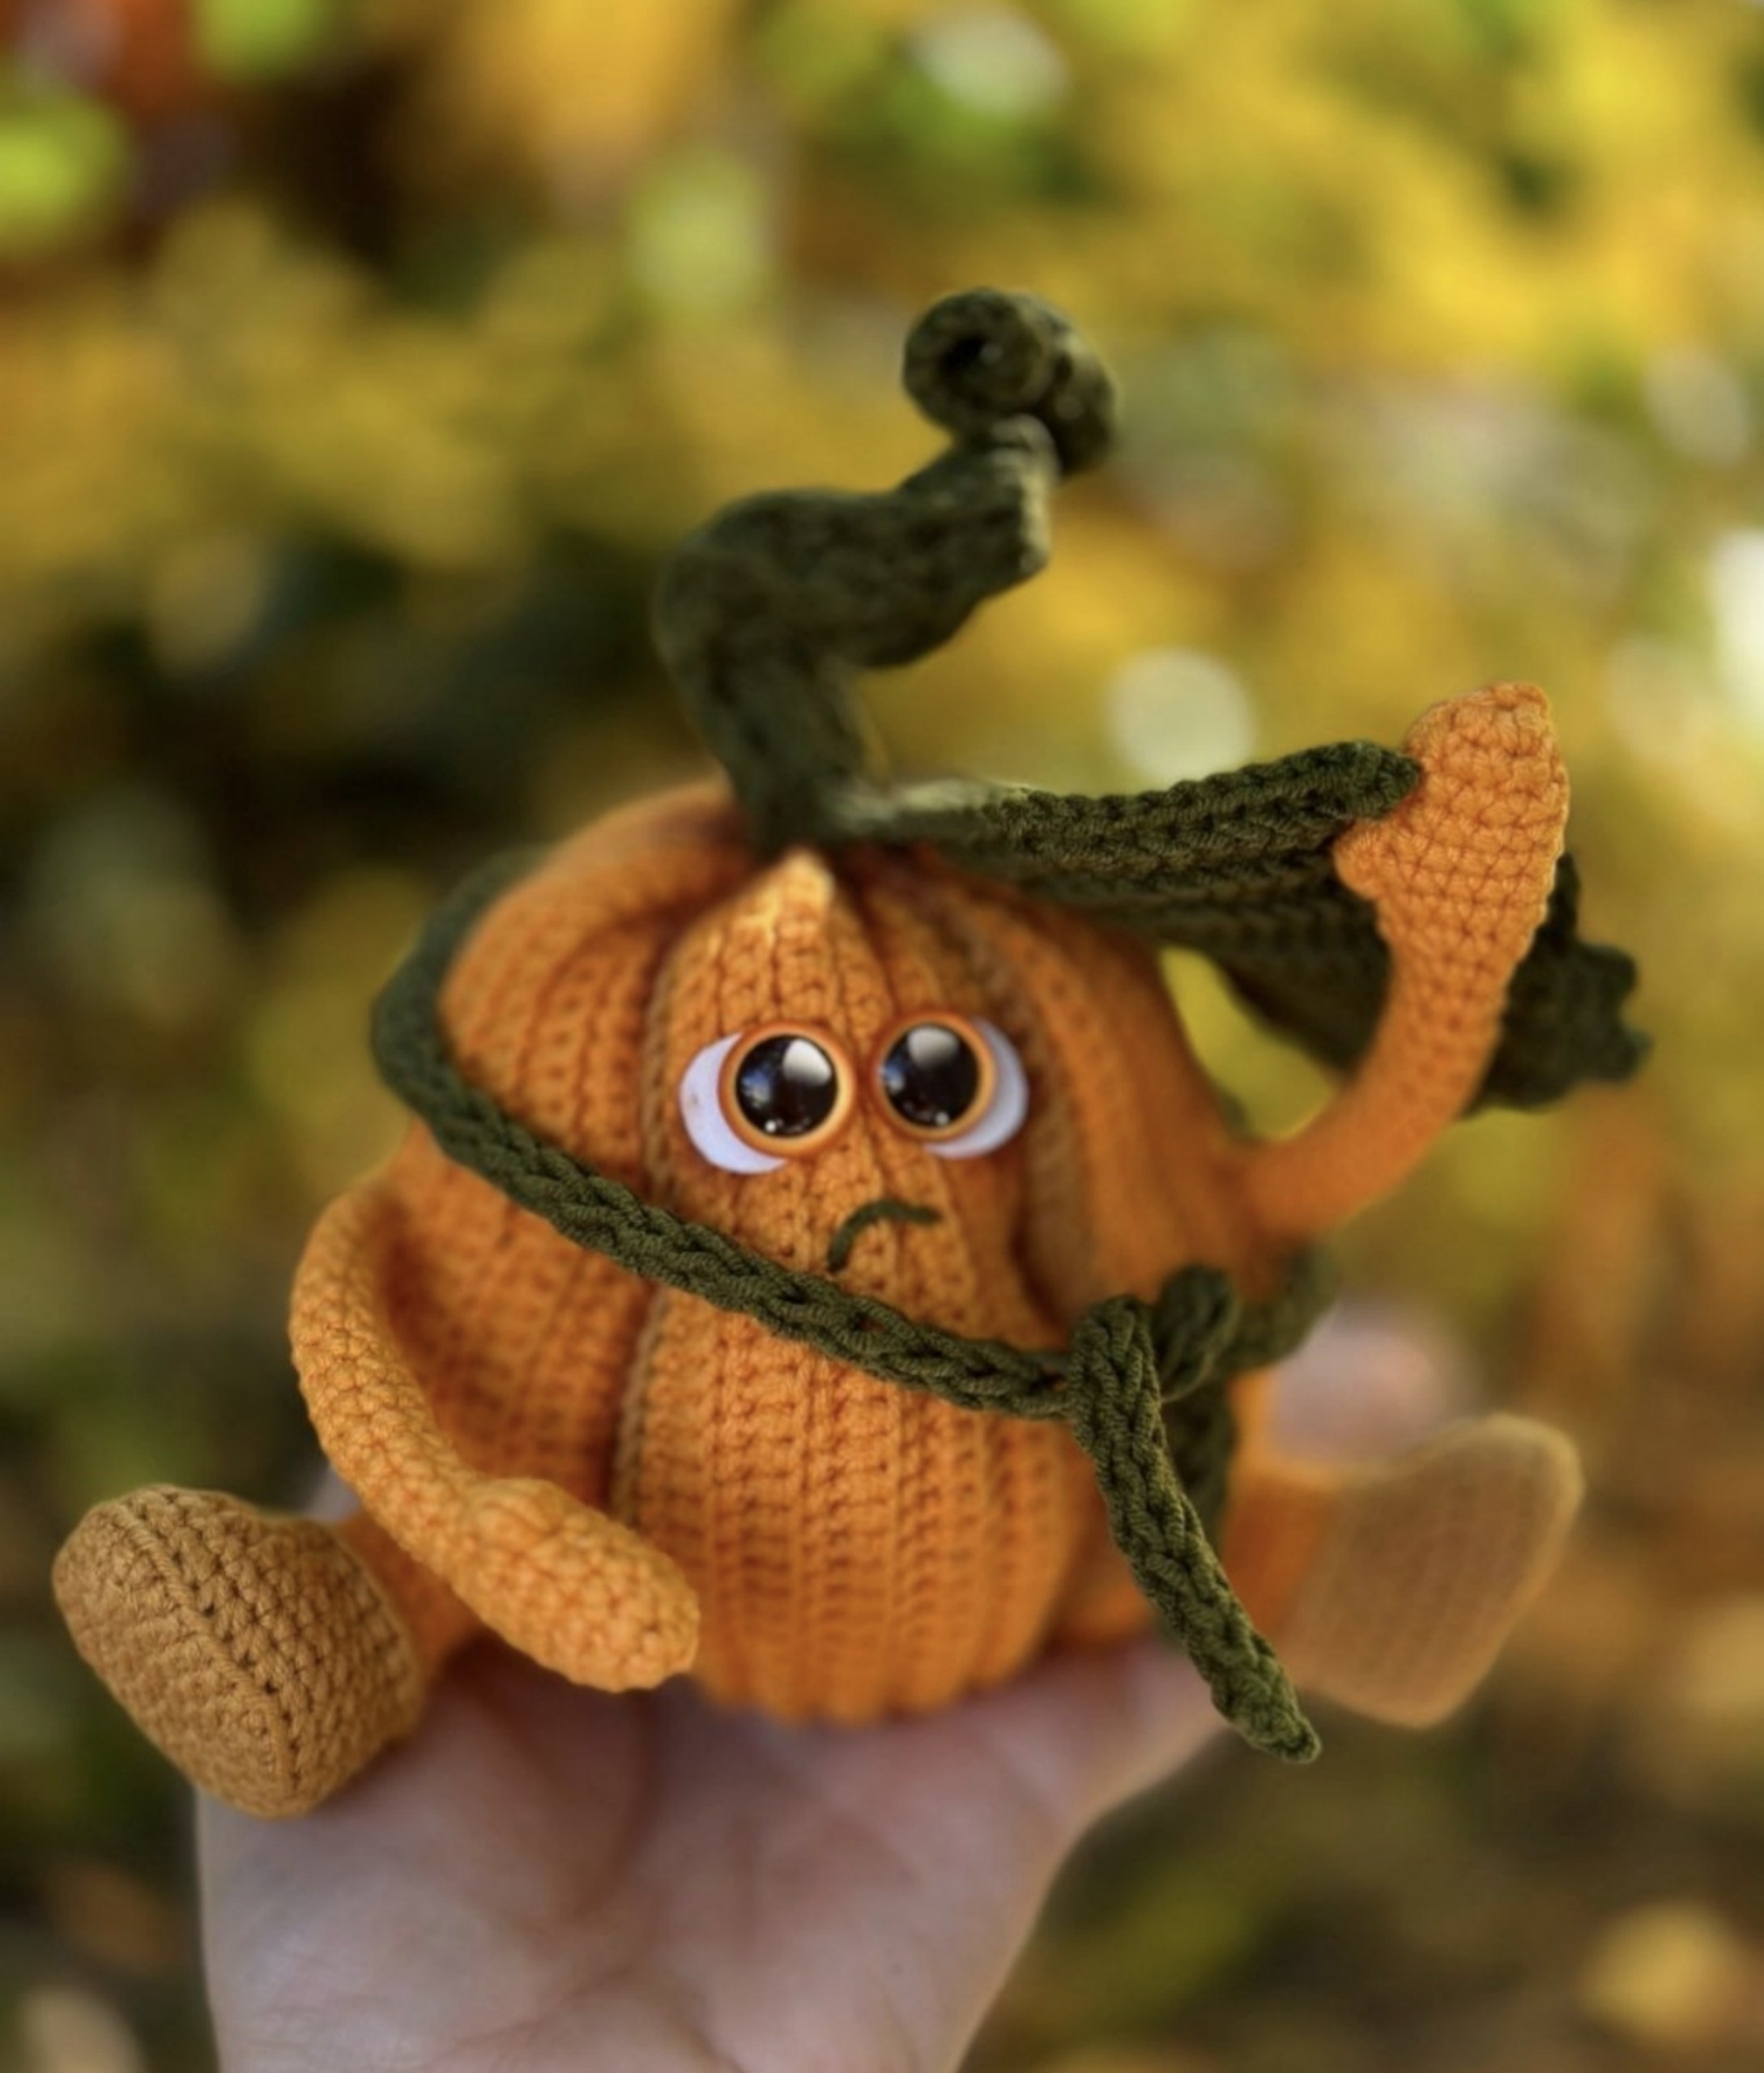
Bring some cozy autumn charm into your home with this darling crochet pumpkin doll! Whether you are looking for a unique Halloween decoration or a sweet fall-themed gift, this little character is the perfect project. With its expressive face and chunky texture, this doll is sure to bring a smile to anyone’s face.
This pattern is designed to be beginner-friendly, though it uses a few interesting textures to give the pumpkin its realistic “ribbed” look. Grab your orange yarn and let’s get started!
Materials & Abbreviations
Materials Needed
- Yarn: Medium weight (Category 4) cotton or cotton-blend yarn in three colors:
- Orange (Main color)
- Terracotta (Accent color)
- Khaki (Stem, leaf, and scarf)
- Crochet Hook: 2.25mm (or a size that gives you a tight fabric to prevent stuffing from showing)
- Eyes: 14mm safety eyes or sew-on eyes
- Wire: 2mm aluminum craft wire (for the stem and arms)
- Stuffing: Polyester fiberfill
- Other tools: Yarn needle, scissors, and a small piece of cardboard for the shoe soles
Abbreviations (US Terms)
- MR: Magic Ring
- ch: Chain
- sc: Single crochet
- sl st: Slip stitch
- hdc: Half double crochet
- dc: Double crochet
- tr: Treble crochet
- dec: Decrease (sc 2 together)
- inc: Increase (2 sc in one stitch)
- FPDC: Front Post Double Crochet
- BLO: Back Loop Only
- FLO: Front Loop Only
- Puff: Puff stitch (3 tr in one stitch, closed together)
Step-by-Step Instructions
The Pumpkin Body
The body is created by making five separate “wedges” (slices) and then sewing them together. Each wedge is worked in rows using a combination of orange and terracotta yarn.
Creating One Wedge
Use orange yarn. Work in turning rows with 1 chain at the start of each row.
- Row 1: Ch 41. Starting in the 2nd chain from the hook, work 40 sc. (40)
- Row 2: 25 sc, 15 sl st. Work all stitches in BLO. (40)
- Row 3: 40 sc in BLO. (40)
Repeat Rows 2 and 3 five more times. You should have a total of 13 rows. This creates 6 repeats of the sc/sl st sequence.
Switch to Terracotta yarn:
- Row 14: 40 sl st in BLO. (40)
- Row 15: 40 sc in BLO. (40)
Fasten off, leaving a long tail for sewing. Make a total of 5 identical wedges.
Assembling the Pumpkin
Sew the wedges together along the sides. The “right side” of the pumpkin is where the vertical ridges are most prominent. Once sewn into a tube, turn the piece inside out. Cinch the wider bottom edge tightly using your yarn needle and pull tight.
Turn the pumpkin right side out, ensuring all yarn tails are hidden inside. Stuff the pumpkin firmly with fiberfill, then cinch the top opening closed.
Shaping the Pumpkin
To get that classic pumpkin shape, we will use a “cinching” technique. Use a strong thread in the main orange color. Insert the needle at the bottom center, bring it up through the top where the sc and sl st transition occurs, and pull tight. Repeat this for each of the 5 wedges to create a rounded, pear-like silhouette.
The Stem and Curly Top
Using khaki yarn, attach your thread to the top center of the pumpkin. Work 10 sc around the center (5 stitches over the terracotta section and 5 over the orange section).
- Row 1: 10 sc. Join with a sl st to the first stitch. (Every subsequent row will end with a sl st and begin with 2 ch, which counts as the first stitch).
- Row 2: Ch 2, 9 dc. (10)
- Rows 3-10: Ch 2, (1 FPDC, 1 dc) repeat 4 times, 1 FPDC. (10)
Cut a piece of aluminum wire about 4 inches long and insert it into the stem. Finish the stem with Row 11: 5 dec in BLO. Fasten off.
The Curl: Ch 31. Starting in the 2nd ch from hook, work 30 sc. Sew this curly strand to the top of the stem and bend it into a spiral.
The Arms
Using orange yarn, make two identical arms.
- R1: 6 sc in MR. (6)
- R2: 6 inc. (12)
- R3-5: 12 sc. (12)
- R6: 5 sc, 1 Puff stitch, 6 sc. (12)
- R7: (1 sc, 1 dec) repeat 4 times. (8)
- R8-22: 8 sc for 15 rows. (8)
Fasten off, leaving a long tail. Insert a piece of aluminum wire (leaving about 0.4″ extra at the end). Do not stuff the arms.
The Legs and Boots
Make two identical legs. Start with terracotta yarn for the boots.
- R1: Ch 6. Starting in 2nd ch: 1 inc, 3 sc, 4 sc in last ch. Work along the other side of the chain: 3 sc, 1 inc. (14)
- R2: 2 inc, 3 sc, 4 inc, 3 sc, 2 inc. (22)
- R3: (1 sc, 1 inc) 2 times, 3 sc, (1 sc, 1 inc) 4 times, 3 sc, (1 sc, 1 inc) 2 times. (30) + 1 sc shift stitch.
Cut a small oval of cardboard to fit the sole and insert it into the boot.
- R4: 30 sc in BLO. (30)
- R5: 30 sc. (30)
- R6: 8 sc, 6 dec, 10 sc. (24)
- R7: 24 sc. (24)
- R8: 5 sc, 6 dec, 7 sc. (18)
- R9: (4 sc, 1 dec) 3 times in BLO. (15)
Switch to orange yarn:
- R10: 15 sc. (15)
Detail Step: Go back to the terracotta yarn and work Row 8 again, but this time work 18 sc into the FLO of Row 8 to create a boot cuff. Fasten off.
Return to the orange yarn at Row 9 and work R11-13: 15 sc for 3 rows. Fasten off, leaving a long tail.
The Leaf
Using khaki yarn, work in turning rows.
- R1: Ch 15. Starting in 2nd ch: 13 sc, 4 sc in last ch. Work other side of chain: 12 sc. (29) Ch 1, turn.
- R2: 12 sc, 4 inc, 11 sc in BLO. (31) Ch 1, turn.
- R3: 11 sc, (1 sc, 1 inc) 4 times, 10 sc in BLO. (33) Ch 1, turn.
- R4: 10 sc, (2 sc, 1 inc) 4 times, 9 sc in BLO. (35) Ch 1, turn.
- R5: 9 sc, (3 sc, 1 inc) 4 times, 8 sc in BLO. (37) Ch 1, turn.
- R6: 8 sc, (4 sc, 1 inc) 4 times, 6 sc in BLO. (38) Ch 1, turn.
- R7: 6 sc, (5 sc, 1 inc) 4 times, 2 sc in BLO. (36) Ch 1, turn.
- R8: Ch 3, 2 sc in ch, 2 sc in body, (6 sc, 1 inc) 4 times, 2 sc in BLO. (38)
- R9: Ch 3, 2 sc in ch, 2 sc in body, 18 sl st in BLO, ch 3, 2 sc. (38)
The Scarf
Using khaki yarn, you can create a hollow i-cord. If you prefer a standard crochet method:
- Row 1: Ch 4. Starting in 2nd ch: 3 dc. Turn.
- Row 2: Ch 2, 2 dc, ch 2. (3)
Repeat Row 2 until the scarf is approximately 16 inches long. Fasten off.
Finishing
- Leaf & Stem: Sew the leaf to the base of the stem.
- Face: Position the safety eyes on one of the pumpkin wedges. Embroider a small, sad or grumpy mouth using black thread for extra personality.
- Arms: Position the arms on adjacent wedges where the body transitions from narrow to wide. Insert the wire ends into the pumpkin body to secure them, then sew the arms in place.
- Legs: Sew the legs to the bottom of the pumpkin, positioned just below the arms.
- Accessories: Wrap the khaki scarf around the pumpkin’s neck and tie it in a cute knot.
Tips for Success
- Tension: Keep your tension tight, especially on the body, to ensure the stuffing doesn’t peak through the stitches.
- Wire Safety: When inserting aluminum wire, ensure the ends are bent or capped so they don’t poke through the crochet fabric.
- Customization: Feel free to use different colors! A white pumpkin with a gold scarf makes a lovely winter decoration.
- Adding Depth: For more realism, you can use a bit of orange or brown pastel chalk to shade the vertical ridges of the pumpkin.