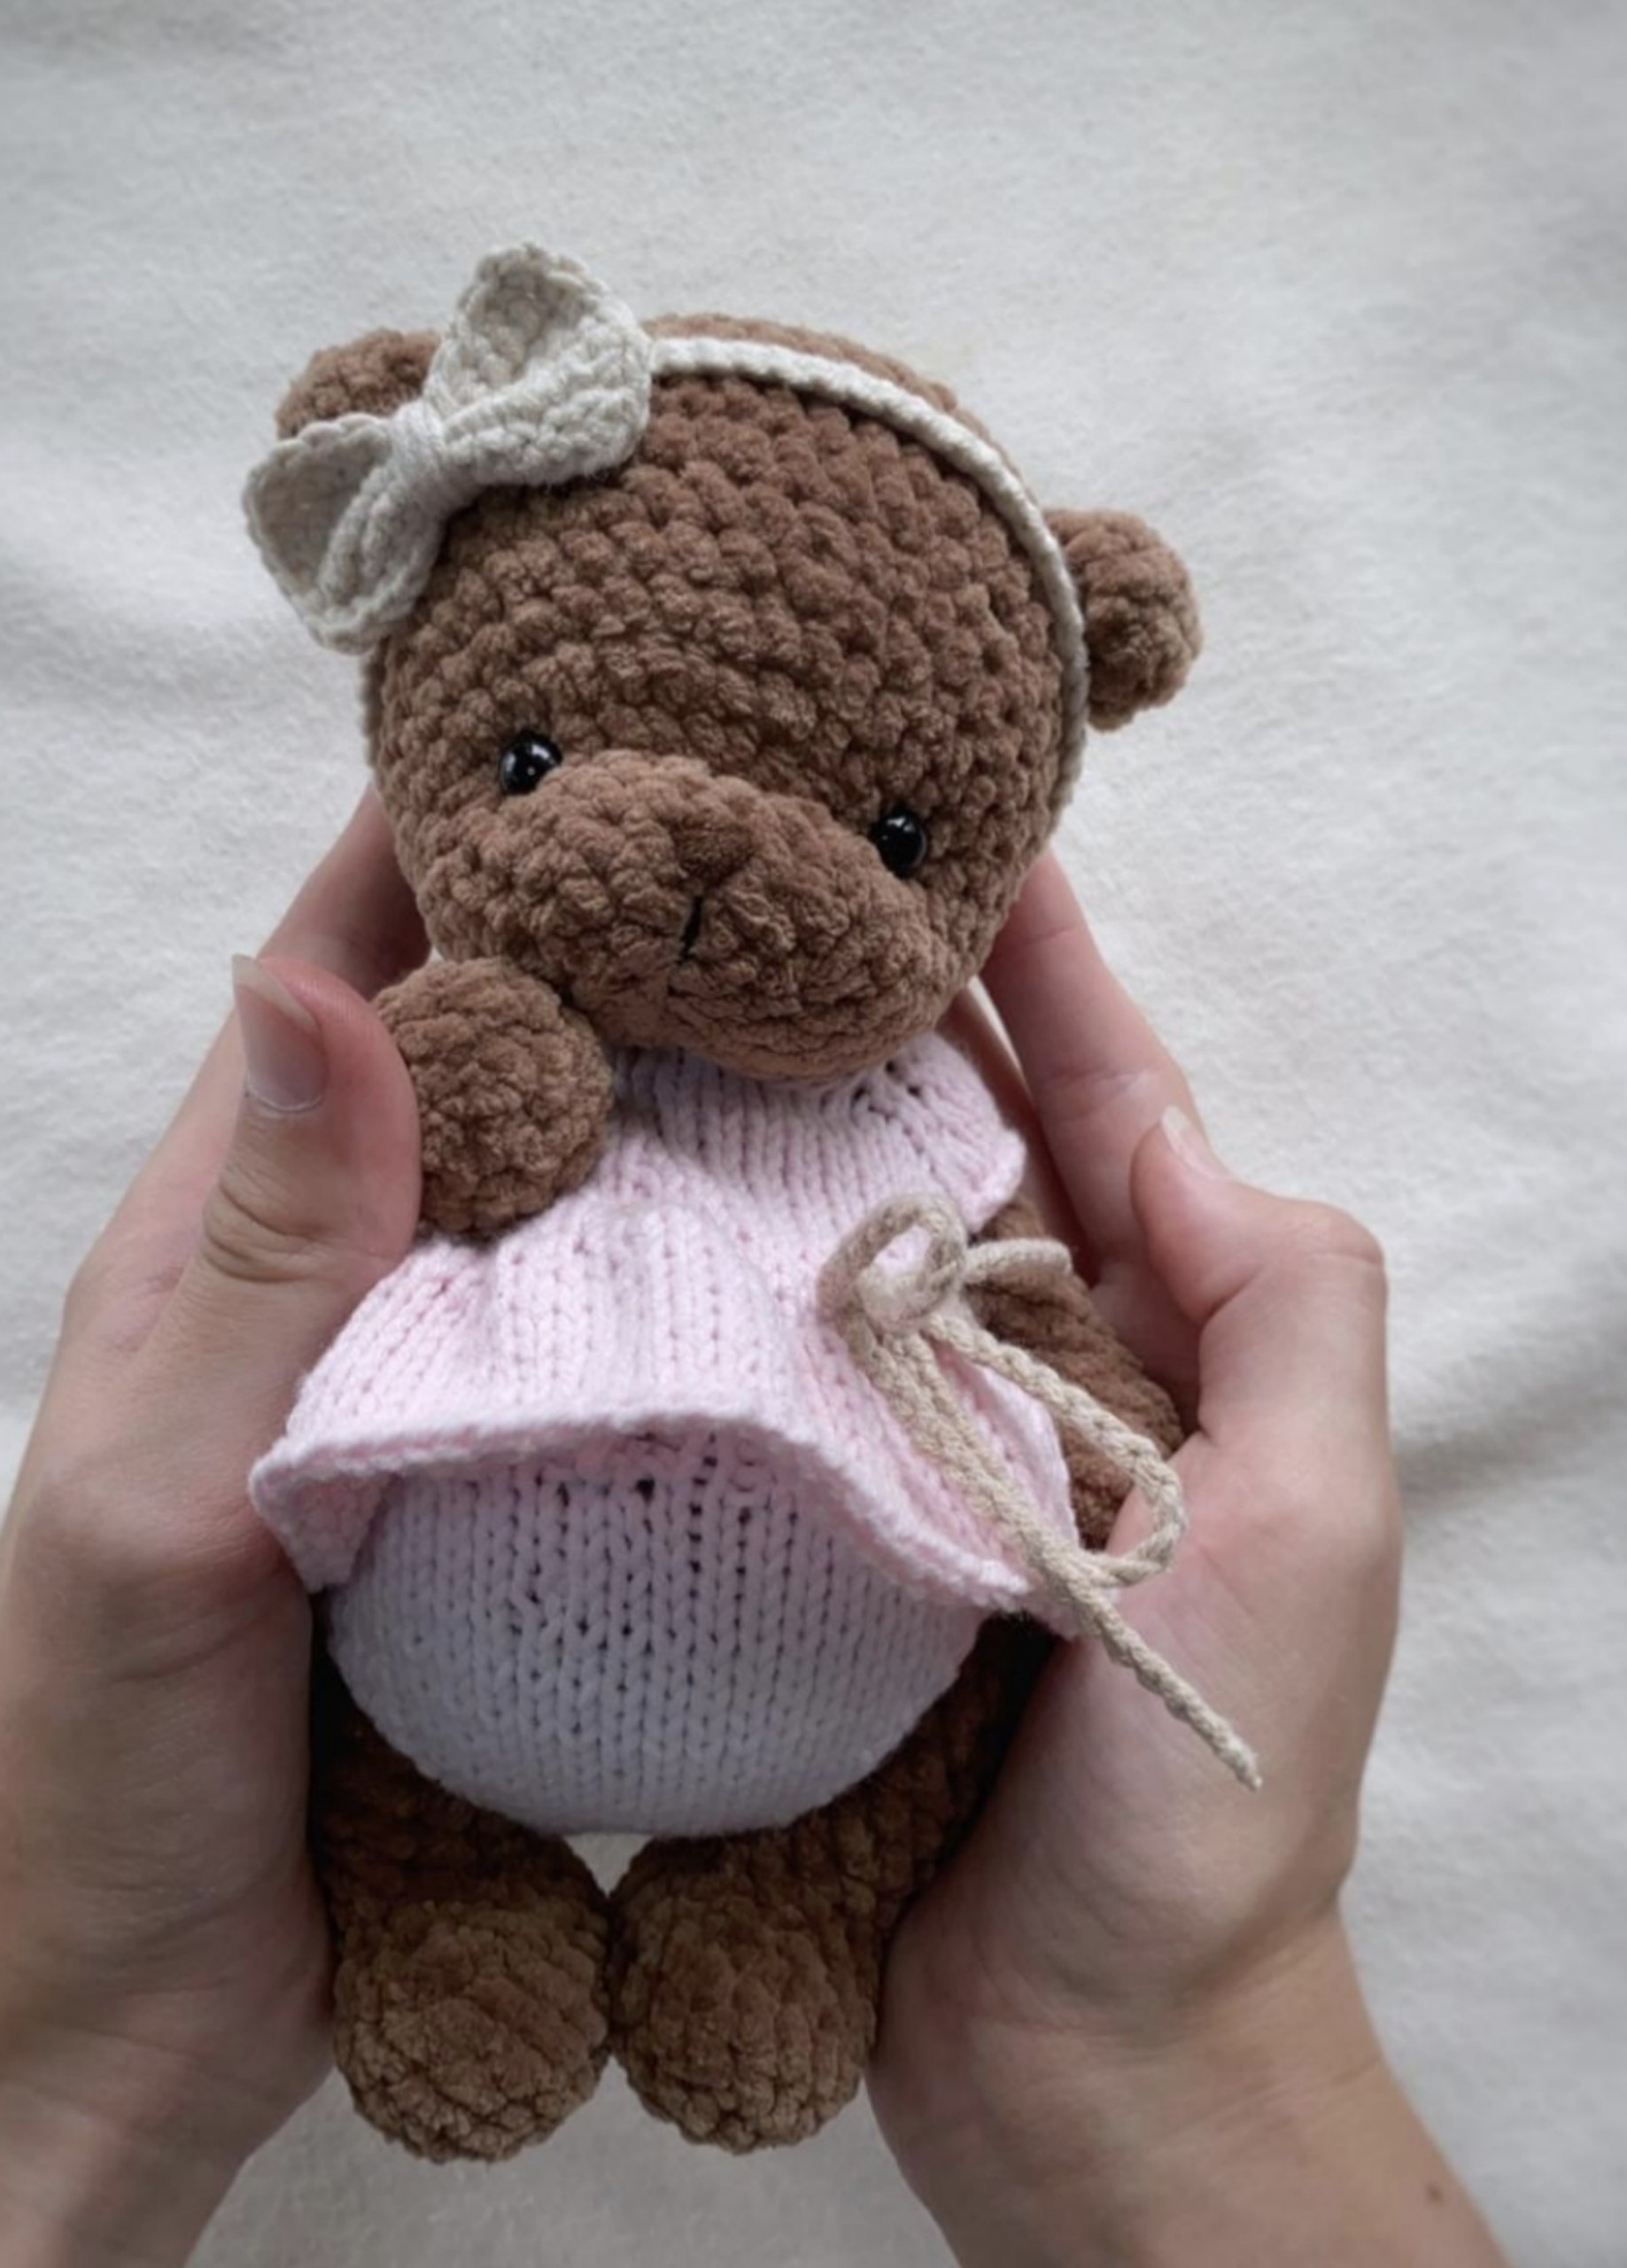
Adorable Velvet Crochet Teddy Bear Pattern with Outfit
There is nothing quite as cozy as a handmade plushie, and this velvet crochet teddy bear is the ultimate project for anyone looking to create a soft, huggable companion. Using plush chenille yarn, this amigurumi bear has a luxury feel and a sweet, expressive face that makes it perfect for a baby shower gift, a nursery decoration, or a special treat for a loved one.
This detailed tutorial will guide you through every step, from sculpting the muzzle and shaping the head to knitting a darling little dress and diaper. Whether you are an experienced maker or a beginner looking for a challenge, this pattern is designed to be accessible and rewarding.
Materials & Abbreviations
To achieve the look of the bear in the photos, we recommend using a “blanket-style” or “chenille” yarn for the body and a smooth cotton yarn for the clothing.
Materials Needed
- Main Yarn: Approximately 2.1 oz (60g) of plush velvet/chenille yarn (e.g., Himalaya Dolphin Baby) in brown.
- Clothing Yarn: Mercerized cotton or cotton-blend yarn (e.g., Alize Cotton Gold) in pink and white.
- Crochet Hook: 3.0mm hook.
- Knitting Needles: 3.0mm double-pointed needles (DPNs) or a circular needle for the clothing.
- Safety Eyes: 8mm black safety eyes.
- Stuffing: High-quality polyester fiberfill.
- Notions:
- Yarn needle and sewing needles.
- Dental floss (for face sculpting).
- Black and brown embroidery floss.
- Stuffing tool or tweezers.
- Fabric glue or super glue.
- Measuring tape and scissors.
Abbreviations (US Terms)
- ch: chain
- sc: single crochet
- inc: increase (2 sc in one stitch)
- dec: decrease (sc 2 together)
- MR: magic ring
- st(s): stitch(es)
- sl st: slip stitch
- K: knit
- P: purl
- yo: yarn over
- edge st: edge stitch
Finished Size: Approximately 8 inches tall when using the materials listed above.
Step-by-Step Instructions
The Head
The head is worked in a continuous spiral. Do not join rounds unless specified.
- Round 1: Make a MR and work 6 sc into it. (6)
- Round 2: inc in every st around. (12)
- Round 3: 1 sc, 3 inc, 4 sc, 3 inc, 1 sc. (18)
- Round 4: 3 sc, 3 inc, 6 sc, 3 inc, 3 sc. (24)
- Rounds 5-6: sc in each st around. (24)
- Round 7: 10 sc, 5 inc, 9 sc. (29)
- Round 8: 10 sc, (inc, 1 sc) repeat 5 times, 9 sc. (34)
- Round 9: sc in each st around. (34)
- Round 10: 13 sc, inc, 1 sc, inc, 4 sc, inc, 1 sc, inc, 11 sc. (38)
- Round 11: sc in each st around. (38)
- Round 12: 15 sc, inc, 2 sc, 2 inc, 2 sc, inc, 15 sc. (42)
- Rounds 13-17: sc in each st around. (42)
- Round 18: (5 sc, dec) repeat 6 times. (36)
- Round 19: (4 sc, dec) repeat 6 times. (30)
- Round 20: (3 sc, dec) repeat 6 times. (24)
- Round 21: (2 sc, dec) repeat 6 times. (18)
- Round 22: (1 sc, dec) repeat 6 times. (12)
- Round 23: dec 6 times. (6)
Fasten off and weave in ends. Stuff the head firmly, ensuring the muzzle area maintains its rounded shape.
The Ears (Make 2)
- Round 1: MR 6 sc. (6)
- Round 2: (1 sc, inc) repeat 3 times. (9)
- Round 3: sc in each st around. (9)
Flatten the ear and sc 4 stitches across the opening to close it. Leave a long tail for sewing.
The Body
- Round 1: MR 6 sc. (6)
- Round 2: inc in every st around. (12)
- Round 3: (1 sc, inc) repeat 6 times. (18)
- Round 4: (2 sc, inc) repeat 6 times. (24)
- Round 5: (3 sc, inc) repeat 6 times. (30)
- Round 6: (4 sc, inc) repeat 6 times. (36)
- Round 7: (5 sc, inc) repeat 6 times. (42)
- Rounds 8-11: sc in each st around. (42)
- Round 12: (5 sc, dec) repeat 6 times. (36)
- Round 13: sc in each st around. (36)
- Round 14: 9 sc, (dec, 3 sc) repeat 4 times, 7 sc. (32)
- Round 15: (4 sc, dec) repeat 5 times, 2 sc. (27)
- Round 16: sc in each st around. (27)
- Round 17: (3 sc, dec) repeat 5 times, 2 sc. (22)
- Round 18: sc in each st around. (22)
- Round 19: (2 sc, dec) repeat 5 times, 2 sc. (17)
- Rounds 20-21: sc in each st around. (17)
Fasten off, leave a long tail, and stuff the body firmly.
The Arms (Make 2)
- Round 1: MR 6 sc. (6)
- Round 2: inc in every st around. (12)
- Rounds 3-4: sc in each st around. (12)
- Round 5: dec 4 times, 4 sc. (8)
- Rounds 6-13: sc in each st around. (8)
- Round 14: dec until closed.
Stuff the bottom half of the arm lightly.
The Legs (Make 2)
- Round 1: Ch 5. Starting in 2nd ch from hook: inc, 2 sc, 4 sc in the last st, 2 sc, inc. (12)
- Round 2: (inc) repeat 2 times, 2 sc, (inc) repeat 4 times, 2 sc, (inc) repeat 2 times. (20)
- Rounds 3-4: sc in each st around. (20)
- Round 5: 6 sc, (dec) repeat 5 times, 4 sc. (15)
- Round 6: 5 sc, (dec) repeat 3 times, 4 sc. (12)
- Round 7: 5 sc, dec, 5 sc. (11)
- Rounds 8-13: sc in each st around. (11)
- Round 14: dec until closed.
Stuff firmly.
The Tail
- Round 1: MR 6 sc. (6)
- Round 2: (1 sc, inc) repeat 3 times. (9)
- Round 3: dec 4 times. (5)
Fasten off and leave a tail for sewing.
Finishing and Face Sculpting
The magic of this bear is in the face shaping. To get that cute, pinched look, we will use a technique called “sculpting” with dental floss.
Sculpting the Muzzle and Eyes
- Eye Placement: Find the center of the face between rounds 6 and 7. Mark this as your center. Count 3 sc to the left and right and mark. Then, count 1 more sc outward from those marks. This is where your eyes will go.
- Muzzle Shape: Using a needle and double-stranded dental floss, insert the needle into the bottom of the muzzle (point 5), bring it up to the side of the nose (point 1), then to point 2, and back to point 5. Repeat this on the other side. Pull tight and knot securely to create the indented mouth area.
- Inserting Eyes: Place your 8mm safety eyes into the marks you made in step 1.
- Embroidering Details:
- Nose: Use brown embroidery floss between rounds 4 and 5. The nose should be about 2 sc wide.
- Mouth: Use black thread to stitch a line from the bottom of the nose down to the sculpted mouth area between rounds 6 and 7.
- Brows: Stitch small brows between rounds 11 and 12, spaced 11 sc apart, each 2 sc wide.
Assembly
- Sew the head to the body using a sturdy yarn tail.
- Sew the ears to the top of the head in your preferred position.
- Attach the arms between rounds 17 and 18 of the body.
- Attach the legs between rounds 7 and 8 of the body.
- Sew the tail to the back of the body.
The Outfit (Knitting)
Switch to your 3mm knitting needles and cotton yarn. All clothing items use a combination of Knit (K) and Purl (P) stitches.
The Dress
Cast on 32 stitches. The dress is worked in a series of rows, alternating between purl rows (for the back/base) and knit rows with increases (for the flare). Follow the pattern of alternating 1 row of purl and 1 row of knit increases until you reach 66 stitches. Work the final rows in stockinette stitch (K one row, P one row) for 9 rows. Bind off. Sew the sides using a mattress stitch.
The Diaper
Cast on 35 stitches. Work in a 1×1 rib (K1, P1) for 5 rows. Transition to stockinette stitch, decreasing at the edges on knit rows and purling on wrong-side rows until the piece fits the bear’s bottom. Bind off and sew the sides.
The Bow & Headband
- Bow: Chain 13. Work 12 sc, ch 1, turn. Work 7 rows of sc. Work a border of sc around the entire rectangle, placing 3 sc in each corner. Wrap yarn around the center to create the bow shape.
- Headband: Chain a length that fits around the bear’s head. Work a slip stitch into every chain. Sew the bow onto the center.
Tips for Success
- Tension is Key: When working with velvet yarn, keep your tension consistent. If you crochet too loosely, the stuffing may peek through.
- The “Invisible” Decrease: Use the invisible decrease method (front loops only) to ensure there are no gaps in the plush fabric.
- Sculpting Caution: When using dental floss to shape the face, be careful not to pull so hard that you tear the yarn, but pull enough to create a deep, defined dimple.
- Yarn Choice: If you cannot find the specific brands mentioned, any “super bulky” chenille yarn will work, though you may need to adjust your hook size to keep the stitches tight.