Adorable Mini Amigurumi Bat Crochet Pattern: A Step-by-Step Tutorial
Looking for a quick, cute, and slightly spooky project to add to your crochet collection? Whether you are preparing for Halloween or just love all things gothic and cozy, this mini amigurumi bat is the perfect project. This little creature is designed to be compact and charming, making it ideal for a brooch, a keychain, or a tiny companion to sit on your desk.
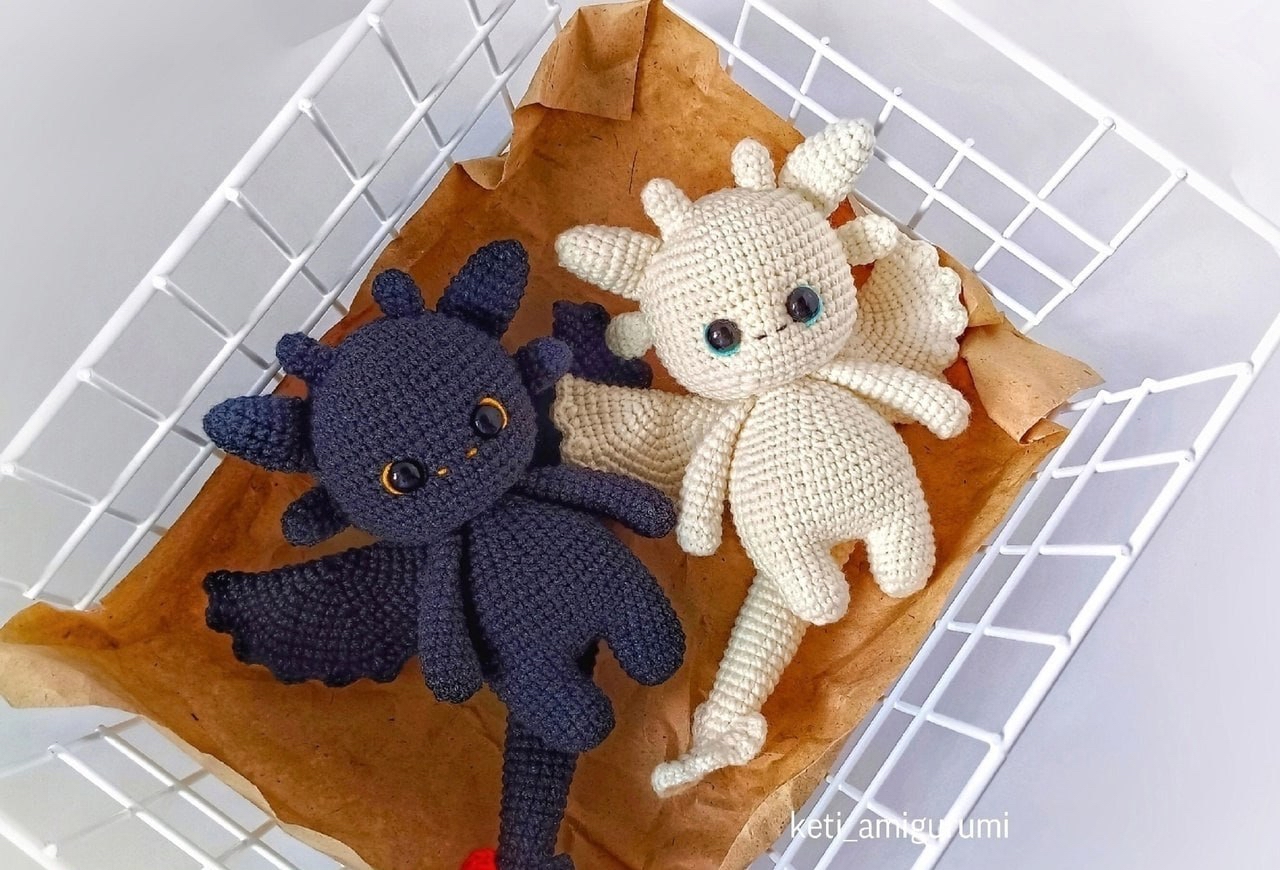
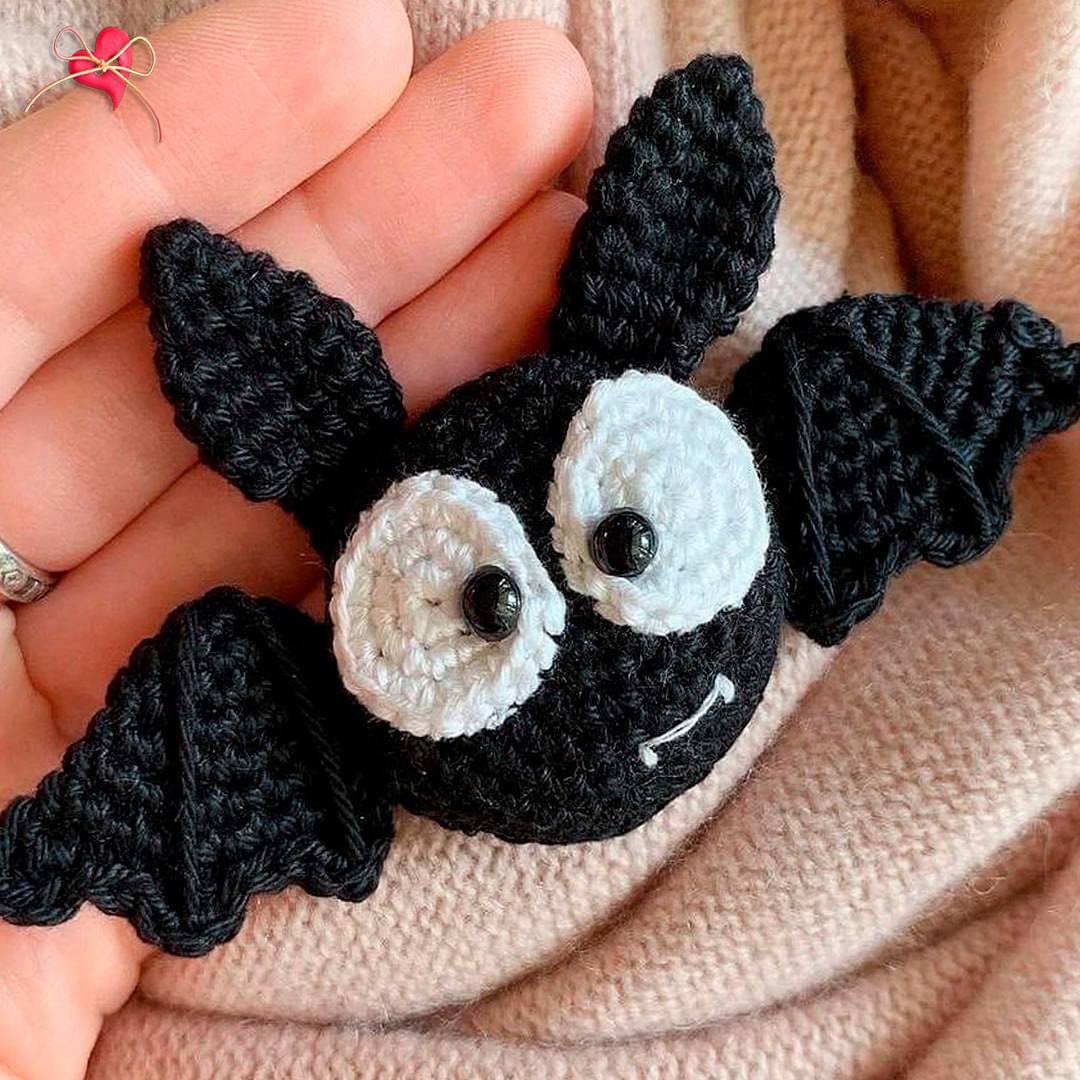
This pattern is designed with beginners in mind. We will be working primarily in continuous spirals, which means you won’t have to worry about unsightly seams around the body. By the end of this tutorial, you’ll have a tiny bat with oversized, expressive eyes and delicate scalloped wings. Let’s dive in and start stitching!
Materials & Abbreviations
To get the best results for this mini bat, I recommend using a cotton yarn. Cotton provides excellent stitch definition, which is crucial for small amigurumi projects where every stitch counts. If you prefer a softer feel, a cotton-acrylic blend works well too.
Supplies You Will Need:
- Yarn: Medium weight (DK) 100% cotton yarn in Black and White. (Approximately 50-100 yards of black and a small scrap of white).
- Crochet Hook: 2.00 mm hook (to ensure the stitches are tight so the stuffing doesn’t show through).
- Eyes: Two 6mm safety eyes or 6mm black beads.
- Stuffing: Polyester fiberfill or any high-quality stuffing.
- Tools: A yarn needle, sewing pins, and scissors.
- Optional: A brooch pin or keychain ring for the final assembly.
US Crochet Terms & Abbreviations:
- MR: Magic Ring (also known as a magic circle)
- ch: Chain
- sc: Single crochet
- hdc: Half double crochet
- dc: Double crochet
- inc: Increase (two single crochet stitches in the same stitch)
- dec: Decrease (two single crochet stitches worked together)
- sl st: Slip stitch
- st: Stitch
- (*): Repeat the instructions inside the asterisks for the number of times indicated.
Step-by-Step Instructions
Remember that this pattern is worked in a spiral. I highly recommend using a stitch marker in the first stitch of every round to keep track of your progress.
The Eye Patches (Make 2)
These white circles give our bat its quirky, wide-eyed look. Use your white yarn for this section.
- Round 1: Create a Magic Ring and work 6 sc into the ring. (6 sts)
- Round 2: Work an inc in every stitch around. (12 sts)
- Round 3: *1 sc, inc* repeat 6 times. Finish with a sl st to join. (18 sts)
Fasten off, leaving a long tail for sewing the patches onto the head later.
The Head and Body
The body is created in two halves—a top dome and a bottom dome—which are later sewn together. Use your black yarn for this part.
Part 1: The Upper Half
- Round 1: Create a Magic Ring and work 6 sc into the ring. (6 sts)
- Round 2: Work an inc in every stitch around. (12 sts)
- Round 3: *1 sc, inc* repeat 6 times. (18 sts)
- Round 4: *2 sc, inc* repeat 6 times. (24 sts)
- Round 5: *3 sc, inc* repeat 6 times. (30 sts)
- Round 6: *4 sc, inc* repeat 6 times. (36 sts)
- Rounds 7-8: Work 36 sc around (one stitch in each stitch). Finish the final round with a sl st. (36 sts)
Fasten off and leave a tail for sewing.
Part 2: The Lower Half
- Round 1: Create a Magic Ring and work 6 sc into the ring. (6 sts)
- Round 2: Work an inc in every stitch around. (12 sts)
- Round 3: *1 sc, inc* repeat 6 times. (18 sts)
- Round 4: *2 sc, inc* repeat 6 times. (24 sts)
- Round 5: *3 sc, inc* repeat 6 times. (30 sts)
- Round 6: *4 sc, inc* repeat 6 times. Finish with a sl st. (36 sts)
The Ears (Make 2)
- Round 1: Create a Magic Ring and work 4 sc into the ring. (4 sts)
- Round 2: *1 sc, inc* repeat 2 times. (6 sts)
- Round 3: *1 sc, inc* repeat 3 times. (9 sts)
- Round 4: *2 sc, inc* repeat 3 times. (12 sts)
- Rounds 5-6: Work 12 sc around. (12 sts)
- Round 7: *2 sc, dec* repeat 3 times. (9 sts)
- Round 8: Work 9 sc around. (9 sts)
To close the ear, flatten the piece and sc through both layers across the top edges (about 4 sc) to create a flat top. Fasten off, leaving a tail for sewing.
The Wings (Make 2)
- Round 1: Create a Magic Ring and work 6 sc into the ring. (6 sts)
- Round 2: Work an inc in every stitch around. (12 sts)
- Round 3: Work 12 sc around. (12 sts)
- Round 4: *1 sc, inc* repeat 6 times. (18 sts)
- Round 5: Work 18 sc around. (18 sts)
- Round 6: *2 sc, inc* repeat 6 times. (24 sts)
- Round 7: *3 sc, inc* repeat 6 times. (30 sts)
Now, we will create the scalloped wing edge by working across the flat edge of the wing:
Chain 2. In the first stitch, work (1 dc, 1 hdc). Work 3 sl st across the next few stitches. In the next stitch, work (1 hdc, 1 dc, 1 hdc). Work 3 sl st. In the next stitch, work (1 hdc, 1 dc, 1 hdc). Work 3 sl st. In the final stitch, work (1 hdc, 1 dc, 1 hdc). End with a sl st. Fasten off, leaving a tail for sewing.
Finishing
Now comes the magic part—assembling your little friend!
Assembling the Body
Place the upper and lower halves of the body together. Use your yarn needle and black yarn to sew the two circles together. As you sew, gradually fill the body with polyester fiberfill. Make sure the stuffing is firm but not overstuffed, so the bat maintains its round shape.
Adding the Face
Insert the 6mm safety eyes into the front of the body, spacing them slightly apart. Once the eyes are secure, take your white eye patches and center them behind the safety eyes. Sew them firmly to the head. For an extra touch of personality, you can use a small piece of white yarn to embroider a tiny, slanted smile on the face.
Adding Ears and Wings
Pin the ears to the top of the head and sew them in place. Then, pin the wings to the sides of the body. Before sewing the wings permanently, use a needle and black yarn to embroider a few straight lines (veins) on the wings to give them a more realistic, bat-like texture. Once detailed, sew the wings securely to the body.
Finally, if you are making this a brooch, sew the brooch base to the bottom or back of the bat.
Tips for Success
- Tension is Key: Since this is a very small project, keep your tension consistent. If the stitches are too loose, the stuffing will peek through. If they are too tight, you’ll struggle to insert your hook.
- Invisible Decreases: For the ears and body, use the “invisible decrease” method (working in the front loops only) to avoid gaps and bumps in your work.
- Stitch Markers: Never forget your stitch marker! When working in a spiral, it is very easy to accidentally add or lose a stitch at the end of a round.
- Yarn Choice: If you find DK cotton too stiff, try a sport-weight yarn with a 1.75mm hook for an even smaller, more delicate bat.