How to Crochet a Cute Colorful Chameleon: Free Amigurumi Pattern
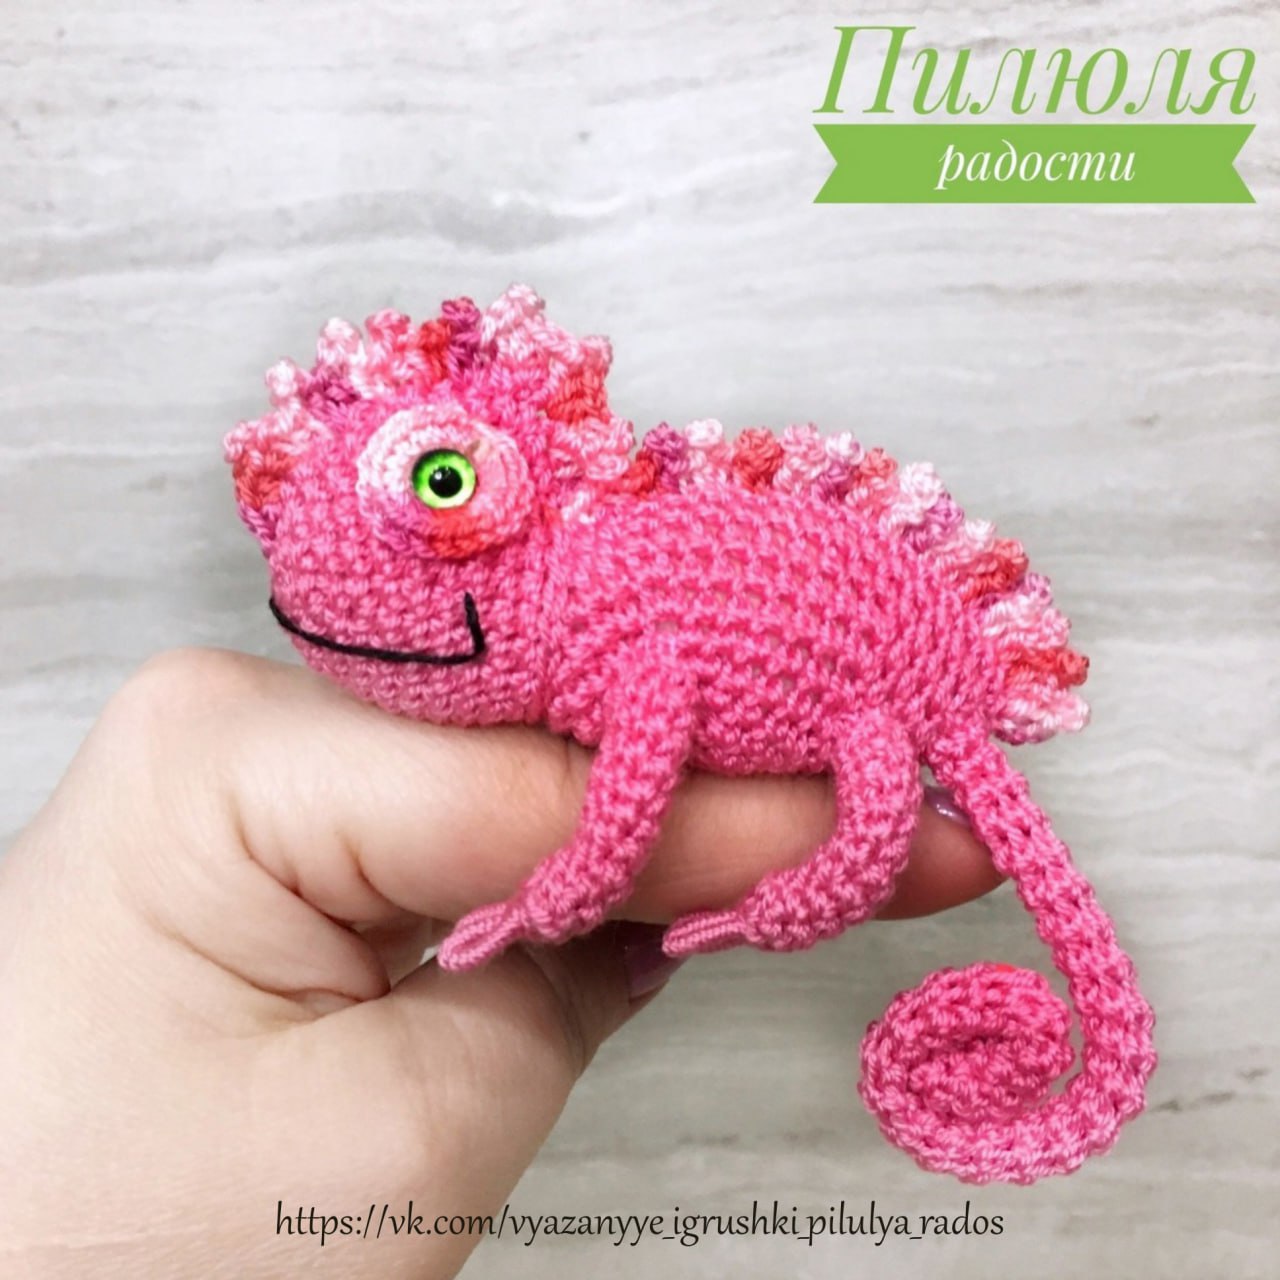
Welcome to the wonderful world of amigurumi! If you are looking for a project that combines vibrant colors, fun shapes, and a little bit of artistic flair, this cute crochet chameleon is the perfect choice. Whether you are a seasoned pro or a beginner looking to level up your skills, this little reptile is a joy to create. With its curly tail and posable legs, this chameleon doesn’t just sit on a shelf—it brings a pop of personality to any room.
In this tutorial, we will walk you through every step of the process, from crafting the tiny head to assembling the posable limbs. We will use US crochet terms and imperial measurements to ensure a smooth crafting experience. Let’s grab our hooks and get started!
Materials & Abbreviations
Before we dive into the stitches, make sure you have all your supplies ready. To achieve the look in the photos, you can use a striped yarn or a melange (variegated) yarn. If you choose a variegated yarn, you can skip the manual color changes mentioned in the pattern.
Supplies Needed
- Yarn: Sport weight or Fingering weight yarn in your choice of colors (the example uses pink and orange for the body and a light green for the crest).
- Crochet Hook: 1.5mm (or a size that keeps your stitches tight enough so the stuffing doesn’t show).
- Safety Eyes: 6mm black safety eyes (or beads).
- Fiberfill: High-quality polyester stuffing.
- Wire: Thin floral wire or jewelry wire for the legs and tail to make them posable.
- Other Tools: Yarn needle, scissors, and a small amount of fabric glue.
Abbreviations (US Terms)
- MR: Magic Ring
- Sc: Single crochet
- Inc: Increase (2 sc in the same stitch)
- Dec: Decrease (sc 2 stitches together)
- Sl st: Slip stitch
- Hdc: Half double crochet
- BLO: Back loop only
- St(s): Stitch(es)
Step-by-Step Instructions
The Head
Start with your primary color (e.g., pink).
- Round 1: 6 sc in MR (6)
- Round 2: (1 sc, inc) x 3 (9)
- Change color to orange (do not cut the pink yarn; carry it along).
- Round 3: (2 sc, inc) x 3 (12)
- Round 4: (1 sc, inc) x 6 (18)
- Change color back to pink.
- Round 5: 18 sc (18)
- Round 6: (2 sc, inc) x 6 (24)
- Change color to orange.
- Rounds 7-8: 24 sc (24)
- Change color to pink.
- Rounds 9-10: 24 sc (24)
- Change color to orange. Cut the pink yarn and secure it.
- Round 11: 24 sc (24)
Fold the piece in half and crochet 5 sc through both layers to close the shape. Leave a long tail for sewing. Stuff the head firmly with fiberfill.
The Body
Start with your primary color (e.g., pink).
- Round 1: 6 sc in MR (6)
- Round 2: 6 inc (12)
- Change color to orange.
- Round 3: (1 sc, inc) x 6 (18)
- Round 4: (2 sc, inc) x 6 (24)
- Change color to pink.
- Round 5: (3 sc, inc) x 6 (30)
- Round 6: (4 sc, inc) x 6 (36)
- Change color to orange.
- Round 7: (5 sc, inc) x 6 (42)
- Round 8: (6 sc, inc) x 6 (48)
- Change color to pink.
- Rounds 9-10: 16 sc, 16 sl st, 16 sc (repeat for 2 rounds)
- Change color to orange. Cut the pink yarn and secure it.
- Round 11: 16 sc, 16 sl st, 16 sc (48)
Fold the piece in half so that the slip-stitch sections align perfectly. Attach your secondary color (e.g., light green). Join the two sides together by working 3 hdc into each stitch for 15 stitches. This creates the ridged spine of the chameleon. Stuff the body with fiberfill, then finish by joining the remaining edges with sc. Fasten off and weave in ends.
The Legs (Make 4)
Start with your accent color (e.g., orange). Keep the MR loose.
- Round 1: 6 sc in MR (6)
- Round 2: 6 sc in BLO (6)
- Round 3: 6 sc (6)
- Change color to pink.
- Rounds 4-5: 6 sc (6)
- Change color to orange.
- Rounds 6-7: 6 sc (6)
- Change color to pink.
- Rounds 8-9: 6 sc (6)
- Change color to orange. Cut pink yarn and secure.
- Round 10: 6 sc (6)
Fasten off, leaving a tail for closing.
The Tail
Using the accent color (e.g., orange), follow the exact same pattern as the legs:
- Round 1: 6 sc in MR (6) – keep loop loose.
- Round 2: 6 sc in BLO (6)
- Round 3: 6 sc (6)
- Change to pink: Rounds 4-5: 6 sc.
- Change to orange: Rounds 6-7: 6 sc.
- Change to pink: Rounds 8-9: 6 sc.
- Change to orange: Round 10: 6 sc.
Fasten off and leave a tail for sewing.
The Eyes (Make 2)
If you are using safety eyes, you can skip the crochet part and simply insert the safety eyes. If you want a crochet border for the eyes:
- Round 1: 6 sc in MR (6)
- Round 2: (1 sc, inc) x 3 (9)
- Round 3: 9 sl st.
Fasten off and leave a tail for sewing. Glue or sew the safety eye into the center of this circle.
Finishing & Assembly
This is where your chameleon comes to life! Follow these steps carefully to ensure your reptile is sturdy and posable.
Step 1: Connecting Head and Body
Insert the body into the head up to the point where the crest begins. Sew the head and body together in a circle using a yarn needle. Hide the thread inside the body.
Step 2: Creating Posable Legs
To make the legs posable, take a piece of wire. Wrap the wire tightly in yarn so the metal is completely covered. Divide the wire into two ends at the center and bend the ends slightly. Insert one end of the wrapped wire into a leg and pull the opening tight. Poke the wire through the body of the chameleon, then insert the second end of the wire into another leg. Secure the second leg and sew the legs to the body using the remaining stitches from Round 2.
Step 3: The Head Details
Attach your light green yarn to the top of the head. Create the “bumps” of the chameleon’s crest by working 3 hdc into a single stitch. Sew the eye borders onto the head and glue the safety eyes in place.
Step 4: The Face
Using black embroidery thread, insert the needle through the magic ring of the head. Embroider a simple curved line for the mouth on both sides of the face. Tie the ends together inside the head and hide the thread.
Step 5: The Tail
Before sewing the tail, insert a piece of wire into the body and the tail. Wrap the wire ends in yarn or masking tape to ensure they don’t poke through the crochet fabric. Sew the tail securely to the back of the body and curl the wire into a spiral shape.
Tips for Success
- Tension is Key: When working with small projects like this, keep your tension consistent. If your stitches are too loose, the fiberfill will peek through.
- Seamless Color Changes: To get those clean stripes, change your color on the last pull-through of the previous stitch.
- Wire Safety: Always blunt the ends of your wire or wrap them heavily in yarn/tape. This prevents the wire from scratching you or wearing through the yarn over time.
- Customization: Don’t feel limited by the colors! Try neon greens, deep purples, or even a realistic brown and green palette.