Effortless Elegance: How to Knit a Chic Minimalist Ribbed Hat
How to Knit a Minimalist Ribbed Hat: Step-by-Step Tutorial
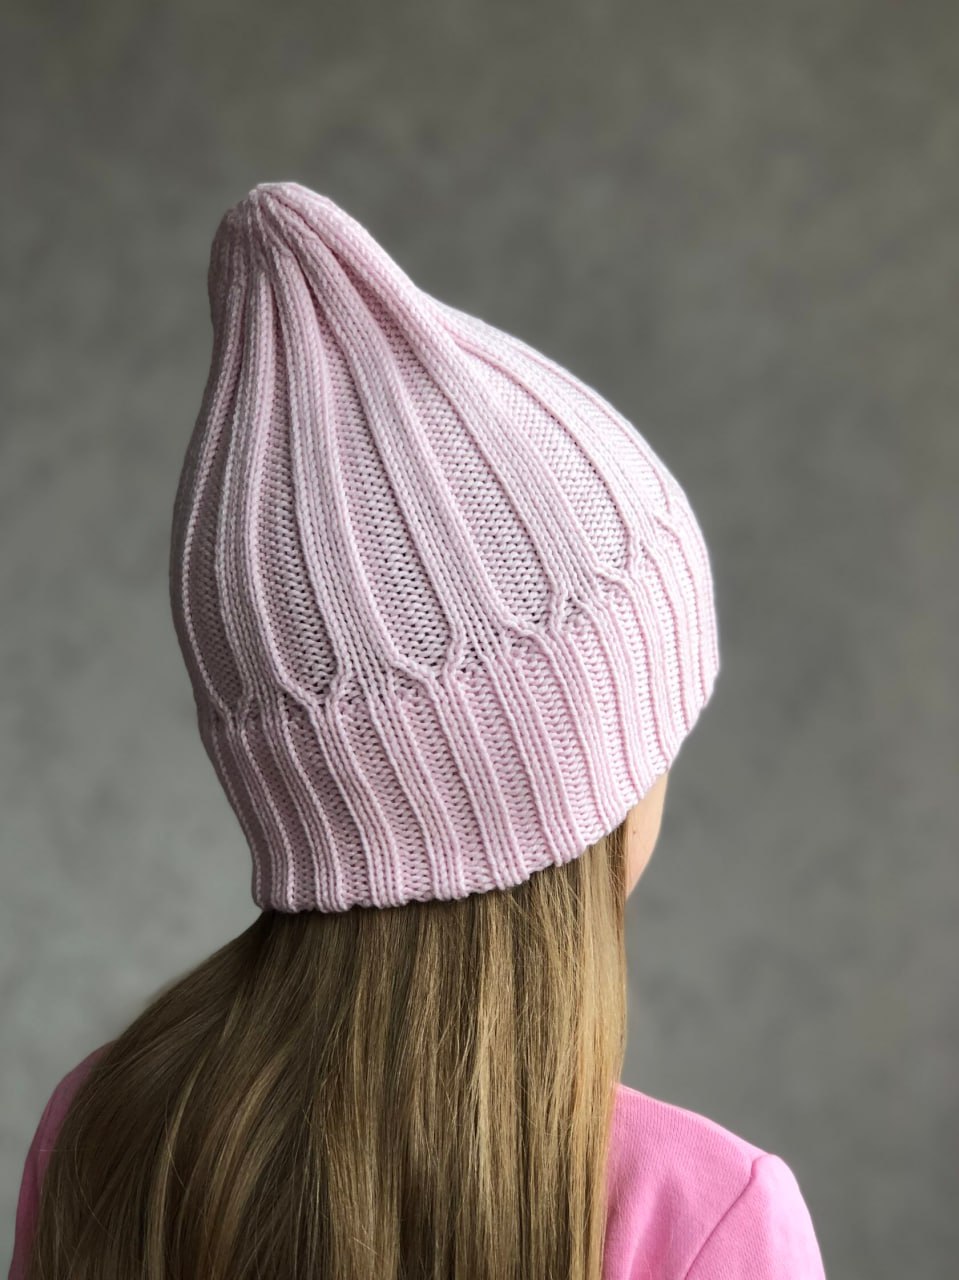
Create a chic, modern look with this Minimalist Ribbed Hat. This design features a sophisticated folded brim and a clean, textured body that makes it a perfect accessory for cold weather. Whether you are an experienced knitter or looking to level up your skills, this detailed guide will walk you through the process.
Materials and Tools
To achieve the look and fit of this hat, gather the following materials:
- Yarn: Lana Gatto Super Soft (50g/125m) or a similar wool-blend yarn that holds ribbing well.
- For a head circumference of 21-23 inches (54-58 cm): 4 skeins.
- Needles:
- Main: 4mm (US 6) circular needles (40cm length).
- Additional: One extra set of 4mm (US 6) circular needles (or smaller, up to 4mm).
- Optional: Double-pointed needles (DPNs) or a 60cm cable for the magic loop method to complete the crown.
- Notions:
- Contrast thread (for temporary cast-on).
- Stitch markers and a row counter.
- Measuring tape.
- Scissors.
Gauge
Using 2 strands of yarn in a 2×2 rib stitch on circular needles:
10cm x 10cm = 28 stitches x 27 rows.
Required Knitting Skills
Before starting, ensure you are comfortable with the following techniques:
- Knit and Purl stitches.
- Determining your own knitting gauge.
- Purl 2 together (p2tog).
- Knit 2 together (k2tog) using both the front and back loops.
Step-by-Step Instructions
Phase 1: The Brim
- Cast On: Use a contrast thread to create a temporary cast-on edge of 112 stitches.
- Ribbing: Work in 2×2 ribbing for 49 rows. Starting with a purl stitch, repeat the pattern: *2 purl, 2 knit*.
Phase 2: Creating the Folded Edge
- Open the Edge: Carefully undo the temporary cast-on thread. Transfer these open stitches onto your additional set of needles.
- The Fold: Fold the bottom edge of the hat inward. Position your main needles closer to the body of the hat and the additional needles behind them.
- Joining the Edges: You will now knit the main stitches and the folded stitches together to secure the brim. This creates row 50.
- For Purl Stitches: Move one purl stitch from the additional needle to the main needle and work them as a p2tog.
- For Knit Stitches: Insert the right needle into the stitch on the main needle, then immediately into the corresponding stitch on the additional needle. Yarn over and k2tog.
- Finish the Fold: Repeat this process for the entire round. The resulting fold should be approximately 3 inches (8cm) high.
Phase 3: The Body
- Patterned Rows: Work rows 51 through 55 following the designated texture chart (alternating knit and purl sequences).
- Main Body: Work in 4×4 ribbing from row 56 to row 85.
- Total height including the fold should be 20cm (approx. 8 inches).
- The height from the top of the fold to the start of decreases should be 12cm (approx. 4.7 inches).
Phase 4: The Crown Decreases
Work the following rounds to shape the top of the hat. Note: “As per pattern” means to knit the knit stitches and purl the purl stitches.
- Row 86: 1 k, *1 p, p2tog, 1 p, 4 k* (repeat from * to * until end of round).
- Row 87: Work as per pattern.
- Row 88: 1 k, *p2tog, 1 p, 4 k* (repeat from * to * until end of round).
- Row 89: Work as per pattern.
- Row 90: 1 k, *2 p, k2tog through the back loop, 2 k* (repeat from * to * until end of round).
- Row 91: Work as per pattern. At the end of the row, slip the last knit stitch to the left needle and move your marker to the right.
- Row 92: *k2tog through the front loop, 2 p, 1 k* (repeat from * to * until end of round).
- Row 93: Work as per pattern. Slip the last stitch to the left needle and move the marker to the right.
- Row 94: *2 k, p2tog* (repeat from * to * until end of round).
- Row 95: Work as per pattern.
- Row 96: *k2tog through the front loop, 1 p* (repeat from * to * until end of round).
- Row 97: Work as per pattern. Slip the last stitch to the left needle and move the marker to the right.
- Row 98: *k2tog through the front loop* (repeat from * to * until end of round).
- Row 99: Work as per pattern.
- Row 100: *k2tog through the front loop* (repeat from * to * until end of round).
The final height of the hat should be approximately 25cm (10 inches). You can adjust this by adding or subtracting rows in the 4×4 ribbing section.
Sizing Adjustments
The pattern is based on a 4×4 rib repeat (8 stitches per repeat). Use the following adjustments for different sizes:
For a Smaller Size
- Circumference: Subtract 8 stitches from the initial cast-on.
- Height: Work the fold to approximately 6.5-7cm. Knit 2 fewer rows before starting the crown decreases.
For a Larger Size
- Circumference: Add 8 stitches to the initial cast-on.
- Height: Keep the fold at 8cm. Knit 2-4 additional rows before starting the crown decreases.
Care and Finishing
To keep your hat looking its best, follow these washing instructions:
- Wash: Use lukewarm water with a specialized wool detergent or a mild shampoo. Gently squeeze the garment; do not rub or scrub.
- Soak: You may let the hat soak for 15-20 minutes.
- Dry: Gently press out excess water without wringing. Roll the hat in a clean towel to absorb moisture.
- Block: Lay the hat flat on a dry towel and shape it by hand. Turn the hat occasionally and turn it inside out to ensure the interior dries completely