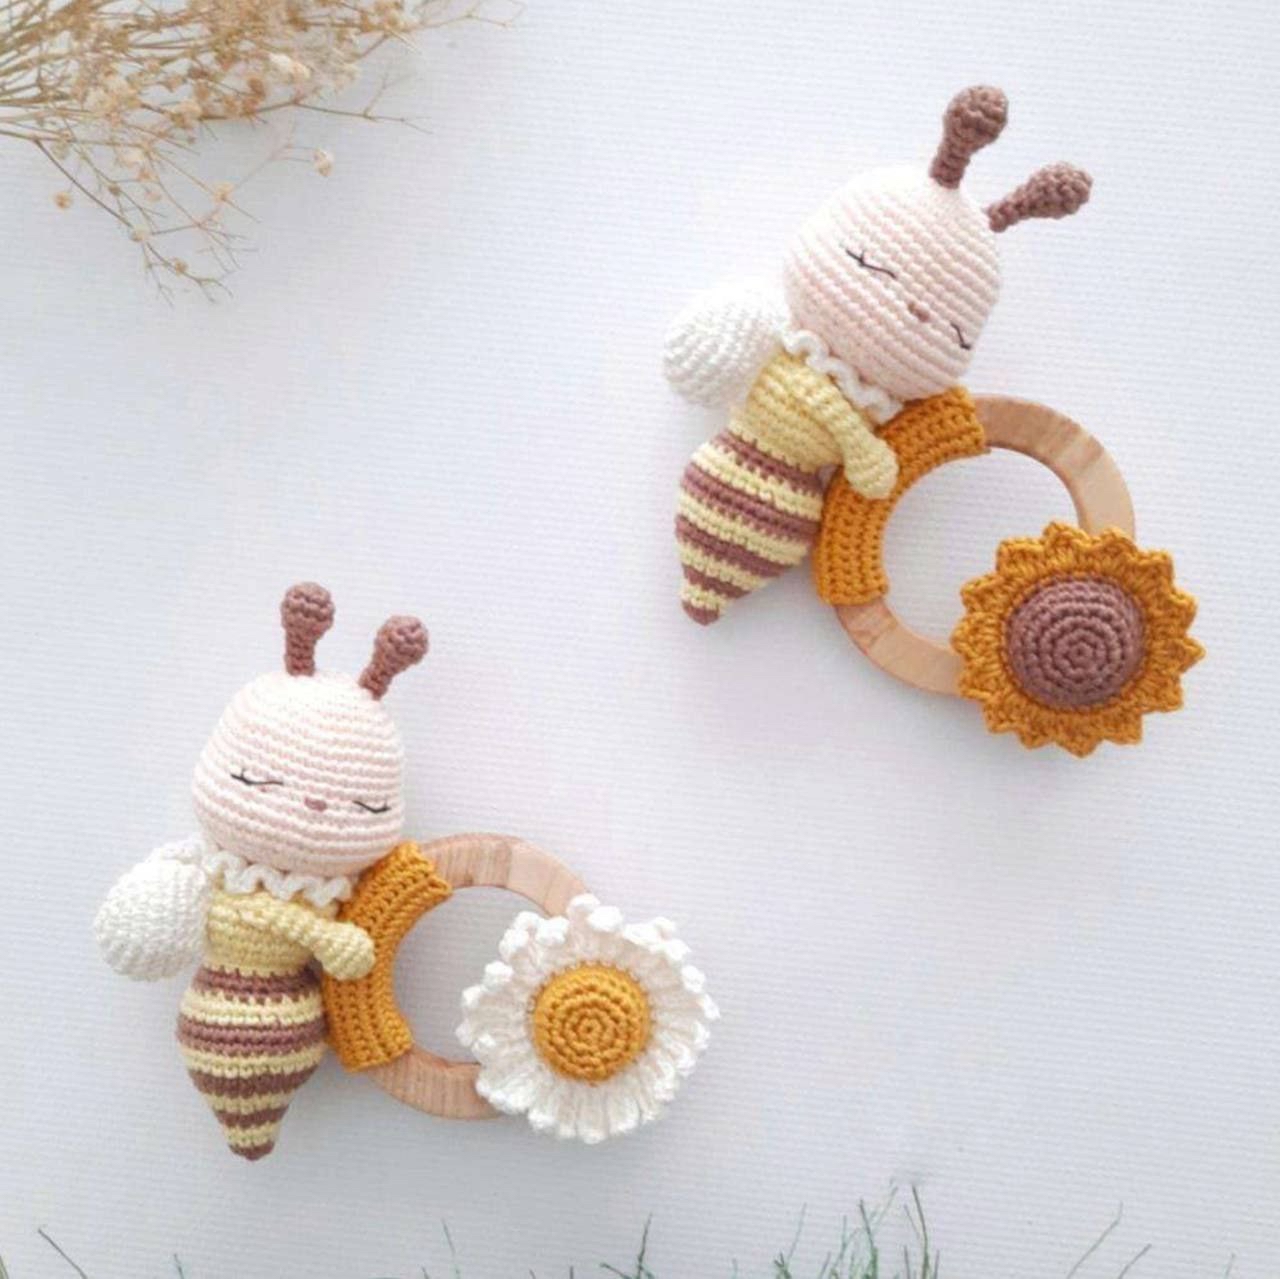
Adorable Crochet Baby Bee Rattle Pattern: A Step-by-Step Tutorial
Creating a handmade toy for a newborn is one of the most thoughtful gifts you can give. This crochet baby bee rattle is not only visually stunning with its sweet stripes and floral accents, but it’s also designed to be a sensory experience for little ones. Combining the soft texture of amigurumi with a natural wooden ring, this rattle helps babies develop their grip and coordination while providing a comforting companion.
Whether you are an experienced crocheter or a beginner looking for a rewarding project, this pattern is designed to be accessible. We will guide you through making the sweet little bee, the wooden ring attachments, and the optional daisy or sunflower embellishments. Let’s dive in and create this buzzing little cutie!
Materials & Abbreviations
To ensure your rattle is safe for babies, please use high-quality, washable yarns and ensure all parts are sewn on securely. We recommend using a cotton yarn for durability and a baby-safe finish.
Materials Needed
- Yarn: Medium weight cotton yarn (such as Schachenmayr Catania) in the following colors:
- Skin tone (for the head and wings)
- White (for the wings and daisy petals)
- Brown (for the bee stripes and sunflower center)
- Mustard (for the ring attachments and sunflower petals)
- Yellow (for the bee stripes and daisy center)
- Crochet Hook: 2.00 mm (or a size that ensures tight stitches so stuffing doesn’t leak)
- Stuffing: Hypoallergenic polyester fiberfill
- Details: Thin black embroidery thread for the eyes and nose
- Hardware:
- One 2.75-inch (70mm) flat maple wooden ring
- Two small 0.6-inch (15mm) plastic rattle inserts
- Tools: Tapestry needle, scissors
Abbreviations (US Terms)
- ch: chain
- mr: magic ring
- sc: single crochet
- inc: increase (two sc in one stitch)
- dec: decrease (sc two stitches together)
- BLO: back loop only
- dc: double crochet
- sl st: slip stitch
- [ ]: final stitch count for the round
Step-by-Step Instructions
The Head
We start with the skin-tone yarn. The head is worked in continuous rounds.
- Round 1: 6 sc in mr [6]
- Round 2: 6 inc [12]
- Round 3: (1 sc, inc) x 6 [18]
- Round 4: (2 sc, inc) x 6 [24]
- Round 5: (3 sc, inc) x 6 [30]
- Round 6: (4 sc, inc) x 6 [36]
- Round 7: (5 sc, inc) x 6 [42]
- Rounds 8-12: 42 sc [42]
- Round 13: 9 sc, (1 sc, inc) x 12, 9 sc [54]
- Rounds 14-16: 54 sc [54]
- Round 17: 9 sc, (1 sc, dec) x 12, 9 sc [42]
- Round 18: (5 sc, dec) x 6 [36]
- Round 19: 2 sc, dec, (4 sc, dec) x 5, 2 sc [30]
- Round 20: (3 sc, dec) x 6 [24]
- Round 21: (6 sc, dec) x 3 [21]
Stuff the head firmly with fiberfill. Fasten off, leaving a tail for sewing. For the face, use your black embroidery thread to create closed “sleeping” eyes on row 12 and a small nose between rows 12 and 13.
The Antennae (Make 2)
Use the brown yarn for the antennae.
- Round 1: 5 sc in mr [5]
- Round 2: 5 inc [10]
- Rounds 3-4: 10 sc [10]
- Round 5: 5 dec [5]
Stuff lightly up to this point. Continue with rows 6-8: 5 sc [5]. Fasten off, leaving a long tail for sewing.
The Arms (Make 2)
Use the yellow yarn.
- Round 1: 5 sc in mr [5]
- Round 2: 5 inc [10]
- Rounds 3-4: 10 sc [10]
- Round 5: 5 dec [5]
- Rounds 6-10: 5 sc [5]
Do not stuff the arms. Flatten the ends and join them with a slip stitch. Leave a long tail for sewing.
The Wings (Make 2)
Use the white yarn.
- Round 1: 6 sc in mr [6]
- Round 2: 6 inc [12]
- Round 3: (1 sc, inc) x 6 [18]
- Round 4: (2 sc, inc) x 6 [24]
- Rounds 5-6: 24 sc [24]
- Round 7: (2 sc, dec) x 6 [18]
- Round 8: (1 sc, dec) x 6 [12]
Do not stuff the wings. Flatten and join the edges with a slip stitch.
The Body
The body features a lovely striped pattern. We will alternate colors every two rows: two rows of brown, then two rows of yellow. For a seamless transition, finish each color change with a slip stitch and start the next round with a chain 1.
- Round 1: 6 sc in mr [6]
- Round 2: (1 sc, inc) x 3 [9]
- Round 3: 9 sc [9]
- Round 4: (2 sc, inc) x 3 [12]
- Round 5: 12 sc [12]
- Round 6: (1 sc, inc) x 6 [18]
- Round 7: 18 sc [18]
- Round 8: (2 sc, inc) x 6 [24]
- Round 9: 24 sc [24]
- Round 10: (3 sc, inc) x 6 [30]
- Round 11: 30 sc [30]
- Round 12: (9 sc, inc) x 3 [33]
- Rounds 13-14: 33 sc [33]
- Round 15: (9 sc, dec) x 3 [30]
- Round 16: 30 sc [30]
- Round 17: (3 sc, dec) x 6 [24]
- Round 18: 24 sc [24]
- Round 19: (6 sc, dec) x 3 [21]
From this point forward, use only yellow yarn. Stuff the body as you go.
- Round 20: (2 sc, dec) x 6 [18]
- Round 21: BLO (2 sc, inc) x 6 [24]
- Round 22: (3 sc, inc) x 6 [30]
- Round 23: (4 sc, inc) x 6 [36]
- Rounds 24-25: 36 sc [36]
- Round 26: 2 sc, dec, (4 sc, dec) x 5, 2 sc [30]
- Round 27: (3 sc, dec) x 6 [24]
- Round 28: (6 sc, dec) x 3 [21]
Stuff the top of the body and fasten off, leaving a long tail for sewing.
The Neck Collar
Using white yarn, chain 29. Skip the first chain and work 3 sc into every chain across. This will create a ruffled collar of approximately 84 stitches. Fasten off.
Flower Accents (Optional)
You can choose to make either a Daisy or a Sunflower to accompany your bee.
The Daisy
Make two yellow circles: 6 sc in mr, inc 6 (12), (sc, inc)x6 (18), (2sc, inc)x6 (24), 2 rounds of 24 sc. Place a rattle insert between the two circles and join them with white yarn using a round of sc. To create the petals, chain 6, work 5 sc back into the chain, slip stitch into the next stitch of the yellow circle. Repeat 25 times.
The Sunflower
Make two brown circles: 6 sc in mr, inc 6 (12), (sc, inc)x6 (18), (2sc, inc)x6 (24), (5sc, inc)x3 (27), 27 sc. Place a rattle insert between the circles and join them with yellow yarn. For the petals: 1 sc, in the next stitch (2 dc, ch 1, 1 sc, 1 dc), 1 sc in the next stitch. Repeat for 14 petals.
Finishing & Assembly
Connecting the Bee to the Ring
To securely attach the bee to the wooden ring, crochet a small rectangular strap using mustard yarn. Chain 21, work 20 sc back, ch 1, and work another 20 sc. Repeat for 11-12 rows. Wrap this strap around the ring and sew it firmly to the bee’s body.
Final Assembly
- Sew the antennae to the top of the head.
- Sew the head to the body, using the white neck collar to hide the seam.
- Attach the wings to the back of the body.
- Sew the arms to the sides of the body (around rows 25-26).
- Sew the ends of the arms to the wooden ring for extra security.
- Attach your chosen flower to the ring using a small matching crochet strap (similar to the bee’s strap, but smaller—approx. 4 sc wide and 8-13 rows long).
Tips for Success
- Tight Stitches: When working with amigurumi, use a hook slightly smaller than the yarn suggests. This prevents the fiberfill from showing through.
- Safe Fastening: Since this is a baby toy, double-knot all your threads and weave them deeply into the stuffing to prevent them from coming loose.
- Clean Finishes: Use a tapestry needle to weave in your ends invisibly. If you’re struggling with the magic ring, you can substitute it with 2 chains and working your first round into the second chain from the hook.