Adorable Floppy Ear Bunny Crochet Pattern: Free Amigurumi Rabbit Tutorial
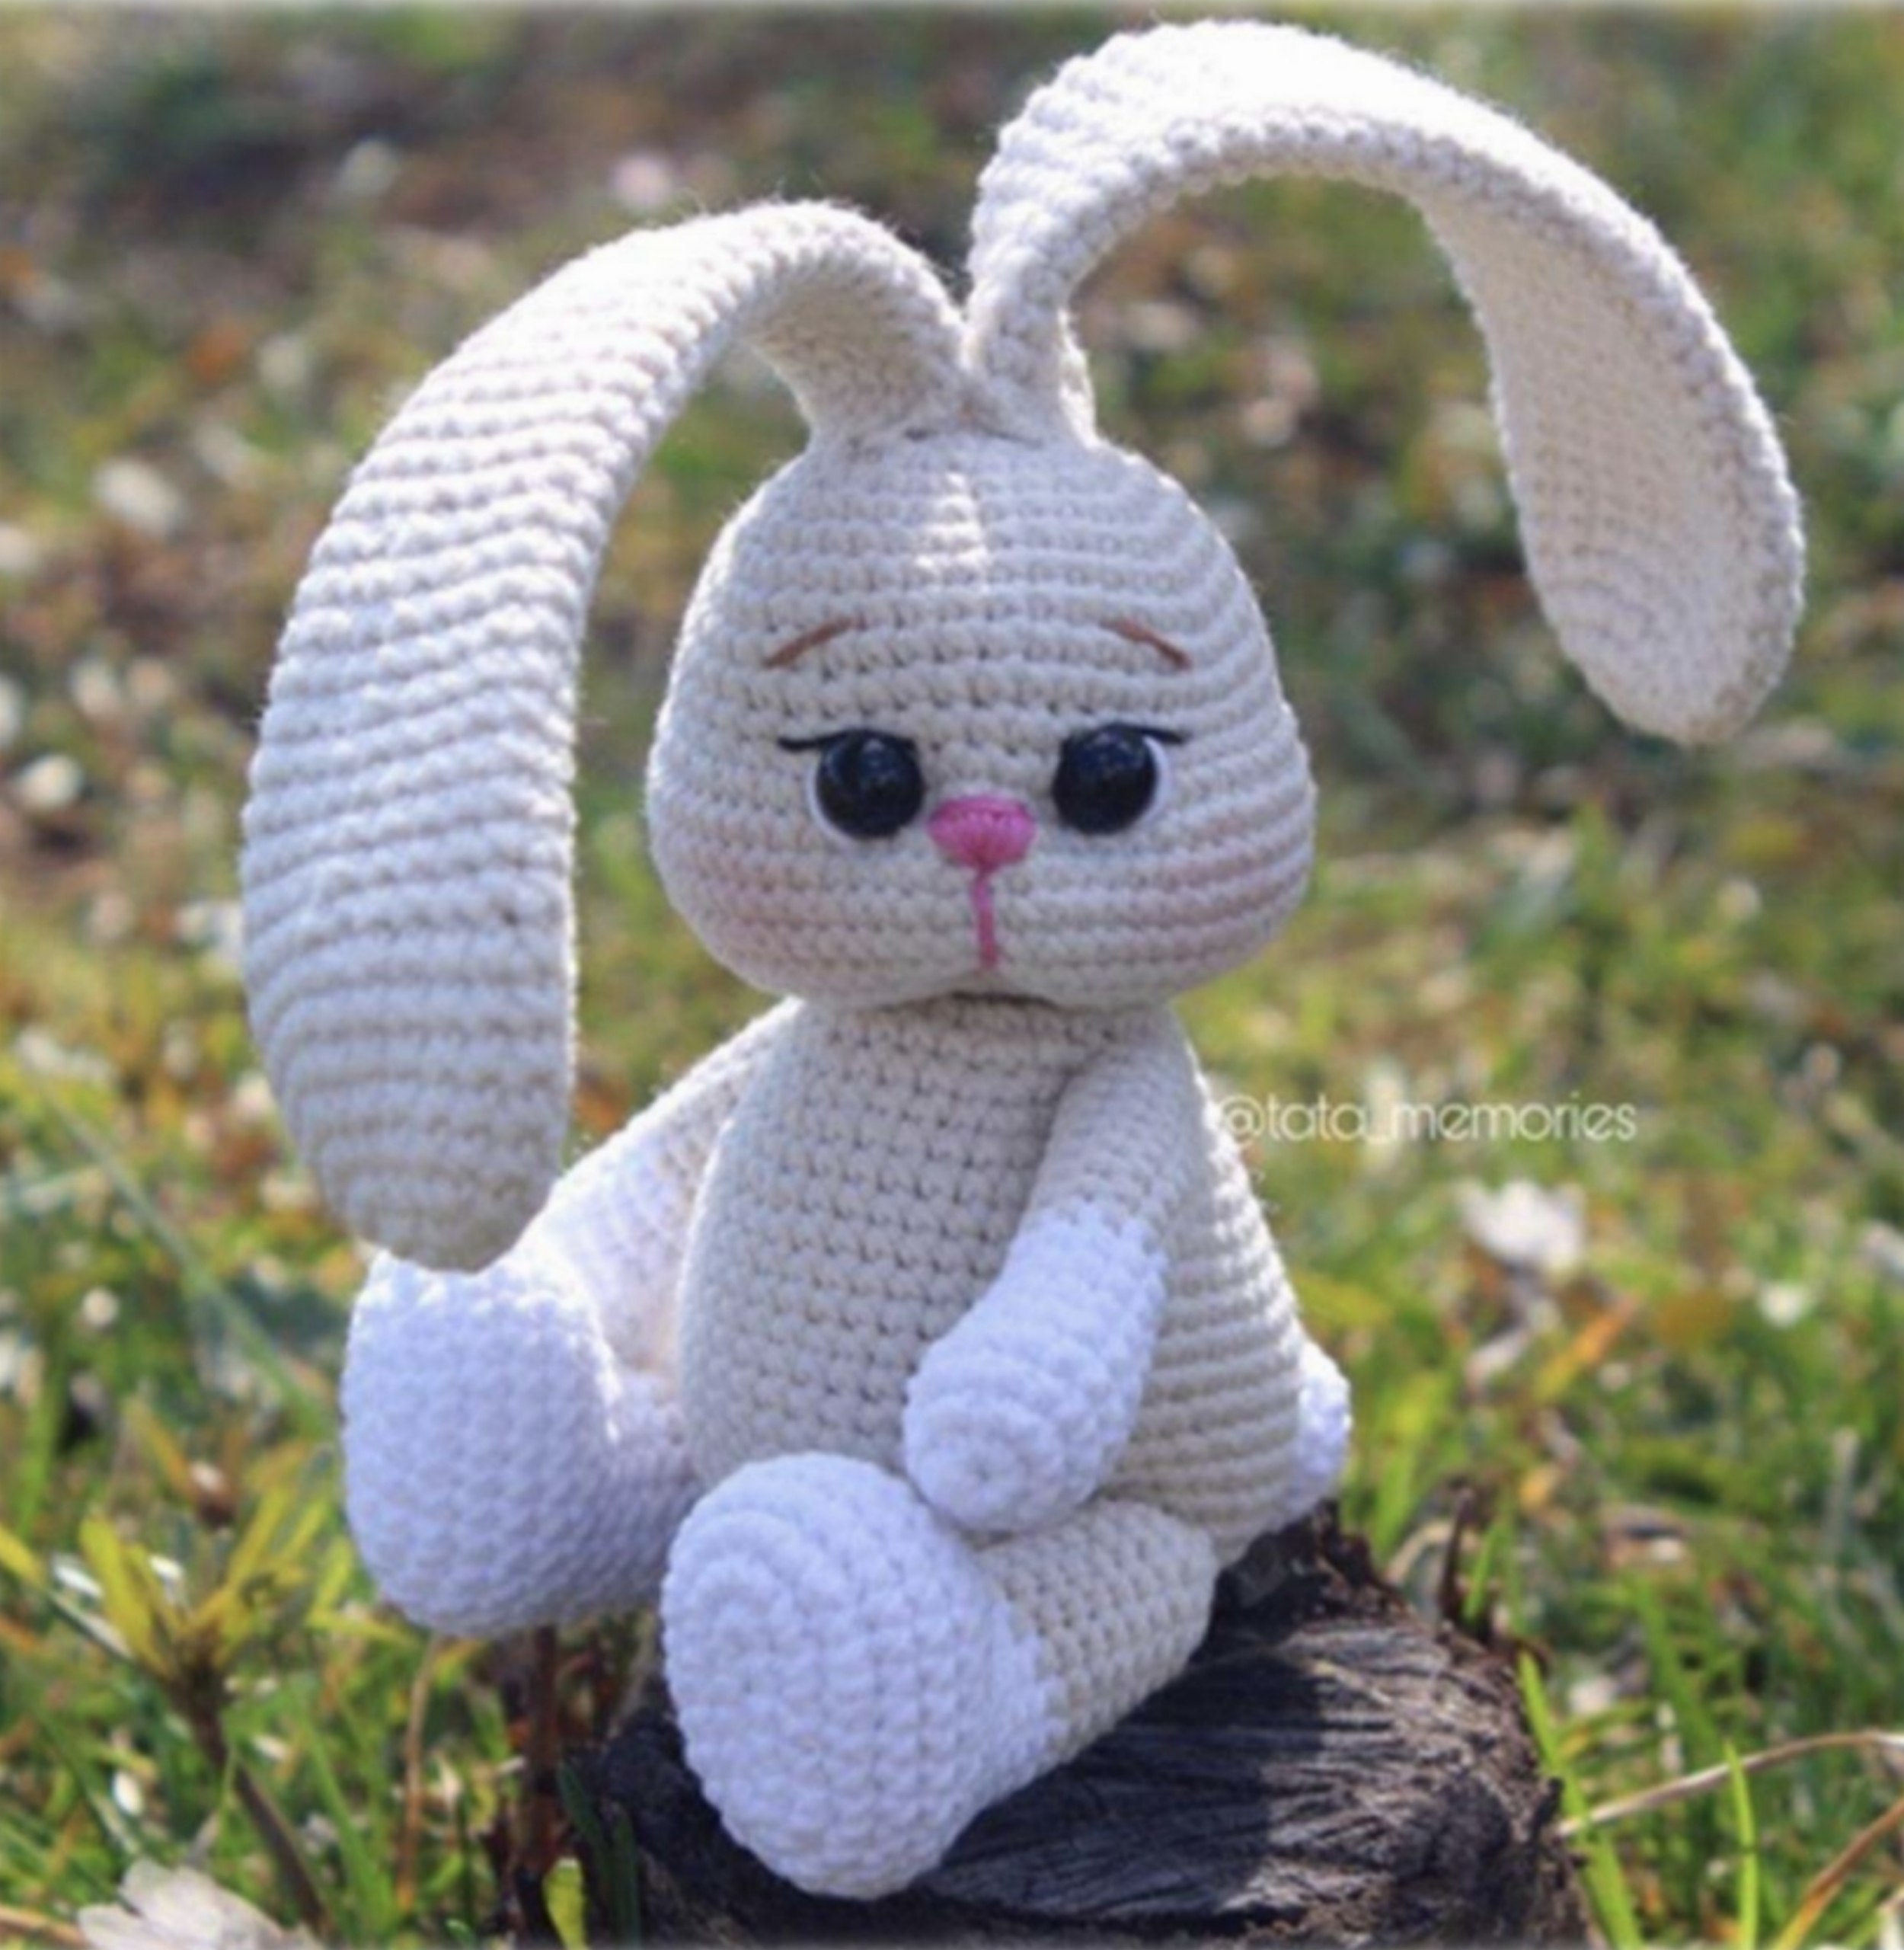
Welcome to this sweet and simple crochet tutorial! Today, we are going to create a charming little bunny with oversized, floppy ears and a tiny carrot to keep him company. This amigurumi project is perfect for anyone looking to make a cuddly gift or a cute addition to their handmade collection. Whether you are an intermediate crocheter or a beginner with a bit of experience, this pattern is designed to be accessible and rewarding.
Once finished, your bunny will stand approximately 5.5 inches tall (without ears) and reach about 10.6 inches when including those iconic long ears. We will be using a combination of a tight stitch for the body to keep the stuffing secure and a slightly looser stitch for the ears to give them that perfect, heavy drape.
Materials & Abbreviations
To get started, gather the following materials. We recommend a sport-weight cotton blend yarn for a clean, professional look.
Materials Needed
- Yarn: Sport weight yarn in Main Color (Grey or Beige), White, Orange, and Green.
- Crochet Hooks: 2.0mm (for the body) and 2.5mm (for the ears).
- Safety Eyes: 8mm plastic safety eyes.
- Stuffing: High-quality polyester fiberfill.
- Embroidery Thread: Pink, black, and brown for facial details.
- Joint: A 1-inch plastic doll joint for the head (optional).
- Tools: Yarn needle with a large eye, scissors, and stitch markers.
US Crochet Abbreviations
- MR: Magic Ring
- sc: Single crochet
- inc: Increase (2 sc in the same stitch)
- dec: Decrease (sc 2 together)
- ch: Chain
- sl st: Slip stitch
- st: Stitch
Note on the “Offset Stitch”: In some rows, you may encounter an offset stitch. This is simply a single crochet placed in the first stitch of the round to align the pattern. It is not counted in the final stitch total for that round.
Step-by-Step Instructions
The Head
Use your 2.0mm hook and the Main Color yarn.
- Round 1: 6 sc in MR (6)
- Round 2: inc * 6 (12)
- Round 3: (1 sc, inc) * 6 (18)
- Round 4: (2 sc, inc) * 6 (24)
- Round 5: (3 sc, inc) * 6 (30)
- Round 6: (4 sc, inc) * 6 (36)
- Round 7: (11 sc, inc) * 3 (39)
- Round 8: (12 sc, inc) * 3 (42)
- Rounds 9-12: sc in each st around (42)
- Round 13: inc, 8 sc, 8 inc, 7 sc (place a marker in the center of these 7 stitches—this is the center of the muzzle), 8 inc, 8 sc, inc, 1 sc (60)
- Rounds 14-19: sc in each st around (60)
Eye Placement: Insert safety eyes between rounds 12 and 13. Space them 7 stitches apart, centering them relative to the muzzle marker.
- Round 20: (1 sc, dec) * 20 (40)
- Round 21: (2 sc, dec) * 10 (30)
Begin stuffing the head firmly.
- Round 22: (3 sc, dec) * 6 (24)
- Round 23: (2 sc, dec) * 6 (18)
If you are using a plastic joint, insert the screw portion of the joint now. Stuff the head very firmly, paying extra attention to the cheeks to give the bunny a plump, cute look.
- Round 24: (1 sc, dec) * 6 (12)
- Round 25: dec * 6 (6)
Fasten off, weave in the ends, and pull the opening tight around the joint screw.
Facial Sculpting & Details
To give the bunny a 3D expression, we will “sculpt” the face using a needle and thread. Mark a few points on the face: points A and B near the eyes, C and D near the eyes on the opposite side, and E and F in the center of the muzzle between rounds 20 and 21.
Using a long needle, weave the thread from the muzzle center up toward the eyes and back down. Repeat the path (Muzzle $\rightarrow$ Eye $\rightarrow$ Muzzle $\rightarrow$ Other Eye) 2-3 times and pull gently to create a recessed mouth and defined eye sockets. Finally, embroider a small pink triangle for the nose, a vertical line for the mouth, and tiny eyelashes and eyebrows using black and brown thread.
The Floppy Ears (Make 2)
Switch to the 2.5mm hook to create a looser fabric. This ensures the ears drape naturally.
- Round 1: 6 sc in MR (6)
- Round 2: inc * 6 (12)
- Round 3: (1 sc, inc) * 6 (18)
- Round 4: (8 sc, inc) * 2 (20)
- Round 5: 1 sc, inc, 9 sc, inc, 8 sc (22)
- Rounds 6-9: sc in each st around (22)
- Round 10: (dec, 9 sc) * 2 (20)
- Rounds 11-13: sc in each st around (20)
- Round 14: (dec, 8 sc) * 2 (18)
- Rounds 15-17: sc in each st around (18)
- Round 18: (dec, 7 sc) * 2 (16)
- Rounds 19-23: sc in each st around (16)
- Round 24: (dec, 6 sc) * 2 (14)
- Rounds 25-29: sc in each st around (14)
- Round 30: (dec, 5 sc) * 2 (12)
- Rounds 31-37: sc in each st around (12)
Flatten the base of the ear and sc 6 stitches across to close the bottom. Fasten off, leaving a long tail for sewing.
The Body
Use the 2.0mm hook and Main Color. The body is worked from the top down.
- Round 1: 6 sc in MR (6). If using a joint, leave the ring loose enough to fit over the screw.
- Round 2: inc * 6 (12)
- Round 3: (1 sc, inc) * 6 (18)
- Round 4: (2 sc, inc) * 6 (24)
- Round 5: (7 sc, inc) * 3 (27)
- Round 6: 3 sc, inc, (8 sc, inc) * 2, 5 sc (30)
- Round 7: (9 sc, inc) * 3 (33)
At this point, slide the body onto the head joint and secure it with the cap. If not using a joint, simply sew the head to the body later.
- Round 8: 4 sc, inc, (10 sc, inc) * 2, 6 sc (36)
- Round 9: (11 sc, inc) * 3 (39)
- Round 10: 5 sc, inc, (12 sc, inc) * 2, 7 sc (42)
- Round 11: 12 sc, 2 inc, 28 sc (44)
- Round 12: 13 sc, 2 inc, 29 sc (46)
- Round 13: 14 sc, 2 inc, 30 sc (48)
- Rounds 14-21: sc in each st around (48)
- Round 22: 2 sc, dec, (6 sc, dec) * 5, 4 sc (42)
- Round 23: (5 sc, dec) * 6 (36)
Start stuffing the body firmly.
- Round 24: 1 sc, dec, (4 sc, dec) * 5, 3 sc (30)
- Round 25: (3 sc, dec) * 6 (24)
- Round 26: (2 sc, dec) * 6 (18)
- Round 27: (1 sc, dec) * 6 (12)
- Round 28: dec * 6 (6)
Fasten off and weave in the ends.
The Legs (Make 2)
Start with White yarn.
- Round 1: Ch 6, start in 2nd ch from hook: inc, 3 sc, 4 sc in next st, 4 sc (13)
- Round 2: 2 inc, 2 sc, 6 inc, 2 sc, inc (22)
- Round 3: (1 sc, inc) * 2, 2 sc, (1 sc, inc) * 6, 3 sc, inc (31)
- Rounds 4-6: sc in each st around (31)
- Round 7: dec, 29 sc (30)
- Round 8: 7 sc, 8 dec, 7 sc (22)
- Round 9: 7 sc, 4 dec, 7 sc (18)
- Round 10: 7 sc, 2 dec, 7 sc (16)
- Round 11: 7 sc, dec, 7 sc (15)
Switch to Main Color.
- Rounds 12-18: sc in each st around (15)
- Round 19: (3 sc, dec) * 3 (12)
- Round 20: dec * 6 (6)
Fasten off and weave in ends.
The Arms (Make 2)
Start with White yarn.
- Round 1: 6 sc in MR (6)
- Round 2: inc * 6 (12)
- Round 3: (3 sc, inc) * 3 (15)
- Rounds 4-5: sc in each st around (15)
- Round 6: 1 dec, 2 sc, 1 dec, 9 sc (13)
- Round 7: 2 dec, 9 sc (11)
- Round 8: 1 dec, 9 sc (10)
Switch to Main Color.
- Rounds 9-17: sc in each st around (10)
- Round 18: dec * 5 (5)
Fasten off and weave in ends.
The Tail & Carrot
Tail: Using White yarn, 6 sc in MR, inc * 6, (1 sc, inc) * 6, then dec * 9. Stuff lightly and fasten off.
Carrot: Using Orange yarn, 6 sc in MR, (1 sc, inc) * 3, 9 sc, (2 sc, inc) * 3, 12 sc, (3 sc, inc) * 3, 15 sc, (4 sc, inc) * 3, 18 sc, (5 sc, inc) * 3, 21 sc, (6 sc, inc) * 3, 24 sc, 5 rounds of 24 sc, then decrease (2 sc, dec) * 6, (1 sc, dec) * 6, dec * 6. Fasten off.
Carrot Greens: Join Green yarn to the top of the carrot. (Ch 20, sl st back into the carrot) * 5 times to create leafy stems. Fasten off.
Finishing
Now it is time to put everything together!
- Ears: Sew the ears to the top of the head, angling them slightly away from each other. To get that “pinch” look, sew the top edges of the ears slightly together. Pro Tip: Gently steam the ears with an iron to help them lay flat and floppy.
- Legs: Sew the legs between rounds 10 and 11 (counting from the bottom) of the body.
- Arms: Sew the arms between rounds 23 and 24 (counting from the bottom) of the body.
- Tail: Attach the tail between rounds 10 and 13 from the bottom.
- Final Touch: Use a little bit of pink blush or fabric paint to add a soft glow to the bunny’s cheeks.
Tips for Success
- Tension Matters: Keep your stitches tight for the body so that the stuffing doesn’t peek through, but remember to relax your tension when working the ears with the 2.5mm hook.
- Stitch Markers: Amigurumi is worked in a continuous spiral. Always use a stitch marker at the start of each round to avoid losing your place.
- Perfect Stuffing: Stuff your bunny in small increments, using your finger to push the fiberfill into the corners and cheeks for a rounded, professional shape.