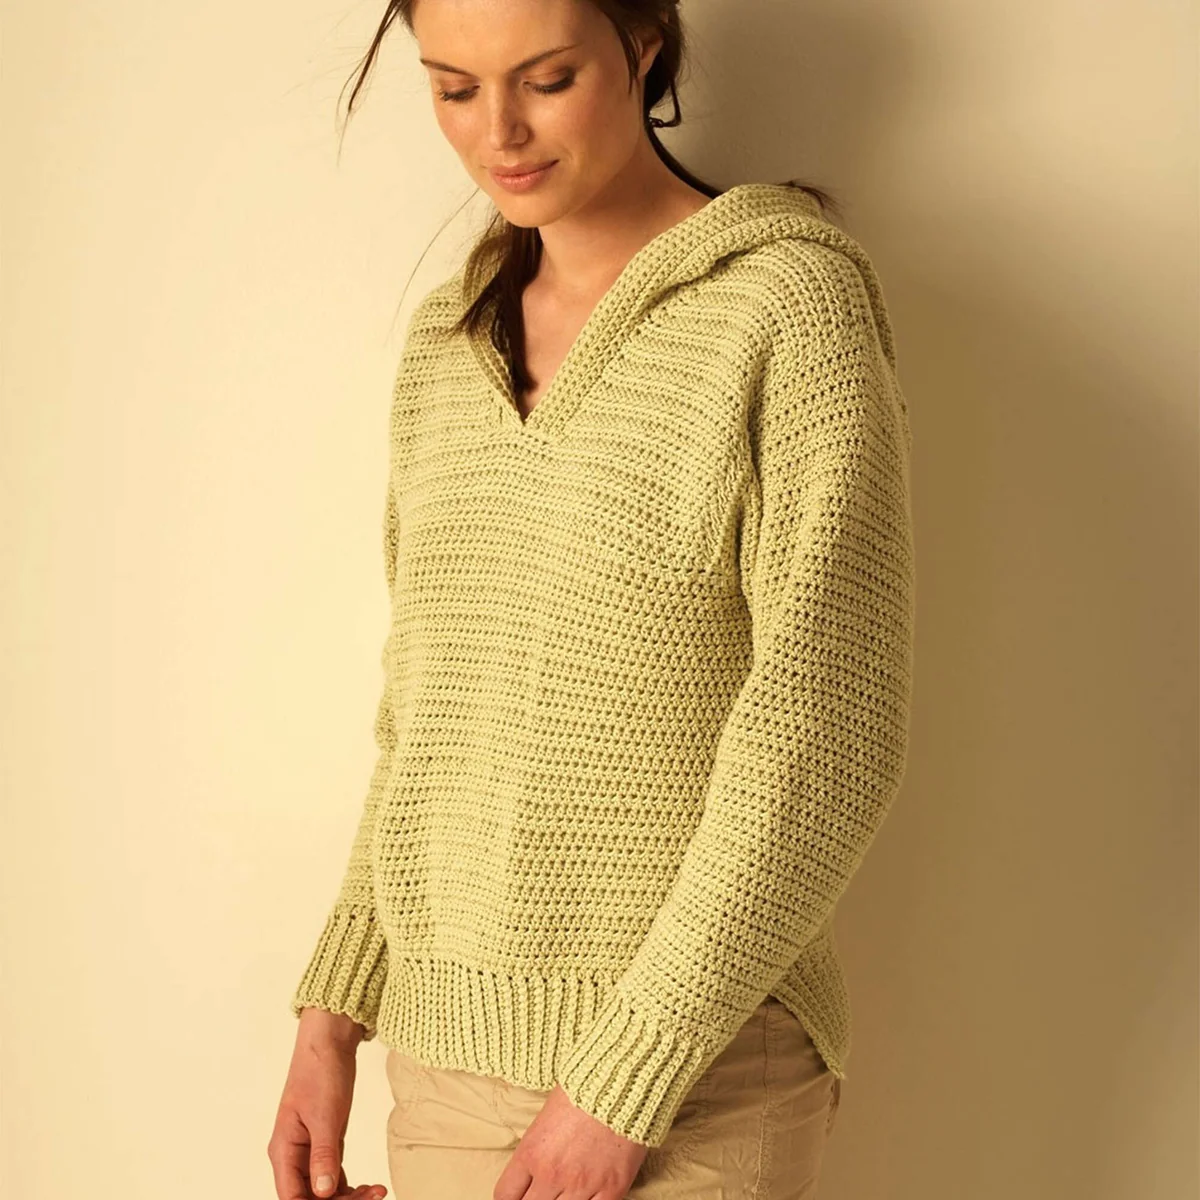
Easy DIY Crochet Hoodie Pattern: A Step-by-Step Guide for All Sizes
There is nothing quite like the cozy feel of a handmade crochet hoodie. Whether you are looking for a lightweight layer for spring or a chunky piece for autumn, this project is a fantastic way to level up your crochet skills. This pattern is designed to be accessible for beginners while providing a professional, tailored fit across a wide range of sizes.
We will be using half-double crochet (hdc) for the majority of the body, which creates a beautiful, dense fabric that holds its shape well without being too stiff. Follow along with this detailed guide to create your own custom-fit hoodie!
Materials & Abbreviations
Before you begin, gather your supplies. For this project, a medium-weight cotton or acrylic yarn works best to provide a clean drape and durability.
Supplies Needed
- Yarn: Medium weight (4) yarn. Recommended: Bernat Handicrafter Cotton or Bernat Satin.
- XS/S: 1,350 yards
- M: 1,435 yards
- L: 1,535 yards
- XL: 1,700 yards
- 2/3XL: 1,865 yards
- 4/5XL: 2,110 yards
- Crochet Hook: 5 mm (U.S. H-8) or the size needed to obtain the gauge below.
- Notions: Yarn needle, scissors, and stitch markers.
Gauge
To ensure your hoodie fits perfectly, please check your gauge. 14 hdc and 12 rows = 4 inches. If your square is too small, try a larger hook; if it is too large, try a smaller hook.
Abbreviations (US Terms)
- Beg: Beginning
- Ch: Chain
- Hdc: Half double crochet
- Hdc2tog: Half double crochet two together (decrease)
- RS: Right side
- WS: Wrong side
- Sc: Single crochet
- Sl st: Slip stitch
- St(s): Stitch(es)
- Rep: Repeat
Note: Throughout this pattern, the instructions are written for the smallest size. Numbers in parentheses ( ) indicate the counts for larger sizes: (M-L-XL-2/3XL-4/5XL). The turning chain 2 does not count as a stitch.
Step-by-Step Instructions
The Back Panel
We start with the back panel, beginning with a ribbed band for a snug fit at the waist.
The Waist Band
Chain 15. Row 1 (RS): Sc in 2nd ch from hook and in each ch across. Turn (14 sc).
Row 2: Ch 1. Working in back loops only, sc in each st across. Turn.
Repeat Row 2 until the band, when slightly stretched, measures 19 (21-23-25-30-34) inches. End on a Right Side (RS) row. Do not turn.
The Main Body
Next Row (RS): Ch 2. Work 67 (73-81-87-105-119) hdc evenly along the side edge of the band. Turn.
Next Row: Ch 2. Hdc in each st across. Turn.
Repeat the last row until the piece measures 13½ (14-14½-15-16-16) inches from the beginning. Fasten off.
Shaping the Armholes
Next Row: Skip the first 8 (8-10-12-20-26) hdc. Join yarn with a sl st in the next st. Ch 2, hdc in the same st. Hdc in each st until the last 8 (8-10-12-20-26) hdc. Turn. Leave the remaining stitches unworked. You should have 51 (57-61-63-65-67) hdc.
Next Row: Ch 2. Hdc in each st across. Turn.
Repeat this row until the armholes measure 9 (9½-10-10½-11-12) inches. Fasten off.
The Front Panel
The front panel is worked similarly to the back until you reach the armholes.
Follow the Back Panel instructions for the band and main body, but continue working the main body until the armholes measure 2 (2½-3-3½-4-5) inches. End on a WS row.
Dividing for the Front Opening
Next Row: Ch 2. Hdc in the first 22 (25-27-28-29-30) hdc. Turn. Leave remaining stitches unworked.
Next Row: Ch 2. Hdc in each st across. Turn.
Repeat this row until the armhole measures 10 rows less than the distance from the back armhole to the shoulder. Fasten off.
Front Neck Shaping
Row 1: Ch 2. Hdc in the first 20 (22-23-23-24-24) hdc. To make an hdc2tog, yarn over and draw up a loop in each of the next 2 sts, then yarn over and draw through all 5 loops on the hook. Turn (21 (23-24-24-25-25) sts). Leave remaining stitches unworked.
Row 2: Ch 2. Hdc2tog over the first 2 sts. Hdc in each st across. Turn.
Row 3: Ch 2. Hdc in each st until the last 2 sts. Hdc2tog over the last 2 sts. Turn.
Repeat Rows 2 and 3 twice more. You will have 15 (17-18-18-19-19) sts.
Next Row (WS): Ch 2. Hdc in each st across. Turn.
Next Row: Ch 2. Hdc in each st until the last 2 hdc. Hdc2tog over the last 2 hdc. Turn (14 (16-17-17-18-18) sts).
Next Row: Ch 2. Hdc in each st across. Fasten off.
Now, repeat this entire neck shaping process for the other side of the front opening, mirroring your work.
The Sleeves
Make two sleeves. Follow the Back Panel instructions for the band. Repeat the band row until it measures 10 (10-10½-10½-11-11¾) inches. Do not turn.
Row 1 (RS): Ch 2. Work 35 (35-37-37-39-41) hdc evenly along the side edge of the band. Turn.
Row 2: Ch 2. Hdc in each st across. Turn.
For 2/3XL and 4/5XL only: Ch 2. 2 hdc in the first st, hdc across to the last st, 2 hdc in the last st. Turn. Repeat this row 3 to 7 times more.
All Sizes: Ch 2. 2 hdc in the first st, hdc across to the last st, 2 hdc in the last st. Turn.
Next Row: Ch 2. Hdc in each st across. Turn.
Repeat these two rows 7 (11-13-15-14-12) times. Continue working evenly until the sleeve measures 18 (18½-18½-18-17½-17) inches. Place markers at the ends of the last row. Work 7 (7-9-10-17-22) additional rows even. Fasten off.
The Hood
Chain 99.
Row 1 (RS): Hdc in 2nd ch from hook and in each ch across (97 hdc). Turn.
Row 2: Ch 2. Hdc in each st across. Turn.
Repeat Row 2 zero (0-0-1-1-2) more times.
Next Row: Ch 2. Hdc2tog over the first 2 sts, hdc across to the last 2 hdc, hdc2tog over the last 2 sts. Turn. Repeat this row 6 more times (83 sts).
Next Row: Ch 2. Hdc in each st across. Turn.
Next Row: Ch 2. Hdc2tog over first 2 hdc, hdc across to the last 2 hdc, hdc2tog over the last 2 sts. Turn.
Work 10 (10-11-13-13-14) more rows even. Place markers at each end of the last row.
Back Neck Shape: For the next 8 rows: sl st in the first 3 sts, ch 1, sc in the same space as the last sl st, hdc in each st until the last 4 sts, sc in the next hdc. Turn. Leave remaining sts unworked. Fasten off.
Finishing
Now it is time to assemble your hoodie!
- Seaming: Sew the shoulder seams together. Sew in the sleeves, aligning the markers with the armhole edges to create a square shape. Sew the side seams and sleeve seams, but leave the bottom sides open along the band to create side slits.
- Attaching the Hood: Pin the hood to the neck edge, aligning the back seam with the center back of the neck. Sew the hood into position using a flat seam.
- Hood Edging: With the RS facing, join yarn to the bottom right corner of the front opening. Ch 1. Work 14 sc up the right side to the neck. Work 97 sc along the edge of the hood, and 14 sc down the left side of the opening (125 sc total).
- Final Border: Ch 1. Working in back loops only, sc in each st across. Turn. Repeat until the edging measures 2 inches. Fasten off and sew the ends of the edging to the front opening.
Tips for Success
- Blocking is Key: Once completed, steam block your hoodie. This helps the seams lay flat and ensures the cotton yarn relaxes into its final shape.
- Consistent Tension: Because this pattern involves a lot of hdc, try to keep your tension consistent to avoid “waisting” or widening in the body.
- Customizing: If you want a more oversized fit, feel free to jump up one size in the yardage and measurements.
- Yarn Choice: If you use a satin or mercerized cotton, your hoodie will have a slight sheen and a smoother feel, whereas a matte cotton will look more casual.