Adorable Crochet Donkey Pattern: Step-by-Step Amigurumi Tutorial
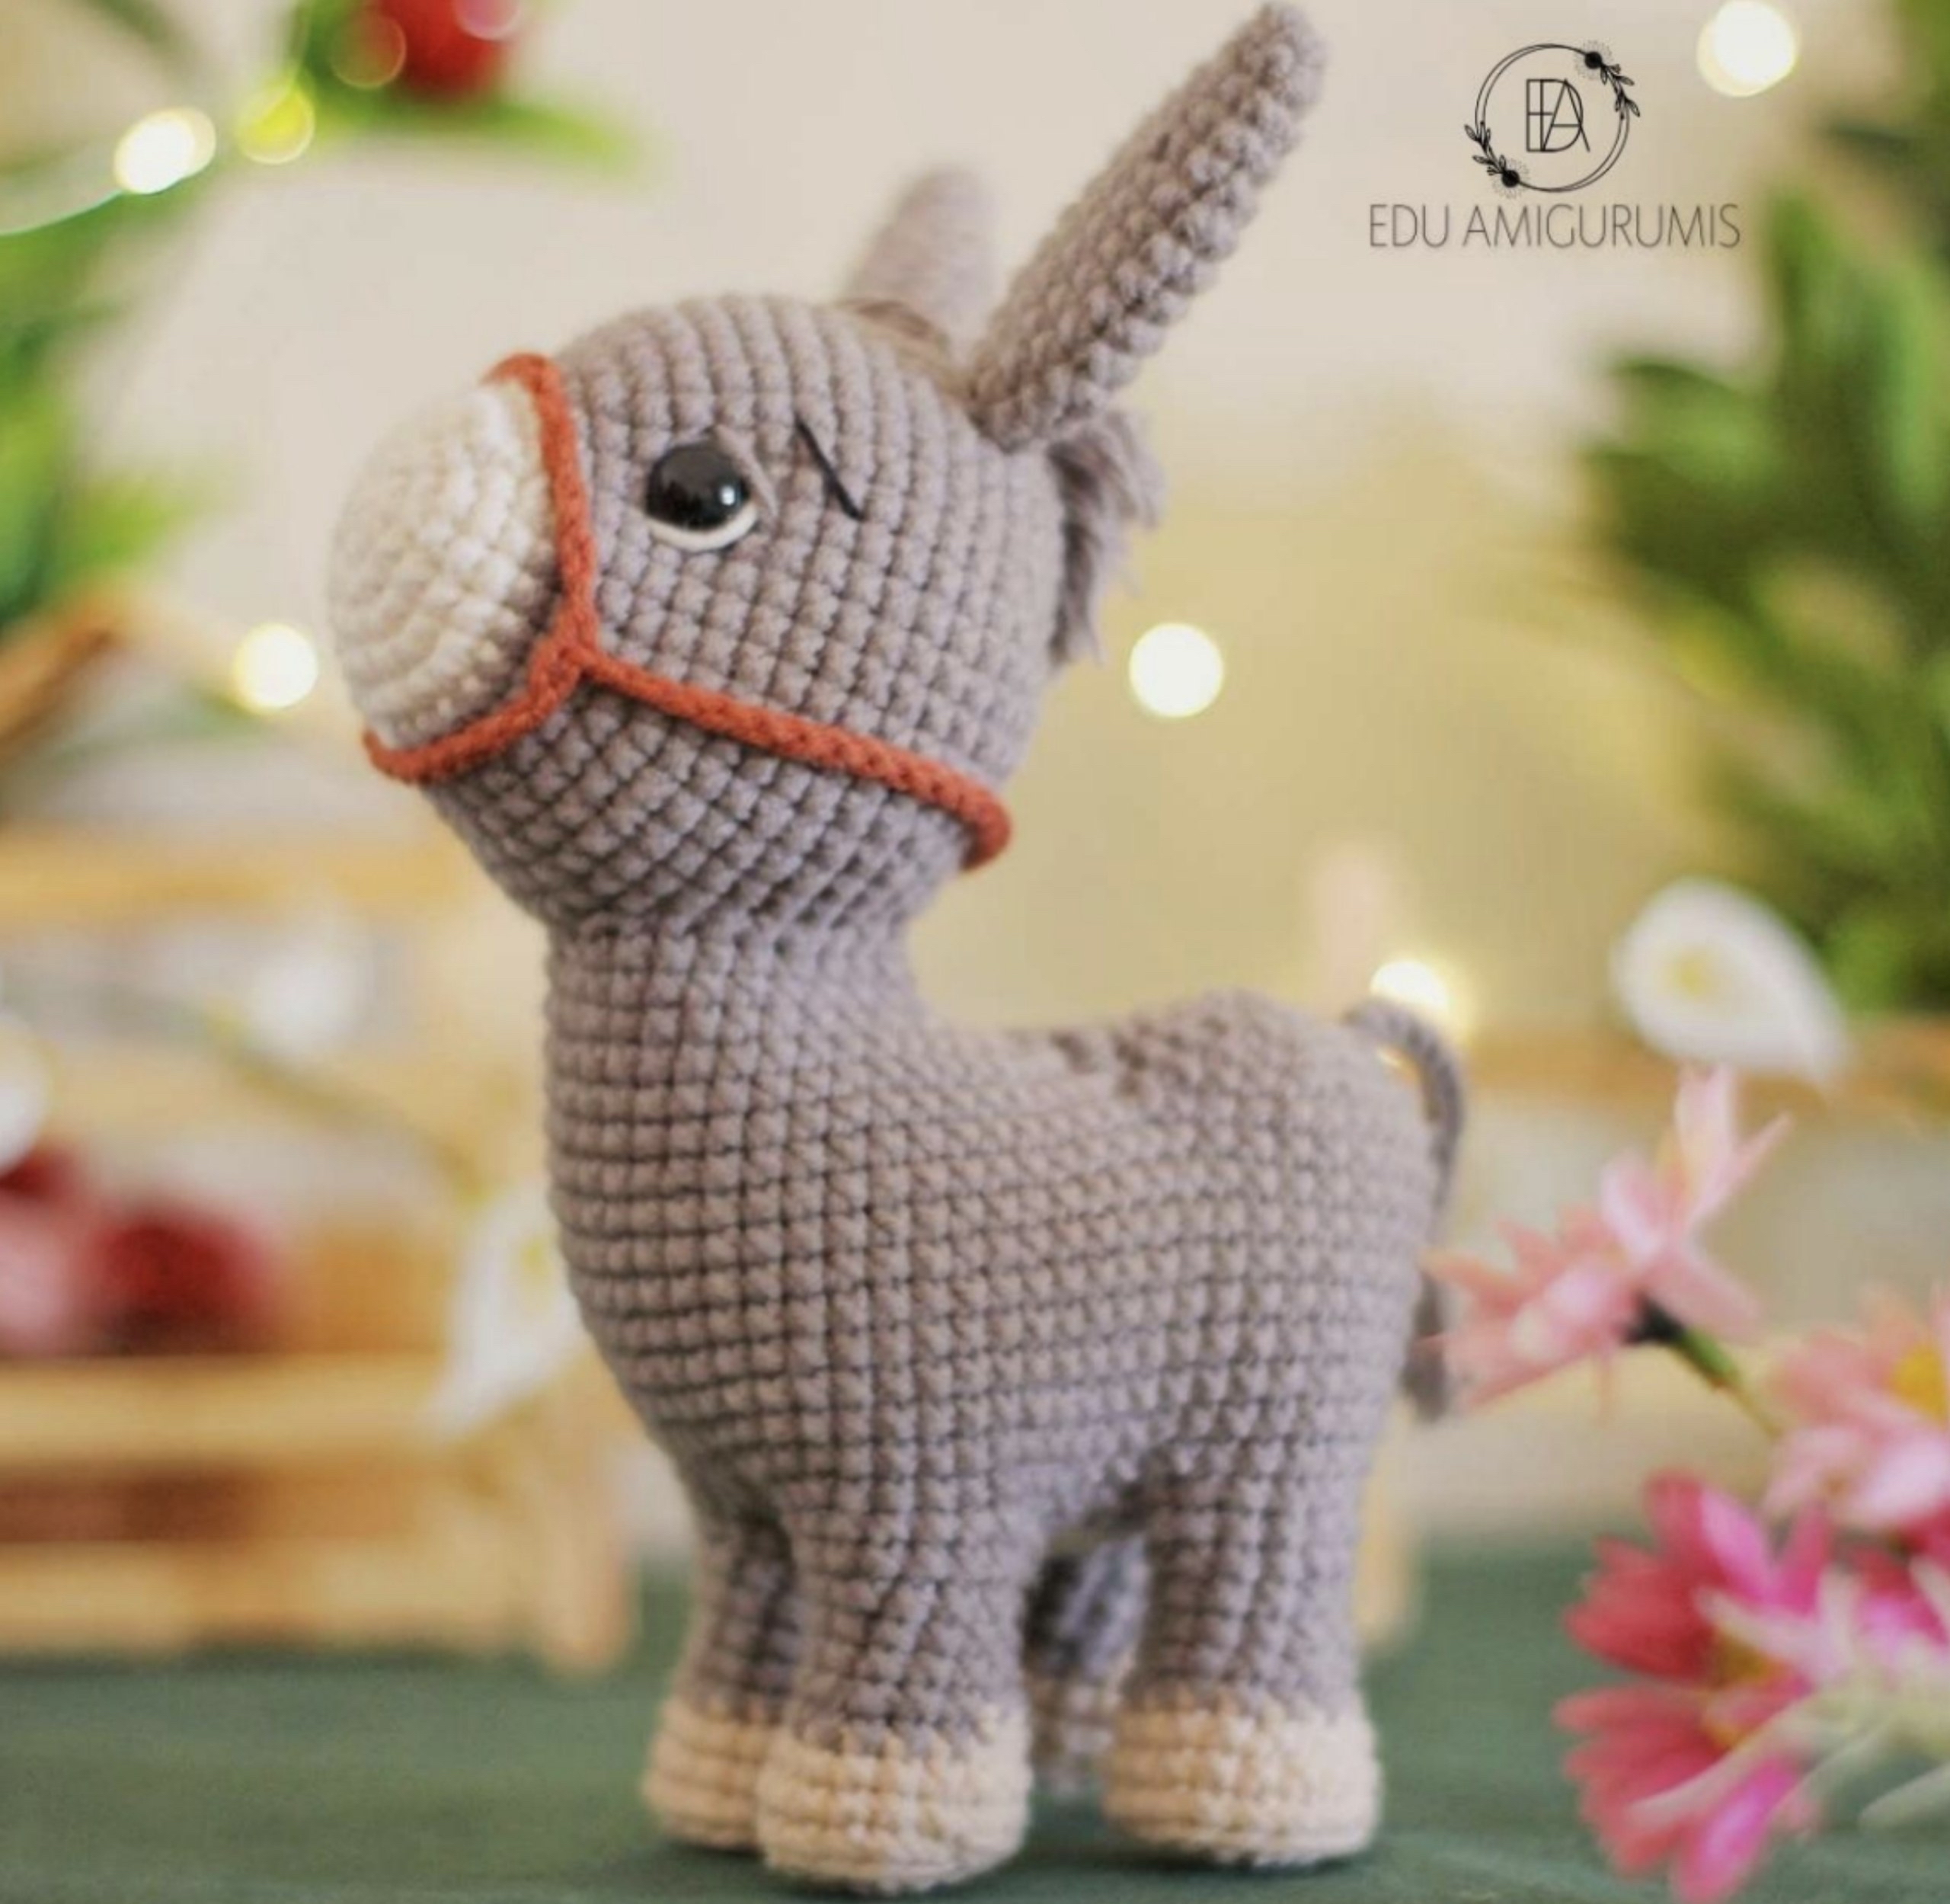
Looking for a charming new project to add to your amigurumi collection? This sweet little crochet donkey is the perfect companion for beginners and experienced makers alike. With his long ears, gentle expression, and tiny halter, he makes a wonderful gift for children, farm animal lovers, or a cozy addition to a nursery shelf. In this tutorial, we will walk you through every stitch to create your very own plush donkey friend!
Materials & Abbreviations
To get started, gather the following materials. We recommend using a soft acrylic or cotton blend yarn to give your donkey a cuddly feel.
Supplies Needed
- Yarn: Medium weight yarn in four colors:
- Grey (Main body color)
- Cream/White (Muzzle and belly)
- Beige/Peanut (Hooves)
- Brown (Halter)
- Crochet Hook: 2.5 mm (or a size that keeps your stitches tight so stuffing doesn’t show)
- Safety Eyes: 11 mm
- Stuffing: Polyfill or fiberfill
- Tools: Stitch markers, tapestry needle, sewing pins, and a small amount of craft glue
- Embroidery Thread: Black and white for facial details
US Crochet Terms & Abbreviations
- ch: chain
- sc: single crochet
- inc: increase (2 sc in one stitch)
- dec: decrease (sc 2 together)
- hdc: half double crochet
- sl st: slip stitch
- mr: magic ring
- BLO: back loop only
- st(s): stitch(es)
Finished Size: Approximately 7.5 inches tall.
Step-by-Step Instructions
The Head
Start with the Cream/White yarn.
- Round 1: 6 sc in mr (6)
- Round 2: 6 inc (12)
- Round 3: (1 sc, 1 inc) * 6 (18)
- Round 4: (2 sc, 1 inc) * 6 (24)
- Round 5: 24 sc (24)
- Round 6: (3 sc, 1 inc) * 6 (30)
Switch to Grey yarn.
- Round 7: 30 sc (30)
- Round 8: 12 sc, 6 inc, 12 sc (36)
- Round 9: 36 sc (36)
- Round 10: (5 sc, 1 inc) * 6 (42)
- Round 11: (6 sc, 1 inc) * 6 (48)
Eye Placement: Insert the safety eyes during Round 11. Place the first eye before the 2nd increase and the second eye after the 4th increase.
- Rounds 12–19: sc in each st around (48) — 8 rounds total
- Round 20: (6 sc, 1 dec) * 6 (42)
- Round 21: (5 sc, 1 dec) * 6 (36)
- Round 22: (4 sc, 1 dec) * 6 (30)
- Round 23: (3 sc, 1 dec) * 6 (24)
- Round 24: (2 sc, 1 dec) * 6 (18)
- Round 25: (1 sc, 1 dec) * 6 (12)
- Round 26: 6 dec (6)
Fasten off and close the hole using a magic ring technique or by sewing the remaining stitches together. Leave a tail for sewing to the body.
The Ears (Make 2)
Use Grey yarn.
- Round 1: 6 sc in mr (6)
- Round 2: 6 sc (6)
- Round 3: (1 sc, 1 inc) * 3 (9)
- Round 4: 9 sc (9)
- Round 5: (2 sc, 1 inc) * 3 (12)
- Rounds 6–12: sc in each st around (12) — 7 rounds total
- Round 13: (2 sc, 1 dec) * 3 (9)
- Round 14: 9 sc (9)
Fasten off with a slip stitch and leave a long tail for sewing. Sew the ears between rounds 18 and 19 of the head, aligned with the eyes, leaving a gap of 6 stitches between the two ears.
The Legs (Make 4)
Start with Beige/Peanut yarn.
- Round 1: 6 sc in mr (6)
- Round 2: 6 inc (12)
- Round 3: (1 sc, 1 inc) * 6 (18)
- Round 4: 18 sc in BLO (18)
- Round 5: 18 sc (18)
- Round 6: (4 sc, 1 dec) * 3 (15)
Switch to Grey yarn.
- Round 7: 15 sc (15)
- Round 8: (3 sc, 1 dec) * 3 (12)
- Rounds 9–10: sc in each st around (12) — 2 rounds total
- Round 11: (3 sc, 1 inc) * 3 (15)
- Round 12: 15 sc (15)
Fasten off each leg with a slip stitch. Do not stuff the legs fully yet; we will finish stuffing after they are attached to the body.
The Body and Leg Assembly
Start with Cream/White yarn.
- Round 1: Ch 6, work 4 sc in the chain, 3 sc in the last chain (to turn the corner), work along the other side of the chain: 3 sc, 1 inc (12)
- Round 2: 1 inc, 3 sc, 3 inc, 3 sc, 2 inc (18)
- Round 3: 1 sc, 1 inc, 3 sc, (1 sc, 1 inc) * 3, 3 sc, (1 sc, 1 inc) * 2 (24)
Switch to Grey yarn.
- Round 4: 2 sc, 1 inc, 3 sc, (2 sc, 1 inc) * 3, 3 sc, (2 sc, 1 inc) * 2 (30)
- Round 5 (Leg Attachment): 10 sc. Now, attach the first leg: skip 5 sts on the body, work 3 sc across the top of the leg, then work 3 sc back onto the body. Attach the second leg: 10 sc on body, skip 5 sts on body, work 2 sc on body, then work 10 sc across the leg. Attach the third leg: skip 5 sts on body, work 3 sc on body, then work 10 sc across the leg. Attach the fourth leg: skip 5 sts on body, work 2 sc (50 total)
- Round 6: (4 sc, 1 inc) * 6 (60)
Use your tapestry needle to sew the remaining unworked stitches of the legs to the skipped stitches on the body to ensure a secure fit. Now, stuff the legs and the body firmly.
- Rounds 7–14: sc in each st around (60) — 8 rounds total
- Round 15: 18 sc, ch 6, skip 24 sts, join with a sl st to the chain, work 1 sc in the chain, 17 sc (36 sc + 6 ch)
- Round 16: 18 sc, 6 sc in the chain, 18 sc (42)
- Round 17: 15 sc, 6 dec, 15 sc (36)
- Round 18: 12 sc, 6 dec, 12 sc (30)
- Round 19: 9 sc, 6 dec, 9 sc (24)
- Round 20: 24 sc (24)
- Round 21: 10 sc, 4 hdc, 10 sc (24)
Fasten off, leaving a long tail for sewing the head to the body.
The Rear and Tail
Attach Grey yarn to the first stitch after the chain 6 from Round 15 of the body.
- Round 16: 24 sc, then 6 sc along the chain (30)
- Round 17: (3 sc, 1 dec) * 6 (24)
- Round 18: (2 sc, 1 dec) * 2, 1 sc. Now, ch 11, work 10 sl st back down the chain. Work 1 sc into the body, 1 dec, (2 sc, 1 dec) * 3 (18)
- Round 19: (1 sc, 1 dec) * 6 (12)
- Round 20: 6 dec (6)
Fasten off and close the hole with a magic ring.
Finishing
Facial Details & Mane
Use your embroidery thread to bring your donkey to life:
- Eyes: Embroider eyelids and a small white “highlight” dot on each eye to make them look shiny.
- Nostrils: Embroider two small nostrils between rounds 4 and 5 of the head, centered between the eyes and about 3 stitches apart.
- Brows: Embroider small eyebrows between rounds 13 and 14.
- Mane: Attach grey yarn to round 18 of the head. Create a small mane by making 5 rows with 4 strands of yarn in each row.
- Tail: Add a few loose strands of grey yarn to the tip of the tail for a fluffy look.
The Halter
Using Brown yarn:
- Chain 36.
- Join with a sl st to the first chain to form a loop (ensure it isn’t twisted).
- Chain 42 more and join with a sl st to the other side.
- Carefully place the halter on the donkey’s head and sew or glue it in place.
Tips for Success
- Tension is Key: Keep your stitches tight so the stuffing doesn’t peek through, especially on the legs and body.
- Stuffing the Legs: Since the legs are attached to the body before being fully stuffed, use a chopstick or a long crochet hook to push the stuffing deep into the hooves.
- Shaping the Head: When sewing the head to the body, use pins to position it first. Ensure it is facing upward and centered for a balanced look.
- The “Ugly Phase”: Don’t worry if the body looks a bit strange during the leg attachment (Round 5). Once you finish the decreases and add the stuffing, the donkey will take its proper shape!