Easy Crochet Chevron Blanket Pattern: A Cozy Super Bulky Tutorial
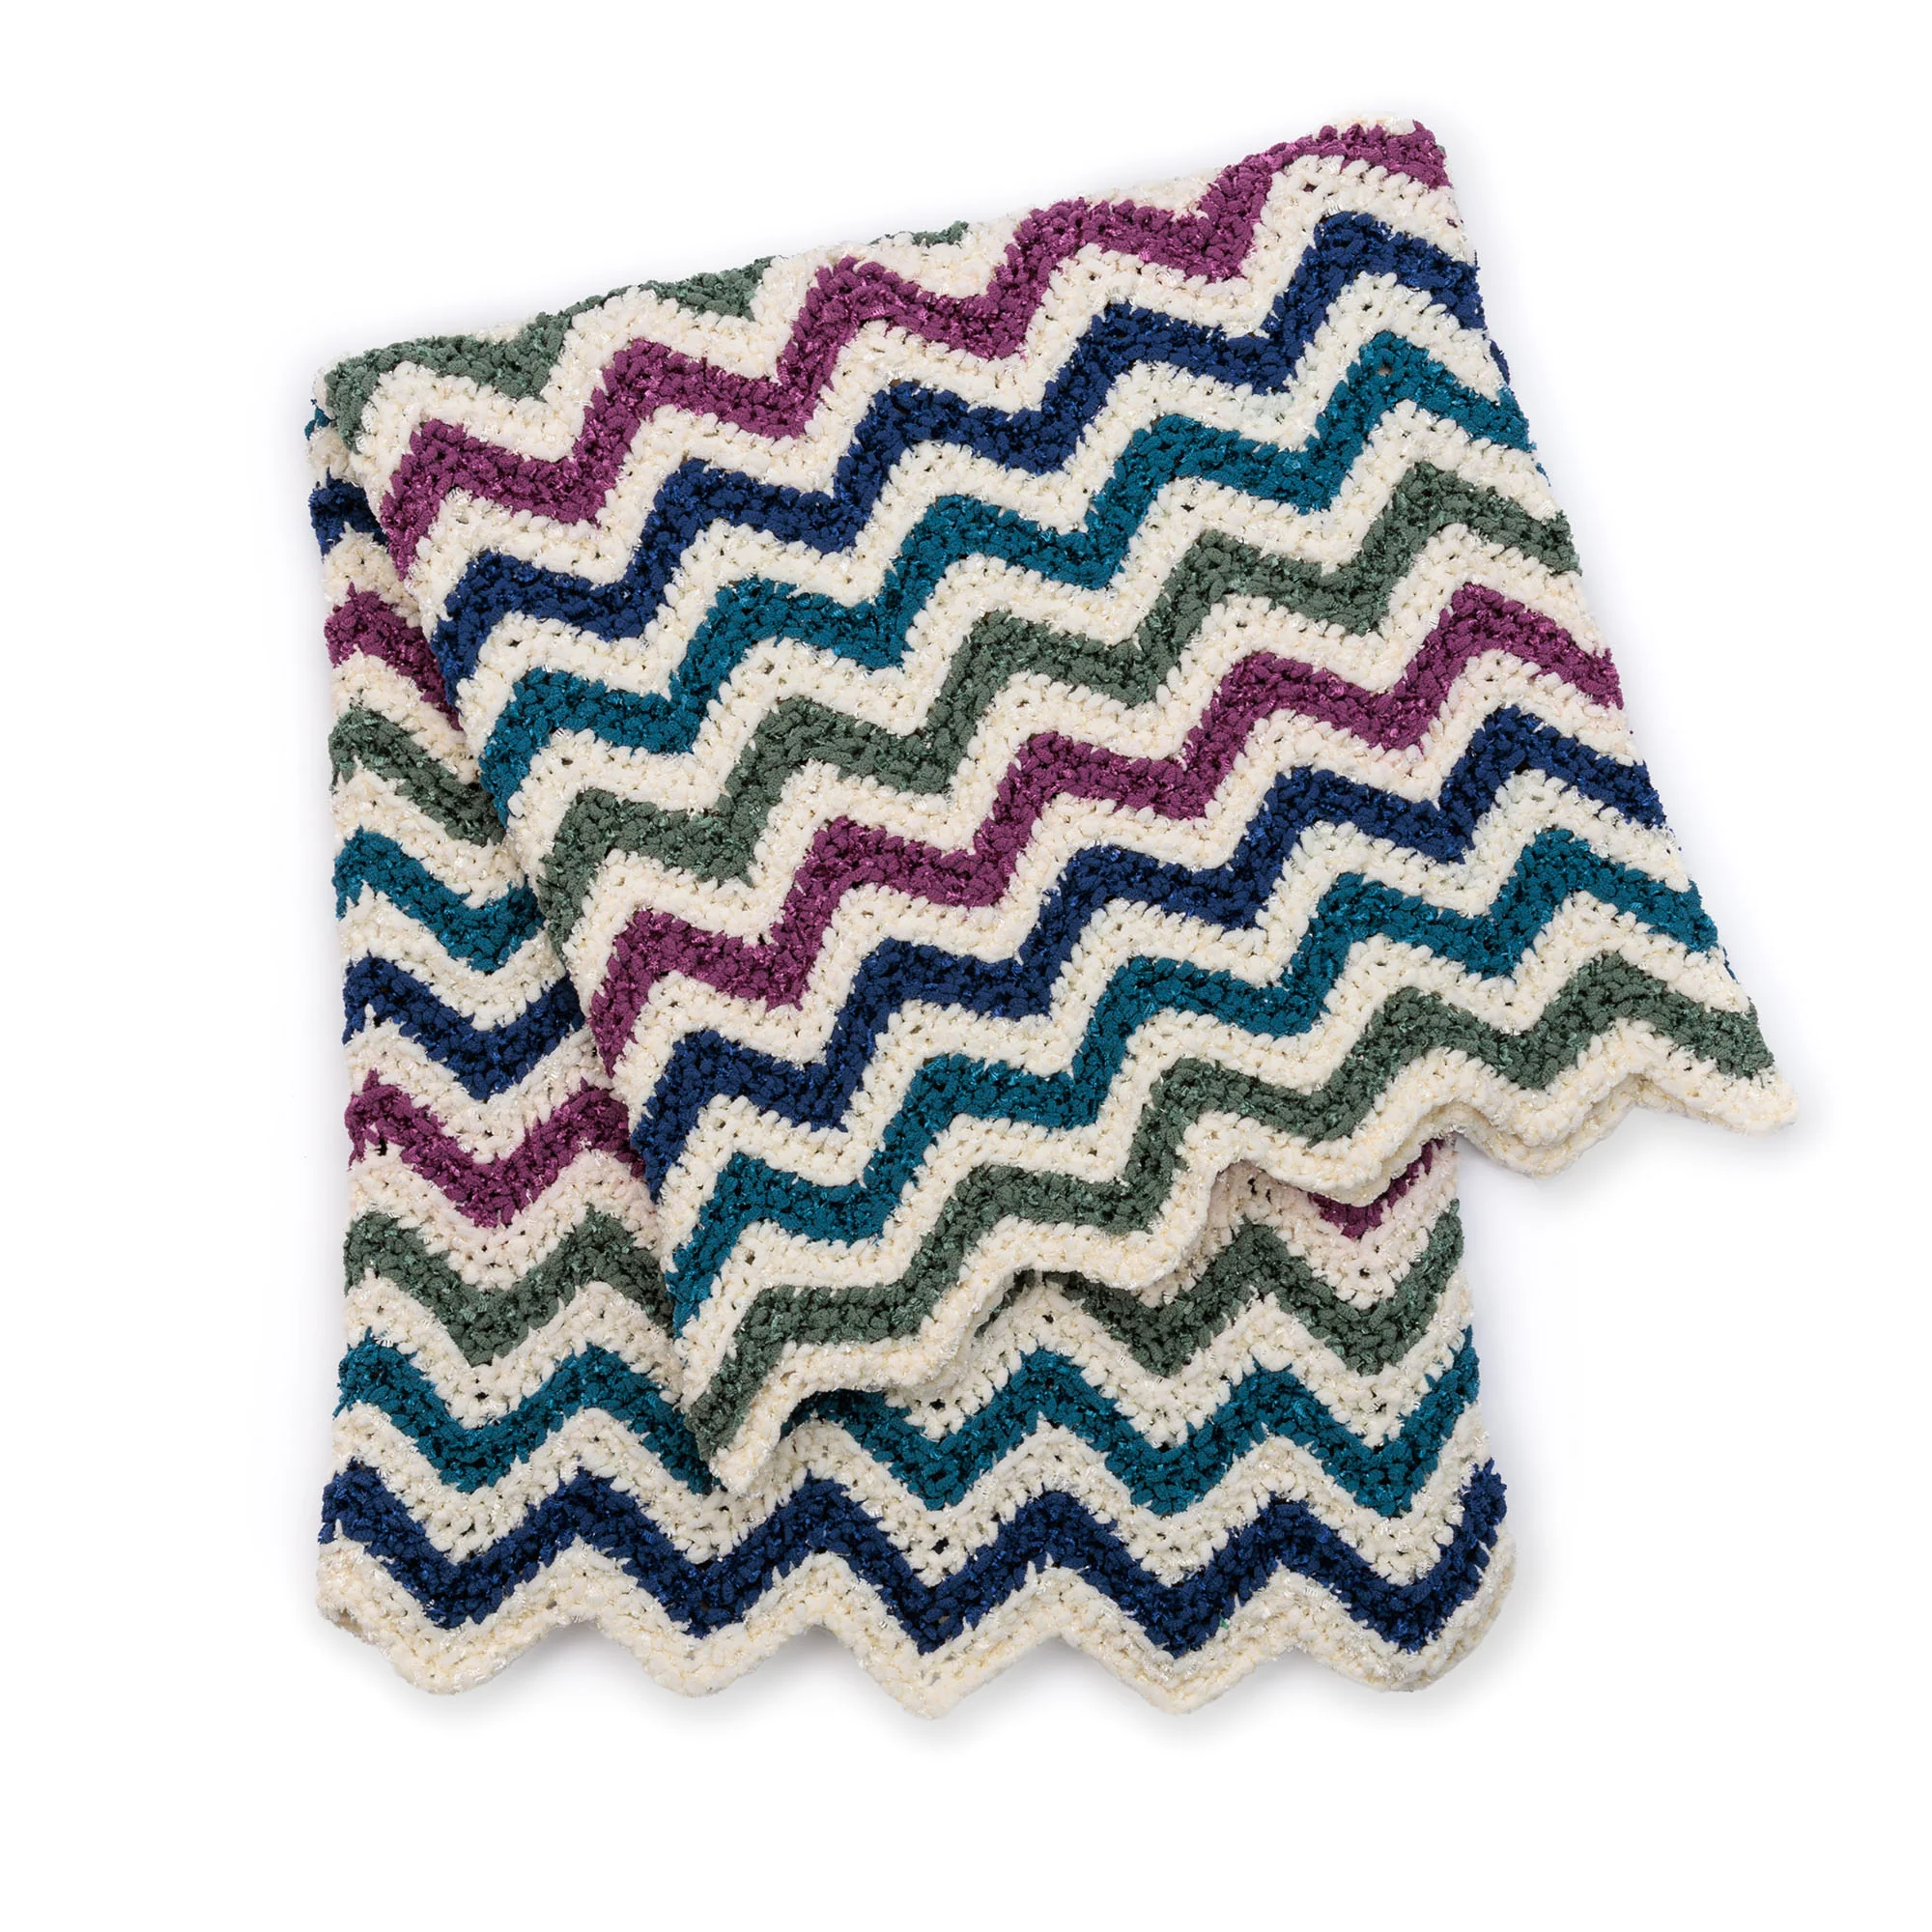
There is nothing quite like the feeling of a chunky, oversized blanket draped over your shoulders on a chilly evening. If you are looking for a project that combines a timeless aesthetic with a fast working pace, this Crochet Chevron Blanket is the perfect choice. Featuring a classic zigzag ripple design and worked with luxurious super bulky yarn, this blanket is as cozy to make as it is to use.
The beauty of this pattern lies in its simplicity. While chevron patterns can sometimes feel intimidating to beginners, this design relies on a basic sequence of single crochet stitches and a clever use of “back loop only” crochet to create a rich, ribbed texture. Because we are using a super bulky weight yarn, the project grows quickly, giving you that instant gratification every crafter loves. Whether you are making this as a housewarming gift or a treat for your own living room, this blanket is sure to become a favorite heirloom.
Materials & Abbreviations
To get started, you will need a few basic supplies. The key to this blanket’s plush feel is the super bulky yarn, which provides a weighted, comforting drape.
Supplies Needed
- Yarn: Super Bulky (Weight 6) yarn. To achieve the look in the tutorial, you will need a Main Color (MC) and four Contrast Colors (A, B, C, and D).
- Main Color (MC): Approximately 685 yards
- Contrast Color A: Approximately 175 yards
- Contrast Color B: Approximately 175 yards
- Contrast Color C: Approximately 175 yards
- Contrast Color D: Approximately 146 yards
- Crochet Hook: U.S. L/11 (8 mm) crochet hook (or the size needed to obtain your gauge).
- Notions: A large yarn needle for weaving in ends and a pair of scissors.
Measurements & Gauge
Finished Size: Approximately 50 inches wide by 58 inches long.
Gauge: 7 single crochet (sc) and 8 rows = 4 inches. If your gauge is too tight, try a larger hook; if it is too loose, try a smaller one to ensure your blanket ends up the correct size.
Abbreviations (US Terms)
- Beg: Beginning
- Ch: Chain
- Rep: Repeat
- RS: Right Side
- Sc: Single crochet
- St(s): Stitch(es)
- BLO: Back loop only
Step-by-Step Instructions
Before we dive into the rows, there are a few important notes to keep in mind for this specific pattern. First, almost all stitches in this blanket are worked into the back loops only (BLO). This creates the distinct ridges that make the chevron pop. Second, when changing colors, do not finish the last stitch of the previous color. Instead, work until there are two loops left on your hook, then pull the new color through those loops to start the next stitch. This ensures a seamless color transition. Finally, carry your Main Color (MC) loosely up the side of your work when it is not in use to avoid tension issues.
The Stripe Pattern
The blanket follows a specific color sequence. This 16-row repeat creates a balanced, rhythmic look. Follow this sequence throughout the project:
- Main Color (MC): 2 rows
- Contrast Color A: 2 rows
- Main Color (MC): 2 rows
- Contrast Color B: 2 rows
- Main Color (MC): 2 rows
- Contrast Color C: 2 rows
- Main Color (MC): 2 rows
- Contrast Color D: 2 rows
Creating the Blanket
The Foundation and Row 1
Using your Main Color (MC), begin by chaining 142. This number is a multiple of 14 chains plus 2, which is essential for the chevron shape to align perfectly.
Row 1 (RS): Start by working 2 sc in the 2nd chain from your hook. Now, we begin the chevron repeat: 1 sc in each of the next 6 chains, skip the next 1 chain, 1 sc in each of the next 6 chains, and then work 3 sc into the next chain. This creates the “peak” of the ripple. Repeat this sequence from the asterisk (*) to the end of the chain. For the very last repeat, finish by working 2 sc in the last chain. Turn your work.
Row 2 and the Texture Shift
Row 2 is where the magic happens. From this point forward, you will be working into the back loops only of every stitch.
Row 2: Chain 1. Working into the back loops only, work 2 sc in the first stitch. Now, begin the repeat: 1 sc in each of the next 6 sc, skip the next 2 sc (this creates the “valley” of the ripple), 1 sc in each of the next 6 sc, and 3 sc in the next sc. Repeat this across the row. For the final repeat, finish with 2 sc in the last stitch. Turn your work.
Building the Body
You have now completed the first two rows of your stripe pattern! To finish the blanket, simply continue repeating Row 2. While the stitch count and placements remain the same as Row 2, you will change your yarn colors according to the 16-row Stripe Pattern listed above.
Continue this process until your blanket measures approximately 58 inches from the beginning. To give the blanket a cohesive look, ensure that your final two rows are worked in the Main Color (MC).
Finishing
Once you have reached the desired length and finished your final two rows of the Main Color, it is time to wrap up. Cut your yarn, leaving a tail of about 6 to 8 inches. Pull the loop through to fasten off securely.
Using your yarn needle, weave all remaining ends into the body of the blanket. Because you used several different contrast colors, you will have a few ends to hide. Weave them in a zigzag motion through the stitches to ensure they stay locked in place and aren’t visible on the right side of the work.
Tips for Success
Handling Super Bulky Yarn
Super bulky yarn is wonderful for speed, but it can sometimes be heavy. To avoid “stretching” your blanket, try to keep your tension consistent. If you find your peaks are becoming too pointy or your valleys too wide, check your gauge again. Remember that the “skip 2” in Row 2 is what creates the dip—be careful not to skip more or fewer stitches.
Mastering the Back Loop Only (BLO) Technique
If you are new to BLO, simply insert your hook only into the loop furthest away from you. This leaves the front loop unworked, creating a horizontal ridge on the surface of the blanket. This technique is what gives the chevron a modern, knitted-look appearance and adds a lovely amount of stretch to the fabric.
Choosing Your Own Colors
While the suggested palette is beautiful, this pattern works with any color scheme. For a modern look, try a monochromatic palette using different shades of grey and blue. For something more vibrant, try a “rainbow” approach with bright primaries. Just remember to keep your Main Color as the anchor to tie the whole design together.