Adorable Crochet Christmas Tree Cupcake Pattern: A Beginner-Friendly Tutorial
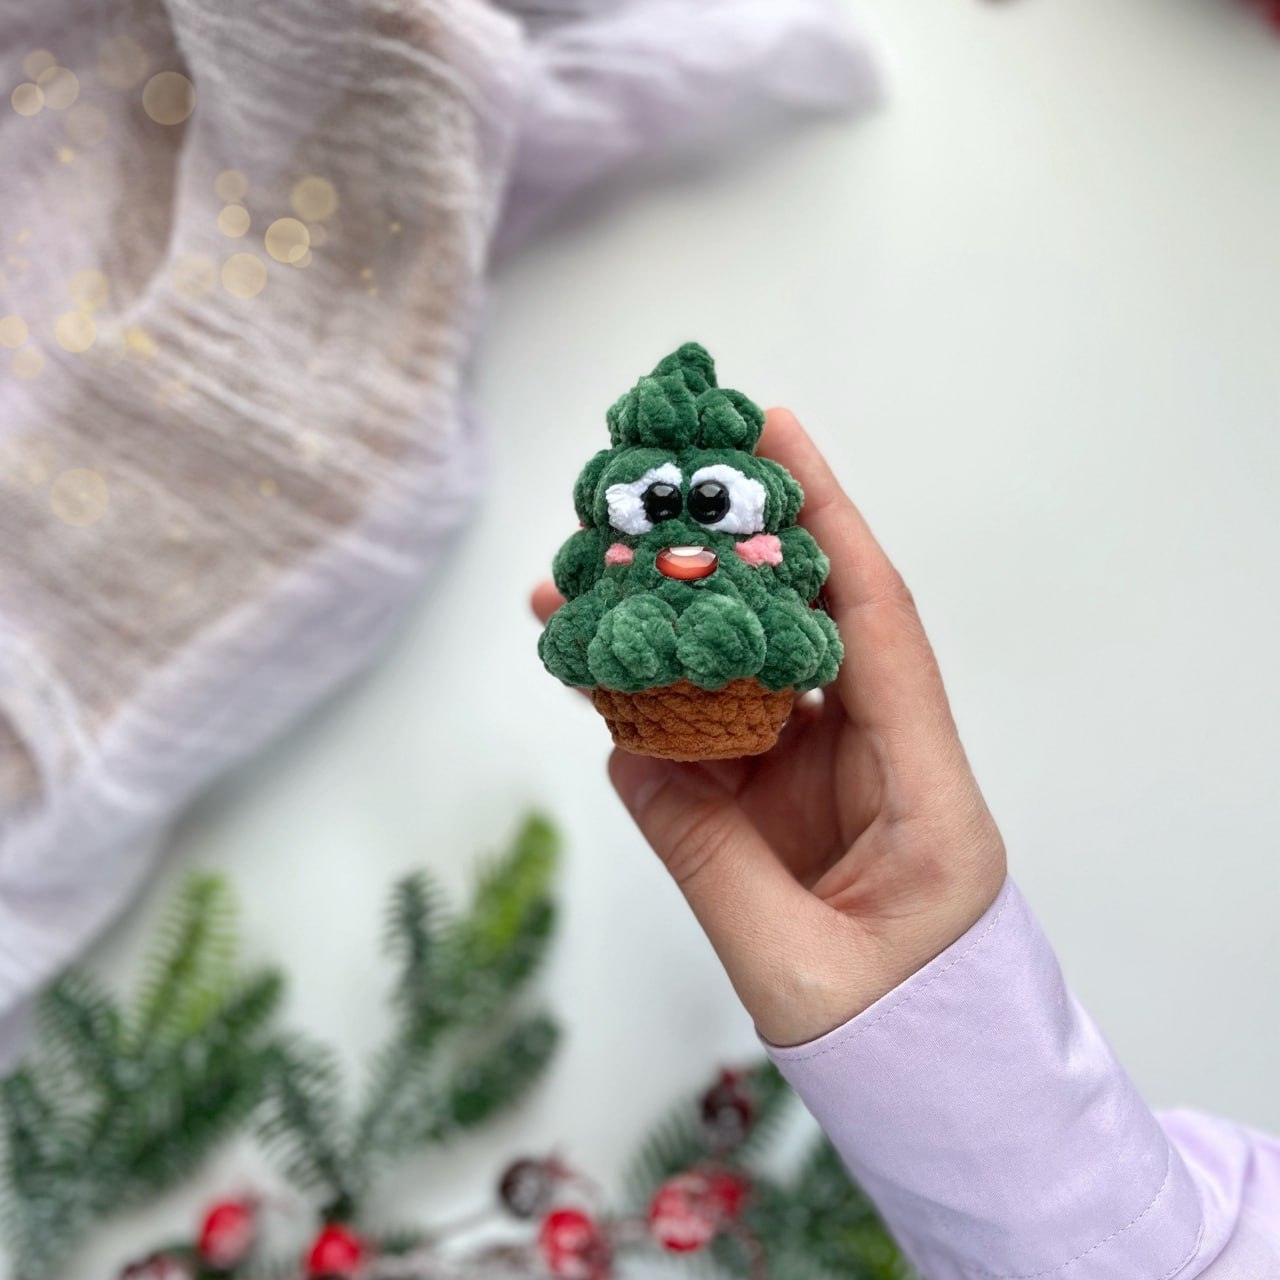
Looking for a quick and sweet holiday project? This Crochet Christmas Tree Cupcake is the perfect blend of festive charm and cozy texture. Whether you are looking to make unique ornaments for your tree, cute desk buddies, or handmade gifts for friends and family, this little plushie is a wonderful choice. Combining the look of a delicious cupcake with the spirit of a Christmas tree, this project uses plush yarn to create a soft, huggable result that looks professional but is surprisingly easy to make.
This pattern is designed for beginners and intermediate crocheters. We will be working in a continuous spiral, meaning you won’t need to join rounds with a slip stitch unless specifically mentioned. The final result is a tiny, festive treat measuring approximately 3.5 inches tall.
Materials & Abbreviations
Materials You Will Need
- Plush Yarn (Chenille/Velvet style):
- Brown (for the cupcake base)
- Green (for the tree frosting)
- White (a tiny amount for the eyes)
- Detail Yarn: Small scraps of pink, red, and white plush yarn for decorations, and a small amount of black cotton or acrylic yarn for facial details.
- Crochet Hook: 3.25mm to 3.5mm (Size D or E).
- Safety Eyes: 9mm black safety eyes.
- Optional: A 12mm safety mouth or black embroidery thread to sew a smile.
- Stuffing: High-quality polyester fiberfill.
- Tools: Stitch markers, scissors, and a large-eye yarn needle.
Abbreviations (US Terms)
- MR: Magic Ring
- sc: Single crochet
- inc: Increase (two single crochets in one stitch)
- dec: Decrease (two single crochets joined into one)
- sl st: Slip stitch
- dc: Double crochet
- FLO: Front loop only
- BLO: Back loop only
- Bobble: A cluster of double crochets worked into one stitch to create a “pop” of texture. (Unless otherwise noted, the bobbles in this pattern consist of 5 double crochets).
- St: Stitch
Step-by-Step Instructions
Part 1: The Cupcake Base
Start with the brown plush yarn. We will work from the bottom up in a spiral.
- Round 1: Create a MR and work 8 sc into the ring. (8 sts)
- Round 2: Work an increase (inc) in every stitch around. (16 sts)
- Round 3: You have two options for the bottom edge here:
- Option A (Simple): Working in the FLO of the previous round, work 16 sl st. Then, working in the BLO of the previous round, work 16 sc. (16 sts)
- Option B (Textured): Work 16 back post single crochets around the round. (16 sts)
- Round 4: (1 inc, 3 sc) repeat 4 times. (20 sts)
- Round 5: 20 sc around. (20 sts)
Pro Tip: Begin stuffing the cupcake base lightly with fiberfill now. Change your yarn color to green at the very end of Round 5. You can cut the brown yarn and weave in the ends.
Part 2: The Tree Frosting
Now we switch to the green yarn to create the textured “frosting” of our cupcake tree.
- Round 6: Working in the BLO for the entire round: (1 Bobble, 1 sc) repeat 10 times. (20 sts)
- Round 7: (3 sc, 1 dec) repeat 4 times. (16 sts)
- Round 8: (1 Bobble, 1 sc) repeat 2 times, 6 sc, (1 Bobble, 1 sc) repeat 3 times. (16 sts)
- Round 9: (2 sc, 1 dec) repeat 4 times. (12 sts)
Part 3: Creating the Face
Depending on how “silly” you want your tree to look, choose one of the following two eye options.
Option A: Classic Eyes
- Round 10: (1 Bobble, 1 sc) repeat 2 times, 4 sc, (1 Bobble, 1 sc) repeat 2 times. (12 sts)
- Placement: Insert your 9mm safety eyes between Round 9 and Round 10. Leave about 2 to 3 sc between the eyes.
Option B: “Funny” Eyes (with white crochet whites)
- Round 10:
- Using green yarn: (1 Bobble, 1 sc) repeat 2 times.
- Switch to white yarn: Work 1 Bobble (using 4 dc for this one), then switch back to green for 1 sc.
- Switch to white yarn: Work 1 Bobble (using 4 dc), then switch back to green for 1 sc.
- Using green yarn: (1 Bobble, 1 sc) repeat 2 times. (12 sts)
- Placement: Insert 9mm safety eyes centered over the white bobbles. Use a drop of glue to secure them.
Part 4: Finishing the Top
- Round 11: (1 dec, 1 sc) repeat 4 times. (8 sts)
- Round 12: (1 Bobble, 1 sc) repeat 4 times. (8 sts)
- Round 13: 4 dec. (4 sts)
Choosing Your Top Finish:
- Pointed Top: Round 14: (1 Bobble [using 3 dc], 1 sc) repeat 2 times. (4 sts)
- Flat Top: Stop at Round 13.
Fasten off, weave the tail through the remaining 4 stitches to close the hole tightly, and hide the end inside the body.
Finishing & Decorations
Now it’s time to bring your Christmas Tree Cupcake to life with some embroidery!
The Face
- Eye Details: Use a small piece of white yarn to embroider the white of the eyes if you chose the classic option. Use black yarn to add tiny eyelashes, a small nose, and a little smile.
- Cheeks: Using light pink plush yarn, make two small horizontal stitches just below the eyes to create cute, rosy cheeks.
The Festive Ornaments (Berries)
To add colorful “berries” to your tree:
- Cut a small piece of red, white, or pink plush yarn (about 1-2 inches).
- Tie 2 or 3 tight knots in the center of the piece to create a small, fuzzy ball.
- Using a yarn needle, sew these little balls onto the green branches of the tree in random spots.
- Ensure the ends of the yarn are tucked deeply into the plush fabric so they don’t pop out.
Tips for Success
- Working with Plush Yarn: Plush yarn can sometimes hide your stitches. Use a stitch marker in the first stitch of every round to keep track of your place.
- Stuffing: Stuff your cupcake firmly but gradually. If you overstuff, the plush yarn may stretch and show the white fiberfill through the stitches.
- The Bobble Stitch: To keep your bobbles consistent, make sure you pull the final loop of the bobble tight so the cluster “pops” outward.
- Customization: Feel free to experiment with colors! A pink “strawberry” tree or a blue “winter” tree would look just as cute.