Adorable Mini Ice Cream Cone Crochet Keychain Pattern: Easy Step-by-Step Tutorial
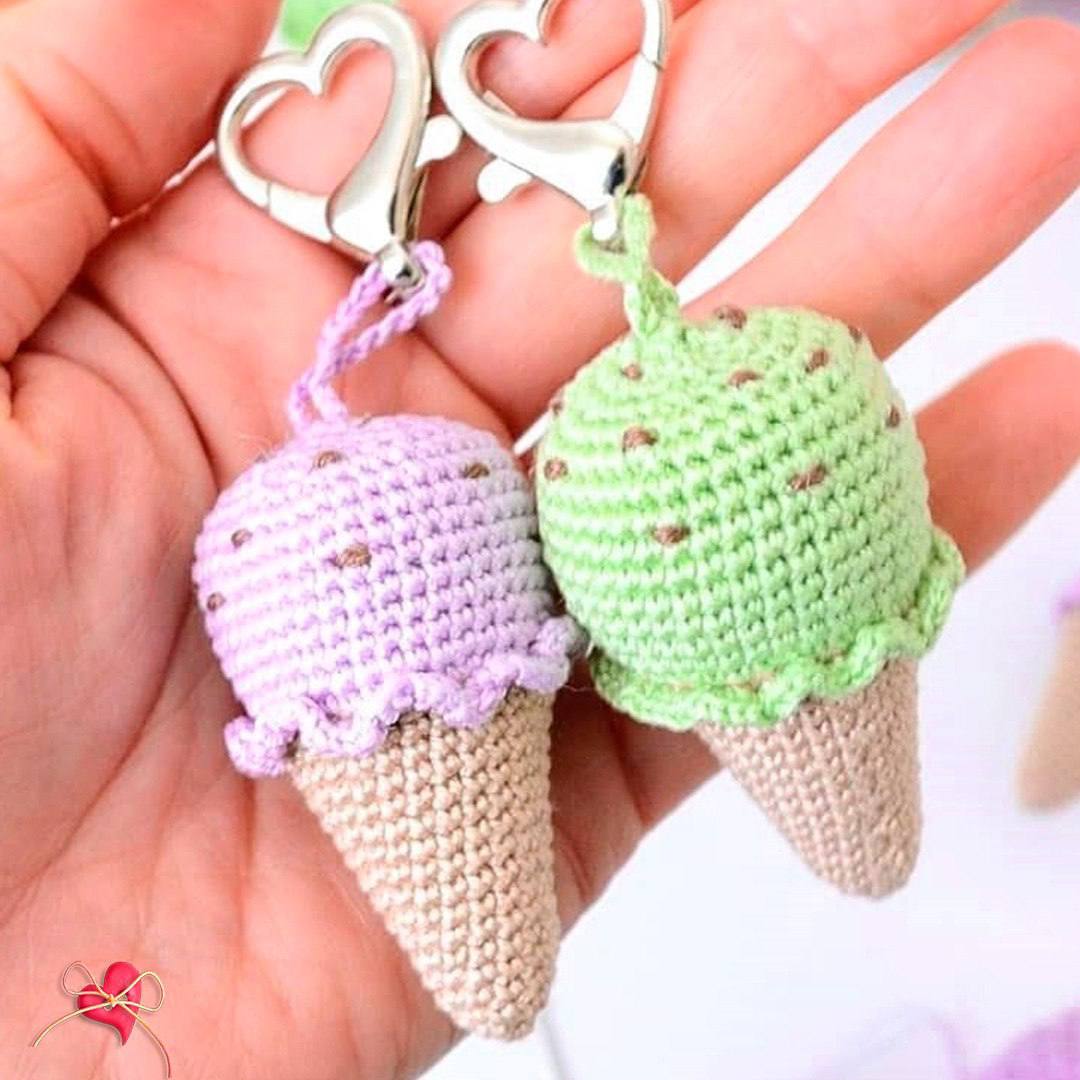
Looking for a quick, sweet, and satisfying crochet project? These mini ice cream cone keychains are the perfect addition to your crochet repertoire. Whether you are looking for a cute gift for a friend, a unique addition to your keys, or a small item to sell at your next craft fair, these little treats are sure to be a hit.
This pattern is designed to be beginner-friendly, utilizing basic amigurumi techniques to create a miniature dessert that looks professional and polished. Because these are so small, they work up incredibly fast, making them an ideal project for those “in-between” moments or for anyone who loves a quick win. In this tutorial, we will walk you through creating the crispy cone, the creamy scoop, and the final decorative touches that make this ice cream cone look delicious.
Materials & Abbreviations
To get that tight, structured look typical of amigurumi, you’ll want to use a hook that is slightly smaller than what the yarn label suggests. This prevents the stuffing from peeking through the stitches.
Materials Needed
- Yarn: 100% Cotton fingering weight or sport weight yarn. You will need a light brown (for the cone) and any bright color of your choice for the ice cream (purple, mint green, or yellow look great!).
- Embroidery Thread: A small amount of dark brown thread for the chocolate sprinkles.
- Crochet Hook: 1.0mm or 1.25mm crochet hook.
- Stuffing: A small amount of polyester fiberfill.
- Tools: A yarn needle, sharp scissors, and a heart-shaped keychain clasp (or any clasp of your choice).
Abbreviations (US Terms)
- MR: Magic Ring
- ch: chain
- sc: single crochet
- inc: increase (two single crochets in the same stitch)
- dec: decrease (single crochet two stitches together)
- BLO: Back Loop Only
- FLO: Front Loop Only
- ( ): Repeat the instructions inside the parentheses
- Stitch count: The number at the end of each row indicates the total number of stitches for that round.
Step-by-Step Instructions
We will work this project in continuous rounds. It is highly recommended to use a stitch marker to keep track of the beginning of each round.
Part 1: The Cone
Using your light brown yarn, begin by creating the cone. We will start with a small base and increase gradually to create the conical shape.
- Round 1: 6 sc in MR (6)
- Round 2: (1 sc, inc) * 3 (9)
- Round 3: (2 sc, inc) * 3 (12)
- Round 4: (3 sc, inc) * 3 (15)
- Round 5: 15 sc (15)
- Round 6: (4 sc, inc) * 3 (18)
- Round 7: 18 sc (18)
- Round 8: (5 sc, inc) * 3 (21)
- Round 9: 21 sc (21)
- Round 10: (6 sc, inc) * 3 (24)
- Round 11: 24 sc (24)
- Round 12: (7 sc, inc) * 3 (27)
- Round 13: 27 sc (27)
- Round 14: (8 sc, inc) * 3 (30)
- Rounds 15-17: 30 sc for 3 rounds (30)
Part 2: The Ice Cream Scoop
Now, switch to your chosen ice cream color. To create a clean transition and leave a ledge for the ruffle later, we will work the first round of the scoop in the back loops only.
- Round 18 (BLO): (2 sc, inc) * 10 (40)
- Rounds 19-26: 40 sc for 8 rounds (40)
- Round 27: (8 sc, dec) * 4 (36)
- Round 28: (4 sc, dec) * 6 (30)
- Round 29: (3 sc, dec) * 6 (24)
- Round 30: (2 sc, dec) * 6 (18)
Stop here to stuff! Fill the cone and the scoop firmly with fiberfill. Make sure to push the stuffing all the way to the bottom of the cone so it holds its shape.
- Round 31: (1 sc, dec) * 6 (12)
- Round 32: 6 dec (6)
Cut the yarn, leaving a long tail. Use your yarn needle to weave the tail through the remaining six stitches and pull tight to close the top of the scoop.
Part 3: The Hanging Loop
While you still have your yarn attached to the top of the scoop, we need to create the attachment point for the keychain.
- Chain 25: Chain 25 stitches to create a sturdy loop.
- Secure: Slip stitch back into the top of the scoop and fasten off securely.
Finishing Touches
The magic is in the details! Now we will add the “melting” ruffle and the chocolate sprinkles to bring the dessert to life.
Adding the Ruffle
Recall Round 18, where we worked in the back loops. There are now unused front loops available. Attach your ice cream color yarn to any front loop of Round 18.
- Work 3 sc into every single front loop around the circumference of the cone. This creates a wavy, ruffled edge that looks like melting ice cream.
- Fasten off and weave in your ends.
Adding the Sprinkles
Use your dark brown embroidery thread and a yarn needle. Using small, straight stitches, randomly embroider tiny “dashes” across the top of the ice cream scoop. These represent chocolate chips or sprinkles. Don’t overdo it—a few scattered dots give it a cute, artisanal look.
Final Assembly
Slide your heart-shaped keychain clasp through the chain loop you created earlier. Secure the clasp tightly. Your mini ice cream cone is now ready to hang!
Tips for Success
To ensure your crochet keychain looks its best, keep these few tips in mind:
- Tight Tension: Amigurumi requires tight stitches. If you notice holes in your work, try a smaller hook or tighten your tension.
- Consistent Stuffing: Use a chopstick or a similar tool to push the stuffing into the narrow point of the cone to avoid any flat spots.
- Color Combinations: Get creative with your colors! Use a mint green for pistachio, a light pink for strawberry, or a pale yellow for lemon. You can even make a “Neapolitan” version by changing colors every few rounds of the scoop.
- Invisible Decreases: For a smoother look, use the “invisible decrease” method (inserting the hook into the front loop of the next stitch instead of over the top of both).