Adorable Crochet Capybara Pattern: A Step-by-Step Amigurumi Tutorial
If you have been following the internet trends lately, you know that capybaras are absolutely taking the world by storm! These giant, friendly rodents are the ultimate symbols of relaxation and peace. What better way to celebrate these lovable creatures than by making your very own tiny, crochet capybara? This amigurumi project is not just a fun craft; it is a heartwarming little companion that is perfect for your desk, a bookshelf, or as a gift for a friend.
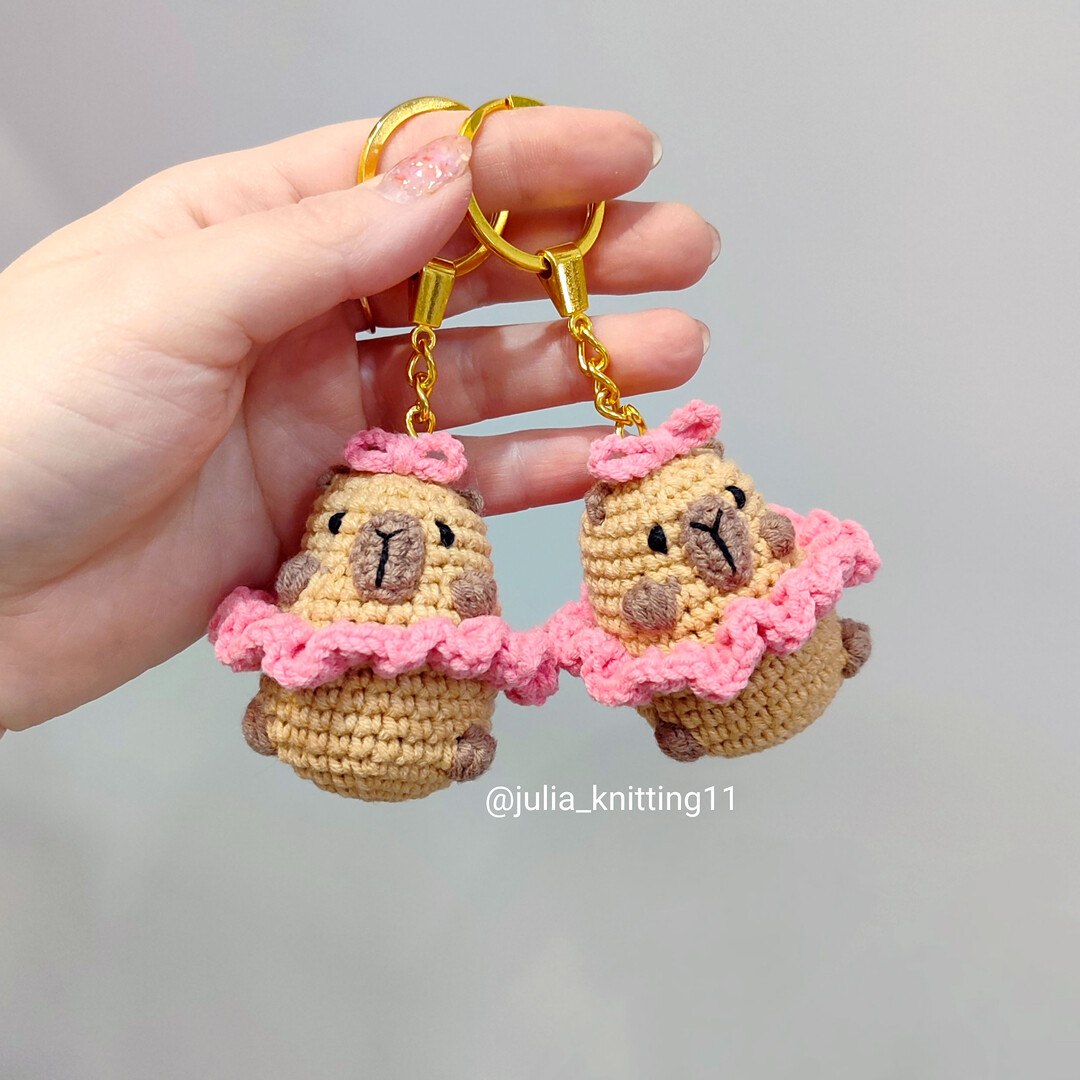
In this detailed tutorial, we are going to create a miniature capybara wearing a charming pink tutu and a tiny bow. This pattern is designed with beginners in mind, using standard crochet techniques. By the end of this guide, you will have a pocket-sized friend that measures roughly 3 to 4 inches tall—the perfect size for any collection!
Materials & Abbreviations
Before we pick up our hooks, let’s make sure you have everything you need. Because this is a small amigurumi project, using a smaller hook will help keep your stitches tight so that the stuffing doesn’t peek through.
Yarn Requirements
For the best results, I recommend using a fine weight cotton yarn (such as Yarn Art Jeans or similar). You will need three colors:
- Beige/Tan: For the main body.
- Brown: For the little paws, muzzle, and ear details.
- Pink: For the ruffled skirt (tutu) and the adorable hair bow.
- Black Embroidery Floss: For detailing the eyes and the nose.
Tools
- Crochet Hook: 2.0 mm (approximately a B-1 hook).
- Stuffing: Polyester fiberfill to make your capybara nice and squishy.
- Tapestry Needle: For sewing parts together and weaving in ends.
- Scissors.
US Crochet Abbreviations
Please ensure you are using US terms for this pattern to avoid confusion:
- MR: Magic Ring
- ch: Chain
- sc: Single crochet
- dc: Double crochet
- sl st: Slip stitch
- inc: Increase (2 sc in the same stitch)
- dec: Decrease (sc 2 together)
- BLO: Back Loops Only
- FLO: Front Loops Only
- Cluster Stitch (Fluffy Stitch): A group of 4 dc worked into a single stitch, then joined at the top to create a textured “fluff.”
Step-by-Step Instructions
The Body
We will start the body with the beige yarn. We are working in continuous rounds, so do not join with a slip stitch at the end of each round unless specified.
Round 1: Make a Magic Ring and work 6 sc into it. (6)
Round 2: 6 inc in the ring. (12)
Round 3: (1 sc, inc) repeat 6 times. (18)
Round 4: (2 sc, inc) repeat 6 times. (24)
Round 5: (3 sc, inc) repeat 6 times. (30)
Round 6 (Color Change): This round creates the cute spots on the capybara.
- Work 9 sc in beige.
- In the next stitch, work a Cluster Stitch using brown yarn.
- Work 10 sc in beige.
- In the next stitch, work a Cluster Stitch using brown yarn.
- Work 9 sc in beige. (30)
Rounds 7-10: Work 30 sc in beige for 4 rounds.
Round 11 (BLO): Work 30 sc into the Back Loops Only. This creates a ridge where the skirt will eventually attach.
Round 12: (8 sc, dec) repeat 3 times. (27)
Round 13 (Color Change):
- Work 10 sc in beige.
- Work a brown Cluster Stitch in the next stitch.
- Work 7 sc in beige.
- Work a brown Cluster Stitch in the next stitch.
- Work 8 sc in beige. (27)
Round 14: (7 sc, dec) repeat 3 times. (24)
Rounds 15-17: Work 24 sc in beige for 3 rounds.
Round 18: (2 sc, dec) repeat 6 times. (18)
Round 19: (1 sc, dec) repeat 6 times. (12)
Round 20: 6 dec. (6)
Fasten off, leaving a long tail for sewing. Stuff the body firmly with fiberfill before closing the hole completely. Weave in your ends securely.
The Ruffled Skirt (Tutu)
To give your capybara that ballerina look, we will go back to the ridge we created in Round 11.
Join your pink yarn to the Front Loops Only of Round 11. In every single stitch around, work 3 dc into the same stitch. This will create a beautiful, voluminous ruffle that circles the waist. Fasten off and weave in the ends.
The Muzzle
We will use the brown yarn for this part.
Chain 4. Starting from the second chain from your hook:
- Work 2 sc.
- In the very last chain, work 3 sc.
- Work 1 sc.
- Work 1 inc.
This should give you a total of 8 stitches. Sew this piece onto the front of the face. Once attached, use your black embroidery floss to stitch a small nose and two little eyes to bring your capybara to life!
The Ears
Attach your brown yarn to Round 18 of the body using a slip stitch. Chain 3, then work 1 sc into the same stitch on Round 19. Fasten off and hide the yarn tail inside the body.
The Hair Bow
Using your pink yarn, chain 16. Tie the two ends together to form a loop. Take a separate piece of pink yarn and wrap it tightly around the middle of your chain loop to create the “knot” shape. Once secure, sew the bow onto the top of the capybara’s head.
Finishing
Now comes the best part: assembly! Take your time when sewing the muzzle and the ears. A little bit of asymmetry can actually make your amigurumi look even more “handmade” and charming. Ensure your bow is centered, and your tutu is fluffed out to its full potential. Once you’ve checked that all your ends are tucked away, your little capybara is ready for its forever home!
Tips for Success
If you are new to amigurumi, don’t be discouraged if your first attempt isn’t perfect! Here are a few expert tips to help you along:
- Tension is Key: Try to keep your stitches consistent. If your stitches are too loose, the stuffing will show. If they are too tight, it might be hard to insert your hook.
- Use Stitch Markers: In amigurumi, it is very easy to lose track of which round you are on. Use a stitch marker or a scrap piece of yarn to mark the beginning of each round.
- Stuffing Technique: When stuffing, push the fiberfill into the corners and crevices of the body. This prevents the capybara from looking lumpy.
- The “Fluffy Stitch”: When working the cluster stitch, make sure you are working all 4 double crochets into the exact same stitch to get that wonderful textured look.