Adorable Crochet Llama Brooch Pattern: An Easy Amigurumi Tutorial
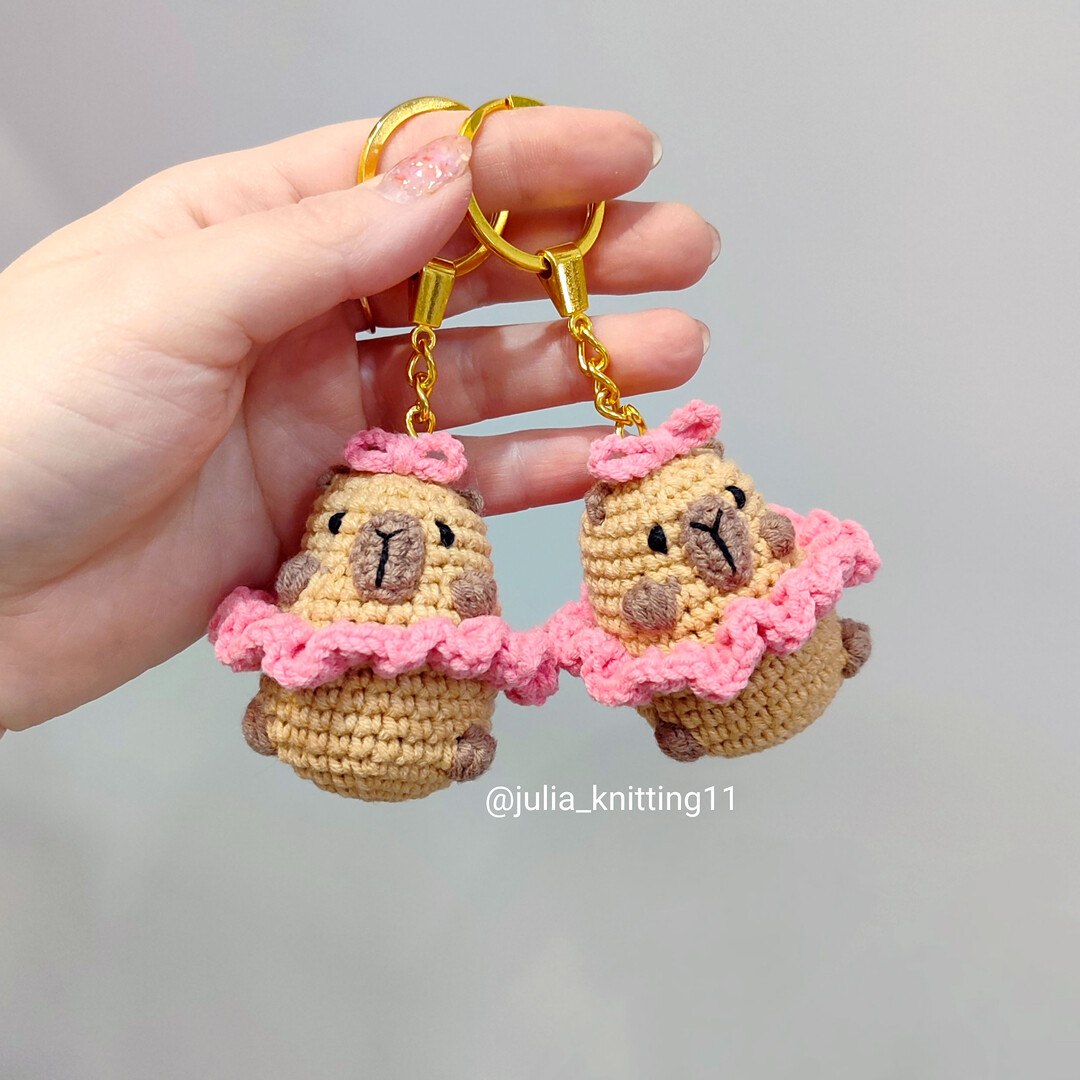
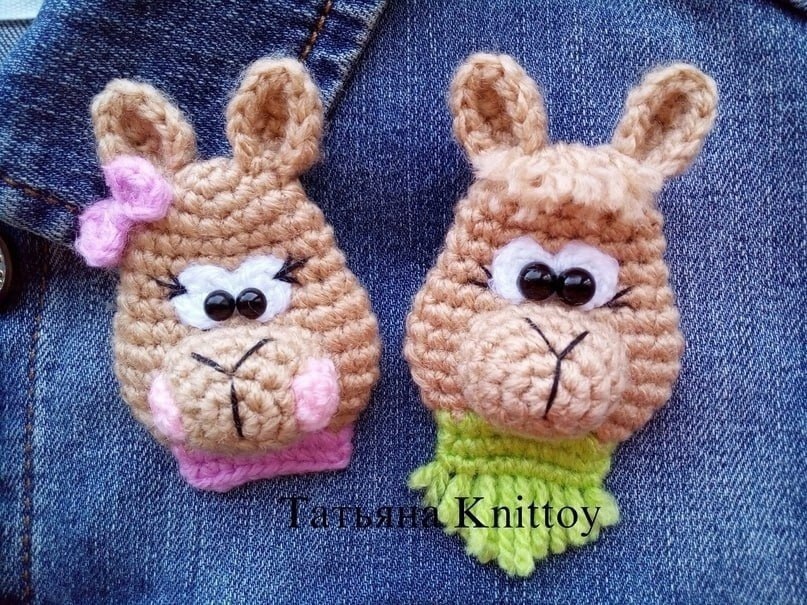
Are you looking for a quick, adorable, and versatile crochet project? This mini crochet llama brooch is the perfect solution! Whether you want to create a sweet little lady llama with a pink bow or a spunky little boy llama with a fuzzy tuft of hair, this pattern is designed to be fun and accessible for beginners and intermediate crocheters alike. These tiny llamas make wonderful accessories for denim jackets, backpacks, or even as unique gifts for friends and family.
Because of their small size—measuring approximately 2.4 inches—these llamas are worked quickly, making them an excellent “stash-buster” project. You can customize the colors to suit your style, creating a whole herd of unique little friends. In this tutorial, we will walk you through every single step, from the magic ring to the final embroidery, ensuring you have a professional-looking result every time.
Materials and Abbreviations
To achieve the clean, tight stitches required for amigurumi, I recommend using a fine yarn and a small hook. This prevents the stuffing from peeking through your stitches.
Required Materials
- Main Color Yarn: Medium brown acrylic yarn (approximately 52 yards / 48 meters).
- White Yarn: For the eyes (approximately 52 yards / 48 meters).
- Accent Yarn (Girl Version): Light pink for cheeks and a darker pink for the bow and collar (approximately 52 yards / 48 meters each).
- Accent Yarn (Boy Version): Light green for the scarf (approximately 52 yards / 48 meters).
- Light Pink Yarn: For the adorable cheeks.
- Crochet Hook: 1.5mm (or a size appropriate for your yarn to ensure tight tension).
- Safety Eyes: 0.2-inch (5mm) diameter eyes, or small black beads.
- Embroidery Thread: Black thread for the nose and eyelashes.
- Stuffing: Small amount of polyester fiberfill.
- Brooch Hardware: A pin back or brooch base.
- Tools: A tapestry needle and scissors.
US Crochet Abbreviations
Please ensure you are using US terms to follow this pattern accurately:
- MR: Magic Ring
- ch: Chain
- sc: Single crochet
- hdc: Half double crochet
- dc: Double crochet
- inc: Increase (2 sc in the same stitch)
- dec: Decrease (sc 2 together)
- sl st: Slip stitch
- st(s): Stitch(es)
Step-by-Step Instructions
Note: All parts are worked in a continuous spiral. Do not join rounds with a slip stitch unless otherwise instructed.
The Head
The head forms the base of our llama. While we will stuff the muzzle later, the head itself should remain relatively flat to act as the body/base for the brooch.
- Start with a MR and work 6 sc into the ring.
- Round 1: 12 sc (inc in every stitch).
- Round 2: 18 sc (inc in every 2nd stitch).
- Rounds 3-6: 18 sc.
- Round 7: 24 sc (inc in every 3rd stitch).
- Round 8: 30 sc (inc in every 4th stitch).
- Rounds 9-10: 30 sc.
- Round 11: 24 sc (dec in every 4th stitch).
- Round 12: 18 sc (dec in every 3rd stitch).
- Round 13: 12 sc (dec in every 2nd stitch).
Note: Do not stuff the head at this stage.
The Muzzle
The muzzle adds the 3D character to the llama’s face.
- Using the brown main color, start with a MR and work 6 sc into the ring.
- Round 1: 12 sc (inc in every stitch).
- Round 2: 18 sc (inc in every 2nd stitch).
- Rounds 3-4: 18 sc.
Lightly stuff the muzzle with fiberfill before you finish the round. Once finished, sew the muzzle onto the center of the head.
The Eyes
Using the white yarn, create the eye patches.
- Start with a MR and work 6 sc into the ring.
- Fasten off, leaving a long tail for sewing.
Sew these white circles onto the head, just above the muzzle. Once the white circles are in place, glue or sew your 5mm safety eyes (or black beads) into the center of the white patches.
The Ears
We will make two ears using the brown main color.
- Start with a MR and work 6 sc into the ring.
- Round 1: 2 sc in the 1st st, 2 hdc in the 2nd st, 3 dc in the 3rd st, 2 hdc in the 4th st, and 2 sc in the 5th st.
To give the ears their shape, fold the edges toward each other (connecting stitch 1 to stitch 11) and sew them closed. Once shaped, sew the ears to the top of the head.
The Girl’s Accessories: Bow and Scarf
For the girl version, we will use pink yarn to add charm.
The Collar/Scarf
- Switch to pink yarn and continue from the bottom of the head.
- Round 14: 18 sc (inc in every 2nd stitch).
- Fold the piece in half and sew it shut through 9 stitches to create a small collar.
The Bow
- Ch 2, then ch 2 more for height.
- In the 2nd ch from the hook, work 2 hdc and 2 ch to form the loop.
- Sl st into the 1st ch to secure.
- Repeat this process to create a second loop, then join them together.
- Sew the bow onto one of the ears.
The Boy’s Accessories: Hair and Scarf
If you are making the boy version, follow the instructions above but use green yarn for the scarf. Additionally, follow these steps for his hair tuft:
The Hair Tuft (Chub)
- Cut 4 strands of yarn, each approximately 1.2 inches (3 cm) long.
- Fold the strands in half.
- Using your crochet hook, pull the folded loop through a small gap between the ears on the head.
- Pull the two loose ends through the loop you just created and tug gently to create a knot.
- Trim the ends and use your fingers to “fluff” the hair out.
The Boy’s Scarf
The boy’s scarf is made using the same “fringe” method as the hair. Cut 9 strands of green yarn, secure them to the neck area, and trim them into a triangle shape for a stylish look.
The Cheeks
Using light pink yarn, start with a MR and work 6 sc into the ring. Fasten off and sew these small circles to the sides of the muzzle to give your llama a blushing, happy expression.
Finishing
Now it is time for the final details that bring your llama to life!
- Embroidery: Using black embroidery thread, sew a “Y” shape onto the muzzle to create the nose and mouth. You can also add small, delicate lines extending from the eyes to create eyelashes.
- Assembly Check: Ensure all parts are securely attached. If any part feels loose, reinforce it with a few extra stitches or a tiny bit of glue.
- Brooch Attachment: Turn the llama over to the back. Glue or sew your brooch pin/base to the center of the back. Make sure it is centered so the llama sits straight when pinned to clothing.
Tips for Success
To make your crochet llamas look as polished as possible, keep these tips in mind:
- Tension is Key: When working with such small pieces, try to keep your tension consistent. If your stitches are too loose, the stuffing will show; if they are too tight, it may be difficult to manipulate the hook.
- Invisible Decreases: For a smoother look, use the “invisible decrease” method (inserting the hook into the front loops only of the next two stitches) to avoid small gaps in the head and muzzle.
- Customization: Don’t be afraid to get creative! You can add tiny hats, different colored scarves, or even tiny flowers to make your llamas truly one-of-a-kind.
- Safety First: If you are making these for small children, avoid using plastic safety eyes. Instead, embroider the eyes with black yarn to ensure there are no small parts that could pose a choking hazard.