Amigurumi Baby Tiger Crochet Pattern: A Cute Mini Tutorial
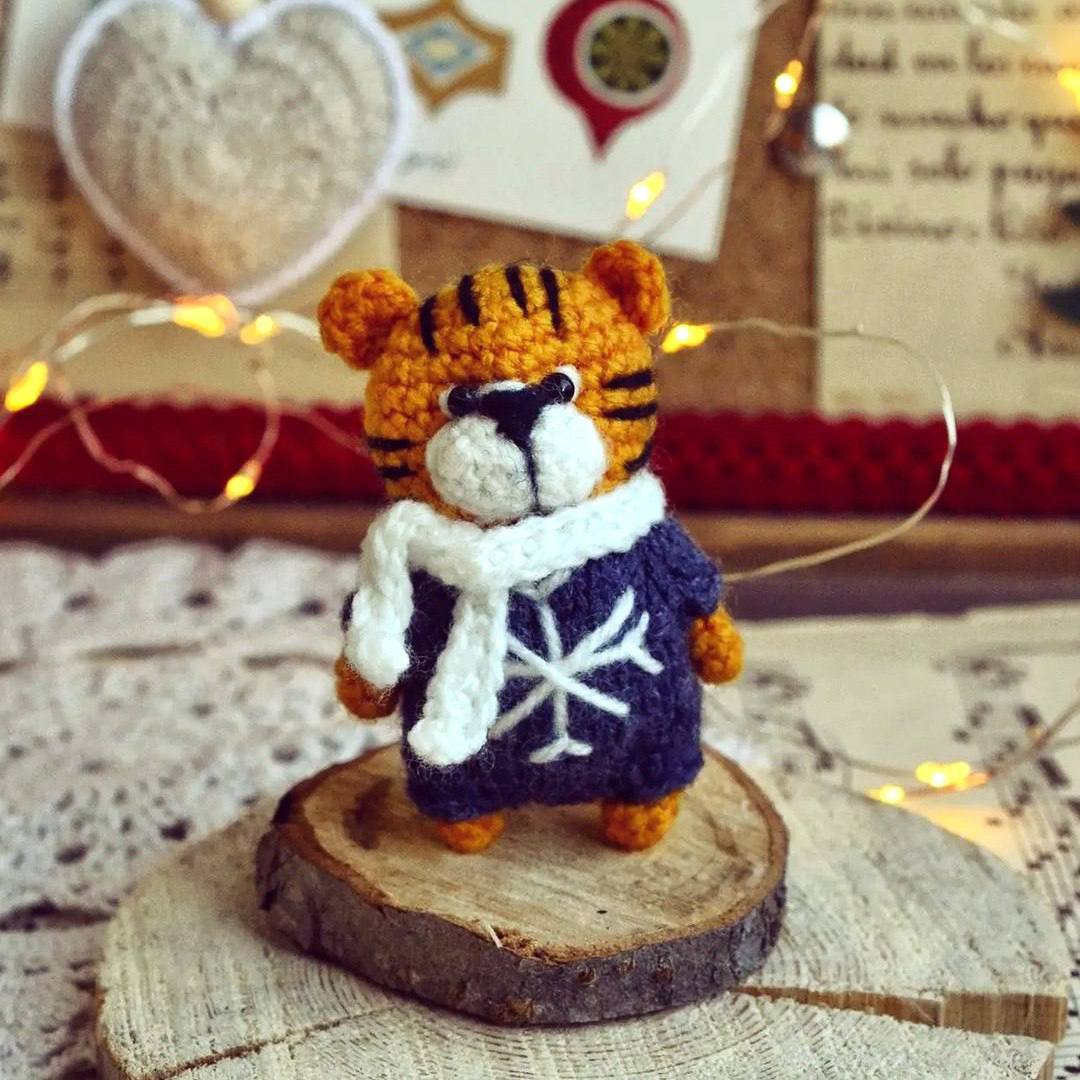
Looking for a quick and adorable project to brighten up your day? This Amigurumi Baby Tiger is the perfect companion for beginner and intermediate crocheters alike. Standing at just under 3 inches tall, this tiny tiger is a delightful blend of crochet and knitting, featuring a cozy little jumpsuit that makes it look irresistibly snug.
Whether you are making this as a gift, a desk buddy, or a festive ornament, the process is straightforward and rewarding. In this guide, we will walk you through every stitch needed to create your own miniature tiger, from the striped head to the tiny knitted clothes.
Materials & Abbreviations
To get the best results and achieve the correct scale for this mini tiger, we recommend using a fine yarn and a small hook to keep the stitches tight, preventing the stuffing from showing through.
Materials Needed
- Yarn: Sport weight or Fingering weight cotton/acrylic blend yarn in Orange, White, Black, and Denim Blue.
- Crochet Hook: 2.0mm (or the size that works best for your tension to create a tight fabric).
- Knitting Needles: 2.0mm needles (for the jumpsuit).
- Stuffing: Polyester fiberfill.
- Eyes: 4-6mm safety eyes or black embroidery thread.
- Tools: Yarn needle, scissors, and stitch markers.
Abbreviations (US Terms)
- MR: Magic Ring
- sc: Single crochet
- inc: Increase (two single crochets in one stitch)
- dec: Decrease (single crochet two stitches together)
- ch: Chain
- st(s): Stitch(es)
- k: Knit (for the knitted jumpsuit)
- p: Purl (for the knitted jumpsuit)
- yo: Yarn over (for the knitted jumpsuit)
Step-by-Step Instructions
The Head
We start by creating the spherical head. Use the orange yarn for this section.
- Round 1: 6 sc in MR (6)
- Round 2: 6 inc (12)
- Round 3: (1 sc, inc) x 6 (18)
- Round 4: (2 sc, inc) x 6 (24)
- Round 5: (3 sc, inc) x 6 (30)
- Rounds 6-9: sc around for 4 rounds (30)
- Round 10: (3 sc, dec) x 6 (24)
- Round 11: (2 sc, dec) x 6 (18)
- Round 12: (1 sc, dec) x 6 (12)
- Round 13: 6 dec (6)
Fasten off and leave a long tail for sewing. Stuff the head firmly with fiberfill.
The Legs and Body
The legs are worked first, then joined together to create the base of the body.
Legs
Using orange yarn:
- Round 1: 6 sc in MR (6)
- Rounds 2-3: sc around (6)
For the first leg, fasten off and weave in the ends. For the second leg, do not fasten off; we will use the working yarn to begin the body.
Body
Switch to the denim blue yarn for the body section.
- Round 1: Ch 6 to connect the first leg to the second leg. Work 6 sc around the first leg, 6 sc across the starting chain, 6 sc around the second leg, and 6 sc across the other side of the chain (24)
- Rounds 2-4: sc around (24)
- Note: Before starting Round 5, if your decrease points aren’t perfectly aligned with the sides of the body, work 1 to 3 sc “shift” stitches to center them.
- Round 5: dec, 10 sc, dec, 10 sc (22)
- Round 6: sc around (22)
- Round 7: dec, 9 sc, dec, 9 sc (20)
- Round 8: sc around (20)
- Round 9: dec, 8 sc, dec, 8 sc (18)
- Round 10: (4 sc, dec) x 3 (15)
- Round 11: (3 sc, dec) x 3 (12)
- Round 12: (2 sc, dec) x 3 (9)
Fasten off and stuff the body firmly.
Arms, Ears, Tail, and Muzzle
These smaller details bring the tiger to life!
Arms
Using orange yarn: Round 1: 6 sc in MR (6). Rounds 2-7: sc around (6). Fasten off.
Ears
Using orange yarn: 6 sc in MR (6). Fasten off, leaving a tail for sewing.
Tail
Using orange yarn: Ch 16. Starting in the second chain from the hook, work 15 sc across the chain. Fasten off.
Muzzle
Using white yarn: Ch 6. Starting in the second chain from the hook, work 4 sc, then 3 sc in the last chain. Working along the other side of the chain, work 3 sc, then 1 inc (12). Work one round of 12 sc. Fasten off.
The Knitted Jumpsuit
To give our tiger his signature look, we will knit a tiny blue outfit. If you are not a knitter, don’t worry—this is a great way to practice basic stitches!
- Cast on: 18 stitches.
- Row 1: Knit all stitches.
- Row 2: Purl all stitches.
- Row 3: 3 k, yo, 1 k, yo, 1 k, yo, 1 k, yo, 6 k, yo, 1 k, yo, 1 k, yo, 1 k, yo, 3 k.
- Row 4: Purl all stitches (26 sts).
- Row 5: 4 k, yo, 1 k, yo, 3 k, yo, 1 k, yo, 8 k, yo, 1 k, yo, 3 k, yo, 1 k, yo, 4 k.
- Row 6: Purl all stitches (39 sts).
- Row 7: 5 k, yo, 1 k, yo, 5 k, yo, 1 k, yo, 10 k, yo, 1 k, yo, 5 k, yo, 1 k, yo, 5 k.
- Row 8: Purl all stitches (42 sts).
- Row 9: 7 k, bind off 7 sts, 19 k, bind off 7 sts, 7 k (28 sts).
- Row 10: Purl all stitches (28 sts).
- Final Section: Work 7 to 10 rows of knit/purl (depending on your tension) to reach the desired length.
Assembly: You can knit this flat and sew a seam down the back and between the legs to create a “pant” shape, or distribute the stitches onto three needles to knit in the round.
Finishing & Assembly
Now it is time to put all the pieces together!
The Face
Start with the muzzle. Sew it onto the head. Attach the safety eyes just above the muzzle. Using black embroidery thread, sew a small triangle for the nose and add tiny white highlights to the eyes. Finally, embroider the tiger’s iconic stripes on the forehead and cheeks using black yarn.
Body Assembly
Sew the ears to the top of the head. Attach the head to the body, making sure it is centered. Sew the arms to the sides of the body and attach the tail to the back.
The Final Touch
Slide the knitted jumpsuit onto your tiger and sew it in place. You can further decorate the outfit with tiny buttons or white embroidery to create a snowflake pattern. For an extra cozy touch, crochet a small scarf by chaining 15 and working one row of single crochet.
Tips for Success
- Tight Tension: Amigurumi requires tight stitches so the stuffing doesn’t leak. If you see gaps, try a smaller hook.
- Invisible Decrease: For a smoother look, use the “invisible decrease” method (working only into the front loops of the stitches being decreased).
- Customization: Feel free to change the blue yarn to red or green for a holiday-themed tiger!
- Stuffing: Use a toothpick or a chopstick to push stuffing into the small areas like the arms and legs.