Adorable Mini Knitted Llama Pattern: A Step-by-Step DIY Tutorial
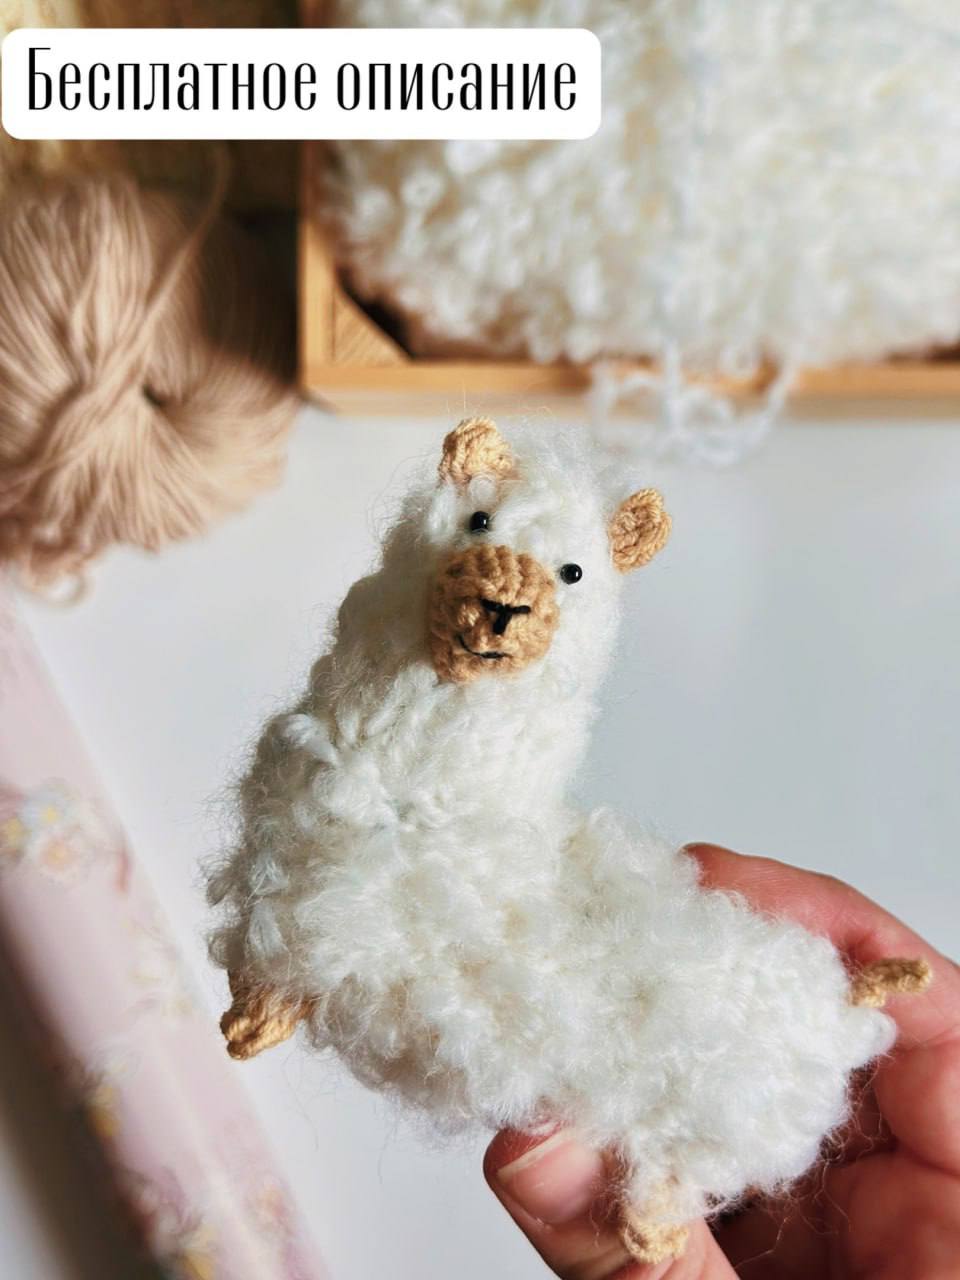
Looking for a cozy and cute project to add to your amigurumi collection? This mini knitted llama is the perfect blend of charm and simplicity. While most amigurumi are purely crocheted, this unique design uses a clever mix of crochet and knitting to create a professional, structured look with a soft, huggable feel. Whether you are a seasoned maker or a beginner looking to practice your knitting-in-the-round skills, this little llama is a delightful companion to create.
In this tutorial, we will guide you through every step of the process, from creating the foundational chain to finishing the tiny I-cord legs. Grab your needles and yarn, and let’s get started!
Materials & Abbreviations
To achieve the look seen in the photos, I recommend using a combination of a smooth acrylic yarn for the details and a fluffy or “bouclé” style yarn for the body to give the llama that signature woolly texture.
Supplies Needed
- Yarn:
- White fluffy/bouclé yarn (for the body)
- Tan or beige DK weight yarn (such as YarnArt Jeans or a similar soft acrylic) for the muzzle, legs, and ears
- Knitting Needles: A set of double-pointed needles (DPNs) or a long circular needle for magic loop (suggested size: US 2 or 3 / 2.25mm – 3.25mm depending on your tension).
- Crochet Hook: A hook that matches your knitting needle size (used for the foundation and picking up stitches).
- Stuffing: Polyester fiberfill.
- Eyes: Small black safety eyes or black beads.
- Tools: Tapestry needle, scissors, and a stitch marker.
Abbreviations (US Terms)
- ch: Chain stitch (crochet)
- st: Stitch
- k: Knit stitch
- k2tog: Knit two stitches together (decrease)
- m1: Make one / increase
- I-cord: A narrow, knitted tube
Step-by-Step Instructions
The Body
The body is created by starting with a crochet foundation and then knitting outwards to create a flat piece that is later sewn into a tube.
The Foundation: Using your crochet hook and white fluffy yarn, chain 12. This chain serves as the center axis of the llama’s body.
Setting Up the Knitting: Now, switch to your knitting needles. Use your crochet hook to pick up 12 stitches along one side of the chain, and then pick up another 12 stitches along the opposite side of the chain. You should now have a total of 24 stitches on your needles.
The Main Section:
Distribute these 24 stitches across 4 double-pointed needles (6 stitches per needle) and work in the round. Use a fifth needle as your working needle.
Rows 1-11: Knit every stitch (24k). At the end of Row 11, cut the yarn, leaving a tail of approximately 6 inches for sewing.
Creating the Tube: Fold the piece in half. Using a mattress stitch, sew 6 stitches on one side to the corresponding 6 stitches on the other side. Once you have sewed the sides, you will be left with 12 active stitches on your needles, forming a tube.
The Neck and Head:
Continue knitting in the round with the remaining 12 stitches.
Rows 12-22: Knit every stitch (12k).
Row 23 (Decreasing): *Knit 2, k2tog; repeat from * 3 times (9 stitches remaining).
Row 24 (Final Decrease): *Knit 1, k2tog; repeat from * 3 times (6 stitches remaining).
Cut the yarn and use your tapestry needle to weave the remaining stitches together tightly, closing the top. Hide the yarn tail inside the body.
The Muzzle
Switch to your tan yarn for the face. We will create a small cone shape.
Cast on 6 stitches and distribute them across 3 double-pointed needles.
- Row 1: Knit 6.
- Row 2 (Increase): *Knit 1, m1; repeat from * 3 times (9 stitches).
- Row 3 (Increase): *Knit 2, m1; repeat from * 3 times (12 stitches).
- Row 4: Knit 12.
Cast off all stitches, leaving a long tail for sewing. Use your tapestry needle to pull the starting stitches tight, closing the hole at the tip of the nose.
Legs, Tail, and Ears
For these details, we use the I-cord technique, which creates a neat, rounded cord. Use your tan yarn for all of these parts.
The Legs
Using a crochet hook, pick up 4 stitches from the bottom of the body. Transfer these stitches to your knitting needles. Knit 4 rows of I-cord. Fasten off, pull the stitches tight with a needle, and weave the end securely into the body. Repeat this process for all four legs.
The Tail
Using a crochet hook, pick up 3 stitches from the rear of the body. Transfer to knitting needles and knit 3 rows of I-cord. Fasten off and weave in the ends.
The Ears
Using a crochet hook, pick up 3 stitches from the top of the head. Transfer to knitting needles and knit 4 rows of I-cord. Fasten off and weave in the ends. Repeat for the second ear.
Finishing
Now it’s time to bring your llama to life!
- Stuffing: Lightly stuff the muzzle with fiberfill and sew it securely to the face.
- Facial Details: Attach the safety eyes just above the muzzle. Using a small piece of black yarn or embroidery floss, stitch a tiny “V” for the nose and a small line for the mouth.
- Closing Gaps: If there is a small hole remaining between the neck and the body from the assembly process, use the leftover yarn from the body to sew it closed with a hidden stitch.
- Final Touch: If you want to add a little extra personality, use a contrasting color of yarn to embroider a tiny heart on the llama’s backside.
Tips for Success
Choosing the Right Yarn
The “fluff factor” is what makes this llama look realistic. If you cannot find bouclé yarn, you can use a brushed alpaca blend or even brush out a standard acrylic yarn with a pet slicker brush to create a faux-fur effect before assembling.
Working with DPNs
If you find double-pointed needles tricky, this project is perfectly suited for the “Magic Loop” method. Just ensure your circular needle is long enough to hold the stitches comfortably without pulling the fabric too tight.
Perfecting the I-Cord
When picking up stitches for the legs and ears, be careful not to pull too tight. If the I-cord feels too stiff, try using a needle one size larger than what you used for the body.
Your mini knitted llama is now complete! This little creature makes a wonderful gift, a cute desk buddy, or a great addition to a handmade toy collection.