Adorable Crochet Pig Pattern: A Step-by-Step Amigurumi Tutorial
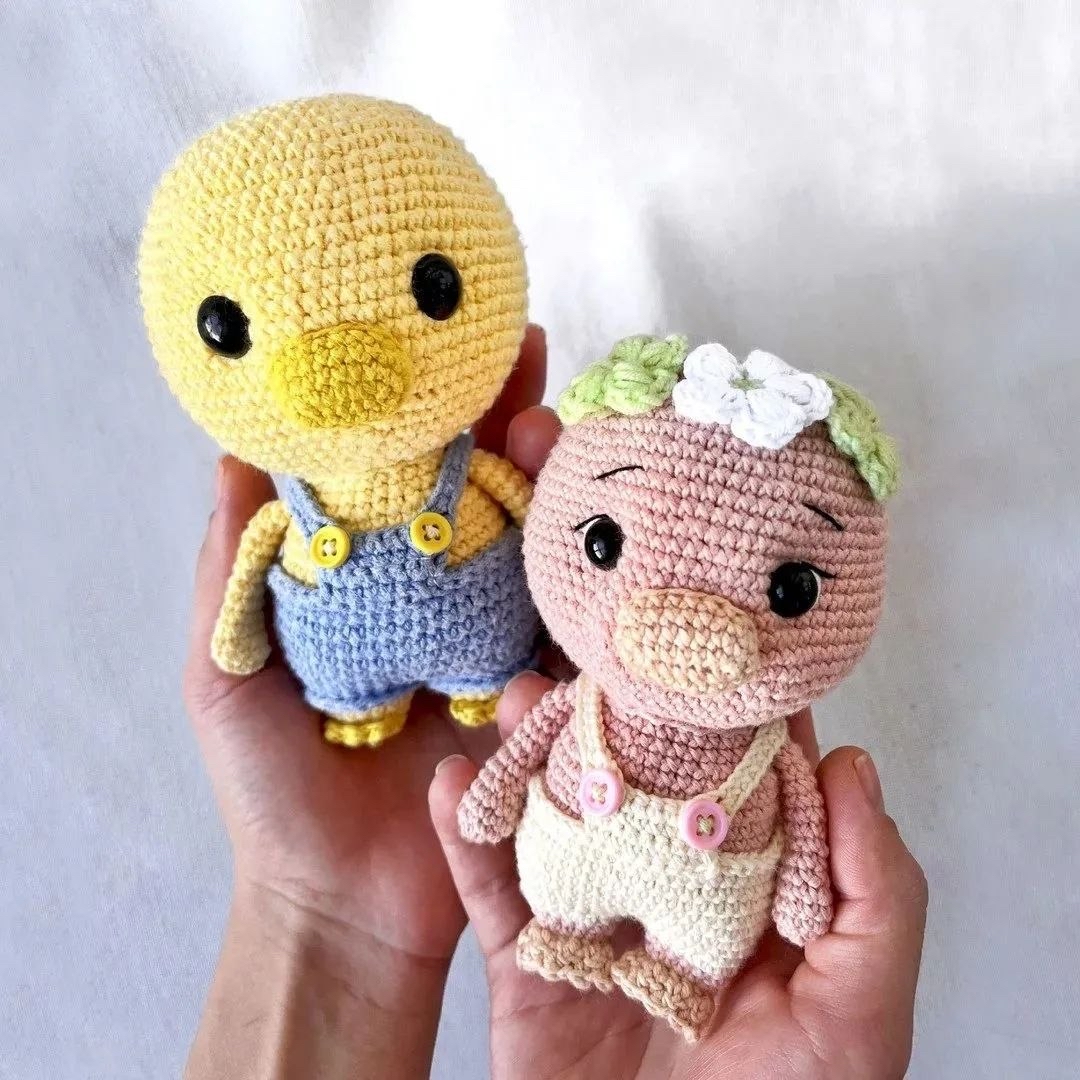
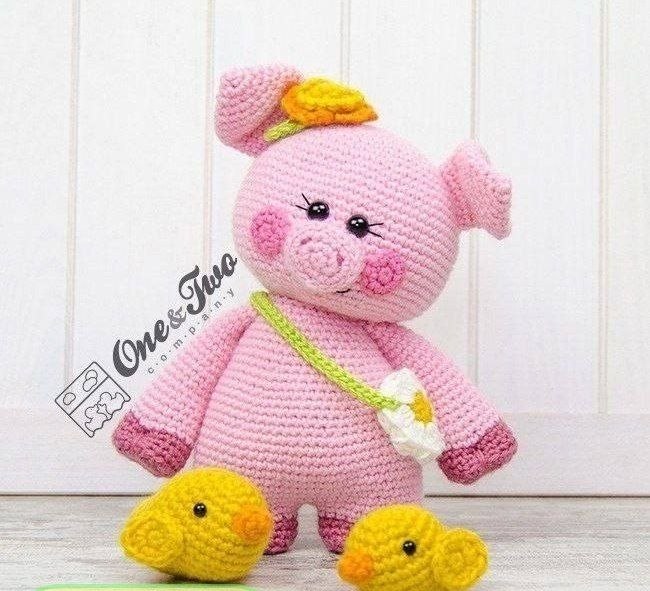
Are you looking for a sweet and simple project to brighten up a nursery or create a handmade gift for a little one? This adorable crochet pig amigurumi is the perfect project for both beginners and seasoned makers. With its soft pink hues and charming expression, this little piglet is sure to become a favorite companion.
In this detailed tutorial, we will walk you through every single stitch to create this cute character. Whether you are making this for yourself or as a gift, this pattern is designed to be easy to follow and incredibly rewarding. Grab your hook and some soft yarn, and let’s get started on making your very own crochet piglet!
Materials & Abbreviations
To ensure your piglet turns out looking just like the pictures, I recommend using soft, cotton-blend yarn. This provides great stitch definition, which is essential for amigurumi.
Materials Needed
- Yarn: Medium weight (worsted) yarn in two shades of pink (a light pink and a slightly darker pink).
- Hook: 2mm crochet hook (or a size that creates tight stitches to prevent stuffing from showing).
- Eyes: 16mm safety eyes.
- Stuffing: Polyester fiberfill.
- Embroidery Thread: Black thread for the mouth and eyebrows.
- Tools: Yarn needle and scissors.
Abbreviations (US Terms)
- MR: Magic Ring
- ch: Chain
- sc: Single Crochet
- inc: Increase (2 sc in one stitch)
- dec: Decrease (sc 2 stitches together)
- sl st: Slip Stitch
- BLO: Back Loops Only
- st(s): Stitch(es)
Step-by-Step Instructions
The Head
Start with the light pink yarn.
- Round 1: 6 sc in a MR (6)
- Round 2: 6 inc (12)
- Round 3: (1 sc, inc) * 6 (18)
- Round 4: 1 sc, inc, (2 sc, inc) * 5, 1 sc (24)
- Round 5: (3 sc, inc) * 6 (30)
- Round 6: 2 sc, inc, (4 sc, inc) * 5, 2 sc (36)
- Round 7: (5 sc, inc) * 6 (42)
- Round 8: 3 sc, inc, (6 sc, inc) * 5, 3 sc (48)
- Round 9: (7 sc, inc) * 6 (54)
- Round 10: 54 sc (54)
- Round 11: 4 sc, inc, (8 sc, inc) * 5, 4 sc (60)
- Round 12: (9 sc, inc) * 6 (66)
- Rounds 13-22: 66 sc (10 rounds total)
- Round 23: (9 sc, dec) * 6 (60)
- Round 24: 4 sc, dec, (8 sc, dec) * 5, 4 sc (54)
- Round 25: (7 sc, dec) * 6 (48)
- Round 26: 3 sc, dec, (6 sc, dec) * 5, 3 sc (42)
- Round 27: (5 sc, dec) * 6 (36)
- Round 28: 2 sc, dec, (4 sc, dec) * 5, 2 sc (30)
- Round 29: (3 sc, dec) * 6 (24)
Fasten off and leave a long tail for sewing. Note: Insert the safety eyes between rounds 16 and 17, approximately 0.75 inches apart.
The Snout
Use the light pink yarn.
- Round 1: 6 sc in a MR (6)
- Round 2: 6 inc (12)
- Round 3: (1 sc, inc) * 6 (18)
- Round 4: 18 sc in BLO (18)
- Round 5: 18 sc (18)
Fasten off, leaving a tail for sewing. To add detail, join your yarn to the back loops from Round 4 and work a round of slip stitches. Stuff lightly and sew onto the face directly under the eyes. While sewing, you can pull the stitches slightly to create a cute indentation between the eyes.
The Cheeks
Use the darker pink yarn.
- Round 1: 6 sc in a MR (6)
- Round 2: 6 inc (12)
Fasten off, leaving a tail for sewing. These small circles will be sewn onto the face to give your pig a blushing look.
The Ears
Use the light pink yarn.
- Round 1: 6 sc in a MR (6)
- Round 2: 6 sc (6)
- Round 3: 6 inc (12)
- Round 4: 12 sc (12)
- Round 5: (1 sc, inc) * 6 (18)
- Round 6: 18 sc (18)
- Round 7: (2 sc, inc) * 6 (24)
- Rounds 8-10: 24 sc (24)
- Round 11: (2 sc, dec) * 6 (18)
- Rounds 12-13: 18 sc (18)
- Round 14: (4 sc, dec) * 3 (15)
- Rounds 15-16: 15 sc (15)
Fasten off and leave a tail for sewing. When assembling, join the two ear pieces together and work 7 sc through both layers. Sew the ears onto the head between rounds 6 and 12.
The Arms
Start with the darker pink yarn.
- Round 1: 6 sc in a MR (6)
- Round 2: 6 inc (12)
- Round 3: (1 sc, inc) * 6 (18)
- Round 4: (5 sc, inc) * 3 (21)
- Round 5: 21 sc in BLO (21)
- Rounds 6-7: 21 sc (21)
Switch to the light pink yarn.
- Rounds 8-10: 21 sc (21)
Optional: Embroider a small line for the foot.
- Round 11: (5 sc, dec) * 3 (18)
- Rounds 12-13: 18 sc (18)
- Round 14: (7 sc, dec) * 2 (16)
- Rounds 15-16: 16 sc (16)
- Round 17: (6 sc, dec) * 2 (14)
- Rounds 18-20: 14 sc (14)
- Round 21: (5 sc, dec) * 2 (12)
- Rounds 22-25: 12 sc (12)
Add 4 more sc to even out the edges. Stuff the arm, fold it, and join it to the body with 6 sc. Fasten off and hide the tail.
The Legs and Body
Start with the darker pink yarn.
- Round 1: 6 sc in a MR (6)
- Round 2: 6 inc (12)
- Round 3: (1 sc, inc) * 6 (18)
- Round 4: 1 sc, inc, (2 sc, inc) * 5, 1 sc (24)
- Round 5: 24 sc in BLO (24)
- Rounds 6-7: 24 sc (24)
Switch to the light pink yarn.
- Round 8: (7 sc, inc) * 3 (27)
- Rounds 9-10: 27 sc (27)
Fasten off, leaving a tail for sewing. Make a second leg exactly like the first, but do not cut the yarn. Instead, use the yarn from the second leg to continue into the body.
- Round 11: Attach the first leg. Work 27 sc, then work 27 sc along the second leg (54 total).
- Rounds 12-13: 54 sc (54)
- Round 14: 4 sc, inc, (8 sc, inc) * 5, 4 sc (60)
- Rounds 15-20: 60 sc (60)
- Round 21: 4 sc, dec, (8 sc, dec) * 5, 4 sc (54)
- Rounds 22-24: 54 sc (54)
- Round 25: (7 sc, dec) * 6 (48)
- Rounds 26-27: 48 sc (48)
- Round 28: 3 sc, dec, (6 sc, dec) * 5, 3 sc (42)
- Rounds 29-30: 42 sc (42)
- Round 31: (5 sc, dec) * 6 (36)
- Rounds 32-33: 36 sc (36)
Incorporate the Arms:
- Round 34: 2 sc, dec, 4 sc, dec, [work arm and body together: 4 sc, dec], [work body: (4 sc, dec) * 2], [work arm and body together: 4 sc, dec], [work body: 2 sc] (30)
- Round 35: (3 sc, dec) * 6 (24)
Stuff the body firmly and fasten off.
The Tail
- Chain 15.
- Starting from the 2nd chain from your hook, work an increase (2 sc) into every chain until the end of the row.
- Fasten off and sew to the back of the pig.
Finishing
Now comes the fun part—assembly! Use your yarn needle to sew the head to the body. Ensure the snout is centered between the eyes and the cheeks are placed slightly below the eyes to give that sweet expression. Finally, use your black embroidery thread to stitch a small, happy mouth and delicate eyebrows above the eyes.
Tips
- Tight Stitches: When making amigurumi, try to keep your tension consistent and tight. This ensures that your stuffing stays hidden inside the toy.
- Safety First: If you are making this for a baby, please ensure the safety eyes are securely fastened or consider embroidering the eyes instead to prevent any choking hazards.
- Color Changes: When switching colors, work the last stitch of the old color and the first stitch of the new color together to create a seamless transition.
- Stitch Markers: Since amigurumi is worked in continuous spirals, always use a stitch marker to keep track of the beginning of your rounds!