Adorable Crochet Duckling Amigurumi Pattern: A Step-by-Step Tutorial
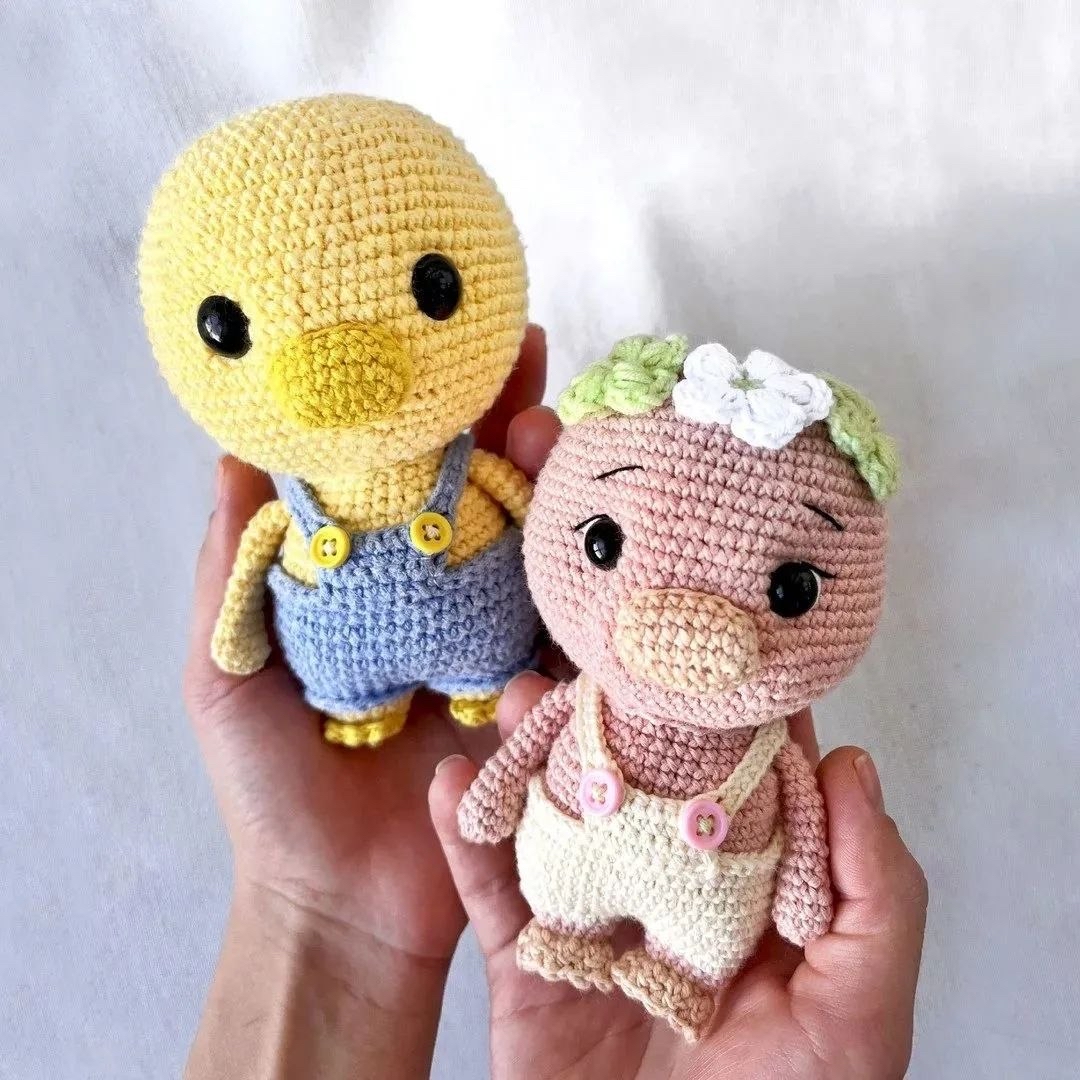
There is nothing quite as charming as a handmade amigurumi toy. If you are looking for your next crochet project, look no further! This adorable little duckling is the perfect addition to any nursery, a thoughtful gift for a baby shower, or a sweet companion for your own crochet collection. With its tiny overalls and round, huggable shape, this duckling is sure to bring a smile to anyone’s face.
This pattern is designed with a “medium” difficulty level in mind. While it requires some knowledge of basic amigurumi techniques—like working in the round and increasing/decreasing—it is very beginner-friendly if you follow the steps closely. The best part? You can customize this little guy! While the classic yellow duck is iconic, you can use any color yarn you like to create a whole flock of colorful ducklings.
Materials & Abbreviations
To ensure your duckling turns out perfectly, I recommend using high-quality cotton yarn. This helps maintain stitch definition and keeps the toy looking professional. You can choose between two different yarn weights depending on the size you want to achieve.
Yarn Options
- Option 1 (Smaller – approx. 5 inches tall): Use a fine cotton yarn (roughly 197 yards per 50g/1.76oz ball). Pair this with a 1.5mm crochet hook.
- Option 2 (Larger – approx. 5.7 inches tall): Use a cotton/acrylic blend (like YarnArt Jeans). Pair this with a 2mm crochet hook.
- Colors Needed: You will need three main colors: your primary body color (e.g., yellow), a secondary color for the beak and feet (e.g., orange), and a third color for the clothing (e.g., blue or pink).
Additional Supplies
- Safety Eyes: 10mm safety eyes.
- Buttons: Two small buttons for the overalls.
- Stuffing: High-quality polyester fiberfill.
- Tapestry Needle: For sewing pieces together and weaving in ends.
- Scissors.
US Crochet Abbreviations
This pattern uses standard US crochet terminology. Please ensure you are using US terms to avoid confusion!
- MR: Magic Ring
- SC: Single Crochet
- INC: Increase (2 SC in one stitch)
- DEC: Decrease (Sc two stitches together)
- DC: Double Crochet
- SL ST: Slip Stitch
- CH: Chain
- ST(s): Stitch(es)
- ( ): Numbers in parentheses indicate the total stitch count at the end of the row.
Step-by-Step Instructions
The Head
Start with your primary body color.
- 1. 6 SC in a MR (6)
- 2. 6 INC (12)
- 3. (1 SC, 1 INC) * 6 (18)
- 4. (2 SC, 1 INC) * 6 (24)
- 5. (3 SC, 1 INC) * 6 (30)
- 6. (4 SC, 1 INC) * 6 (36)
- 7. (5 SC, 1 INC) * 6 (42)
- 8. (6 SC, 1 INC) * 6 (48)
- 9. (7 SC, 1 INC) * 6 (54)
- 10. (8 SC, 1 INC) * 6 (60)
- 11-12. 60 SC (60)
- 13. (9 SC, 1 INC) * 6 (66)
- 14-15. 66 SC (66)
- 16. (10 SC, 1 INC) * 6 (72)
- 17-24. 72 SC (72)
Eye Placement: Before moving to the decrease section, insert your 10mm safety eyes between rows 19 and 20. Make sure they are spaced exactly 13 stitches apart.
- 25. (10 SC, 1 DEC) * 6 (66)
- 26. (9 SC, 1 DEC) * 6 (60)
- 27. (8 SC, 1 DEC) * 6 (54)
- 28. (7 SC, 1 DEC) * 6 (48)
- 29. (6 SC, 1 DEC) * 6 (42)
- 30. (5 SC, 1 DEC) * 6 (36)
- 31. (4 SC, 1 DEC) * 6 (30)
- 32. (3 SC, 1 DEC) * 6 (24)
- 33. (2 SC, 1 DEC) * 6 (18)
Fasten off, leaving a long tail for sewing. Stuff the head firmly.
The Beak
Using your secondary color (e.g., orange):
Start by making a chain of 7. We will now work back along the opposite side of the chain.
- 1. 1 INC, 4 SC, 3 SC in the last stitch, 4 SC, 1 SC in the first chain stitch.
- 2. 2 INC, 3 SC, 3 INC, 4 SC, 1 INC.
- 3-4. 20 SC.
Stuff the beak lightly, fasten off, and leave a long tail for sewing to the face.
The Arms (Make 2)
Using your primary body color:
- 1. 6 SC in a MR (6)
- 2. 6 INC (12)
- 3-4. 12 SC (12)
- 5. (2 SC, 1 DEC) * 3 (9)
Note: Stuff the bottom part of the arm lightly, but leave the long upper part hollow. This makes it easier to sew onto the body.
- 6-7. 9 SC (9)
- 8. 2 SC, 1 DEC, 3 SC, 1 DEC (7)
- 9-14. 7 SC (7)
Fold the arm in half and SC through both sides to close it. Leave a long tail for sewing.
The Legs and Body
We will create the legs first and then immediately join them to start the body.
Legs
First, use your secondary color:
- 1. 8 SC in a MR (8)
- 2. 8 INC (16)
Switch to your primary body color:
- 3-5. 16 SC (16)
Switch to your clothing color:
- 6. (3 SC, 1 INC) * 4 (20)
Fasten off the yarn on the first leg. Do not fasten off the second leg; we will use it to continue to the body.
The Body
Connecting the two legs into one piece:
- 1. 10 SC across the second leg, 20 SC across the first leg, and 10 SC across the second leg (40)
- 2. 40 SC (40)
- 3. (4 SC, 1 INC) * 8 (48)
- 4-8. 48 SC (48)
Switch back to primary body color:
- 9. (4 SC, 1 DEC) * 8 (40)
- 10-14. 40 SC (40)
- 15. (3 SC, 1 DEC) * 8 (32)
- 16-17. 32 SC (32)
Stuff the body firmly. If you notice small gaps between the legs, use a needle and thread to sew them shut before stuffing the rest of the body. Fasten off, leaving a long tail.
The Feet
Using your secondary color, join the yarn between rows 2 and 3 of the legs. Work 8 SC in the center of the leg, CH 1, and turn.
- 1. (1 SC, 1 DC) * 4, CH 1, turn.
- 2. (1 SL ST, 1 DC) * 4, CH 1, turn.
Fasten off and hide the yarn tails inside the feet.
The Overalls
Using your clothing color:
The Top Part
At the center of the duck’s belly, work 8 SC. Then, work 4 rows of turning rows (crochet across the stitches and chain 1 at the end of each row). Fasten off and hide the tail.
The Straps (Make 2)
- CH 28. Working back down the chain, SC 22 stitches. Fasten off.
Attach the straps to the back of the overalls using the yarn tails. On the front of the overalls, sew two small buttons and thread the strap loops through them for a realistic look.
Finishing
Now comes the fun part—assembly! Use your tapestry needle to sew the pieces together carefully.
- Attach the Arms: Sew the arms to the body between rows 16 and 17.
- Attach the Head: Sew the head to the top of the body.
- The Face: Sew the beak to the face. If you want extra detail, you can use a little bit of dark yarn to embroider eyebrows or the whites of the eyes.
- Final Touches: Use a slightly darker shade of your primary color to outline the transitions between colors on the legs and body for a polished look.
Tips for Success
To make your duckling look its absolute best, keep these professional tips in mind:
- Mind Your Tension: Amigurumi should be worked with slightly tighter tension than a scarf or blanket. This ensures that your stuffing doesn’t peek through the stitches.
- The “Magic Ring” Secret: If you struggle with the Magic Ring, don’t worry! You can always make a chain of 2 and work your first round of stitches into the second chain from the hook.
- Stuffing Technique: When stuffing, work in small clumps rather than one big ball. This helps you push the stuffing into the corners (like the bottom of the head) so the shape stays smooth and round.
- Hiding Ends: Always weave your yarn tails in a “zigzag” pattern through the stitches rather than just straight through. This prevents them from popping out later.
Congratulations! You have just completed your very own crochet duckling. Whether you display it on a shelf or give it to a loved one, you should be incredibly proud of your beautiful handmade creation!