Adorable Knitted Puppy Pattern: A DIY Amigurumi-Style Puppy Tutorial
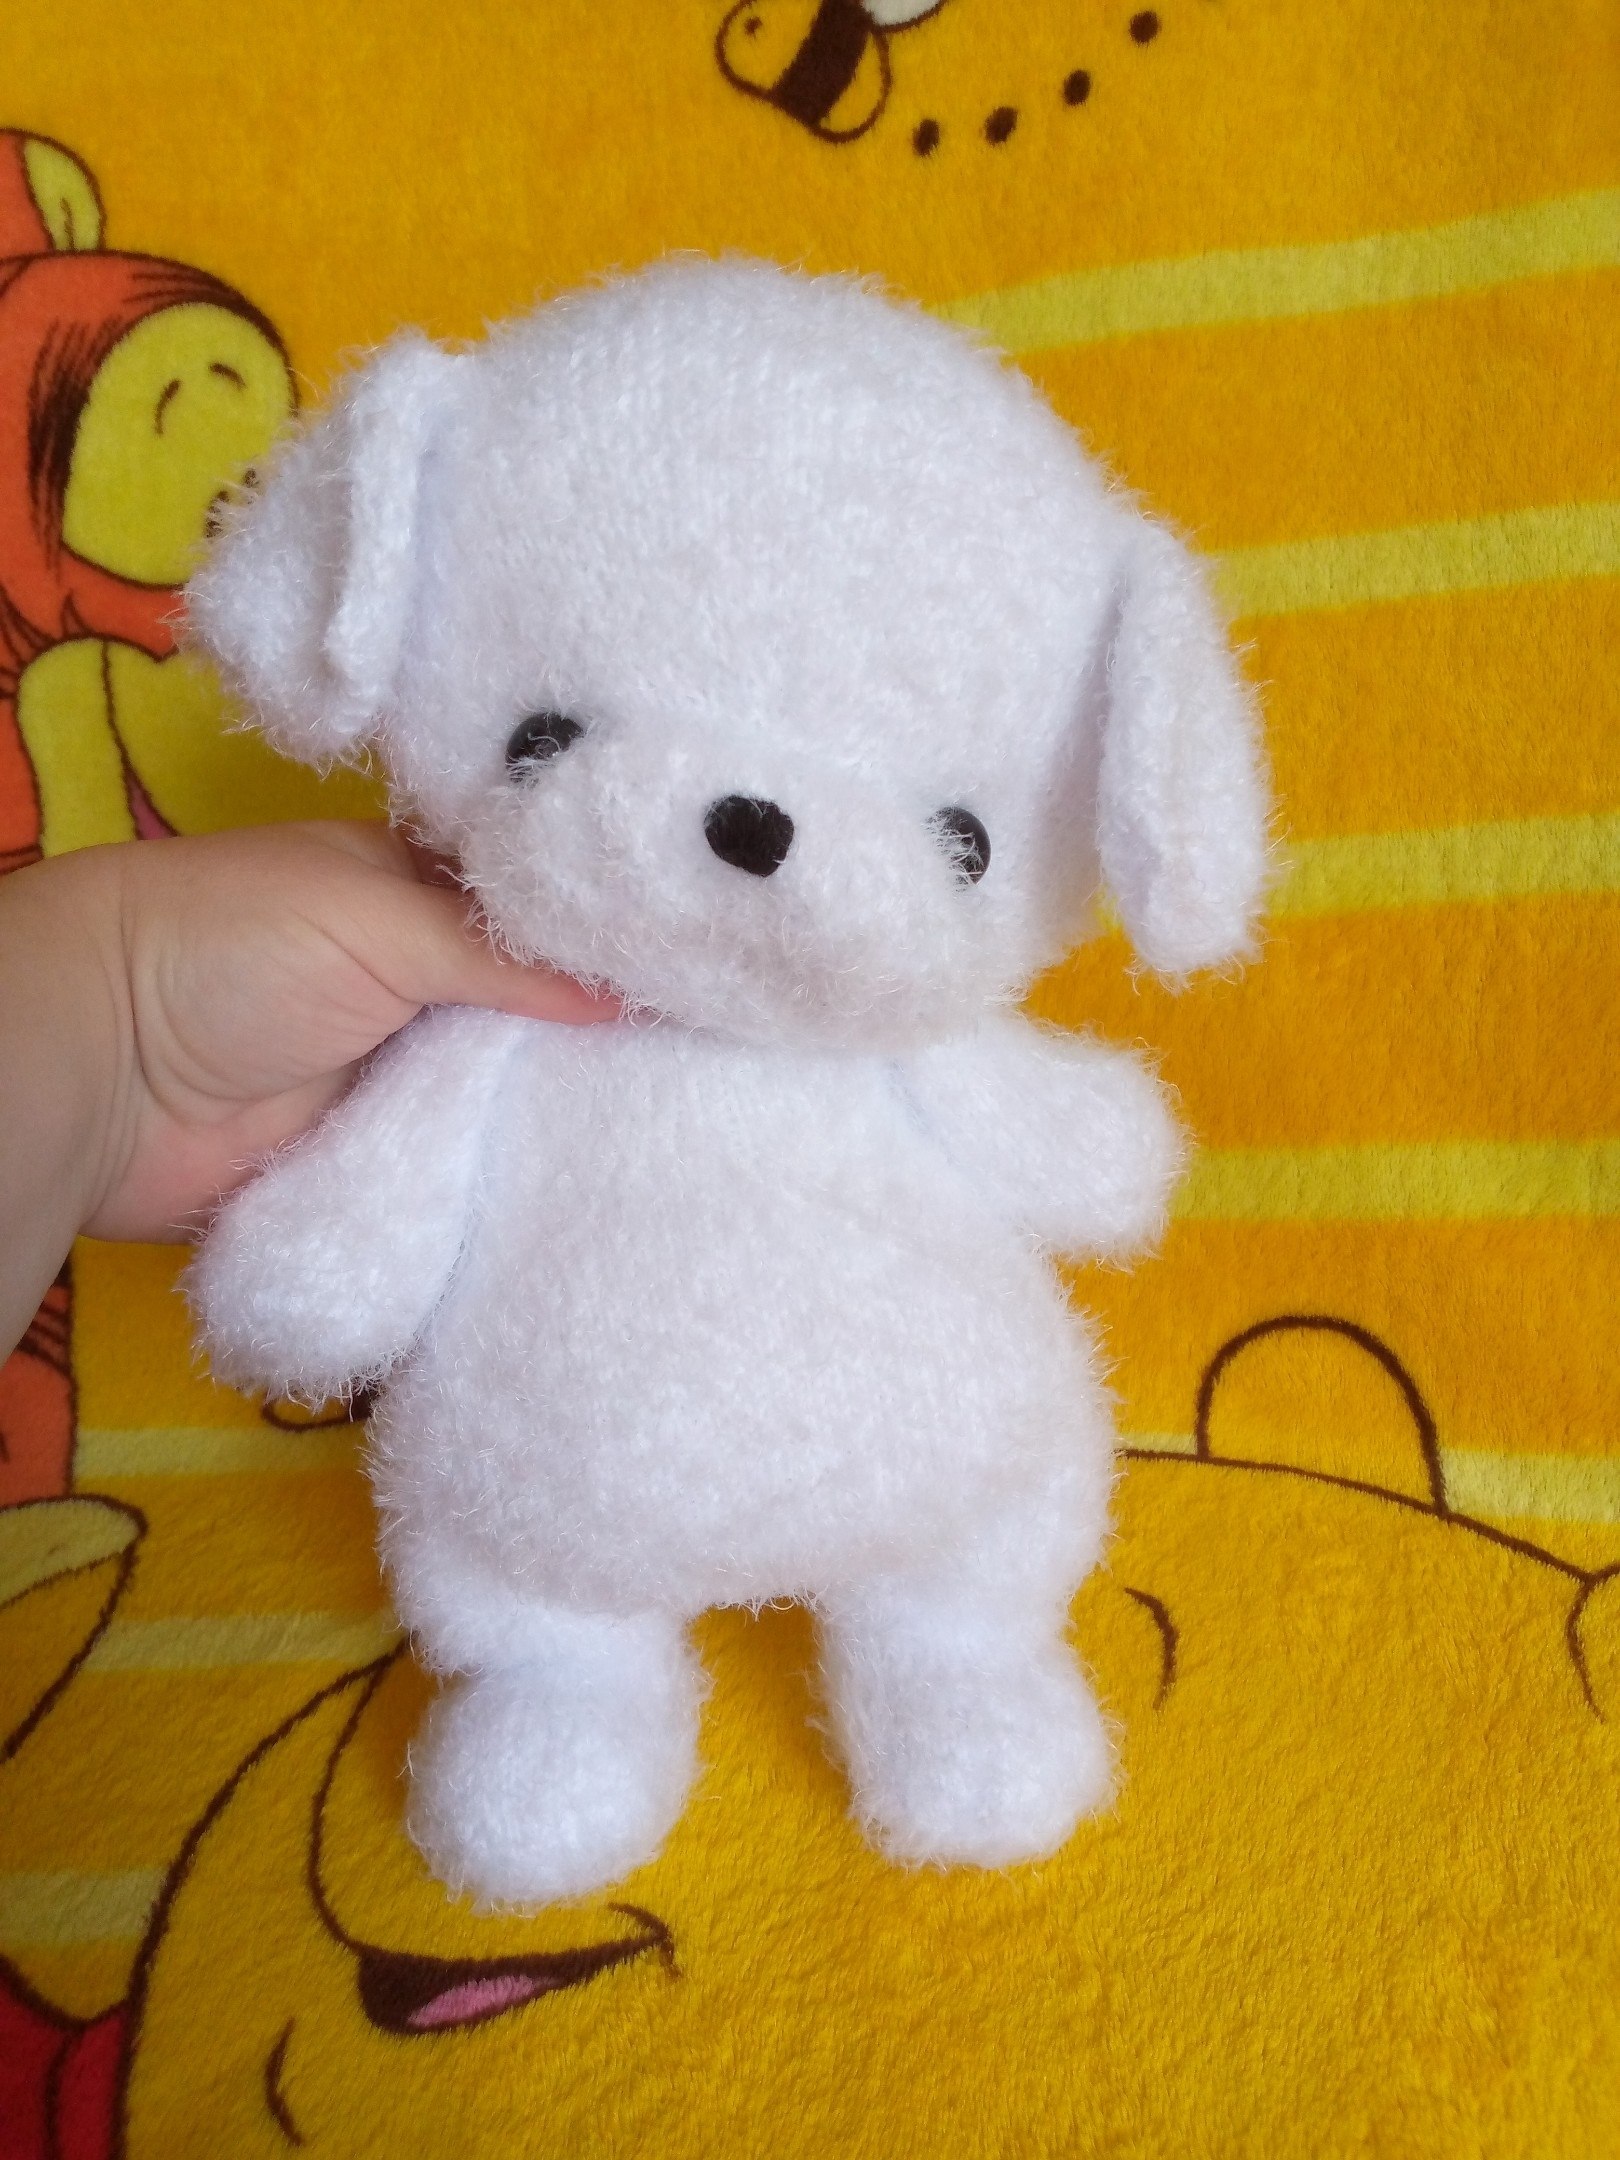
Are you looking for a heartwarming project that will bring a smile to anyone’s face? This adorable, small knitted puppy is the perfect project for your next fiber arts adventure! Whether you are looking to create a cuddly companion for a child or a charming decorative piece for a nursery, this little pup is sure to be a hit. This pattern is designed to create a soft, plush toy approximately 11 inches tall, making it the perfect size for little hands to hold.
While many plush toys are made using crochet, this specific design utilizes beautiful knitting techniques to achieve a smooth, professional-looking texture. This tutorial is written for the beginner to intermediate knitter, with clear instructions and tips to help you navigate the shaping and joining of the limbs. Grab your needles and let’s get started on making your new best friend!
Materials & Tools
To ensure your puppy turns out soft and squishy, I recommend using a cotton-blend yarn. This provides great stitch definition and holds its shape well when stuffed.
- Yarn: Approximately 3.5 oz (100g) of a cotton-blend yarn. I recommend having a second skein on hand just in case, especially if you want to make extra accessories like a little sweater!
- Needles: 2.5 mm (US size 1.5 or 2) double-pointed needles (DPNs) or small circular needles.
- Stuffing: About 1.7 oz (50g) of polyester fiberfill, down, or synthetic stuffing.
- Eyes: 0.6-inch (15 mm) safety eyes.
- Extras:
- A long embroidery needle for sewing and assembly.
- Embroidery thread or matching yarn for the nose.
- Multi-colored stitch markers to keep track of your rounds.
- Scissors.
Knitting Abbreviations
Please ensure you are familiar with these US knitting terms before beginning. Using the correct abbreviations is key to following the pattern accurately.
- K: Knit
- P: Purl
- M1L: Make 1 Left (Left-leaning increase)
- M1R: Make 1 Right (Right-leaning increase)
- k2tog: Knit two together (Right-leaning decrease)
- ssk: Slip, slip, knit (Left-leaning decrease)
- sk2p: Slip 1, knit 2 together, pass slipped stitch over (Triple decrease)
- St(s): Stitch(es)
- StM: Stitch Marker
- Sl1: Slip one stitch
- S1 with yarn in front: Slip one stitch with the yarn held in front to create a double stitch.
Step-by-Step Instructions
The Head and Snout
We begin by working in the round to create the main shape of the head. Use a stitch marker to denote the beginning of each round.
Main Head Shape:
- Cast on: 6 sts.
- Round 1: 6 K (6)
- Round 2: 6 M1 (12)
- Round 3: 12 K (12)
- Round 4: (1 K, M1L, 1 K) * 4 times (20)
- Round 5: 20 K (20)
- Round 6: (2 K, M1L, 2 K) * 4 times (28)
- Round 7: 28 K (28)
- Round 8: (3 K, M1L, 3 K) * 4 times (36)
- Round 9: 36 K (36)
- Round 10: k2tog, 10 K, sk2p, 10 K, k2tog, 9 K (32)
- Round 11: 3 K, place remaining sts on a stitch marker.
The Muzzle (Snout) Fold:
This part is worked in two sections—the back and the front of the fold—to create a 3D effect for the puppy’s face.
Back Section:
- Row 1: 21 P (21)
- Row 2: 21 K (21)
- Row 3: 21 K (21)
- Row 4: 21 P (21)
- Row 5: 21 K (21)
- Row 6: 21 P (21)
- Row 7: 21 K (21). Set these sts aside on a marker.
Front Section:
Continue without breaking the yarn. This section involves complex increases and decreases to create volume. Work through the specified rows (Row 12 to Row 27), alternating between knit and purl rows as indicated in the pattern to build the snout. Once complete, you will join the front and back sections in Round 28 by knitting the stitches from both pieces together in pairs.
The Front Legs
The legs are worked in the round to create a sturdy, cylindrical shape.
- Cast on: 8 sts (using a loop cast-on method).
- Round 1: 8 K (8)
- Round 2: (M1R, 2 K, M1L) * 2 times (12)
- Round 3: (2 M1R, 2 K, 2 M1L) * 2 times (20)
- Round 4: (1 K, M1R, 1 K, M1R, 2 K, M1L, 1 K, M1L, 1 K) * 2 times (28)
- Round 5: (2 K, M1R, 8 K, M1L, 2 K) * 2 times (32)
- Rounds 6-15: 32 K (10 rounds total)
- Round 16: /4 K, k2tog, 4 K, k2tog, 4 K/, 16 K (30)
- Round 17: /4 K, k2tog, 2 K, k2tog, 4 K/, 16 K (28)
- Round 18: /3 K, k2tog, 2 K, k2tog, 3 K/, 16 K (26)
- Round 19: /2 K, k2tog, 2 K, k2tog, 2 K/, 16 K (24)
- Rounds 20-38: 24 K (19 rounds total)
- Round 39: 10 K (incomplete round). Divide the sts between your needles (12 sts per needle).
The Back Legs (with Heel Flap)
The back legs require a bit more technique to create the “foot” shape using a heel flap method.
- Cast on: 14 sts.
- Round 1: 14 K (14)
- Round 2: (M1R, 5 K, M1L) * 2 times (18)
- Round 3: (2 M1R, 5 K, 2 M1L) * 2 times (26)
- Round 4: (1 K, M1R, 1 K, M1R, 5 K, M1L, 1 K, M1L, 1 K) * 2 times (34)
- Round 5: (2 K, M1R, 11 K, M1L, 2 K) * 2 times (38)
- Rounds 6-11: 38 K (6 rounds total)
- Round 12: /5 K, k2tog, 5 K, k2tog, 5 K/, 19 K (36)
- Round 13: /5 K, k2tog, 3 K, k2tog, 5 K/, 19 K (34)
- Round 14: /4 K, k2tog, 3 K, k2tog, 4 K/, 19 K (32)
- Round 15: 30 K (Do not finish the last 2 sts).
Heel Flap: Work the heel flap by turning the work and alternating knit and purl rows (Rows 16-37) to create the necessary depth for the puppy’s hind legs.
The Body and Belly
The body is worked in rounds, starting from the joining of the legs and expanding to create a rounded belly.
- Joining: Once the legs are finished, join them to the body. Use the simultaneous closing method to pick up the stitches from both the leg and the body, knitting them together to create a seamless transition.
- Body Rounds: Follow the pattern through the increasing rounds to build the width of the belly. Pay close attention to the increases (M1R/M1L) to ensure the body remains symmetrical.
- Tapering: After reaching the widest part of the belly, the pattern will guide you through several rounds of decreases to taper the body toward the tail end.
The Ears
The ears are worked flat (back and forth, not in the round).
- Cast on: 2 sts.
- Row 1: 2 K (2)
- Row 2: 2 P (2)
- Row 3: (M1L) * 2 times (6)
- Row 4: 6 P (6)
- Row 5: (M1R, 1 K, M1R) * 2 times (10)
- Row 6: 10 P (10)
- Row 7: M1R, 8 K, M1R (12)
- Row 8: 12 P (12)
- Row 9: (M1R, 4 K, M1R) * 2 times (16)
- Row 10: 16 P (16)
- Row 11: M1R, 14 K, M1R (18)
- Row 12: 18 P (18)
- Row 13: (M1R, 7 K, M1R) * 2 times, then cast on 6 sts and join in the round!
- Row 14: 25 K (Incomplete round, 14 sts per needle).
- Row 15: (M1R, 12 K, M1R) * 2 times (32)
- Rows 16-18: 32 K (3 rows)
- Row 19: (k2tog, 12 K, k2tog) * 2 times (28)
- Rows 20-24: 28 K (5 rows)
- Row 25: k2tog, 11 K, M1R, M1R, 11 K, k2tog (28)
- Rows 26-27: 28 K (2 rows)
- Row 28: (k2tog, 10 K, k2tog) * 2 times (24)
- Row 29: 24 K (24)
- Row 30: (k2tog, 8 K, k2tog) * 2 times (20)
- Row 31: (k2tog, 6 K, k2tog) * 2 times (16)
- Row 32: (k2tog, 4 K, k2tog) * 2 times (12)
- Row 33: (k2tog, 2 K, k2tog) * 2 times (8). Fasten off and pull tight.
Finishing & Assembly
Now comes the most rewarding part—bringing your puppy to life!
- Stuffing: Before sewing the head to the body and closing the limbs, stuff each part firmly with your fiberfill. Be sure to distribute the stuffing evenly so there are no lumps.
- Eyes: Attach the 15 mm safety eyes to the head. I recommend pinning them in place first to find the perfect, symmetrical position that gives your puppy its “personality.”
- Nose: Use your embroidery thread to stitch a cute little nose onto the snout.
- Sewing: Using a large embroidery needle and matching yarn, carefully sew the ears to the head, and then the head to the body. Pin everything in place before you start sewing to ensure the puppy sits correctly.
Tips for Success
- Watch Your Tension: Since this pattern uses a lot of increases and decreases, keep your tension consistent. If you knit too tightly, the increases might look bunched up; if too loosely, the decreases might look uneven.
- Use Markers: Don’t skip the stitch markers! In a pattern with many rounds and complex shaping, markers are your best friend to ensure you don’t lose your place.
- The Importance of the “Double Stitch”: When the pattern calls for slipping a stitch with the yarn in front, make sure you do it carefully. This creates the “double stitch” effect used for seamless transitions.
- Don’t Rush the Joining: Joining the legs to the body can be tricky. Take your time with the “simultaneous closing” method to ensure the puppy is sturdy and the seams are clean.