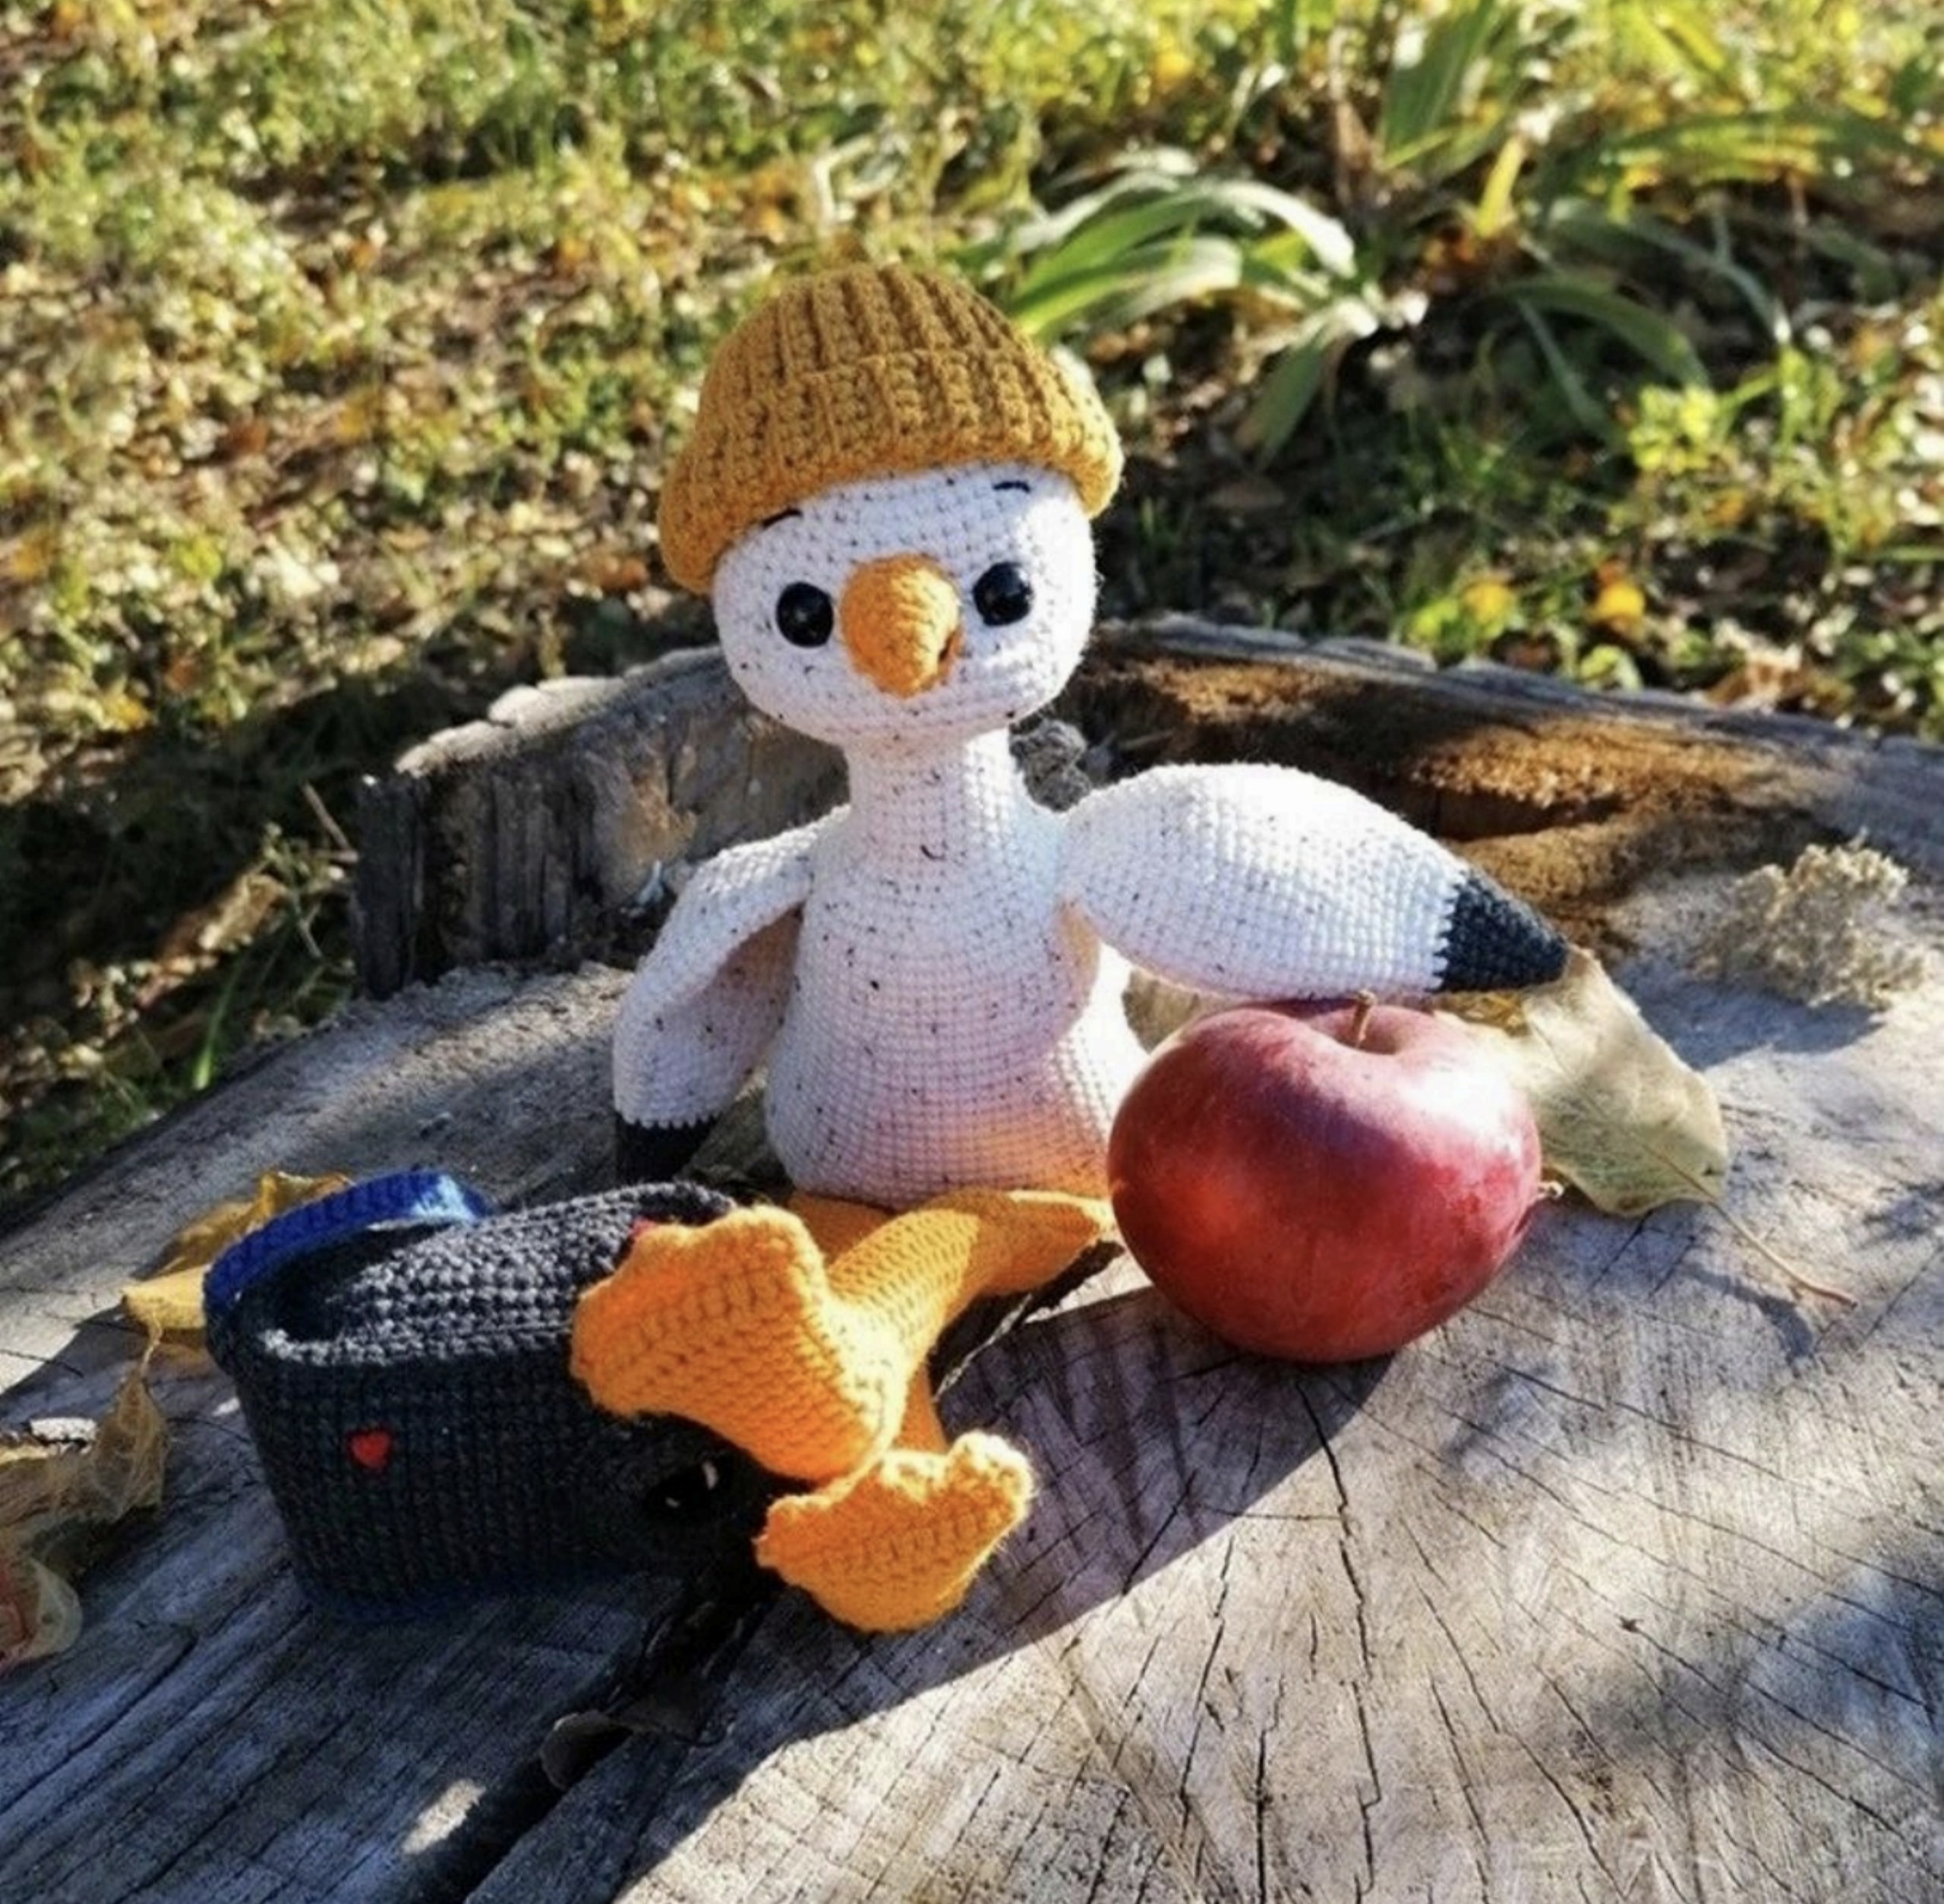
Crochet Seagull Amigurumi Pattern: A Cute Seaside Project
Are you looking for a whimsical and adorable project to add to your amigurumi collection? This crochet seagull is the perfect seaside companion! Whether you want to decorate a shelf, create a unique gift for a beach lover, or simply enjoy the process of making something charming, this pattern is designed to be engaging and fun.
This seagull features a cozy mustard-colored beanie, a tiny crochet camera accessory, and a sweet expression that is sure to bring a smile to your face. While this pattern has a few different components, the instructions are broken down into manageable steps, making it an excellent project for intermediate crocheters or ambitious beginners who are comfortable with basic amigurumi techniques.
Introduction
Crocheting amigurumi is all about character. This seagull pattern isn’t just about following stitches; it is about bringing a little personality to life. From the way the tiny feet are shaped to the inclusion of a miniature camera, every detail is designed to tell a story. This tutorial will guide you through creating the head, body, wings, tail, feet, and even a tiny accessory to complete the look.
By the end of this project, you will have a sturdy, stuffed seagull that looks ready for a day at the beach. Grab your favorite hooks and let’s dive into the waves of creativity!
Materials and Abbreviations
To ensure your seagull turns out looking exactly like the inspiration, I recommend using high-quality cotton or cotton-blend yarns. Below is a list of recommended materials and the standard US crochet terms used throughout this pattern.
Materials Needed
- Yarn:
- Main Color (White/Milky): A cotton-blend yarn, approximately 330 yards per 100g (DK or Sport weight).
- Secondary Color (Mustard/Gold): A cotton-blend yarn, approximately 160 yards per 50g (DK weight).
- Accent Color (Black/Graphite): A cotton-blend yarn, approximately 160 yards per 50g (DK weight).
- Accent Color (Orange): A cotton-blend yarn, approximately 160 yards per 50g (DK weight).
- Strap Color (Blue): Any small amount of blue yarn.
- Crochet Hook: 1.75 mm (or the size needed to achieve a tight, dense fabric).
- Eyes: 9 mm safety eyes.
- Stuffing: Polyester fiberfill (holofiber).
- Tools: Yarn needle, scissors, and a stitch marker.
US Crochet Abbreviations
- MR: Magic Ring
- ch: Chain
- ch-up: Chain up (for turning)
- sc: Single crochet
- inc: Increase (2 sc in the same stitch)
- dec: Decrease (sc 2 together)
- sl st: Slip stitch
- hdc: Half double crochet
- dc: Double crochet
- st(s): Stitch(es)
- rep: Repeat
Step-by-Step Instructions
The Feet (Make 2)
Using orange yarn, we will begin by creating the base of the feet. Remember to stuff the knee area lightly.
Round 1: Start with a chain of 13. Starting in the 2nd ch from the hook, work 12 sc. ch-up, then work 12 sc along the other side of the foundation chain to create an oval. Place a stitch marker. Work in both the front and back loops of the first row to complete 24 sc total.
Rounds 2–3: 24 sc (2 rows).
Round 4: (10 sc, dec) repeat 2 times (22 sc).
Rounds 5–7: 22 sc (3 rows).
Round 8: (9 sc, dec) repeat 2 times (20 sc).
Round 9: 20 sc.
Heel Shaping: For rounds 10 through 15, work in turning rows. At the end of each row, perform a ch-up. Use the following sequence for shaping:
- Round 10: 8 sc, sl st.
- Round 11: 6 sc, sl st.
- Round 12: 7 sc, sl st.
- Round 13: 8 sc, sl st.
- Round 14: 9 sc, sl st.
- Round 15: 5 sc, dec, 3 sc, sl st.
- Round 16: 4 sc, dec, 12 sc.
Place a marker and continue working in a circle from here. Follow the remaining pattern steps for the foot structure, ensuring you fold the piece in half and work through both walls as directed in the final shaping rounds to create the three-dimensional foot shape.
The Tail
Using graphite yarn. This piece is worked in rows and is not stuffed.
Round 1: Ch 21. Starting in the 2nd ch from hook, work 20 sc, ch-up. Place a marker and work 20 sc on the other side of the chain to create a total of 40 sc. (40 sc total).
Round 2: 40 sc.
Rounds 3–4: 40 sc (2 rows).
Round 5: (18 sc, dec) repeat 2 times (38 sc).
Rounds 6–7: 38 sc (2 rows).
Round 8: (17 sc, dec) repeat 2 times (36 sc).
Rounds 9–12: 36 sc (4 rows).
Round 13: (7 sc, dec) repeat 4 times (32 sc).
Rounds 14–17: 32 sc (4 rows).
Round 18: (6 sc, dec) repeat 4 times (28 sc).
Rounds 19–22: 28 sc (4 rows).
Round 23: (5 sc, dec) repeat 4 times (24 sc).
Rounds 24–29: 24 sc (6 rows). Ensure the marker stays on the side. Fold the piece in half and work through both sides to finish. Fasten off.
The Wings (Make 2)
Using graphite yarn. These are worked flat and not stuffed.
Round 1: 8 sc in a Magic Ring.
Round 2: 8 inc (16 sc).
Round 3: (1 sc, inc) repeat 8 times (24 sc). Change to graphite if needed.
Rounds 4–5: 24 sc working in the back loops only (2 rows).
Round 6: (3 sc, inc) repeat 6 times (30 sc).
Round 7: 30 sc. Fasten off, leaving a long tail for sewing.
Decorative Edge: To create the “fan” effect, work a row of: (sl st, skip 1 sc, 5 dc in the next stitch, skip 1 sc, sl st) repeat 4 times.
The Head
Using the main white/milky color.
Round 1: 6 sc in a Magic Ring.
Round 2: 6 inc (12 sc).
Round 3: (1 sc, inc) repeat 6 times (18 sc).
Round 4: (1 sc, inc, 2 sc, inc) repeat 5 times, 1 sc (24 sc).
Round 5: (3 sc, inc) repeat 6 times (30 sc).
Round 6: (2 sc, inc, 4 sc, inc) repeat 5 times, 2 sc (36 sc).
Round 7: 36 sc.
Round 8: (5 sc, inc) repeat 6 times (42 sc).
Round 9: (3 sc, inc, 6 sc, inc) repeat 5 times, 3 sc (48 sc).
Rounds 10–14: 48 sc (5 rows).
Round 15: 18 sc, 3 inc, 6 sc, 3 inc, 18 sc (54 sc).
Round 16: 18 sc, (1 sc, inc) repeat 3 times, 6 sc, (1 sc, inc) repeat 3 times, 18 sc (60 sc).
Rounds 17–19: 60 sc (3 rows).
Round 20: (8 sc, dec) repeat 6 times (54 sc).
Round 21: (7 sc, dec) repeat 6 times (48 sc).
Round 22: (6 sc, dec) repeat 6 times (42 sc).
Round 23: (5 sc, dec) repeat 6 times (36 sc).
Round 24: (4 sc, dec) repeat 6 times (30 sc).
Round 25: (3 sc, dec) repeat 6 times (24 sc). Fasten off, leaving a long tail for sewing.
The Beak
Using orange yarn.
Round 1: 4 sc in a Magic Ring.
Round 2: (1 sc, inc) repeat 2 times (6 sc).
Round 3: 6 sc.
Round 4: (1 sc, inc) repeat 3 times (9 sc).
Round 5: 9 sc.
Round 6: 3 sc, 3 inc, 3 sc (12 sc).
Round 7: 6 sc, sl st. Fasten off, leaving a long tail for sewing.
The Body
Using the main white/milky color. Stuff firmly as you work.
Round 1: Ch 19. Starting in the 2nd ch from hook: inc, 14 sc, 4 sc in the next stitch, 14 sc, inc (36 sc).
Round 2: 2 inc, 18 sc, 4 inc, 18 sc, 2 inc (44 sc).
Round 3: (1 sc, inc) repeat 2 times, 16 sc, (1 sc, inc) repeat 4 times, 16 sc, (1 sc, inc) repeat 2 times (52 sc).
Round 4: 3 sc, 2 inc, 18 sc, 2 inc, 6 sc, 2 inc, 18 sc, 2 inc, 3 sc (64 sc).
Round 5: 3 sc, (1 sc, inc) repeat 2 times, 18 sc, (1 sc, inc) repeat 2 times, 35 sc (68 sc).
Rounds 6–10: 68 sc (5 rows).
Round 11: 2 sc, dec, 28 sc, dec, 34 sc (66 sc).
Round 12: 66 sc.
Round 13: (9 sc, dec) repeat 6 times (60 sc).
Rounds 14–18: 60 sc (5 rows).
Round 19: (8 sc, dec) repeat 6 times (54 sc).
Rounds 20–24: 54 sc (5 rows).
Round 25: (7 sc, dec) repeat 6 times (48 sc).
Rounds 26–30: 48 sc (5 rows).
Round 31 (Attaching Wings): 8 sc, work wing into the body, 12 sc, work other wing into the body, 20 sc (48 sc).
Round 32: (6 sc, dec) repeat 6 times (42 sc).
Round 33: (5 sc, dec) repeat 6 times (36 sc).
Round 34: (4 sc, dec) repeat 6 times (30 sc).
Round 35: (3 sc, dec) repeat 6 times (24 sc).
Rounds 36–43: 24 sc (8 rows). Finish with a sl st and fasten off.
The Mustard Beanie Hat
Using mustard yarn. This is worked in 4 separate wedges/panels and then joined.
Wedge Construction: Work in turning rows, using only the back loops (BLO). On even-numbered rows, work the last sc through both loops to create a smooth edge.
Wedge Pattern:
- Row 1: Ch 21. Starting in 2nd ch from hook, work 13 sc, sl st.
- Row 2: 14 sc.
- Row 3: 14 sc, sl st.
- Row 4: 15 sc.
- Row 5: 15 sc, sl st.
- Row 6: 16 sc.
- Row 7: 16 sc, sl st.
- Row 8: 17 sc.
- Row 9: 17 sc, sl st.
- Row 10: 18 sc.
- Row 11: 18 sc, sl st.
- Row 12: 19 sc.
- Row 13: 19 sc, sl st.
- Row 14: 20 sc.
Repeat this process to create 4 wedges. Once finished, join the edges of the wedges together using slip stitches until they form a hat shape. Fold the brim upward for a cozy look.
The Mini Camera Accessory
Camera Body: Using graphite yarn.
Round 1: 8 sc in a Magic Ring.
Round 2: 8 inc (16 sc).
Round 3: (1 sc, inc) repeat 8 times (24 sc). Change to graphite.
Rounds 4–5: 24 sc working in the back loops only (2 rows).
Round 6: (3 sc, inc) repeat 6 times (30 sc).
Round 7: 30 sc. Fasten off, leaving a long tail.
Camera Lens: Using black yarn.
Round 1: 8 sc in a Magic Ring.
Round 2: 8 inc (16 sc).
Round 3: (1 sc, inc) repeat 8 times (24 sc). Change to graphite.
Rounds 4–5: 24 sc in the back loops only (2 rows).
Round 6: (3 sc, inc) repeat 6 times (30 sc).
Round 7: 30 sc. Fasten off, leaving a long tail.
Assembly: Sew the lens to the center of the camera body. To create the strap, join blue yarn to the side of the body, ch 5, sl st back into the body (skipping 3 sc from the attachment point). Repeat on the other side. Connect the two loops with a long blue chain of 65 ch, then work 64 sc back along the chain to create a sturdy strap.
Finishing
Now comes the most rewarding part: assembly! This is where your seagull truly comes to life.
- Eyes: Insert the 9mm safety eyes between rounds 14 and 15 of the head, directly above the increases. Keep the eyes 6 sc apart.
- Beak: Sew the orange beak to the center of the face, just below the eyes.
- Details: Using black thread or yarn, embroider small eyes/eyebrows or even a little smile to give your seagull extra character. You can also add small graphite “feathers” to the top of the head by attaching yarn to the crown and working small groups of stitches.
- Body Assembly: Sew the head to the body. Attach the tail to the back, the wings to the sides, and the feet to the bottom.
- Accessories: Place the tiny camera next to your seagull for the perfect photo op!
Tips
To make your seagull look professional, keep these tips in mind:
- Tension is Key: When making amigurumi, aim for a tight tension so that your stuffing doesn’t peek through the stitches. If you find your stitches are too loose, try a smaller hook.
- Use Stitch Markers: Working in rounds can be tricky. Always use a stitch marker to keep track of your starting point.
- Stuffing Technique: Stuff your pieces firmly but evenly. For the body, ensure the stuffing reaches the corners so the shape remains smooth. For the feet, keep the stuffing light to maintain shape.
- Invisible Decreases: For a cleaner look, use the “invisible decrease” method (inserting the hook into the front loops only of the next two stitches) to prevent holes in your work.