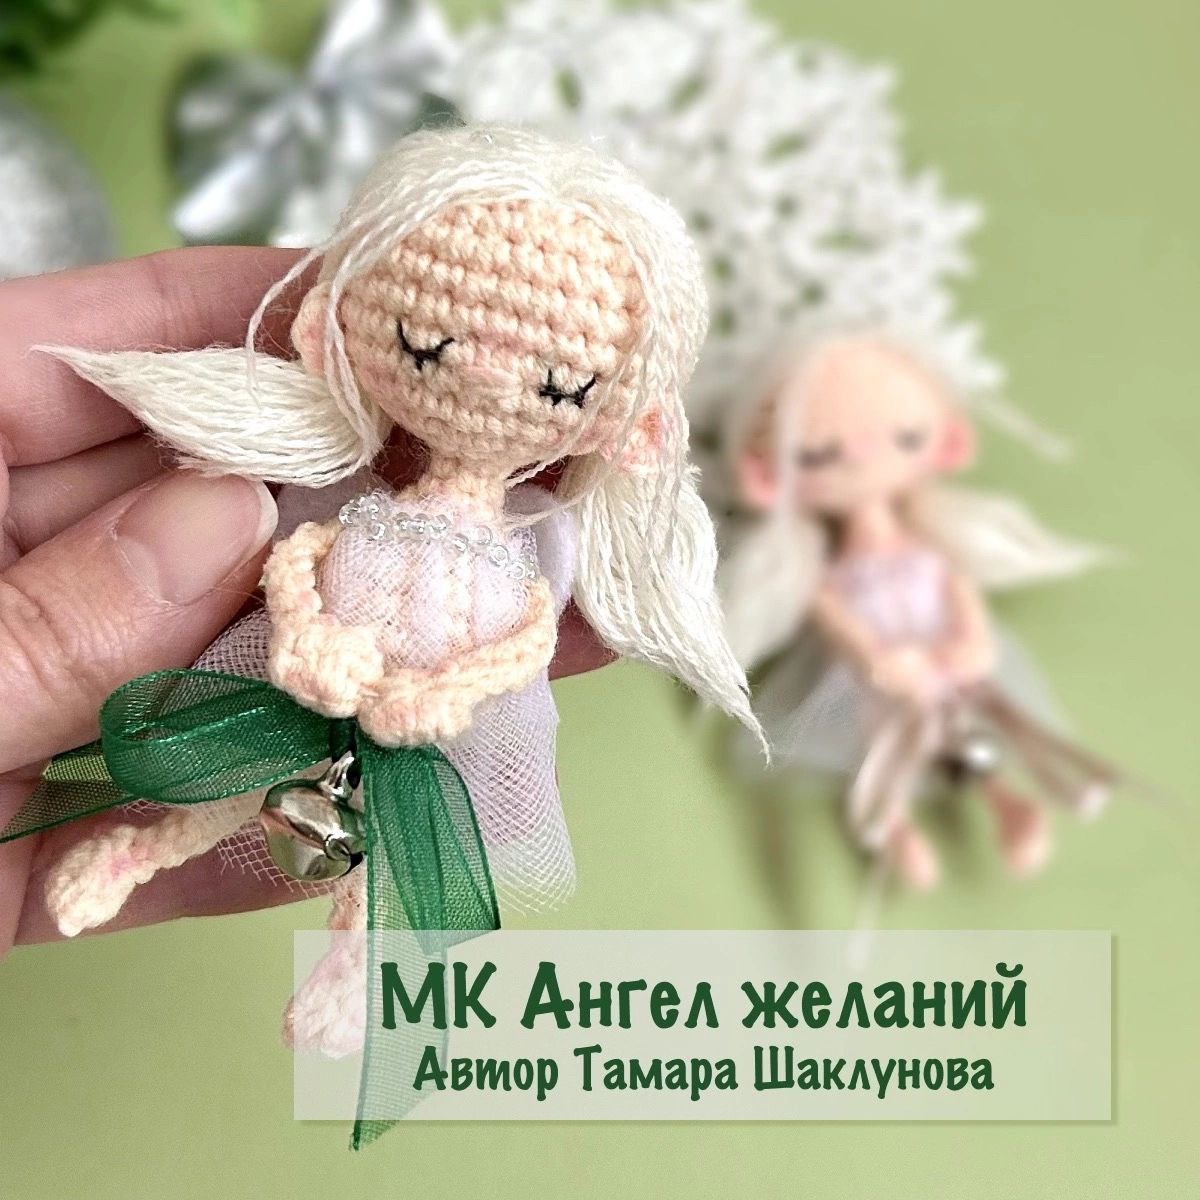
DIY Crochet Wish Angel Pattern: A Cute Amigurumi Tutorial
Are you looking for a whimsical, heartwarming project to add to your crochet collection? This DIY Wish Angel is the perfect little companion. Whether you want to create a tiny guardian for a nursery, a sweet gift for a friend, or a charming ornament for your holiday decor, this amigurumi angel is sure to bring a smile to everyone’s face. This pattern is designed to be beginner-friendly, focusing on fundamental stitches while allowing you to get creative with textures and accessories.
The magic of this project lies in the details. From the delicate tulle skirt to the tiny, expressive face, this angel is all about the little things. Grab your favorite fine-weight yarn, find a cozy spot, and let’s start crafting your very own Wish Angel!
Materials and Tools Needed
To achieve the best results and ensure your angel has that clean, professional amigurumi look, I recommend using a smaller hook than usual to keep your stitches tight. This prevents the stuffing from peeking through.
- Yarn: A fine-weight cotton or cotton/acrylic blend (such as YarnArt Jeans) in skin tone and white.
- Crochet Hook: 1.75 mm (US size B-1).
- Stuffing: High-quality polyester fiberfill.
- Tulle: A small piece of tulle, approximately 6 x 6 inches.
- Decorative Elements: Small beads, a bead needle, white felt, and wool embroidery floss.
- Adhesive: PVA glue for securing felt or beads.
- Tools: A felting needle (if you plan to needle-felt the facial details) and a standard tapestry needle.
Crochet Abbreviations Used
This pattern uses standard US crochet terminology. Please ensure you are familiar with these terms before beginning:
- MR: Magic Ring
- ch: Chain
- sc: Single crochet
- hdc: Half double crochet
- dc: Double crochet
- sl st: Slip stitch
- inc: Increase (2 single crochets in one stitch)
- dec: Decrease (sc 2 stitches together)
Step-by-Step Instructions
We will begin by crocheting the body and the head as one continuous piece. This creates a sturdy, seamless foundation for your angel.
Crafting the Body and Head
The Body Section:
We start by creating an oval base for the body. Begin by making a chain of 5 ch. Starting in the second chain from your hook, work the following:
Row 1: 1 inc, 2 sc, 3 sc in the very last stitch. Now, working on the opposite side of the chain to complete the oval, sc in the remaining 3 stitches. (Total: 10 stitches)
Row 2: 2 inc, 2 sc, 3 inc, 2 sc, 1 inc. (Total: 16 stitches)
Rows 3–6: sc in each stitch around (16 stitches per row).
Row 7: (2 sc, 1 dec) repeat 4 times. (Total: 12 stitches)
Row 8: (1 sc, 1 dec) repeat 4 times. (Total: 8 stitches)
Row 9: (1 dec, 2 sc) repeat 2 times. (Total: 6 stitches)
Stop here to stuff the body firmly with your fiberfill.
The Head Section:
Now, we will expand the stitches to create the rounded shape of the head.
Rows 10–11: sc in each stitch around (6 stitches per row).
Row 12: 6 inc. (Total: 12 stitches)
Row 13: (1 sc, 1 inc) repeat 6 times. (Total: 18 stitches)
Row 14: (2 sc, 1 inc) repeat 6 times. (Total: 24 stitches)
Row 15: (3 sc, 1 inc) repeat 6 times. (Total: 30 stitches)
Rows 16–20: sc in each stitch around (30 stitches per row).
Row 21: (3 sc, 1 dec) repeat 6 times. (Total: 24 stitches)
Row 22: (2 sc, 1 dec) repeat 6 times. (Total: 18 stitches)
Row 23: (1 sc, 1 dec) repeat 6 times. (Total: 12 stitches)
Continue stuffing the head firmly. It is important to ensure the transition between the body and head is well-padded.
Row 24: 6 dec. (Total: 6 stitches)
Fasten off, leaving a long tail for sewing. Use your tapestry needle to weave the tail through the remaining stitches to close the hole completely. Do not cut the yarn yet, as you may need it for assembly.
Making the Ears
The ears are very simple and add a sweet, celestial touch to your angel.
Make two ears using the following pattern:
Create a MR and work 4 sc into the ring. Fasten off, leaving a long tail of yarn to allow for easy sewing onto the sides of the head.
Assembly and Decoration
This is where your angel truly comes to life! Since the body and head are finished, it is time to add the personality and the outfit.
The Face
For a soft, “sleeping” look, you can use a felting needle and white wool embroidery floss to create closed, curved eyelashes on the face. Alternatively, you can use small black beads or simply embroider them with dark thread. Don’t forget to add a tiny bit of pink to the cheeks using a felt pen or a very light touch of pink embroidery floss for a rosy, youthful glow.
The Tutu Skirt
Take your 6 x 6 inch piece of tulle. You can wrap it around the waist of the angel to create a voluminous skirt. Secure it by wrapping the yarn tail around the waist several times and knotting it securely. You can even layer different colors of tulle if you want a more colorful look!
The Limbs and Accessories
While the limbs are typically worked separately as small cylinders, you can use your leftover skin-colored yarn to crochet tiny arms and legs. Once finished, sew them to the body. To complete the “Wish Angel” look, consider adding a tiny silver bell or a ribbon around the waist to mimic the charm shown in the inspiration photos.
Finishing and Care Tips
Once everything is sewn in place, go back and weave in all your loose ends very carefully. Use a tiny drop of PVA glue on the knots if you are worried about them coming undone over time, especially if the angel is intended for a child’s room.
Care: Because this angel uses delicate materials like tulle and fine yarn, I recommend spot cleaning only. If it gets dusty, a gentle shake or a light use of a lint roller should do the trick. Avoid machine washing to prevent the tulle from getting crushed or the facial details from shifting.
Pro Tips for a Perfect Angel
- Tension is Key: If you notice gaps between your stitches, switch to a slightly smaller hook. A tight amigurumi is a professional-looking amigurumi!
- Use Stitch Markers: In amigurumi, it is very easy to lose track of where a round begins. Always use a stitch marker to stay on track.
- Pin Before Sewing: Before you permanentely sew the ears or limbs on, use sewing pins to test the placement. This ensures your angel isn’t lopsided!
- Stuffing Technique: When stuffing the head, push the fiberfill into the corners using your crochet hook. This prevents “lumps” and ensures a perfectly round shape.