Adorable Mini Plush Cow Crochet Pattern: A Beginner-Friendly Tutorial
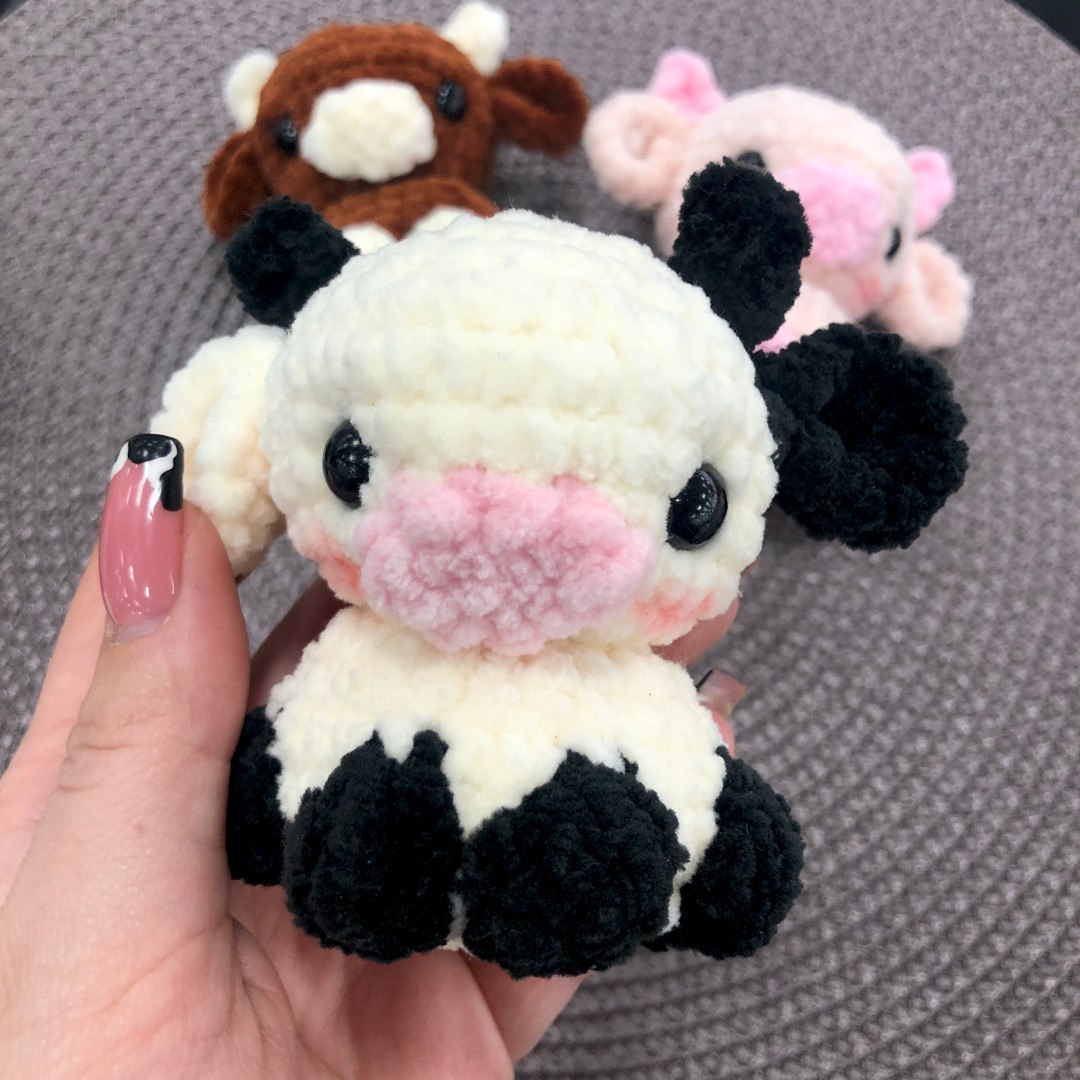
Looking for your next quick and cuddly crochet project? This mini plush cow is the perfect addition to any amigurumi collection! With its oversized head, tiny body, and squishy texture, this little calf is designed to be incredibly cute and easy to make. Whether you are looking for a heartfelt handmade gift or a fun weekend project to practice your color changes, this pattern is for you.
In this tutorial, we will walk you through every step of creating your own plush cow. We will be using “super bulky” chenille-style yarn, which makes the finished toy feel like a store-bought plushie and works up incredibly fast. Let’s get hooking!
Materials & Abbreviations
To achieve the look of the cow in the photos, you will need a few specific supplies. If you don’t have the exact brand of yarn listed, any plush or velvet yarn (Weight 6) will work perfectly.
Supplies Needed
- Plush Yarn: A super bulky chenille yarn in White (or beige), Black, and Pink.
- Crochet Hook: 3.5mm (E) hook.
- Safety Eyes: 10mm black safety eyes.
- Stuffing: High-quality polyester fiberfill.
- Tools: A large-eye yarn needle, scissors, and a stitch marker.
- Optional: Dental floss or strong sewing thread for sculpting the face.
US Crochet Terms & Abbreviations
- MR: Magic Ring
- Ch: Chain
- Sc: Single crochet
- Dc: Double crochet
- Inc: Increase (two single crochet stitches in one stitch)
- Dec: Decrease (crochet two stitches together)
- Sl st: Slip stitch
- \*6: Repeat the instruction inside the parentheses 6 times
Note: This pattern is worked in continuous spiral rounds. Do not join your rounds with a slip stitch unless specifically mentioned. Use your stitch marker to keep track of the first stitch of every round.
Step-by-Step Instructions
The Head and Body
The head and body are worked as one continuous piece. When the pattern mentions a color change, please switch to the black yarn for those specific stitches to create the cow’s spots.
Round 1: Start with white yarn. Make 6 sc in a MR (6)
Round 2: 6 inc (12)
Round 3: 12 inc (24)
Round 4: 6 sc, (switch to black) 4 dc in the next stitch, (switch to white) 3 sc, (black) 4 dc in the next stitch, (white) 2 sc, (black) 4 dc in the next stitch, (white) 3 sc, (black) 4 dc in the next stitch, 6 sc (36)
Round 5: 6 sc, (black) 4 dc together (decrease), (white) 3 sc, (black) 4 dc together, (white) 2 sc, (black) 4 dc together, (white) 3 sc, (black) 4 dc together, 6 sc (24)
Rounds 6-8: 24 sc for 3 rounds (24)
Round 9: 12 dec (12)
Round 10: 12 inc (24)
Round 11: (1 sc, inc) * 6 (36)
Round 12: 8 sc, (black) 1 sc, (white) 27 sc (36)
Round 13: 7 sc, (black) 3 sc, (white) 26 sc (36)
Round 14: 6 sc, (black) 5 sc, (white) 25 sc (36)
Round 15: 5 sc, (black) 7 sc, (white) 24 sc (36)
Eye Placement: Insert your 10mm safety eyes between Round 13 and Round 14, leaving approximately 10 sc between them.
Round 16: 4 sc, dec, 4 sc, dec, (4 sc, dec) * 4 (30)
Round 17: 3 sc, dec, 1 sc, (black) 2 sc, (white) dec, (3 sc, dec) * 4 (24)
Round 18: 2 sc, dec, 2 sc, (black) dec, (white) (2 sc, dec) * 4 (18)
Round 19: (1 sc, dec) * 6 (12)
Round 20: 6 dec (6)
Fasten off and weave in the ends. Stuff the head and body firmly with fiberfill.
The Muzzle
Using pink yarn: Chain 4. Starting from the second chain from the hook:
Round 1: 2 sc, 3 sc in the last stitch. Turn to work along the opposite side of the chain: 3 sc, sl st to join. Fasten off, leaving a long tail for sewing.
The Ears (Make 2)
Using white yarn:
Round 1: 6 sc in a MR (6)
Round 2: Ch 1, turn, 6 inc. Join the two edges together with a sl st to create a small semi-circle. Fasten off, leaving a long tail for sewing.
The Horns (Make 2)
Using black yarn: Chain 3. Starting from the second chain from the hook:
Round 1: 1 sc, 1 dc. Join the two edges together with a sl st. Fasten off, leaving a long tail for sewing.
Finishing Your Cow
Now it’s time to assemble your cute companion! Use your yarn needle and the tails left over from the pieces.
Assembly Guide
- The Muzzle: Sew the muzzle to the center of the face between rounds 11 and 13. Ensure it is centered between the eyes.
- The Ears: Sew the ears between rounds 14 and 15, roughly 3 to 4 sc away from the eyes.
- The Horns: Sew the horns directly underneath the ears. For a professional look, sew one side with the right side of the stitch facing out and the other side tucked in.
- Face Sculpting: To give your cow a more expressive look, use a piece of dental floss or strong thread. Insert the needle through the head from one side of the eye, across the bridge of the nose, and out the other eye. Pull gently and tie off to create a slight indentation.
Pro Tips for a Perfect Plushie
Working with plush yarn can be a bit different than traditional acrylic or cotton. Here are a few tips to ensure your mini cow looks great:
Manage the “Fuzz”
Plush yarn can hide your stitches. To avoid missing a stitch or accidentally splitting the yarn, use your fingers to feel for the gaps between stitches rather than relying solely on your eyes. A stitch marker is absolutely essential for this pattern!
Tension is Key
Because the yarn is so thick, it’s easy to crochet too loosely, which can let the stuffing peek through. Try to keep your tension snug. If you see gaps, consider dropping down a hook size (e.g., to 3.0mm).
Perfecting the Color Changes
When switching from white to black for the spots, do the color change on the last pull-through of the previous stitch. This ensures your color transitions are seamless and clean.
Your mini plush cow should now be roughly 3.5 inches tall and ready for a new home! Feel free to experiment with different colors—brown and white make a classic highland cow, or pink and white for a fantasy calf.