The Ultimate Crochet Bunny Pattern: An Easy Amigurumi Tutorial
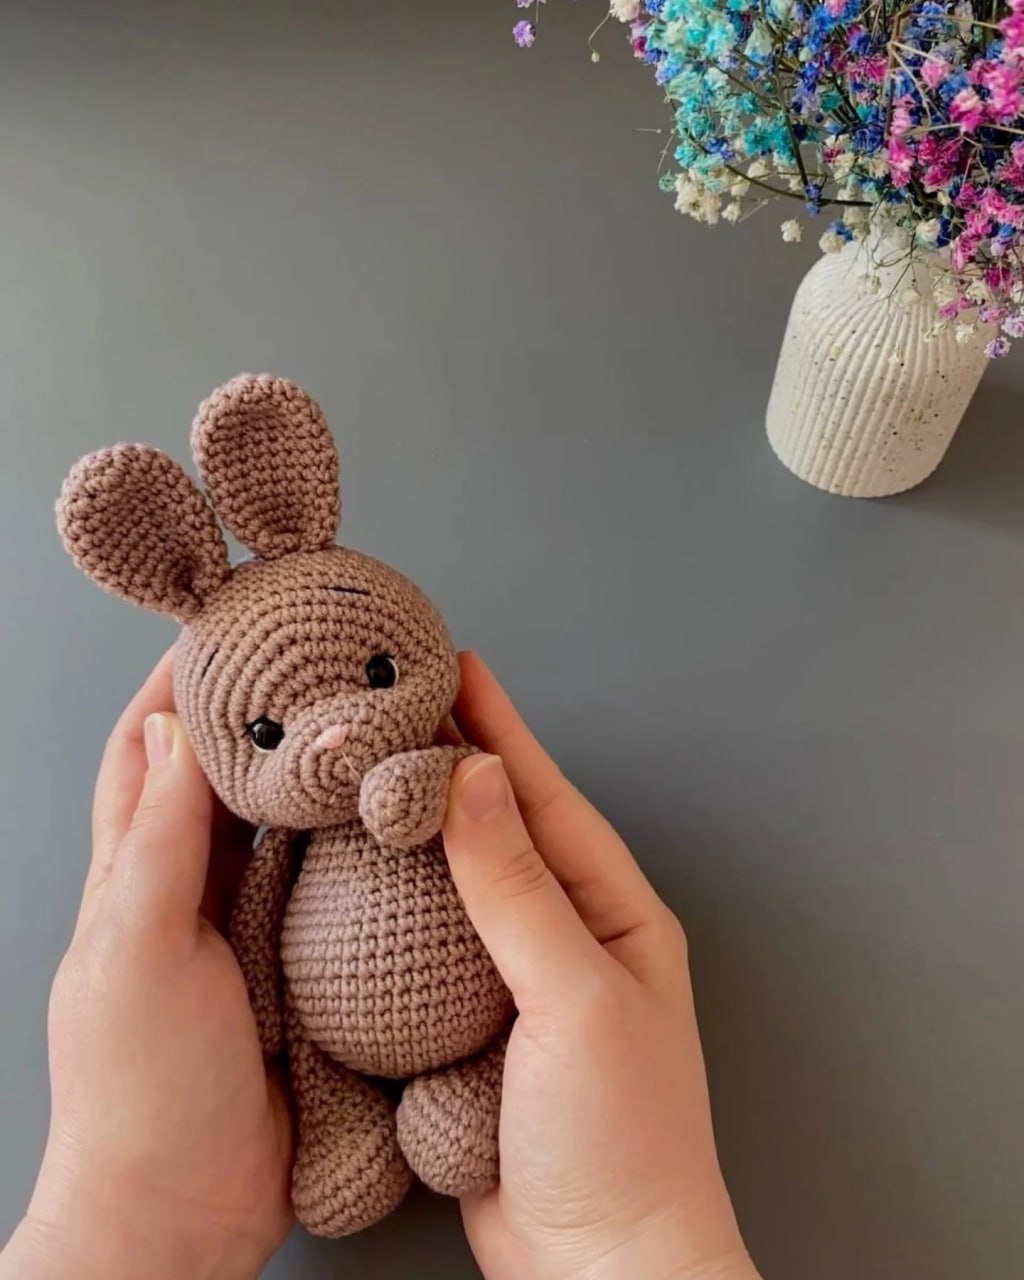
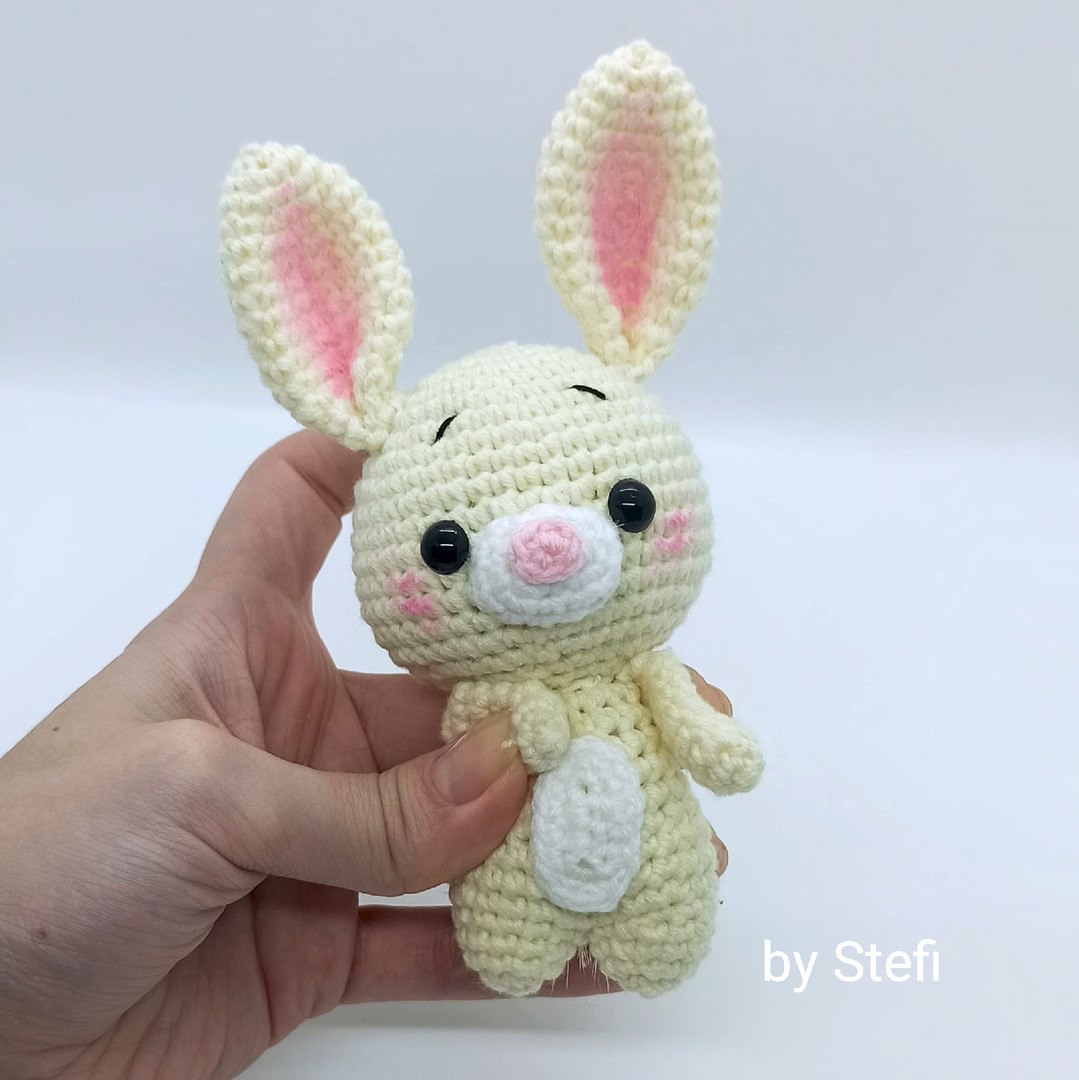
Are you looking for your next adorable amigurumi project? This cute, chubby crochet bunny is the perfect addition to your handmade collection. Whether you are looking to create a nursery decoration, a soft gift for a child, or simply want to practice your crochet skills, this pattern is designed to be approachable and fun. This little bunny features big, expressive eyes, long floppy ears, and a sweet little tummy that makes it absolutely irresistible!
In this comprehensive tutorial, we will walk you through every single step, from creating the magic ring to the final assembly. This pattern is written in US crochet terms and is optimized for beginners who are ready to tackle their first stuffed animal. Grab your favorite yarn and let’s get stitching!
Materials & Tools
To ensure your bunny turns out soft and professional, I recommend using high-quality yarns. Here is everything you will need to get started:
- Yarn: You will need a medium weight (worsted) yarn in three colors:
- Main Color: Yellow or a creamy off-white.
- Secondary Color: White (for the muzzle, belly, and tail).
- Accent Color: A small amount of light pink (for the nose).
Note: Cotton, cotton blends, or soft acrylic yarns work best for amigurumi to maintain stitch definition.
- Crochet Hook: A 1.5mm hook (or a size appropriate for your chosen yarn to ensure tight stitches).
- Eyes: 8mm to 10mm (approximately 3/8 inch) black safety eyes.
- Stuffing: Polyester fiberfill (hollowfiber) to make your bunny plump and huggable.
- Tail: A small white pom-pom.
- Other Tools: A yarn needle for sewing, scissors, and optionally, some pink blush or fabric marker to add color to the cheeks.
Abbreviations
If you are new to amigurumi, don’t worry! We use standard US crochet terminology. Here is a quick cheat sheet:
- MR: Magic Ring (or Magic Circle)
- Ch: Chain
- Sc: Single Crochet
- Inc: Increase (2 single crochets in the same stitch)
- Dec: Decrease (Invisible decrease is highly recommended for amigurumi)
- Sl st: Slip Stitch
- St(s): Stitch(es)
- Rnd: Round
Step-by-Step Instructions
The Head
Using Yellow/Cream yarn.
We begin the head with a magic ring to ensure there is no hole at the top.
- Rnd 1: 6 sc in MR (6)
- Rnd 2: Inc in each st (12)
- Rnd 3: (1 sc, inc) x 6 (18)
- Rnd 4: (2 sc, inc) x 6 (24)
- Rnd 5: (3 sc, inc) x 6 (30)
- Rnd 6: (4 sc, inc) x 6 (36)
- Rnd 7: 36 sc (36)
- Rnd 8: (5 sc, inc) x 6 (42)
- Rnd 9-16: 42 sc (42) — work 8 rounds total.
- Rnd 17: (5 sc, dec) x 6 (36)
- Rnd 18: (4 sc, dec) x 6 (30)
Stop here to begin adding stuffing. Ensure the head is firm and well-filled.
- Rnd 19: (3 sc, dec) x 6 (24)
- Rnd 20: (2 sc, dec) x 6 (18)
- Rnd 21: (1 sc, dec) x 6 (12)
- Rnd 22: Dec in each st (6)
Fasten off, pull the thread through to close the hole, and hide the tail inside the head.
The Muzzle
Using White yarn.
The muzzle gives your bunny its adorable expression.
- Rnd 1: Chain 4. Starting from the 2nd chain from your hook: 2 sc in the first chain, 3 sc in the last chain, 2 sc on the other side of the chain, and 1 inc in the very last stitch (8).
- Rnd 2: Inc, 1 sc, 3 inc, 1 sc, 2 inc (14)
- Rnd 3: 14 sc (14)
Leave a long tail of yarn for sewing the muzzle onto the face later.
The Legs and Body
Using Yellow/Cream yarn. We will work the legs first, then join them to create the body.
First Leg
- Rnd 1: 6 sc in MR (6)
- Rnd 2: Inc in each st (12)
- Rnd 3-4: 12 sc (2 rounds)
Fasten off the thread.
Second Leg
- Rnd 1: 6 sc in MR (6)
- Rnd 2: Inc in each st (12)
- Rnd 3-4: 12 sc (2 rounds)
Important: Do not fasten off! We will continue working directly from the second leg to form the body.
The Body
- Rnd 5: Sc in the first leg, then continue working 23 sc around both legs (Total: 24 sc).
- Rnd 6: (3 sc, inc) x 6 (30)
- Rnd 7-8: 30 sc (2 rounds)
- Rnd 9: (3 sc, dec) x 6 (24)
- Rnd 10-11: 24 sc (2 rounds)
- Rnd 12: (2 sc, dec) x 6 (18)
- Rnd 13-14: 18 sc (2 rounds)
Add stuffing to the body as you work. Leave a long tail for sewing the head to the body.
The Belly Patch
Using White yarn.
- Rnd 1: Chain 5. Starting from the 2nd chain from your hook: 3 sc in the first chain, 4 sc in the last chain, 2 sc on the other side of the chain, and 3 sc in the very last stitch (12).
- Rnd 2: Inc, 2 sc, 3 inc, 4 sc, 2 inc (18)
Leave a tail for sewing the belly onto the front of the bunny.
The Arms (Make 2)
Using Yellow/Cream yarn.
- Rnd 1: 6 sc in MR (6)
- Rnd 2: (2 sc, inc) x 2 (8)
- Rnd 3-8: 8 sc (6 rounds)
Fold the piece in half and crochet 4 sc through both layers to close it. Leave a long tail for sewing.
The Tiny Nose
Using Pink yarn.
- Rnd 1: 6 sc in MR (6). Join with a slip stitch to the start of the round.
Leave a tail for sewing.
The Long Ears (Make 2)
Using Yellow/Cream yarn.
- Rnd 1: 5 sc (5)
- Rnd 2: Inc in each st (10)
- Rnd 3: (4 sc, inc) x 2 (12)
- Rnd 4: 12 sc (12)
- Rnd 5: (1 sc, inc) x 6 (18)
- Rnd 6-12: 18 sc (7 rounds)
- Rnd 13: (1 sc, dec) x 6 (12)
- Rnd 14: 12 sc (12)
Fold the ear in half and crochet 6 sc through both layers to close the edge. Leave a long tail for sewing.
Finishing
Now comes the most rewarding part—bringing your bunny to life! Follow these steps for assembly:
- Attach the Eyes: Before sewing the head closed completely, place your safety eyes between rounds 14 and 15 (adjust slightly depending on your tension) to ensure they are centered.
- Sew the Muzzle and Nose: Sew the white muzzle onto the center of the head. Then, sew the tiny pink nose right in the middle of the muzzle.
- Attach the Ears: Sew the ears to the top of the head. Position them so they stand upright or flop slightly to your liking.
- Attach the Body and Limbs: Sew the head to the body. Then, sew the arms to the sides of the body and the legs to the bottom.
- Add the Belly: Sew the white belly patch onto the front of the body.
- The Tail: Glue or sew the white pom-pom to the back of the bunny.
- Personalize: For a professional look, use a bit of pink blush or fabric marker to add rosy cheeks just below the eyes.
Tips for a Perfect Crochet Bunny
Creating amigurumi can be tricky at first, so here are a few professional tips to help you succeed:
- Use Invisible Decreases: When working on rounds where you need to decrease (dec), try the “invisible decrease” method (inserting the hook into the front loops only of the next two stitches). This prevents gaps and makes the stuffing less visible.
- Mind Your Tension: Amigurumi should be worked with slightly tighter tension than a standard scarf or blanket. This ensures the stuffing stays hidden inside the toy.
- Stuffing Technique: Stuff your project in small increments. As you reach the final rounds of a part, make sure the stuffing is pushed firmly into the corners so the shape remains smooth and rounded.
- Eye Placement is Key: The “cuteness” of an amigurumi character often depends on the placement of the eyes. Try placing the eyes slightly wider apart and lower on the head to give the bunny a “baby-like” appearance.