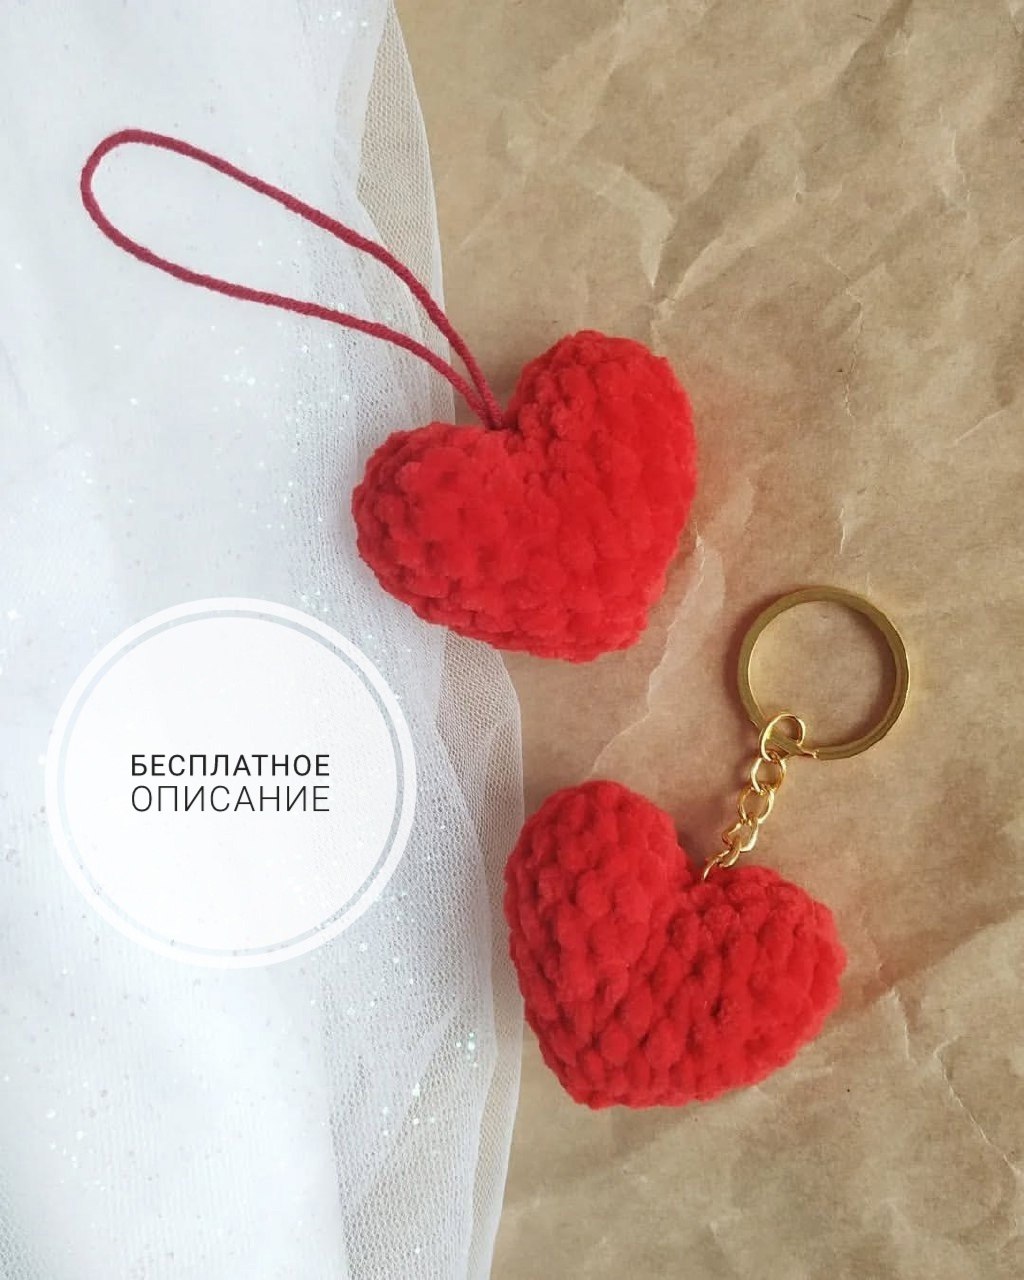
Crochet Plush Heart Keychain Pattern: A Cute and Easy Amigurumi Tutorial
Are you looking for a quick, adorable, and heartwarming crochet project? Whether you want to make a sweet gift for a loved one, create a batch of Valentine’s Day treats, or simply add some personality to your keys or backpack, this plush heart keychain is the perfect project for you! Amigurumi—the Japanese art of knitting or crocheting small, stuffed creatures and objects—is incredibly popular, and this soft, squishy heart is a fantastic way to dive into the world of plush crochet.
This pattern is specifically designed to be beginner-friendly. It uses simple stitches and a straightforward construction method that results in a professional-looking, high-quality accessory. Because we are using a plush, chenille-style yarn, the finished product will be extra soft and “squishy,” making it a tactile delight. Let’s grab our hooks and get started on this lovely little project!
Materials & Abbreviations
Before we begin, let’s make sure you have everything you need on your crochet table. Using the right materials will ensure your heart looks plump and holds its shape beautifully.
Materials Needed:
- Yarn: A plush or chenille-style yarn is highly recommended for that “squishy” feel. For this pattern, we are using a soft micro-polyester yarn (like YarnArt Dolce) in a bright red. You will only need about half a 3.5 oz (100g) skein.
- Crochet Hook: A 4 mm (G) hook. If your yarn is particularly thick, you might want to go up half a size to ensure your stitches are tight enough to prevent stuffing from peeking through.
- Stuffing: Polyester fiberfill (often called polyfill or hollofiber) to give your heart its shape.
- Stitch Marker: Since we are working in a continuous spiral, a stitch marker is essential to keep track of your rounds. You can also use a piece of contrast-colored scrap yarn.
- Keychain Hardware: A standard metal keychain ring or a lobster clasp.
- Tools: A long, blunt-tipped tapestry needle for sewing and assembly, and a pair of sharp scissors.
Finished Size: When using the recommended materials, your finished heart will be approximately 2 inches (5 cm) wide.
US Crochet Abbreviations:
Please note that this pattern uses standard US crochet terminology. If you are used to UK terms, be sure to adjust accordingly!
- MR: Magic Ring (or Magic Circle)
- sc: Single crochet
- inc: Increase (work 2 single crochet stitches into the same stitch)
- dec: Decrease (work 2 single crochet stitches together)
- sl st: Slip stitch
- (…) : The number in parentheses indicates the total number of stitches at the end of that round.
- (…) * N: Repeat the instructions inside the parentheses N times.
Note: This pattern is worked in a continuous spiral. Do not join your rounds with a slip stitch unless specifically instructed. This prevents a visible seam from forming on your plushie.
Step-by-Step Instructions
Creating the Heart Halves
To create the heart, we are actually going to crochet two separate pieces and then join them together. This creates the iconic “dip” at the top of the heart.
Make Piece #1:
- Round 1: Start with a Magic Ring and work 6 sc into the ring (6).
- Round 2: Work an increase in every stitch around (12).
- Round 3: Work 12 sc in the round, then finish the round with a slip stitch (12).
Fasten off your yarn, leaving a tail of about 8 inches (20 cm) for sewing later. This tail will be used to join the two halves.
Make Piece #2:
Repeat the exact same steps for the second piece, but do not fasten off the yarn after Round 3. Leave a long tail attached so we can work directly into it for the next step.
Joining the Halves Together
This is the most important part of the pattern! We are going to join the two halves to form the body of the heart.
- Round 4: Working with the second piece (where the yarn is still attached), crochet 6 sc into the stitches. Now, join the two pieces by inserting your hook into the same loop where you made the slip stitch in Piece #1. You will now crochet around the perimeter of both pieces. Work 12 sc around the first piece, and 6 sc around the second piece (24 total stitches).
Decreasing and Shaping the Heart
Now that we have our base, we need to shape the heart so it tapers toward the bottom.
- Round 5: (4 sc, 1 dec) repeat 4 times (20).
Important Assembly Step: Before you continue crocheting, take your tapestry needle and the yarn tail from the first piece. Use it to sew the “V” shaped opening located at the top center of the heart (between the two halves). This closes the gap and gives the heart its proper shape.
- Round 6: (3 sc, 1 dec) repeat 4 times (16).
- Round 7: (2 sc, 1 dec) repeat 4 times (12).
- Round 8: (1 sc, 1 dec) repeat 4 times (8).
Stuffing the Heart
Once you reach the end of Round 8, it is time to add the volume! Gently stuff the heart with your polyester fiberfill. Be careful not to overstuff it, as you still need enough space to close the bottom of the heart, but make sure it is firm enough to hold its shape.
- Round 9: (2 sc, 1 dec) repeat 2 times, then finish with a slip stitch (6).
Finishing
Now that your heart is stuffed and shaped, we need to close it up and attach the hardware.
Closing the Bottom:
Cut your yarn, leaving a long tail. Thread the tail onto your tapestry needle. Insert the needle through the front loops of the remaining stitches and pull tight to close the hole. Weave the tail through the remaining stitches a few times to ensure it is secure, then pull it through to the inside of the heart. Once the tail is secure, trim any excess yarn.
Hiding the Yarn:
Use your needle to weave the loose ends into the stuffing inside the heart. This keeps the finished product looking clean and prevents the yarn from poking out.
Attaching the Keychain:
Take your keychain ring and carefully insert it through the top center of the heart (the area you previously sewed shut). You can use a small loop of yarn or directly attach the metal ring through the stitches to ensure it is firmly held in place.
Tips for Success
Even though this is a simple pattern, here are a few professional tips to help your plush heart turn out perfectly:
- Mind Your Tension: When working with plush yarn, it can be easy to crochet too loosely. Keep your tension consistent and tight. If you see gaps where the stuffing is visible, try using a slightly smaller hook.
- Use a Stitch Marker: It is incredibly easy to lose count when working in a continuous spiral, especially with thick yarn. Always use a marker at the start of every round.
- The “Magic Ring” Trick: If you struggle with the Magic Ring, you can alternatively chain 2 and work your first 6 stitches into the first chain. However, the Magic Ring provides a much tighter center, which is better for amigurumi.
- Even Stuffing: When stuffing, try to distribute the fiberfill evenly. This prevents the heart from looking lumpy or asymmetrical.
- Color Variations: While red is classic, this pattern works beautifully with pink, white, or even multi-colored variegated yarns for a fun, modern look!
Congratulations! You have just completed a beautiful, handmade plush heart keychain. You can use these as adorable stocking stuffers, wedding favors, or even small tokens of affection for your friends and family. Happy crocheting!