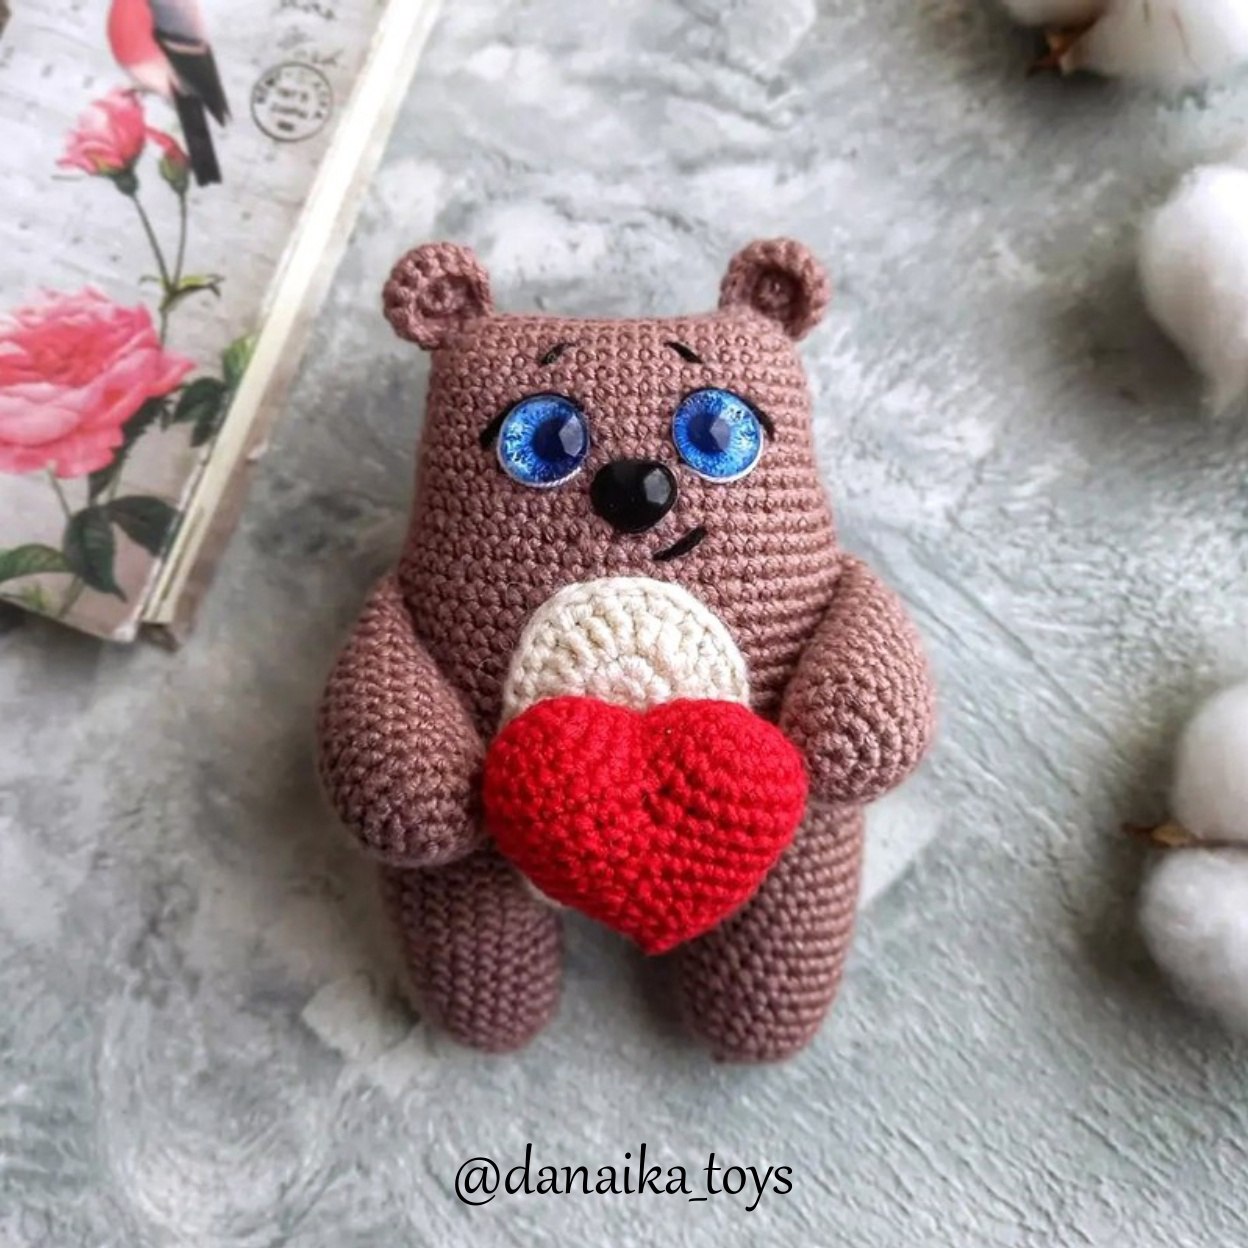
Adorable Amigurumi Bear with Heart Crochet Pattern: A Step-by-Step Guide
Are you looking for a quick, heartwarming crochet project? This tiny amigurumi bear holding a bright red heart is the perfect project for your next crafting session. Whether you are looking to make a Valentine’s Day gift, a sweet nursery decoration, or just want to practice your amigurumi skills, this little bear is designed to be both charming and beginner-friendly.
This little companion measures approximately 4.3 inches tall, making it an ideal size for desk buddies, keychain charms (with a little modification), or small keepsakes. The design uses basic stitches, but the finished result looks incredibly professional and polished. Grab your favorite cotton yarn and your smallest crochet hook, and let’s get started on making your very own lovable little bear!
Materials & Abbreviations
To achieve the tight, clean stitches seen in the photos, I recommend using a fine cotton yarn. Cotton provides excellent stitch definition, which is crucial for amigurumi to ensure that your stuffing doesn’t peek through the holes.
What You Will Need
- Yarn: Medium-weight cotton yarn in three colors:
- Main Color: Cappuccino or Light Brown
- Accent Color: Beige/Cream (for the belly patch)
- Accent Color: Red (for the heart)
- Small amount of Black and White yarn for embroidery (eyebrows, lashes, and mouth)
- Crochet Hook: 1.6 mm (or the smallest hook that gives you very tight stitches)
- Eyes: 12 mm safety eyes or black cabochon eyes
- Nose: A small black bead or black yarn for embroidery
- Stuffing: Polyester fiberfill
- Tools: Yarn needle, scissors, and fabric glue
Abbreviations (US Terms)
Please ensure you are using US crochet terminology for this pattern:
- MR: Magic Ring
- ch: chain
- st(s): stitch(es)
- sc: single crochet
- inc: increase (2 sc in one stitch)
- dec: decrease (sc 2 stitches together)
- hdc: half double crochet
- dc: double crochet
- FLO: front loop only
- BLO: back loop only
- TURN: turn your work
- rep: repeat
Step-by-Step Instructions
Head, Body, and Bottom Legs
The head, body, and bottom legs are worked as one continuous piece. We will start with the main cappuccino color.
The Foundation:
Start with a magic ring. Ch 1 (this does not count as a stitch).
Row 1: 1 inc, 12 sc along the chain, 3 sc in the very first chain from the hook, 13 sc along the other side of the chain (30 sc total).
Row 2: 2 inc, 12 sc, 3 inc, 12 sc, 1 inc (36 sc).
Row 3: (1 sc, 1 inc) rep 2 times, 12 sc, (1 sc, 1 inc) rep 3 times, 13 sc, 1 inc (42 sc).
Rows 4-7: sc in each st around (42 sc).
Row 8: (3 sc, 1 inc, 3 sc) rep 6 times (48 sc).
Rows 9-11: sc in each st around (48 sc).
Row 12: (7 sc, 1 inc) rep 6 times (54 sc).
Rows 13-32: sc in each st around (54 sc).
Left Bottom Leg:
Without cutting your yarn, we will begin the legs. For the first leg (the left one):
1. Work 17 sc.
2. Count back 5 stitches from your marker/start of the row.
3. Work 5 sc into those 5 stitches in a circular fashion to create the leg base. This creates the opening for the leg.
Right Bottom Leg:
To start the right leg, count 5 sc away from the left leg on the body.
Row 1: 22 sc (you should have 5 sc remaining before reaching the left leg).
Rows 2-5: sc in each st around (22 sc).
Row 6: 5 sc, 1 dec, 9 sc, 1 dec, 4 sc (20 sc).
Rows 7-8: sc in each st around (20 sc).
Row 9: (2 sc, 1 dec) rep 5 times (15 sc).
Row 10: 7 dec, 1 sc (8 sc). Fasten off, weave in ends, and stuff the leg.
Note: Once both legs are shaped, stuff the entire body and head firmly with fiberfill and sew the final opening closed.
Top Arms (Make 2)
Using the main cappuccino color:
- Row 1: 6 sc in a magic ring.
- Row 2: 6 inc (12 sc).
- Row 3: (1 sc, 1 inc) rep 6 times (18 sc).
- Rows 4-15: sc in each st around (18 sc).
Stuff the arm lightly, fold it in half, and crochet 9 sc through both layers to close it. Leave a long tail for sewing. Attach the arms to the body between rows 15 and 22.
Ears (Make 2)
Using the main cappuccino color:
- Row 1: 6 sc in a magic ring.
- Row 2: 6 inc (12 sc).
- Row 3: 12 sc.
Fasten off, leaving a long tail. Sew the ears onto the top corners of the head.
Belly Patch
Using the beige/cream color. This piece is worked in rows.
- Foundation: Ch 18.
- Row 1 (FLO): 16 sc, 3 sc in the last stitch, 16 sc on the other side of the chain (35 sc).
- Row 2 (BLO): Ch 1, turn, 16 sc, 3 inc, 16 sc (38 sc).
- Row 3 (FLO): Ch 2, turn, 2 sc, 5 hdc, 9 dc [ (1 dc, 1 dc) rep 3 times ], 9 dc, 5 hdc, 2 dc (41 sc).
- Row 4 (BLO): Ch 1, turn, 16 sc, (2 sc, 1 inc) rep 3 times, 16 sc (38 sc).
Fasten off, leaving a tail. Sew this patch onto the front of the body, positioned between the two bottom legs.
The Heart
Using the red color. You will make two identical pieces and join them.
First Piece:
Row 1: 6 sc in a magic ring.
Row 2: 6 inc (12 sc).
Row 3: (1 sc, 1 inc) rep 6 times (18 sc).
Rows 4-5: sc in each st around (18 sc).
Fasten off, leaving a long tail for sewing.
Second Piece:
Follow the same steps as the first piece, but do not fasten off.
Joining the Heart:
1. On the first piece, skip 4 stitches from the end of the row and work 14 sc into the remaining stitches.
2. On the second piece, skip 4 stitches from the beginning of the row and work 14 sc into the remaining stitches.
3. This should leave a small gap in the middle. Join the two pieces together by sewing them with the leftover yarn from the first piece (28 sc total).
Row 2: 28 sc.
Row 3: 12 sc, 1 dec, 12 sc, 1 dec (26 sc).
Row 4: 11 sc, 1 dec, 11 sc, 1 dec (24 sc).
Row 5: (2 sc, 1 dec) rep 6 times (18 sc).
Row 6: 18 sc.
Row 7: (1 sc, 1 dec) rep 6 times (12 sc).
Row 8: 6 dec. Fasten off and weave in ends.
Finishing
Now comes the most fun part—bringing your bear to life! This is where the character really shows.
Assembly and Details
- Eyes and Nose: Use glue to secure the 12mm safety eyes on the head. Position them widely apart to give the bear an adorable, wide-eyed look. Glue the nose centered between and slightly below the eyes.
- Embroidery: Using black yarn and a fine needle, embroider the eyelashes above the eyes, small eyebrows above the lashes, and a sweet little mouth below the nose. You can also add small white highlights to the eyes to make them look “shiny.”
- The Heart: Sew the finished red heart onto the front of the bear, nestled near the top of the beige belly patch or between the arms.
Tips for Success
To ensure your amigurumi looks professional, keep these tips in mind:
- Tension is Key: Try to maintain even tension throughout your project. If your stitches are too loose, the stuffing will show through. If they are too tight, it may be difficult to work the subsequent rows.
- Use Stitch Markers: Amigurumi is worked in rounds, and it is very easy to lose count. Always use a stitch marker to identify the first stitch of every round.
- Stuffing Technique: When stuffing, push the fiberfill into all the corners and crevices of the bear. This prevents “lumps” and ensures a smooth, rounded shape.
- Invisible Decreases: For a cleaner look, try using the “invisible decrease” method (working only through the front loops of the next two stitches) to minimize gaps in your work.