Adorable Square Bunny Amigurumi Crochet Pattern
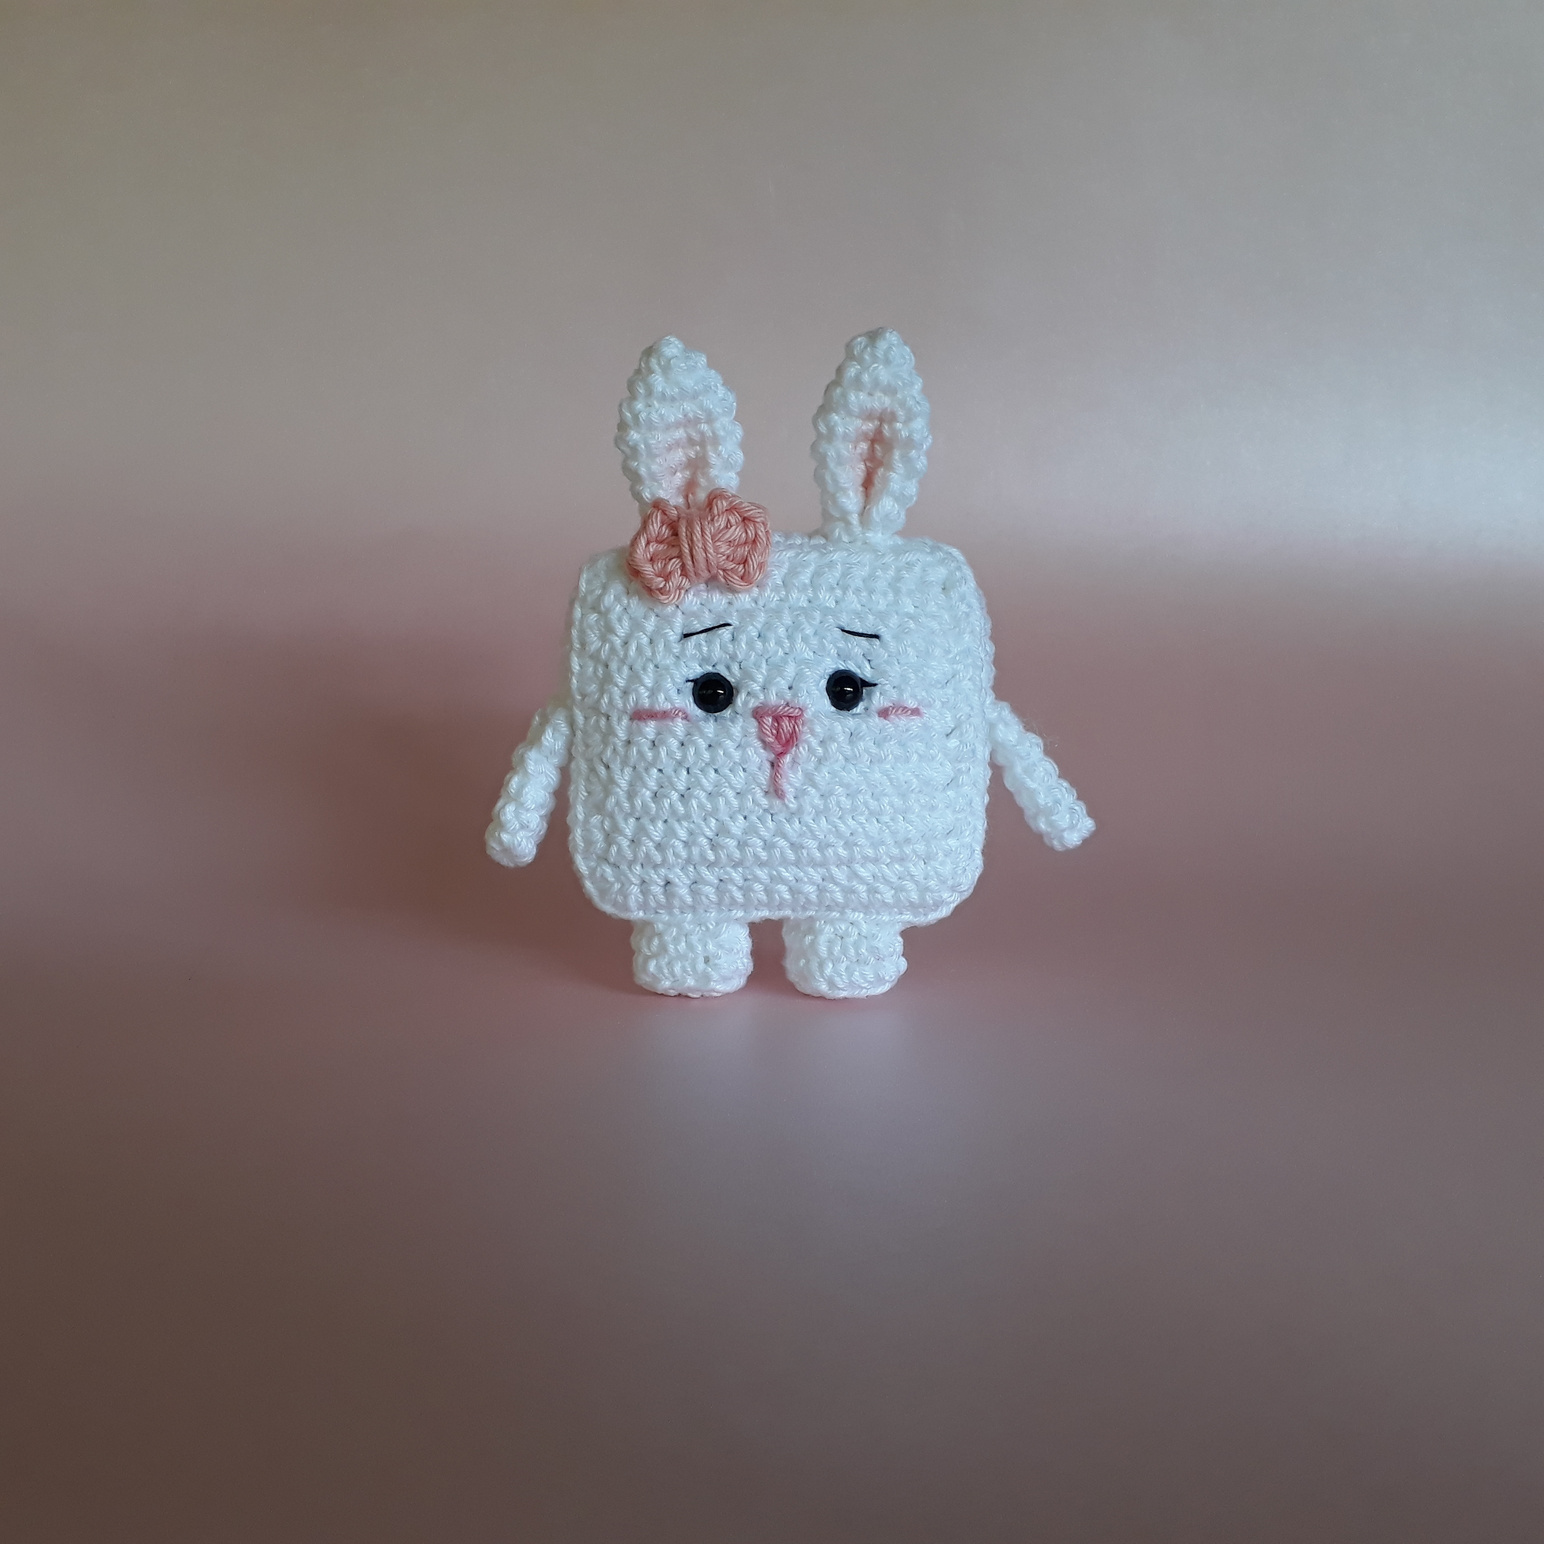
If you are looking for a project that is equal parts quirky and cute, this square bunny amigurumi is the perfect choice! Unlike traditional rounded plushies, this little bunny features a unique, blocky shape that makes it look like a sweet little marshmallow. Whether you are a seasoned crochet pro or a beginner looking for a rewarding project, this tutorial will guide you through every stitch.
This pattern uses basic amigurumi techniques, making it a fantastic way to practice working in the round, switching from rows to rounds, and assembling different pieces. The result is a charming, huggable companion that makes a wonderful gift for Easter, a baby shower, or just because!
Materials & Abbreviations
To get started on your square bunny, gather the following supplies. We recommend using a tight tension to ensure the fiberfill doesn’t peek through the stitches.
Supplies Needed
- Yarn: Medium weight amigurumi yarn in White (main body), Pink (nose and cheeks), and Salmon (for the bow). You will need approximately 100-150 yards of white yarn.
- Crochet Hook: 2.0mm hook (or a size that keeps your stitches tight).
- Safety Eyes: 7mm black safety eyes.
- Stuffing: High-quality polyester fiberfill.
- Embroidery Thread: Black thread for the facial details.
- Tools: Tapestry needle, sharp scissors, and stitch markers.
Abbreviations (US Terms)
- ch: chain
- sc: single crochet
- inc: increase (two single crochets in one stitch)
- hdc: half double crochet
- dc: double crochet
- sl st: slip stitch
- MR: magic ring (or magic circle)
- BLO: back loop only
- st(s): stitch(es)
- Rnd: round
Step-by-Step Instructions
The construction of this bunny is unique because it begins with flat panels that are then joined and expanded. Let’s dive into the process!
The Body (Front Panel)
Using white yarn, we will first create a flat rectangular face for our bunny.
Rnd 1: Start with a chain of 15. Starting in the second chain from the hook, work 14 sc. Chain 1 and turn. (14 sts)
Rnds 2 – 13: Work 14 sc across the row. Chain 1 and turn. (14 sts per row)
Rnd 14: Work 14 sc. (Do not turn at the end of this row).
Rnd 15: Now, we will crochet around the entire edge of the rectangle to create a border. Work 14 sc along the side, 14 sc across the bottom, and 14 sc up the other side. (42 sts total)
Rnd 16: Work 56 sc in the BLO (back loop only), increasing slightly to expand the base. (56 sts)
Rnds 17 – 19: Work 56 sc in each round. Fasten off and weave in your ends.
The Body (Back Panel)
The back is almost identical to the front, but we stop before creating the depth of the body.
Repeat the instructions for the Front Panel from Rnd 1 through Rnd 15. Once you complete Rnd 15, fasten off, leaving a long tail of yarn for sewing the two panels together later.
The Legs
Make 2 legs using white yarn.
Rnd 1: Chain 4. Starting in the second chain from the hook, work 3 sc. Chain 1 and turn. (3 sts)
Rnd 2: Work 3 sc. Chain 1 and turn. (3 sts)
Rnd 3: Work 3 sc. (Do not turn).
Rnd 4: Crochet around the edge of the small rectangle: work 3 sc on each of the three remaining sides. (9 sts total)
Rnd 5: Work 12 sc in the BLO. (12 sts)
Rnd 6: Work 12 sc. Fasten off and leave a tail for sewing.
The Arms
Make 2 arms using white yarn.
Rnd 1: Work 6 sc into a magic ring. (6 sts)
Rnds 2 – 5: Work 6 sc in each round. (6 sts)
Closing: Flatten the top of the arm and work 3 sc through both layers to close the opening. Fasten off and leave a tail for sewing.
The Ears
Make 2 ears using white yarn.
Rnd 1: Work 5 sc into a magic ring. (5 sts)
Rnd 2: Work 5 sc. (5 sts)
Rnd 3: Work an increase (inc) in every stitch. (10 sts)
Rnds 4 – 8: Work 10 sc in each round. (10 sts)
Fasten off and leave a tail for sewing.
The Tail
Using white yarn:
Rnd 1: Work 6 sc into a magic ring. (6 sts)
Rnd 2: (2 sc, 1 inc) repeat twice. (8 sts)
Rnd 3: Work 8 sc. Fasten off and leave a tail for sewing.
The Bow
Using salmon-colored yarn:
Rnd 1: Working into a magic ring, follow this sequence: (ch 2, 1 hdc, 1 dc, 1 hdc, ch 2, 1 sl st). Repeat this sequence one more time. (2 loops total)
Close the magic ring tightly and fasten off, leaving a tail. To finish the bow, wrap the remaining yarn several times around the center of the two loops to pinch them together, then tie a secure knot.
Finishing & Assembly
Now comes the magic part where all your pieces become a bunny!
Facial Details
Before sewing the body together, it is much easier to add the face to the front panel.
- Eyes: Place the 7mm safety eyes between rounds 5 and 6 (counting from the top down). Ensure there are 3 stitches of space between the two eyes.
- Nose and Cheeks: Using pink yarn and your tapestry needle, embroider a small triangle for the nose centered between the eyes. Add two small horizontal stitches for the cheeks.
- Details: Use the black embroidery thread to add small, thin eyebrows and delicate eyelashes to give the bunny a sweet expression.
Joining the Body
Align the front panel and the back panel. Using your tapestry needle and the long tail from the back panel, sew the two pieces together. As you reach the final few stitches, firmly stuff the body with fiberfill so the bunny holds its square shape. Sew the opening closed.
Attaching the Limbs and Accessories
- Arms: Sew the arms to the sides of the body, aligning them horizontally with the eyes.
- Legs and Tail: Sew the legs to the bottom and the tail to the center back.
- Ears: For a professional look, you can lightly brush a small amount of pink makeup or fabric paint onto the inner part of the ears. Fold the bottom of the ears slightly to create a “cup” shape, then sew them to the top of the head with about 6 stitches of space between them.
- The Bow: Sew the salmon bow near one of the ears for a final touch of cuteness.
Tips for Success
To make sure your square bunny turns out perfectly, keep these tips in mind:
- Stitch Markers are Key: Because the body transitions from rows to rounds, it is very easy to lose your place. Use a stitch marker to mark the first stitch of every round.
- Stuffing Consistency: When stuffing the body, use a chopstick or a pencil to push the fiberfill into the corners of the square. This prevents the bunny from looking like a ball and keeps that signature blocky look.
- Tension Control: If you notice holes in your work, try dropping down a hook size. Amigurumi looks best when the stitches are tight enough that the stuffing is invisible.
- Customization: Feel free to change the colors! A blue or lavender bunny is just as cute, and you can change the bow color to match.