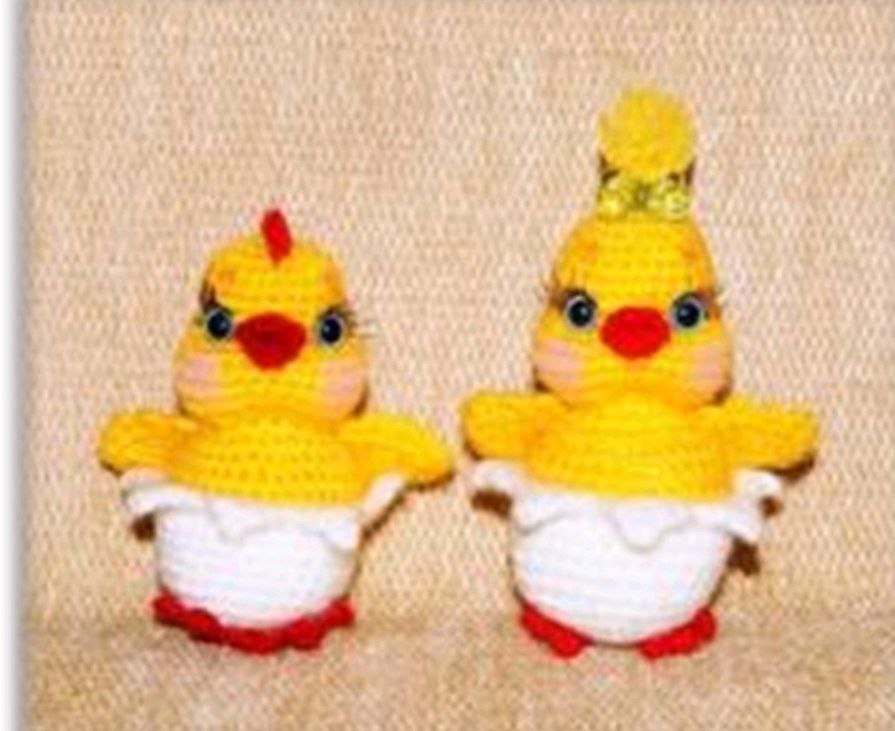
Crochet Easter Chick Pattern: DIY Adorable Amigurumi Chick in an Eggshell
Spring is just around the corner, and there is no better way to celebrate the season than with a delightful new crochet project! If you are looking for a quick, adorable, and heartwarming project to brighten up your home decor or to give as a seasonal gift, this crochet Easter chick is the perfect choice. This little fellow sits snugly inside a textured eggshell, making him an instant favorite for both kids and adults alike.
This pattern is designed with beginners in mind. While it involves some amigurumi techniques like working in the round and shaping, the instructions are straightforward. By the time you finish, you will have a charming little character with expressive cheeks and tiny wings, all ready to nestle into your Easter basket.
Materials and Abbreviations
Before you pick up your hook, gather all your supplies. To ensure your chick turns out looking just like the photos, it is helpful to use a soft, smooth yarn that holds its shape well.
Materials Needed:
- Yarn: Medium weight (worsted) yarn in yellow, white, and red.
- Crochet Hook: A hook appropriate for your yarn weight (usually 3.25mm to 4.0mm for amigurumi).
- Safety Eyes: A pair of small safety eyes or black beads.
- Eyelashes: Small pieces of black thread or eyelashes for detail.
- Stuffing: Polyester fiberfill.
- Needle: A yarn needle for sewing and a standard needle for sculpting.
- Pins: Straight pins to hold pieces in place while sewing.
- Glue: Clear craft glue (such as Moment Crystal or a similar transparent adhesive).
- Decorations: Satin ribbons or small embellishments to customize your chick.
- Optional: Watercolor pencils or pastel for blushing the cheeks.
US Crochet Abbreviations:
This pattern uses standard US crochet terminology. Please ensure you are using US terms to avoid confusion with stitch heights.
- MR: Magic Ring
- sc: Single crochet
- dc: Double crochet
- hdc: Half double crochet
- sl st: Slip stitch
- ch: Chain
- inc: Increase (2 sc in the same stitch)
- dec: Decrease (sc 2 stitches together)
- BLO: Back loops only
- FLO: Front loops only
- st(s): Stitch(es)
Step-by-Step Instructions
The Eggshell and Chick Body
The body of this project is worked in one continuous piece. We begin by creating the white “base” of the egg and then transition into the yellow chick body.
Part 1: The White Base (Eggshell)
Start with white yarn using a Magic Ring.
- Round 1: 6 sc in MR (6)
- Round 2: 6 inc (12)
- Round 3: (1 sc, inc) repeat 6 times (18)
- Round 4: (2 sc, inc) repeat 6 times (24)
- Round 5: (3 sc, inc) repeat 6 times (30)
- Rounds 6-11: Sc in each stitch around (30)
- Round 12 (Decorative Edge): This round creates the jagged eggshell look. Work in the Front Loops Only (FLO). Skip the first stitch, then start with the second stitch. Work (5 dc in one stitch, skip 1 sc, 1 sc, skip 1 sc) repeating this pattern around until you have created 7 decorative “teeth” or points. After the third dc in one of your clusters, work a small picot (ch 3, sl st in the first ch) to add extra texture.
Part 2: The Yellow Chick Body
Join your yellow yarn to the Back Loops Only (BLO) of the previous round.
- Round 12 (Continued): 30 sc in the back loops (30)
- Rounds 13-14: 30 sc (30)
- Round 15: (3 sc, dec) repeat 6 times (24)
- Round 16: (1 sc, dec) repeat 8 times (16)
- Round 17: 16 sc (16)
- Round 18: 16 inc (32)
- Rounds 19-22: 32 sc (32)
- Round 23 (Shaping the Cheeks): 3 sc, 5 dec, 3 sc. At the second stitch of this sequence, place a temporary stitch marker. Continue with 5 dec, and finish with 6 sc (22). This creates the indentations for the chubby cheeks.
- Rounds 24-28: 22 sc (22)
Note: At this point, stuff the toy moderately. Be careful not to overstuff; you want to ensure the “cheek” indentations created in Round 23 remain visible.
- Round 29: (1 sc, dec) repeat 7 times, then 1 sc (15)
- Round 30: 7 dec, 1 sc.
Fasten off, weave in your ends, and hide the yarn tail inside the body.
Making the Wings (Make 2)
The wings are small and delicate, perfect for a tiny chick.
- Ch 3.
- Round 1: In the second chain from the hook, work 1 sc, 1 inc, 1 ch, turn (3)
- Round 2: 2 sc, 1 inc, 1 ch, turn (4)
- Round 3: 3 sc, 1 inc, 1 ch, turn (5)
- Round 4: 5 sc.
To finish the wings, work small decorative arches (scallops) along the edges of the ch-3 side. Work 4 small arches on each side and one on the top. Leave a tail of approximately 8 inches (20 cm) for sewing. Pin the wings to the sides of the body—you can place them horizontally or diagonally depending on your preference—and sew them securely.
Creating the Feet (Make 2)
Using red yarn, we will create tiny, bright feet.
- Ch 10. Start in the second chain from the hook.
- Round 1: 4 sc, 4 ch, turn (4 sc + 4 ch)
- Round 2: 4 sc (work the 4th sc into the very last sc of the previous round), 4 ch, turn
- Round 3: 9 sc
- Round 4: 5 sc
Fasten off, leaving an 8-inch (20 cm) tail for sewing. Pin the feet to the bottom of the white eggshell and sew them in place.
Crafting the Tiny Beak
The beak adds the perfect finishing touch to your chick’s expression.
Using red yarn, ch 2.
- Round 1: In the second chain from the hook, work 2 sc, 1 ch, turn.
- Round 2: 2 inc, 1 ch, turn.
- Round 3: 4 sc in the Front Loops Only (FLO), 1 ch, turn.
- Round 4: 2 dec, 1 ch, turn.
- Round 5: 1 dec.
Fasten off and hide the yarn. To attach, fold the beak in half along the line of Round 3. Sew it into the center of Round 23, right between the cheek indentations.
Finishing and Facial Details
Sculpting the Cheeks
This is a professional “secret” to making amigurumi look high-quality. We will use a thread to create depth in the face.
- Using pins, mark five points on the face:
- Point 1: Vertically down from your marker in Round 23 to Round 17.
- Points 3 and 4: Two stitches to the left and two stitches to the right of the marker.
- Points 2 and 5: Two stitches further out from points 3 and 4.
- Using a strong yellow thread, insert your needle at Point 1 and bring it out at Point 2.
- Insert at Point 3 and bring it out at Point 1.
- Skip one stitch, then insert the needle and bring it out at Point 4.
- Insert at Point 5 and bring it out at Point 1.
- Gently pull the thread to tighten the indentations, tie a knot, and hide the ends inside the head.
Adding the Top Finial/Comb
You can choose one of two ways to finish the top of the head:
Option 1: The Fluffy Fringe
Cut 2-3 small strands of yellow yarn. Attach them to the top of the head (the crown). Use a fine-tooth comb or a pet slicker brush to lightly brush the yarn strands out, making them look fluffy. You can also attach a small satin bow or a ribbon to complete the look.
Option 2: The Red Comb
Using red yarn, work into 5 stitches on the back part of the head and turn your work.
- Row 1: 2 hdc, 1 sc, 1 sl st.
- Row 2: 1 sc, 1 hdc, 1 sl st.
- Row 3: 1 hdc, 1 sl st.
- Row 4: 2 sc.
Fasten off and weave in your ends.
Optional: The Eggshell Cap
If you want your chick to wear a separate little “hat” instead of having the shell attached to the bottom, you can crochet a second shell piece.
- Round 1: 6 sc in MR (6)
- Round 2: 6 inc (12)
- Rounds 3-4: 12 sc (12)
- Round 5: (1 sc, inc) repeat 6 times (18)
- Round 6: 18 sc (18)
- Round 7: (2 sc, inc) repeat 6 times (24)
- Round 8: 24 sc (24)
- Round 9: (Skip 1 st, 5 dc in one stitch with a picot after the 3rd dc, skip 1 st, 1 sc) repeat 6 times to create 6 points.
Expert Tips for Amigurumi Success
- The Blush Look: To give your chick extra personality, use a pink watercolor pencil or a bit of actual makeup blush. Lightly apply it to the “cheek” areas you sculpted to give him a warm, rosy glow.
- Consistent Tension: When working with amigurumi, try to keep your tension tight. This ensures that the stuffing doesn’t peek through the stitches.
- Symmetry is Key: When sewing the wings and feet, use your pins! Pinning them first allows you to step back and ensure they are level and symmetrical before you commit to sewing.
- Eye Placement: Always place your safety eyes before you finish stuffing the head. This allows you to adjust the height and width of the eyes to get the perfect “cute” expression.