Easy Crochet Change Purse Pattern with Ombre Pompom
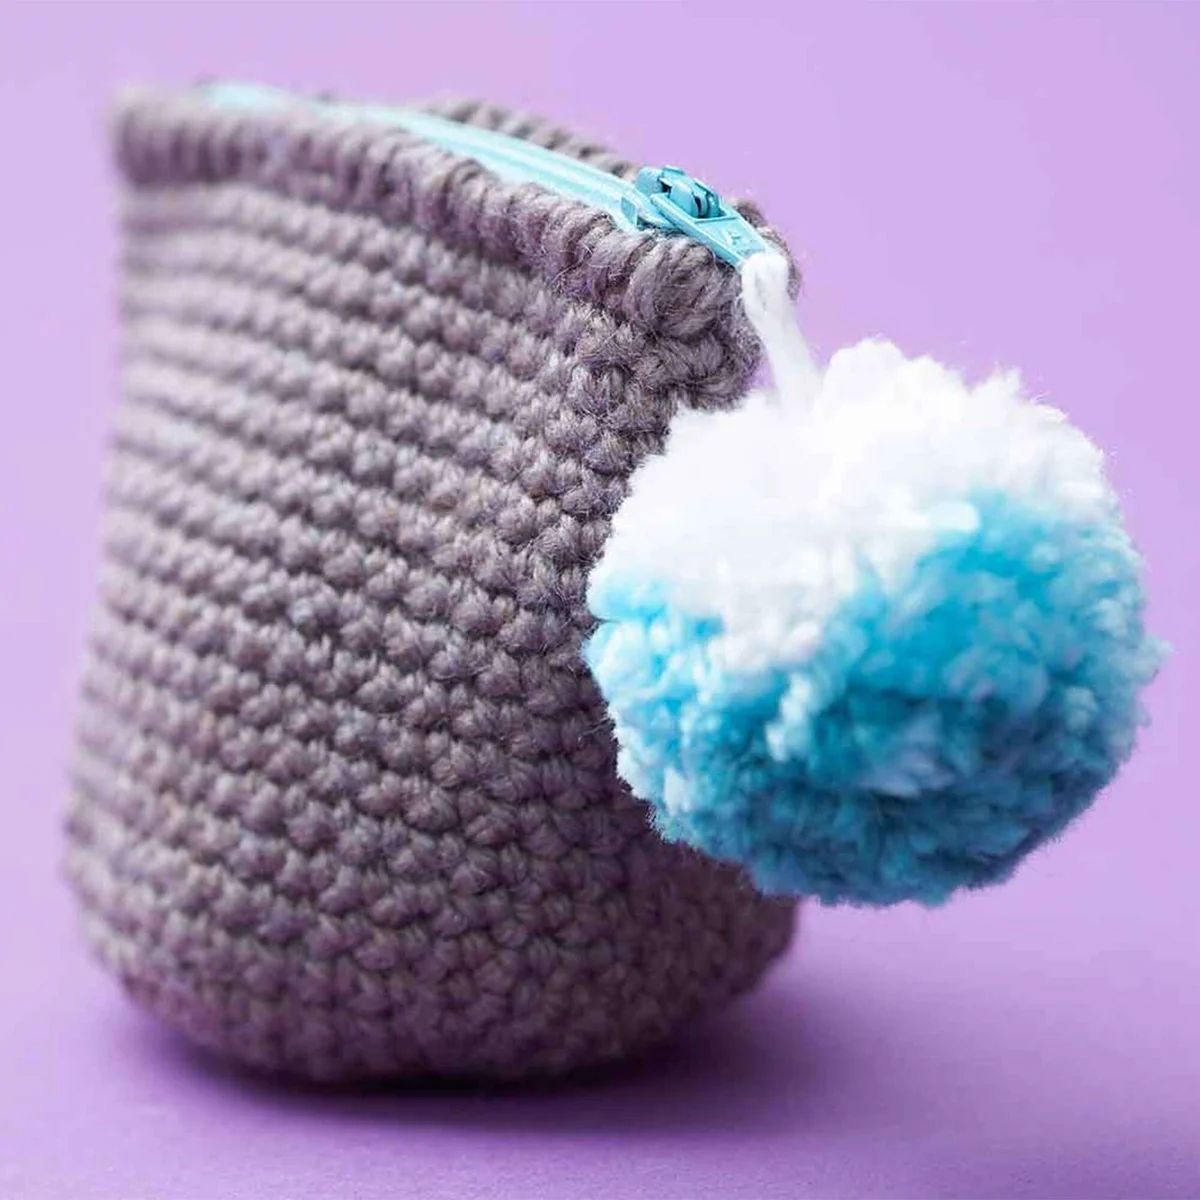
Whether you are looking for a quick weekend project or a cute, handmade gift for a friend, this Ombre Pompom Change Purse is the perfect choice. This little accessory is not only practical for holding coins, earbuds, or small treasures, but it also adds a pop of color and texture to any handbag. With its soft, satin-like finish and a playful multi-colored pompom, it looks far more complex than it actually is!
This pattern is designed to be beginner-friendly, utilizing basic stitches and a simple shaping technique to create a sturdy, rounded pouch. The highlight of the design is the “ombre” effect of the pompom and a decorative reverse single crochet border that gives the purse a professional, polished look. Let’s dive into the details and get crafting!
Materials & Abbreviations
To get started, you will need to gather a few supplies. For this project, a satin-style yarn is recommended to give the purse a slight sheen and a smooth feel, but you can substitute this with any medium-weight yarn you prefer.
Supplies Needed
- Yarn: Medium weight satin-style yarn in four colors:
- Main Color (MC): Grey or a neutral tone
- Contrast Color A: Bright blue or aqua
- Contrast Color B: Medium blue or lagoon
- Contrast Color C: White or cream
- Crochet Hook: Size F/5 (3.75 mm) or whatever size is needed to obtain the gauge.
- Zipper: One 4-inch zipper.
- Tools: A 4-inch square piece of cardboard, glue, scissors, and a yarn needle for sewing.
Pattern Gauge
To ensure your purse ends up the correct size (approximately 4″ x 4″), check your gauge: 16 single crochet stitches and 17 rows should equal 4 inches.
Abbreviations (US Terms)
- Approx: Approximately
- Beg: Beginning
- Ch: Chain
- Rep: Repeat
- Rnd: Round
- Sc: Single crochet
- Sl st: Slip stitch
- St: Stitch
Step-by-Step Instructions
The purse is worked in the round, starting from the bottom and moving upward to create a seamless cylinder. We will start with the Main Color (MC).
Creating the Base
The first few rounds create a flat circle that serves as the bottom of your change purse. Be sure to join each round with a slip stitch to keep the edges clean.
Round 1: Chain 2. Work 6 sc into the second chain from the hook. Join with a sl st to the first sc. (6 sts)
Round 2: Chain 1. Work 2 sc in each stitch around. Join with a sl st to the first sc. (12 sts)
Round 3: Chain 1. [1 sc in the next st, 2 sc in the next st] repeat 6 times. Join with a sl st to the first sc. (18 sts)
Round 4: Chain 1. [1 sc in each of the next 2 sts, 2 sc in the next st] repeat 6 times. Join with a sl st to the first sc. (24 sts)
Round 5: Chain 1. [1 sc in each of the next 3 sts, 2 sc in the next st] repeat 6 times. Join with a sl st to the first sc. (30 sts)
Round 6: Chain 1. [1 sc in each of the next 4 sts, 2 sc in the next st] repeat 6 times. Join with a sl st to the first sc. (36 sts)
Round 7: Chain 1. [1 sc in each of the next 5 sts, 2 sc in the next st] repeat 6 times. Join with a sl st to the first sc. (42 sts)
Building the Body
Now that the base is flat, we will stop increasing. This causes the crochet work to “turn” and grow upward into a pouch shape.
Round 8: Chain 1. Work 1 sc in each stitch around. Join with a sl st to the first sc.
Following Rounds: Repeat Round 8 until the piece measures 4 inches from the beginning of the work.
The Decorative Edge
To finish the top of the purse, we will use a technique called the reverse single crochet (also known as the crab stitch). This creates a thick, cord-like edge that is very durable.
Final Round: Chain 1. Instead of working from right to left as you usually do, work from left to right. Work 1 reverse sc in each stitch around. Join with a sl st to the first stitch. Fasten off and weave in your ends.
Finishing Touches
Adding the Zipper
Once your crochet pouch is complete, it is time to seal it. Take your 4-inch zipper and align it with the top opening of the purse. Using a yarn needle and a small amount of matching yarn (or a sewing needle and thread), carefully sew the zipper tape to the inside of the reverse sc border. Ensure the zipper is centered and lays flat before securing it completely.
Creating the Ombre Pompom
The ombre pompom adds a professional, designer touch to the purse. Since we aren’t using a pre-made template, you can create your own using a 4-inch piece of cardboard.
- Prepare the Cardboard: Cut two identical circles out of cardboard (approx 4 inches in diameter). Cut a small hole in the center of each circle. Glue these circles to a larger piece of cardboard for stability if needed, then cut them out.
- Set the Base: Cut a piece of yarn approximately 8 inches long. Thread this through the center hole and tie it loosely to hold the two cardboard discs together.
- Wrapping for the Ombre Effect: You will wrap the yarn around the discs in specific sections to create the color gradient:
- Contrast Color A: Wrap 50 times around the top section of the discs.
- Contrast Color B: Wrap 30 times on the left side and 30 times on the right side.
- Contrast Color C: Wrap 25 times on the bottom left and 25 times on the bottom right.
- Tying it Off: Take a separate piece of yarn and slide it between the two cardboard discs. Tie it very tightly around the center of all the wrapped yarn.
- Cutting: Carefully slip your scissors between the two discs and cut all the wrapped yarn around the outer edge of the circle.
- Trimming: Remove the cardboard discs. Fluff the yarn and use your scissors to trim the pompom into a smooth, neat sphere.
- Attachment: Secure the pompom to the zipper pull using a small piece of yarn.
Tips for Success
Choosing the Right Yarn
While this pattern suggests satin yarn, you can customize the look. Using a cotton yarn will make the purse more structured and durable, while a velvet or chenille yarn will make it incredibly soft and squishy. Just remember to adjust your hook size to maintain the 4-inch gauge.
Mastering the Reverse Single Crochet
If the reverse single crochet feels awkward at first, don’t worry! The trick is to remember that you are “crocheting backward.” Insert your hook into the stitch to the right of your current position, pull up a loop, and then complete the stitch by pulling the loop through the stitch to the left. It takes a few stitches to find the rhythm, but the result is well worth the effort.
Keeping the Pompom Full
To get a really dense, fluffy pompom, make sure your wraps are tight against the cardboard but not overlapping so much that they bunch up. The more wraps you add, the fuller the pompom will be. If you want an even larger pompom, simply double the number of wraps for each color.