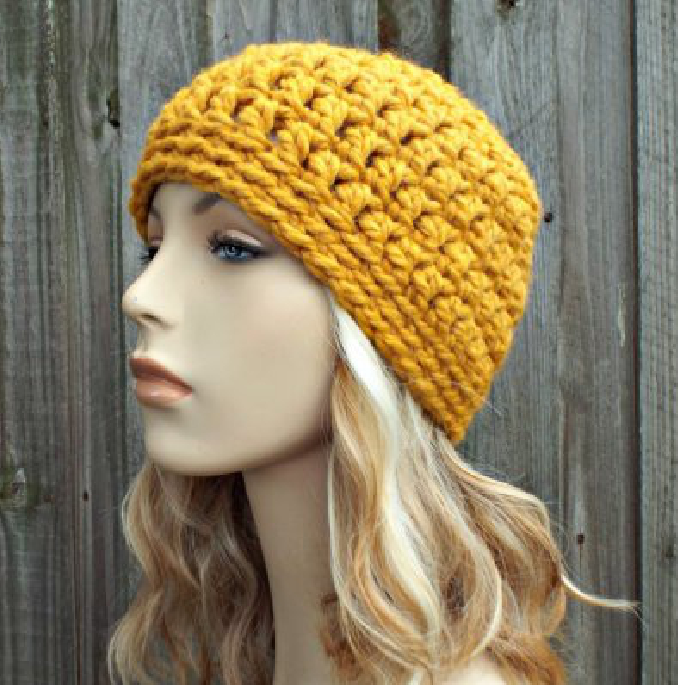
Woven Crochet Hat Patterns
Materials
- Approx 270 yds of worsted weight yarn (e.g., Mary Maxim Prism in Sandy Shores)
- 4 mm Crochet Hook (US size F)
- Faux Fur Pom Pom (optional)
- Yarn Needle
Abbreviations
This pattern uses standard US crochet terminology.
- Ch: Chain
- Hk: Hook
- Rem: Remaining
- Rep: Repeat
- Sc: Single Crochet
- SlSt: Slip Stitch
- Sp: Space
- St(s): Stitch(es)
- Ws: Woven Stitch
- YO: Yarn Over
Woven Stitch (Ws) Definition: YO and insert hk in designated st. YO and pull up a loop (three loops on hk). Pull last loop through middle loop on hk. YO and pull through rem two loops. YO and insert hk in same st (three loops on hk). Pull last loop through rem two loops.
Gauge
11 stitches x 12 rows = 2 inches, worked in the band stitch pattern.
Finished Size
- Circumference: 20-22 inches
- Length: 9.5 inches
Pattern Notes
- Chain one at the beginning of band rows does not count as a stitch.
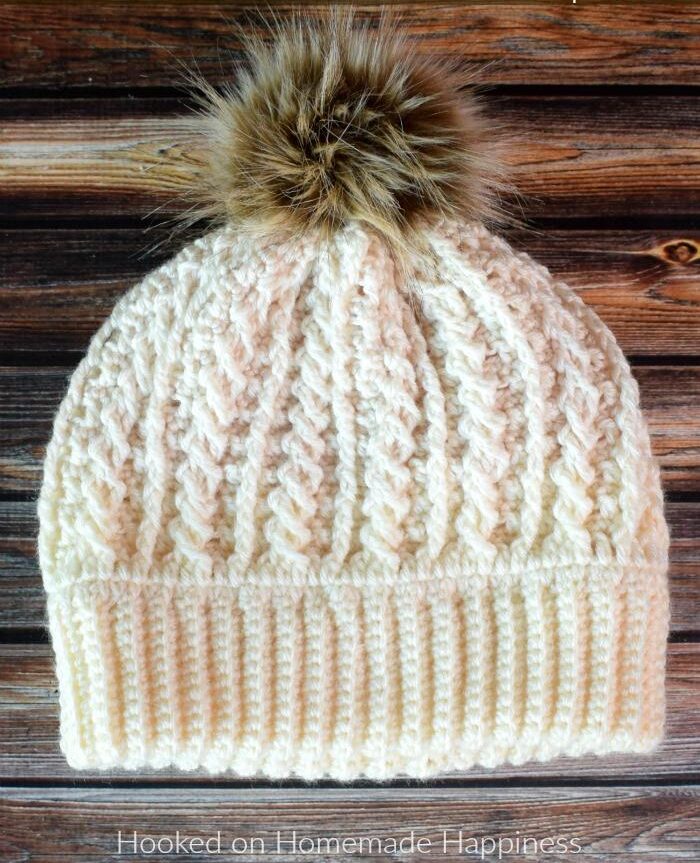
- This hat is worked from the band up to the crown, featuring a unique stitch pattern that gives it a barely-crocheted look. The band is crocheted flat, then joined to continue the hat in the round.
- There are no crown decreases; the hat is designed to draw up at the top, contributing to a slouchy fit.
Instructions: Crochet the Woven Stitch Hat
Band Construction
The hat begins with the ribbed band, crocheted in a flat piece.
- Row 1: Chain 13. Make 1 single crochet (sc) in the 2nd chain from the hook and in each remaining chain across. Turn your work. (You should have 12 stitches)
- Row 2: Chain 1. Work 1 single crochet in the Back Loop Only (BLO) of each stitch across. Turn. (12 stitches)
- Repeat: Continue repeating Row 2 until your band measures approximately 19.5 inches from the starting edge.
Joining the Band: Fold the band in half, bringing the short ends together. Slip stitch (slst) in the BLO of each stitch, catching both sides of the band to form a circle. Do not fasten off. You will now continue with the hat sides, working in the round.
Hat Sides (Working in the Round)
- Round 1: Chain 1 and sc in the same space as the chain 1. Evenly space 110 single crochet stitches by working along the side of the band. Join with a slip stitch to the first sc. (110 stitches)
- Round 2: Chain 1. Work a Woven Stitch (Ws) in the first stitch. *Skip 1 stitch. Work a Woven Stitch (Ws) in the next stitch. Repeat from * to the end of the round. Do not join with a slip stitch; instead, continue working in a spiral for subsequent rounds.
- Repeat: Continue repeating Round 2 (working in a spiral) until your hat measures approximately 9.5 inches from the bottom edge of the band.
Assembly & Finishing
- Step 1: Fasten off your yarn, leaving a tail that is about 12 inches long.
- Step 2: Thread the yarn tail onto your yarn needle. Weave the tail in and out of each stitch along the last round of the hat, creating a drawstring.
- Step 3: Gently pull the yarn tail to draw up and close the crown of the hat. Secure the opening tightly with the tail and fasten off any remaining yarn.
- Step 4: Attach a faux fur pom pom to the top of the hat for a decorative touch, if desired.
Tips for Crocheting the Woven Stitch
The Woven Stitch (Ws) has a distinct front and back. For this hat design, we want the back of the Woven Stitch to be visible on the outside of the hat. After completing the first round of single crochet (Round 1 of the Sides section), turn your hat inside out before beginning Round 2. This way, you will be looking at the inside of the hat while making your stitches, ensuring the correct side of the Woven Stitch faces outwards.
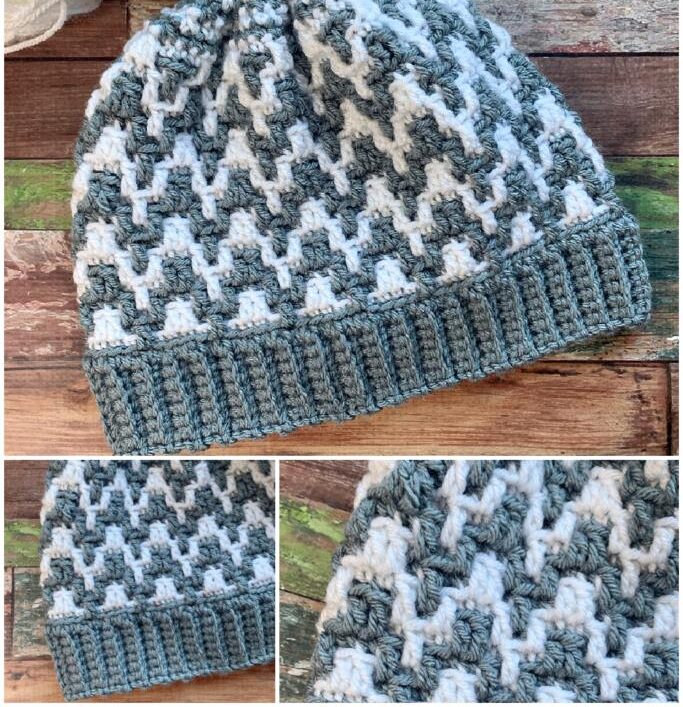
The Woven Beanie Crochet Pattern
Materials
- Approx 290 yds of worsted weight yarn (e.g., Sugarbush Bold in Silver Islet)
- H/5.0 mm crochet hook
- Yarn needle
- Scissors
- Pom pom (optional)
Abbreviations & Stitches to Know
This pattern is written using US crochet terms.
- Sl st: Slip stitch
- Ch: Chain
- Sc: Single crochet
- Sc blo: Single crochet back loop only
- Dc: Double crochet
- Fpdc: Front post double crochet
- Bpdc: Back post double crochet
- Fpdc2tog: Front post double crochet 2 together (a front post double crochet decrease)
- Bpdc2tog: Back post double crochet 2 together (a back post double crochet decrease)
Finished Size
(Approximate adult size)
- Width: 9.5 inches
- Length: 9 inches (not including pom pom)
Pattern Notes
- Beginning chain does not count as a stitch.
- This beanie is worked from the bottom up, starting with the ribbed brim.
- This pattern is considered Intermediate level.
Instructions: Crochet the Woven Beanie
Ribbed Brim
The brim is worked flat and then joined to form a circle.
- Chain 10.
- Row 1: Single crochet (sc) in the 2nd chain from the hook and in each chain across. (You should have 9 stitches)
- Row 2: Chain 1, turn. Sc in the first stitch, then work a single crochet in the back loop only (sc blo) in the next 7 stitches, and finally, sc in the last stitch. (9 stitches)
- Repeat: Repeat Row 2 until you reach Row 78. Note: To adjust the circumference of the beanie, you can add or remove rows from the ribbing, but the total number of rows must be a multiple of 6.
Joining the Brim: Bring both short ends of the ribbing together to form a circle. Single crochet both short ends together to securely join the brim. Now, you will work around the long edge of the ribbing to start the body of the beanie.
Beanie Body
The main body of the beanie uses a combination of front post and back post double crochet stitches to create texture.
- Round 1: Chain 1. Work single crochet (sc) evenly around the long edge of the ribbing, placing 1 sc in the end of each row. Join to the first sc with a slip stitch (sl st). (78 stitches)
- Round 2: Chain 2. Double crochet (dc) in each stitch around. Join to the first dc with a slip stitch. (78 stitches)
- Round 3: Chain 2. *Front post double crochet (fpdc) in the next 3 stitches, back post double crochet (bpdc) in the next 3 stitches*. Repeat from * to * around the entire round. Join to the first fpdc with a slip stitch. (78 stitches)
- Round 4: Repeat Round 3.
- Round 5: Repeat Round 3.
- Round 6: Chain 2. *Back post double crochet (bpdc) in the next 3 stitches, front post double crochet (fpdc) in the next 3 stitches*. Repeat from * to * around. Join to the first bpdc with a slip stitch. (78 stitches)
- Round 7: Repeat Round 6.
- Round 8: Repeat Round 6.
- Repeat Pattern: Continue repeating Rounds 3 through 8 until you have completed Round 22.
Crown Decreases
The decreasing rounds shape the top of the beanie.
- Round 23: Chain 2. *Fpdc in the next stitch, fpdc2tog (front post double crochet 2 together) over the next 2 stitches, bpdc in the next stitch, bpdc2tog (back post double crochet 2 together) over the next 2 stitches*. Repeat from * to * around. Join to the first fpdc with a slip stitch. (52 stitches)
- Round 24: Chain 2. *Fpdc2tog over the next 2 stitches, bpdc2tog over the next 2 stitches*. Repeat from * to * around. Join to the first stitch with a slip stitch. (26 stitches)
Assembly & Finishing
- Fasten off your yarn, leaving a long end for sewing.
- With a yarn needle, weave the long end in and out of the top loops of the stitches from the last round.
- Pull the yarn end tight to cinch the top of the beanie closed.
- Sew the top closed securely, making sure there are no gaps.
- Weave in any remaining loose ends.
- Optionally, add a pom pom to the top of your finished beanie for a playful touch.