Cozy & Chic: Master the Timeless Dual Loop Beanie
How to Knit a Dual Loop Beanie: A Step-by-Step Guide
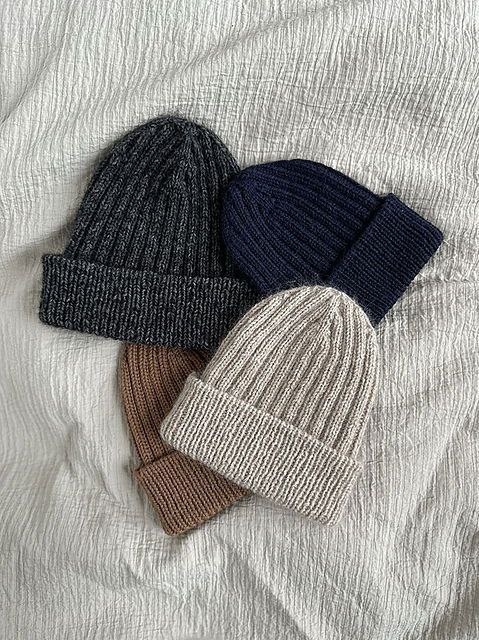
Create a timeless, cozy accessory with this Dual Loop Beanie pattern. This classic hat features a sophisticated combination of two different ribbing styles: a tight 1×1 rib for a secure, high-fold brim and a relaxed 2×2 rib for the main body. This project is worked from the bottom up, ensuring a professional finish and a perfect fit.
Materials Needed
Yarn Options
You can achieve the look of this beanie using two different yarn weight combinations:
- Option 1 (Two Strands): Hold one strand of DK weight wool together with one strand of Lace weight mohair.
- Option 2 (Single Strand): Use one strand of Aran weight wool.
Tools
- Needles: 3.5 mm (US size 4) circular needles with a 16-inch (40 cm) cable. Alternatively, you can use double-pointed needles (DPNs) or a longer circular cable using the Magic Loop method.
- Other Essentials: Stitch markers, a tapestry needle for weaving in ends.
Sizes and Gauge
Sizing
This pattern is designed for two sizes:
- Child/Teen: Fits head circumference approximately 19-20 inches (48-52 cm).
- Adult: Fits head circumference approximately 21-23.5 inches (53-60 cm).
Gauge
24 stitches x 30 rows = 4 inches (10 cm) in 1×1 ribbing using 3.5 mm needles after washing and blocking. If your gauge differs, please adjust your needle size to achieve the correct fit.
Knitting Abbreviations
- RS: Right Side
- WS: Wrong Side
- st: Stitch
- k: Knit
- p: Purl
- M: Marker
- MBO: Marker for the Beginning of the Round
- k2tog: Knit 2 stitches together (right-leaning decrease)
- ssk (modified): Slip 1 stitch knitwise, slip 1 stitch purlwise, insert left needle into the slipped stitches from left to right, and knit them together through the back loop (left-leaning decrease)
- p2tog: Purl 2 stitches together (right-leaning decrease)
- p2tog tbl: Purl 2 stitches together through the back loop (left-leaning decrease)
Step-by-Step Instructions
1. Casting On and The Brim
Using a tubular cast-on method in a 1×1 rib rhythm (k1, p1), cast on 96 (112) stitches.
To create a clean, rounded, hollow edge, work a few setup rows of double knitting as follows:
- Row 1 (RS): *k1, slip 1 stitch as if to purl with the yarn in front; repeat from * until the last 2 stitches, k1, p1.
- Row 2 (WS): *k1, slip 1 stitch as if to purl with the yarn in front; repeat from * to the end of the row.
Join the work into a circle and place a Marker for the Beginning of the Round (MBO). Work two circular rounds of double knitting:
- Round 1: *k1, slip 1 stitch as if to purl with the yarn in front; repeat from * to the end of the round.
- Round 2: *slip 1 stitch as if to purl with the yarn in back, p1; repeat from * to the end of the round.
Now, transition to the brim: work in 1×1 ribbing (k1, p1) in circular rounds until the piece measures 4 (4.75) inches (10 or 12 cm).
2. The Beanie Body
In the next round, transition to a 2×2 ribbing (k2, p2). Continue working in 2×2 ribbing for another 9 (10) inches (23 or 25 cm).
Tip: Try the beanie on at this point to ensure the height is to your liking before beginning the crown decreases.
3. Shaping the Crown
If necessary, switch to DPNs or use the Magic Loop method as the circumference decreases.
Set up markers for 8 sections: Starting from the MBO, *place a marker (M) after 2 stitches, then place a marker after 22 (26) stitches. Repeat from * 3 more times (the final marker is the MBO).
Work decreases every second round as follows:
- Round 1: *slip marker, k2, slip marker, p2tog, work in ribbing pattern until 2 stitches before the next marker, p2tog tbl; repeat from * to the end of the round.
- Round 2: Work all stitches in the ribbing pattern.
- Round 3: *slip marker, k2, slip marker, k2tog, work in ribbing pattern until 2 stitches before the next marker, ssk; repeat from * to the end of the round.
- Round 4: Work all stitches in the ribbing pattern.
- Round 5: Work as Round 3.
- Round 6: Work all stitches in the ribbing pattern.
- Round 7: Work as Round 1.
- Round 8: Work all stitches in the ribbing pattern.
You have now decreased 32 stitches; 64 (80) stitches remain.
Repeat Rounds 1 through 6 once more. You will have 40 (56) stitches remaining.
Final Rapid Decreases: Now perform decreases in every round:
- Round 1: *slip marker, k2, slip marker, p2tog, work in ribbing pattern until 2 stitches before the next marker, p2tog tbl; repeat from * to the end of the round.
- Round 2: Work as Round 1.
- Round 3: *slip marker, k2, slip marker, k2tog, work in ribbing pattern until 2 stitches before the next marker, ssk; repeat from * to the end of the round.
For Adult Size only:
- Round 4: Work as Round 3.
- Round 5: Work as Round 1.
Finishing the Beanie
You should now have 16 stitches remaining on your needles.
Remove all markers except the MBO. In the final round, k2tog across all stitches until only 8 stitches remain. Cut the yarn, pull the tail through the remaining 8 loops, and pull tight to secure the top of the hat.
Weave in all loose ends using a tapestry needle. To finish, wash the beanie and block it to the specified measurements to set the stitches and ensure a professional shape