How to Crochet a Mesh Cardigan: A Detailed Step-by-Step Pattern
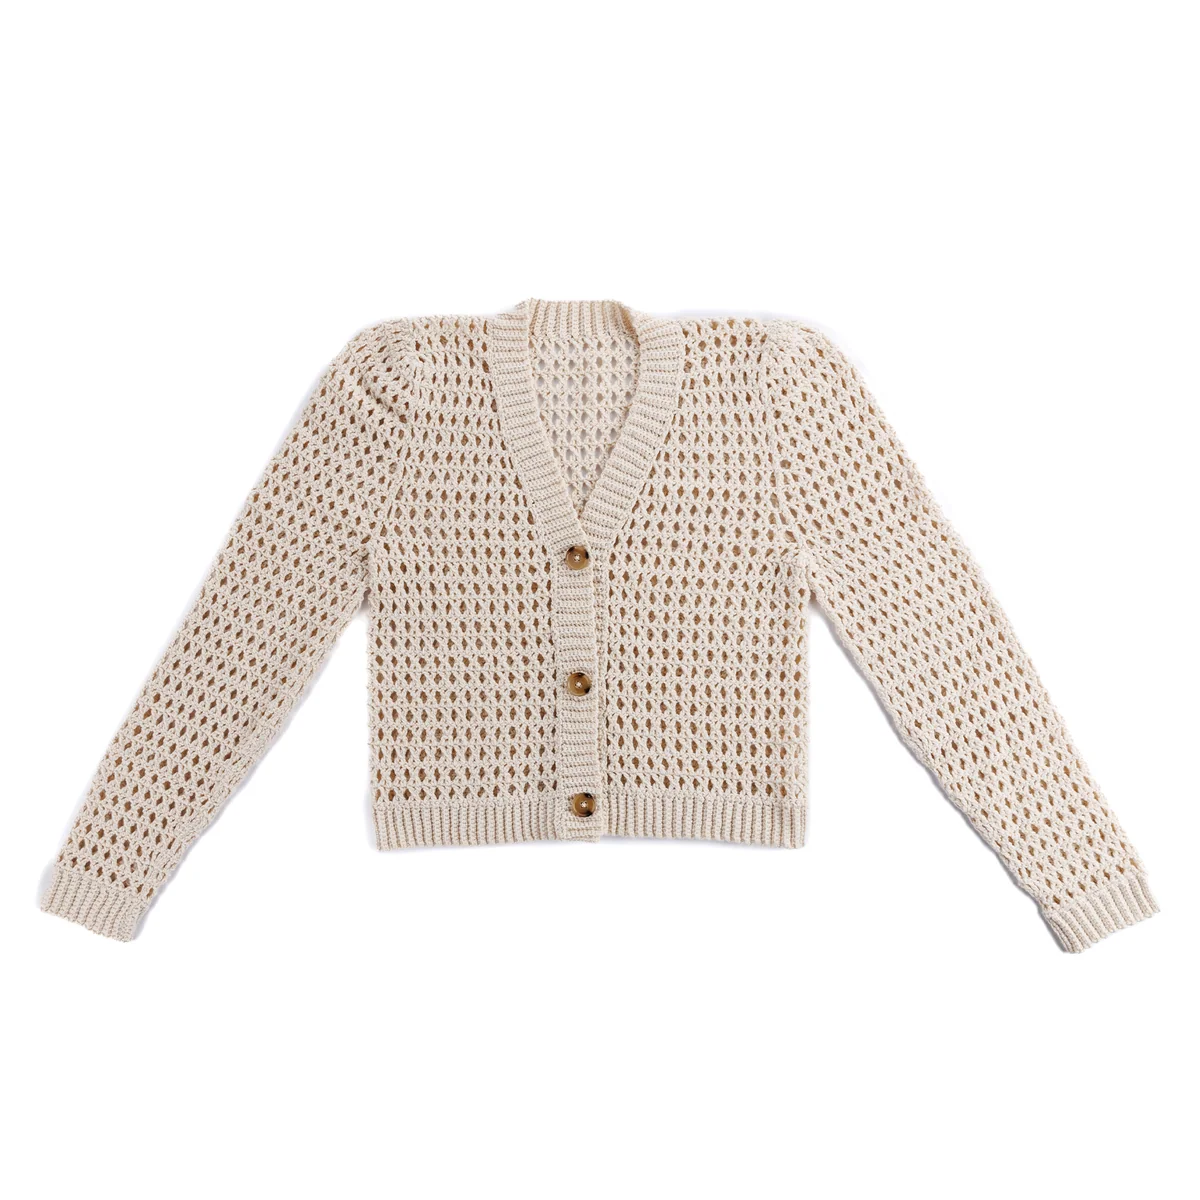
There is nothing quite like a lightweight, breezy cardigan to layer over your favorite outfits during the transition between seasons. This mesh crochet cardigan blends a modern silhouette with a unique, open-work texture that is perfect for spring or summer evenings. While the overall look is airy and effortless, the “X-stitch” creates a sophisticated geometric pattern that makes this piece look professionally made.
This pattern is designed for an intermediate crocheter. If you are comfortable with basic stitches and can follow shaping instructions, you will love creating this garment. We have included sizing for a wide range of body types to ensure a comfortable, flattering fit for everyone.
Materials & Abbreviations
Before you begin, gather your materials. Using a cotton blend yarn is highly recommended for this project as it provides the necessary drape and breathability for a mesh garment.
Materials Needed
- Yarn: Lightweight (Category 3) cotton blend yarn.
- XS/S: 1,357 yards
- M: 1,574 yards
- L: 1,676 yards
- XL: 1,906 yards
- 2/3XL: 2,216 yards
- 4/5XL: 2,381 yards
- Crochet Hooks: 3.5 mm (E/4) for ribbing and 3.75 mm (F/5) for the main body.
- Buttons: 3 to 4 buttons (approx. 1.25 inches in diameter).
- Notions: Yarn needle, stitch markers, and a measuring tape.
Abbreviations (US Terms)
- Approx: Approximately
- Beg: Beginning
- Ch: Chain
- Cont: Continue
- Hdc: Half double crochet
- PM: Place marker
- Rep: Repeat
- RS: Right side
- WS: Wrong side
- Sc: Single crochet
- Scbl: Single crochet in back loop only
- Sl st: Slip stitch
- Sp(s): Space(s)
- St(s): Stitch(es)
- Tr: Treble crochet
- Yoh: Yarn over hook
The Special Stitch: The X-Stitch (X-st)
The beauty of this cardigan lies in the X-stitch. Because this is a non-standard stitch, take your time with the first few rows!
X-st over next 3 sc: Yarn over twice and draw up a loop in the next sc. Yarn over and draw through 2 loops on hook. Skip the next sc. Yarn over and draw up a loop in the next sc. (Yarn over and draw through 2 loops on hook) 4 times. Chain 1. Yarn over and draw up a loop through the 2 front vertical bars of the 2 “legs” created. (Yarn over and draw through 2 loops) twice. The X-st is now complete.
X-st (Standard): Yarn over twice and draw up a loop in the first “arm” of the next X-st. Yarn over and draw through 2 loops on hook. Skip the next ch-1 space of the same X-st. Yarn over and draw up a loop in the second “arm” of the same X-st. (Yarn over and draw through 2 loops on hook) 4 times. Chain 1. Yarn over and draw up a loop through the 2 front vertical bars of the 2 “legs.” (Yarn over and draw through 2 loops) twice.
Step-by-Step Instructions
Note: All instructions are written for size XS/S. Changes for larger sizes are listed in parentheses as (M-L-XL-2/3XL-4/5XL). A chain 4 at the beginning of a row counts as a treble crochet (tr).
The Body
Unlike many sweaters, this body is worked in one piece up to the armholes, starting with the bottom ribbing and working sideways.
Bottom Ribbing
Using the smaller (3.5 mm) hook: Chain 11.
Row 1 (RS): Work 1 sc in the 2nd chain from hook and in each chain across. (10 sc). Turn.
Row 2: Ch 1, 1 scbl in each sc across. Turn.
Repeat Row 2 until the ribbing, when slightly stretched, measures 36 (40-44-48-56-60) inches. End on a Right Side (RS) row. Do not fasten off.
Main Body Construction
Turn your work sidewise. Switch to the larger (3.75 mm) hook and work across the long edge of the ribbing.
Row 1 (RS): Ch 1. Work 158 (176-194-212-242-260) sc evenly across the long edge of the ribbing. Turn.
Row 2 (WS): Ch 4. *Work an X-st over the next 3 sc. Repeat from * to the last sc. Work 1 tr in the last sc. Turn. You should have 52 (58-64-70-80-86) X-sts.
Row 3: Ch 4. Work an X-st in each X-st across to the last tr. Work 1 tr in the last tr. Turn.
Repeat the last row until the piece measures 10 (10-10-11-12-13) inches from the beginning, ending on a Wrong Side (WS) row.
The Back, Right Front, and Left Front
Now we will divide the work to create the armholes and the V-neck.
Right Front
Row 1 (RS): Ch 4. Work 1 tr in the ch-1 space of the next X-st. Work an X-st in each of the next 8 (10-11-12-14-16) X-sts. Work 1 tr in the ch-1 space of the next X-st. Turn. Leave remaining stitches unworked.
Row 2: Ch 4. Work 1 tr in the ch-1 space of the next X-st. Work an X-st in each X-st to the last 2 tr. Skip the next tr. Work 1 tr in the last tr. Turn.
Repeat the last row 1 (1-3-3-5-5) more times.
Shape V-Neck: Work a sequence of decreasing rows by skipping tr and working X-sts as specified in the shaping section, reducing the stitch count until you have 4 (5-5-5-6-6) X-sts left. Finish with 2 rows of straight X-sts and fasten off.
The Back
Skip the next 4 (4-4-6-6-6) X-sts from the center. Join yarn with a slip stitch to the ch-1 space of the next X-st.
Row 1 (RS): Ch 4. Work an X-st in each of the next 22 (24-28-28-34-36) X-sts. Work 1 tr in the ch-1 space of the next X-st. Turn. Leave remaining stitches unworked.
Continue working the X-st pattern and reducing at the edges to shape the armholes. Repeat the pattern until the armhole measures 1 row less than the Front.
Neck Shaping: Work the final few rows to create the back of the neck by reducing stitches at the center, then fasten off.
Left Front
Mirror the Right Front instructions. Skip the next 4 (4-4-6-6-6) X-sts and join yarn. Follow the same shaping for the armhole and V-neck, ensuring you are decreasing on the opposite side to create a symmetrical garment.
The Sleeves
Make two sleeves. Start with the smaller (3.5 mm) hook for the ribbing: Chain 11. Work sc rows, then scbl rows until the ribbing measures 10 (10.5-11-11-13-13) inches.
Switch to the larger (3.75 mm) hook. Work 44 (47-50-53-59-59) sc evenly across the long edge of the ribbing.
Establish the X-st pattern. Increase at the edges of the sleeve every few rows to create a slight taper. Continue until the sleeve measures 17 inches from the beginning.
Sleeve Top: Shape the top of the sleeve using slip stitches and decreases to create a rounded cap, then fasten off.
Finishing
Now it is time to assemble your cardigan!
- Blocking: Pin all pieces to the required measurements. Cover them with a damp cloth and leave them to dry. This is crucial for the mesh to open up and the garment to hang correctly.
- Assembly: Sew the shoulder seams together. Sew the sleeve seams and then attach the sleeves to the body. Ease the extra fabric at the top of the sleeve opening to create a slight “puff” effect.
- Button Band: Using the smaller hook, crochet a long strip of ribbing (sc and scbl). Sew this band along the Left Front, around the neck, and down the Right Front.
- Buttonholes: While working the band for the Right Front, create buttonholes by chaining 3 and skipping 3 stitches, then working a sc into the chain space in the following row.
- Buttons: Sew your buttons to correspond with the buttonholes.
Tips for Success
Perfecting the Gauge
Because this is a garment, gauge is everything. If your X-stitches are too tight, the cardigan will be stiff; if they are too loose, it may stretch out of shape. Make a small swatch using the X-st pattern to ensure you match the gauge (5.75 X-sts and 5.5 rows = 4 inches).
Yarn Choice
If you want a more “structured” look, use a 100% cotton yarn. For a softer, more fluid drape, choose a cotton-acrylic blend. Avoid very “fuzzy” yarns, as they can hide the intricate detail of the X-stitch.
Dealing with the “X”
If you find the X-stitch confusing at first, use stitch markers to mark the “arms” of the stitch in the previous row. This ensures you never skip a space or accidentally work into the same stitch twice.