Knit-Look Magic: Crochet Your Own Pixel Stitch Summer Crop Top
How to Crochet a Pixel Stitch Summer Crop Top
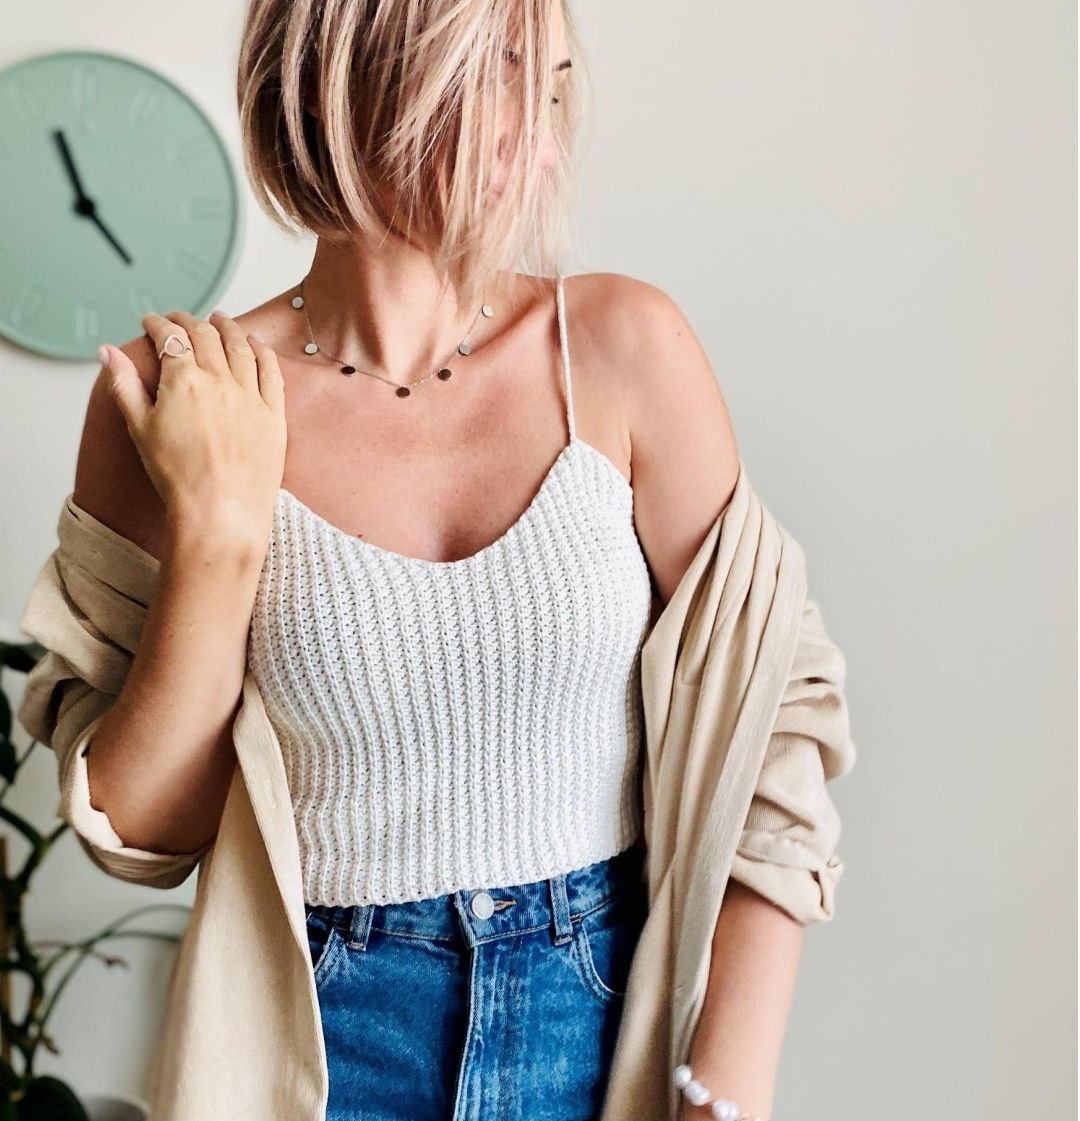
Looking for a stylish, breathable top for the summer? This Pixel Stitch Crop Top is the perfect project for beginners. While it looks like it was created with knitting needles, it is actually 100% crochet. The resulting fabric is elastic, holds its shape well, and offers a modern, textured look that pairs perfectly with high-waisted jeans or skirts.
Project Overview
This top is designed as a “crop” fit that hugs the figure. It is worked sideways (crosswise) as one continuous piece of fabric, starting from one side and ending at the other. The unique “Pixel Stitch” is created by alternating stitches and working primarily in the back loops to create a ribbed, knit-like appearance.
Materials Needed
- Yarn: 120-150g of a cotton-acrylic blend (approximately 530-660 yards). A weight similar to Gazzal Baby Cotton (165m/50g) is recommended.
- Crochet Hook: 3.5mm (or a size that helps you achieve the required gauge).
- Notions: Stitch markers, a blunt-ended yarn needle for weaving in ends, and scissors.
Stitch Guide (US Terms)
To complete this top, you will need to know the following stitches:
- Ch: Chain
- Sc: Single Crochet
- Hdc: Half Double Crochet
- Sl st: Slip Stitch
- BLO: Back Loop Only
- Inc: Increase (2 stitches in 1)
- Dec: Decrease (2 stitches joined into 1)
The Pixel Stitch Theory
The “Pixel Stitch” is the heart of this design. It is created by alternating 1 slip stitch and 1 half double crochet across the row.
Crucial Rule: All stitches in this pattern (except for the final edge stitch of each row) are worked into the back loop only (BLO). This is what gives the fabric its elasticity and texture.
To keep the edges from curling or leaning, the very last stitch of every row is always worked as a single crochet (sc) through both loops.
Gauge and Sizing
Gauge: 10cm x 10cm (approx. 4″ x 4″) = 27 stitches x 20.5 rows.
Tip: It is highly recommended to crochet a swatch and block it (wet-block) before starting, as the fabric will stretch slightly in width after blocking.
Sizing (Medium): Designed for a bust of 35-36 inches (90-92 cm). The finished top (without straps) has a back height of approximately 12 inches (31 cm) and a width of 8.5 inches (22 cm).
Adjustments:
- To change the length: Increase or decrease the number of stitches in your starting chain.
- To change the width: Increase or decrease the total number of rows worked.
Step-by-Step Instructions
Part 1: The Back Section
- Start by chaining 65. (Adjust this number if you want a longer or shorter top).
- Wrong Side (WS) Row: Work a sequence of (sl st, hdc) in the BLO across the row. Work the final stitch as a sc through both loops.
- Right Side (RS) Row: Repeat the same sequence: (sl st, hdc) in BLO, ending with a sc through both loops.
- One “path” consists of one WS row and one RS row. Repeat this until you have completed 10 paths (20 rows total). Do not fasten off.
Part 2: The Front Section (Shaping)
Now we create the curved silhouette of the front of the top using increases and decreases.
The Increase Phase:
- WS Row: Start with an increase (2 stitches in the first loop, following the Pixel pattern). Continue with (hdc, sl st) in BLO until the last stitch, which is a sc.
- RS Row: Work (sl st, hdc) in BLO across until the last stitch. Work an increase (2 stitches in 1) in the final stitch.
- Repeat these two rows 8 more times. You will have completed 9 paths (18 rows) of increases.
The Decrease Phase:
- WS Row: Start with a decrease (join 2 stitches into 1, following the Pixel pattern). Continue with (sl st, hdc) in BLO until the last stitch, which is a sc.
- RS Row: Work (sl st, hdc) in BLO across until the last 2 stitches. Work a decrease in the final stitches.
- Repeat these two rows 8 more times. You will have completed 9 paths (18 rows) of decreases.
Final Front Shaping:
- Work 1 path (2 rows) straight with no increases or decreases.
- Repeat the Increase Phase (9 paths) and the Decrease Phase (9 paths) once more to complete the front shaping. Do not fasten off.
Part 3: Completing the Back and Ribbing
- Back Continuation: Work 10 paths (20 rows) in the standard Pixel Stitch (straight, no shaping).
- The Ribbing (Hem): To prevent the top from stretching out, we will add a tighter ribbing for another 20 paths (40 rows).
- RS Rows: Work only slip stitches (sl st) across the entire row.
- WS Rows: Work the Pixel Stitch (sl st, hdc), but end the row with a sl st instead of a sc.
- Closing the Loop: Do not work the final RS row of the ribbing. Instead, work slip stitches through both layers—connecting the last row of the ribbing to the original starting chain—along the wrong side of the work. Fasten off.
Part 4: The Straps
- Attach yarn to the top edge of the front section.
- Chain approximately 80 stitches (try the top on to determine the exact length needed for your height).
- Join the chain to the back section using a slip stitch at a symmetrical point.
- Work slip stitches back down the length of the chain to the front starting point.
- Repeat for the second strap. You can add one or two more rows of slip stitches if you prefer wider straps.
Finishing Touches
Weave in all remaining yarn tails using your yarn needle. Finally, perform a wet-block (soak the item in lukewarm water, gently squeeze out excess water, and lay flat to dry to the desired measurements). Your Pixel Stitch Top is now ready to wear