How to Crochet a Charming Amigurumi Doll: The Flora Doll Pattern Tutorial
Introduction
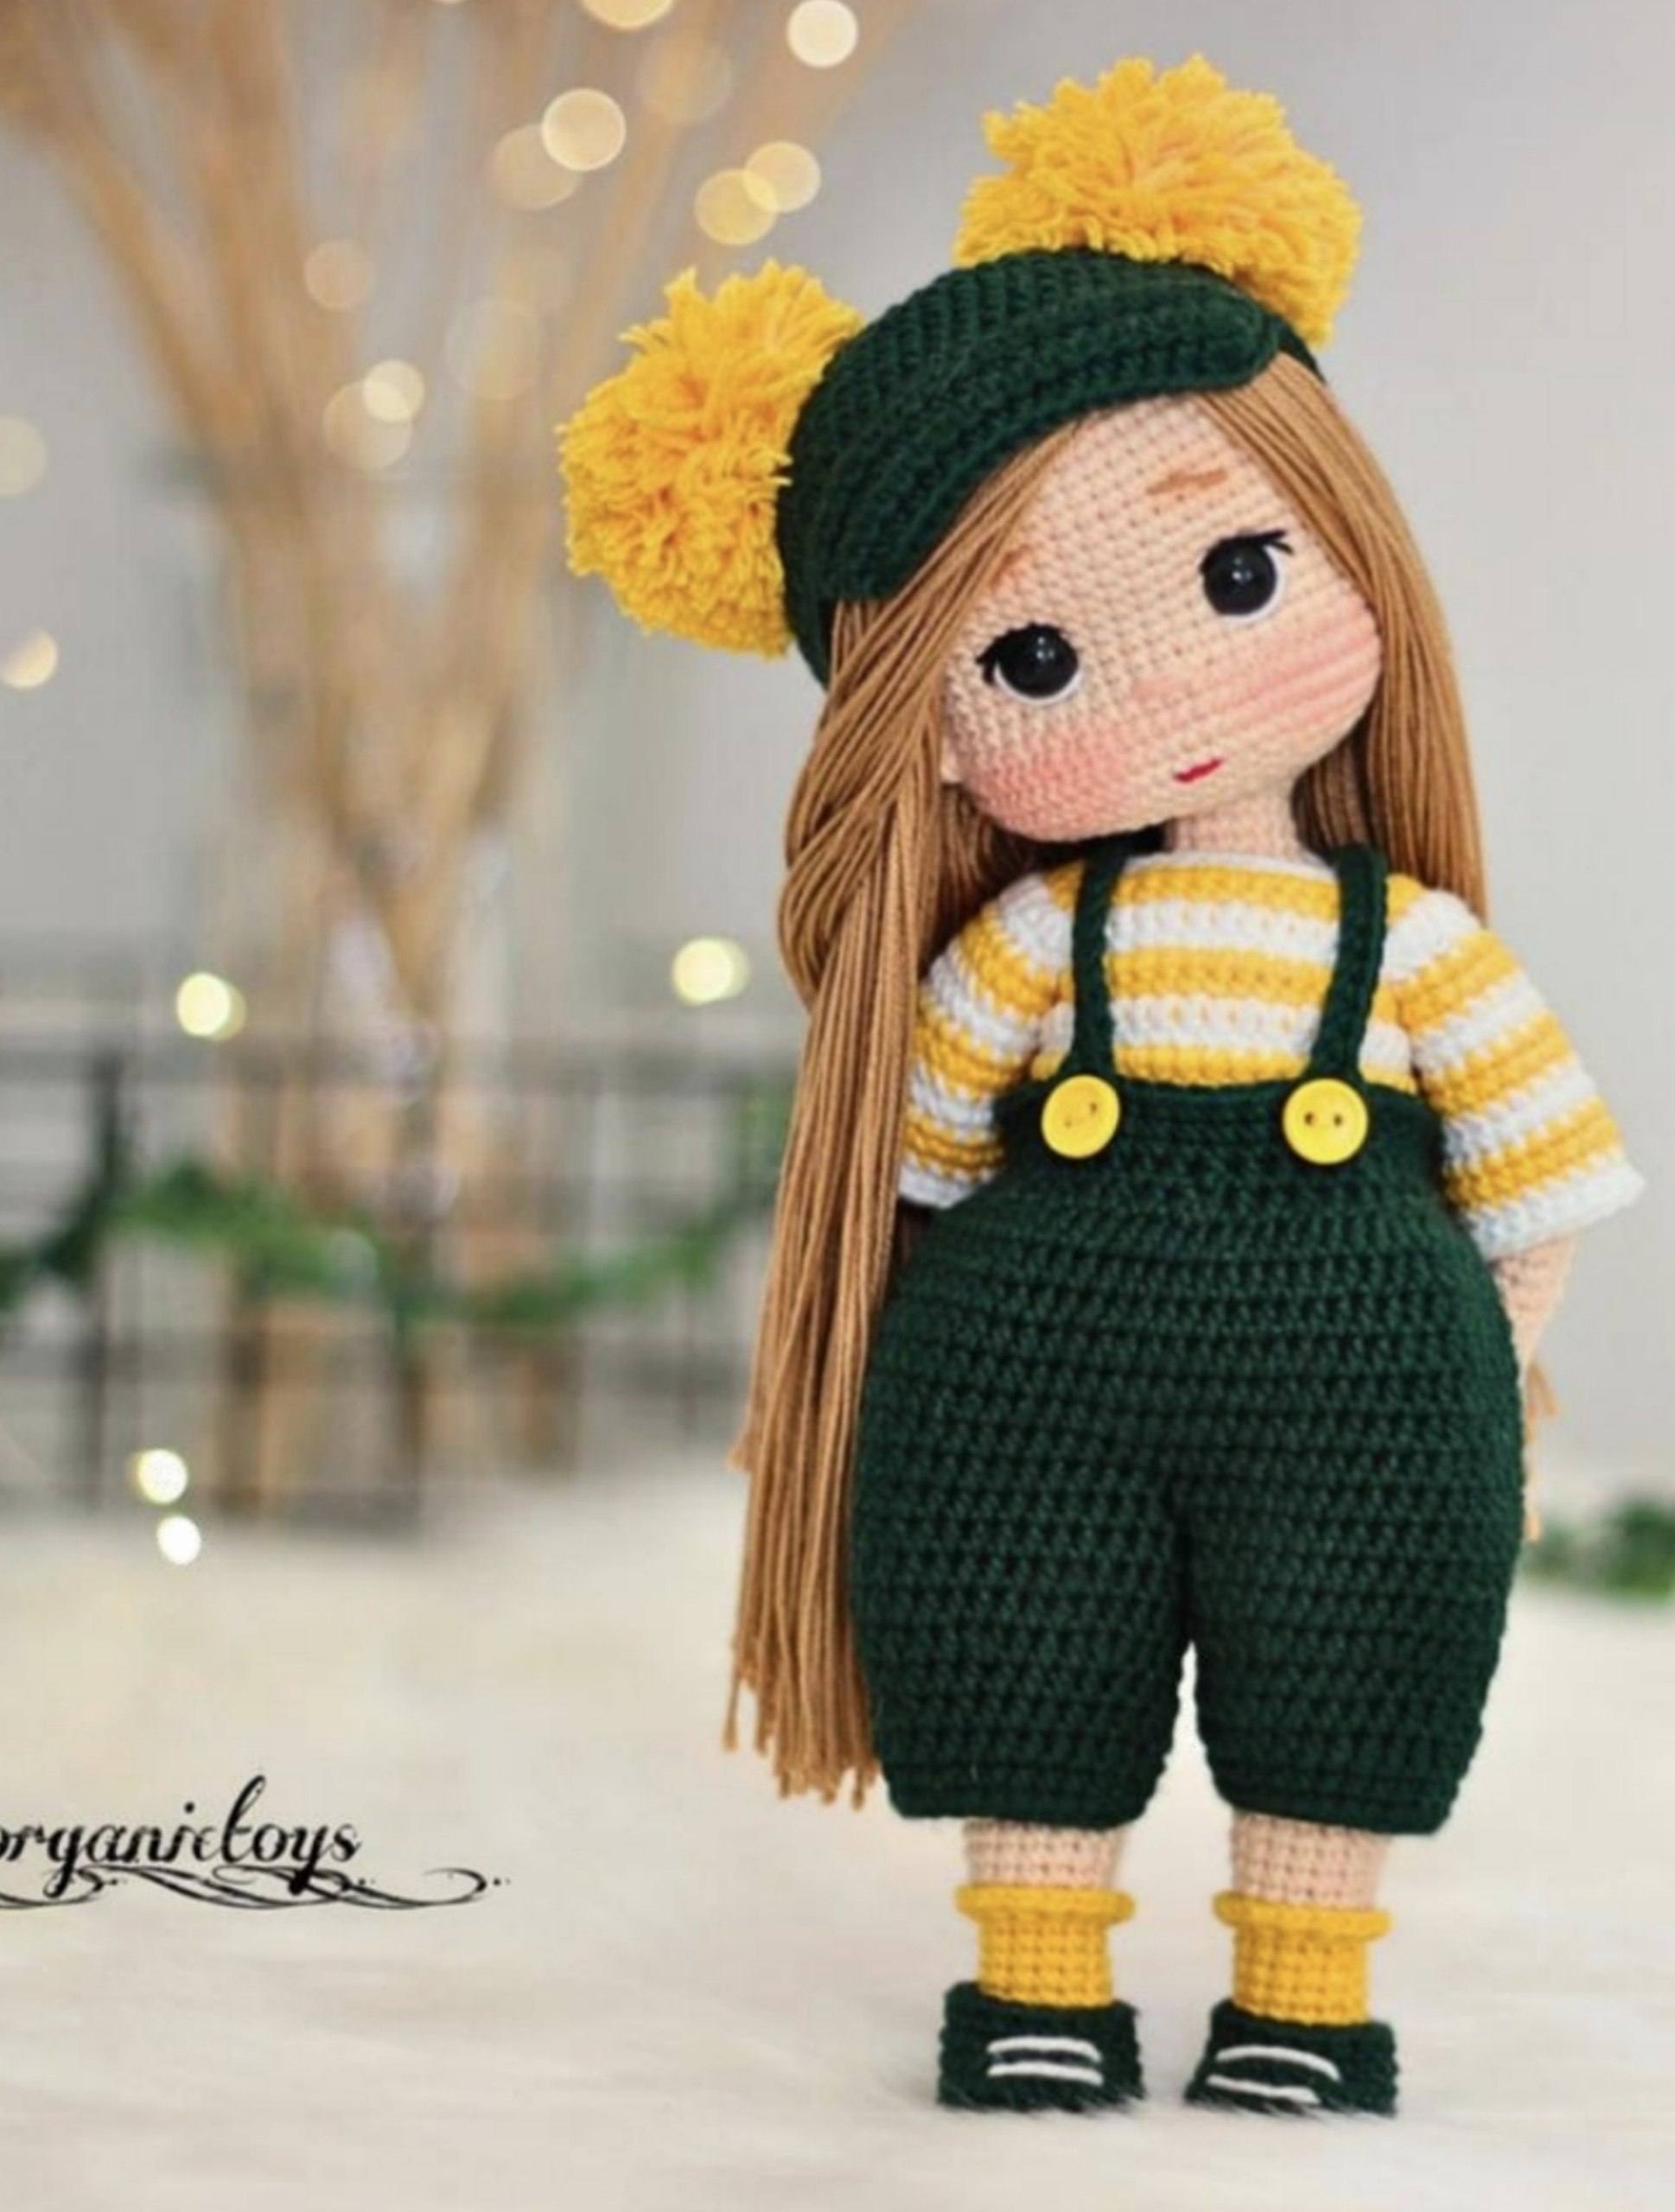
Are you looking for your next favorite crochet project? Look no further! The Flora Doll is a whimsical, stylish, and incredibly cute amigurumi character that is perfect for both home decor and gifting. With her signature green overalls, striped blouse, and adorable little backpack, this doll captures a sense of adventure and charm that anyone will fall in love with.
This pattern is designed to be a rewarding challenge for intermediate crocheters, but I have written it with a friendly, tutorial-style voice to help beginners navigate the more complex parts, such as shaping the face and attaching the limbs. Whether you are making this for a child or as a collector’s item for yourself, the process of bringing Flora to life is pure magic. Grab your favorite hooks and some cozy yarn, and let’s get started on this delightful journey!
Materials & Abbreviations
Materials Needed
- Cotton Yarn: You will need several colors including White, Yellow, Emerald Green, and a Skin/Nude tone. For the hair, a long-strand yarn or embroidery floss in a brown/tan shade works best.
- Crochet Hooks:
- 1.75 mm hook (for the doll’s body)
- 2.00 mm hook (for the clothing)
- Safety Eyes: 10 mm black safety eyes.
- Wire:
- Approximately 10 inches (25 cm) of wire for the body structure.
- Approximately 6 inches (15 cm) of wire for the arms.
- Buttons: 5 small yellow buttons for the overalls and backpack.
- Stuffing: High-quality polyester fiberfill.
- Embroidery Thread: Small amounts of black (for eyes/lashes) and red (for lips).
US Crochet Abbreviations
Please ensure you are using US terms for this pattern:
- MR: Magic Ring
- ch: Chain
- sl st: Slip stitch
- sc: Single crochet
- hdc: Half double crochet
- dc: Double crochet
- tr: Treble crochet
- inc: Increase (2 sc in one stitch)
- dec: Decrease (sc 2 together)
- 3 sc in one: 3 single crochet stitches in the same stitch
- sc3tog: Single crochet 3 together
- BLO: Back loop only
- FLO: Front loop only
- Popcorn: 4 hdc in one stitch, joined at the top
Step-by-Step Instructions
The Head
Start with your skin-tone yarn using a magic ring.
- Round 1: 6 sc in MR (6)
- Round 2: 6 inc (12)
- Round 3: (1 sc, inc) repeat 6 times (18)
- Round 4: (2 sc, inc) repeat 6 times (24)
- Round 5: (3 sc, inc) repeat 6 times (30)
- Round 6: (4 sc, inc) repeat 6 times (36)
- Round 7: (5 sc, inc) repeat 6 times (42)
- Round 8: (6 sc, inc) repeat 6 times (48)
- Rounds 9-17: 48 sc (9 rounds total)
- Round 18: 18 sc, ch, skip 1 stitch, 8 sc, ch, skip 1 stitch, 20 sc (48). Note: This is where you will insert your safety eyes.
- Rounds 19-20: 48 sc (2 rounds)
- Round 21: 11 sc, (1 sc, inc) repeat 5 times, 3 sc, (1 sc, inc) repeat 5 times, 14 sc (58)
- Rounds 22-24: 58 sc (3 rounds)
- Round 25: 11 sc, (1 sc, dec) repeat 5 times, 3 sc, (1 sc, dec) repeat 5 times, 14 sc (48)
- Round 26: 3 sc, dec, (6 sc, dec) repeat 5 times, 3 sc (42)
- Round 27: (5 sc, dec) repeat 6 times (36)
- Round 28: 2 sc, dec, (4 sc, dec) repeat 5 times, 2 sc (30)
- Round 29: (3 sc, dec) repeat 6 times (24)
- Round 30: 1 sc, dec, (2 sc, dec) repeat 5 times, 1 sc, ch (18)
Fasten off, leaving a long tail for sewing.
Face Details and Hair
To give Flora her sweet expression, we will use a technique called “eye pulling.” Pass your needle and thread through the back of the head, through the top of the eye, down through the bottom, and back out the back of the head. Pull tight to create a socket.
Embroider the following:
- Eyebrows: Embroider 4 rows above the eyes, angled slightly downward. Width should be 3 sc.
- Nose: Embroider 1 row below the eyes. Width should be 2 sc.
- Mouth: Embroider 4 rows below the nose. Width should be 2 sc.
- Cheeks: Stuff the head firmly after embroidery to smooth out any bumps.
Hair Attachment: Attach strands of hair yarn densely around the perimeter of the head. For the top, leave a 1-stitch gap between expansions every other row. For the back, leave a 1-stitch gap between every row, with a width of about 3 sc. You can use a hair straightener on low heat to smooth the hair strands if desired!
The Arms
Using skin-tone yarn:
- Round 1: Ch 5. From the 2nd ch from hook: inc, 2 sc, 3 sc in one stitch, 3 sc on the other side of the chain (10)
- Rounds 2-4: 10 sc (3 rounds)
- Round 5: Popcorn stitch, 9 sc (10)
- Round 6: 10 sc (10)
- Round 7: 8 sc, dec (9)
- Rounds 8-24: 9 sc (17 rounds)
Do not stuff the arms. Insert wire for posing and fasten off.
The Legs & Body
Legs (Make 2): Start with skin-tone yarn. Follow the pattern for the feet, including the “heel” section using turns to create shape. Insert wire into the legs before stuffing. Stuff the legs firmly, adding more stuffing every 5-6 rows to prevent lumps.
Body: The body is worked by joining the legs together. Start by chaining between the legs and crocheting around the base. Continue working up, incorporating the arms into the body in Round 26 to ensure a seamless connection. Insert wire into the body for stability.
Clothing: Blouse, Overalls, and Accessories
Blouse: This is a striped piece using white and yellow yarn. Work in rows of dc and hdc to create the colorful pattern. Don’t forget to create a small loop for the button at the top!
Overalls: Use emerald green yarn. These are worked in hdc. The straps are created by working the piece up from the waist and adding buttonholes. Attach the two yellow buttons to the front straps.
Hat & Backpack: The hat is a green beret-style cap finished with two large, fluffy yellow pompoms. The white backpack is a small worked pouch with green trim and two straps attached to the back.
Finishing
Once all pieces are crocheted, carefully sew the head onto the body using the long tail left from the head. Attach the arms to the sides of the body, ensuring the fingers point forward. Finally, sew the hat onto the head and the backpack onto the back. Ensure all loose ends are woven in securely so they don’t pop out during play!
Tips
- Tension is Key: When working on the body, try to keep your tension consistent so the stuffing doesn’t show through the stitches.
- Firm Stuffing: To get that professional “store-bought” look, stuff your amigurumi very firmly. This prevents the doll from looking saggy over time.
- Wire Safety: If you are making this doll for a very young child, consider using plastic armature instead of metal wire to ensure safety.
- Customization: Don’t be afraid to play! You can change the hair color or the outfit colors to make your own unique version of Flora.