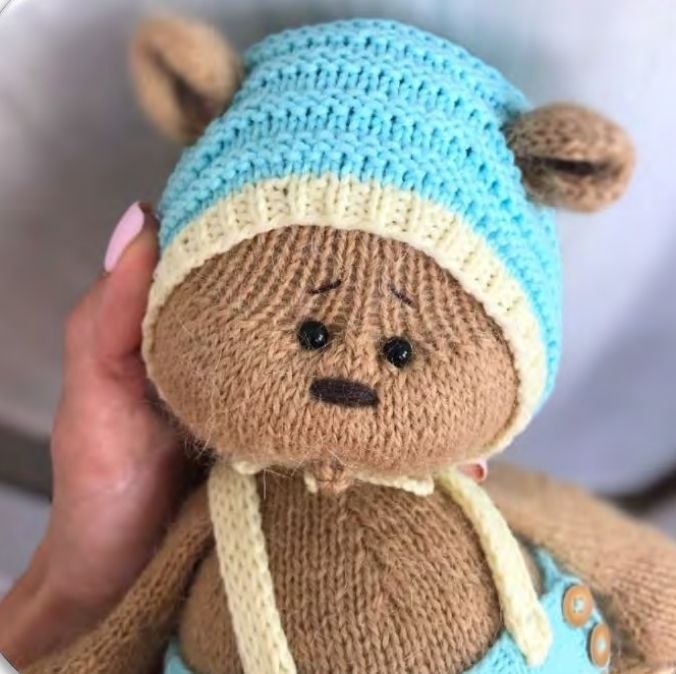
Adorable Knitted Teddy Bear Pattern: Create Your Own Cuddly Companion
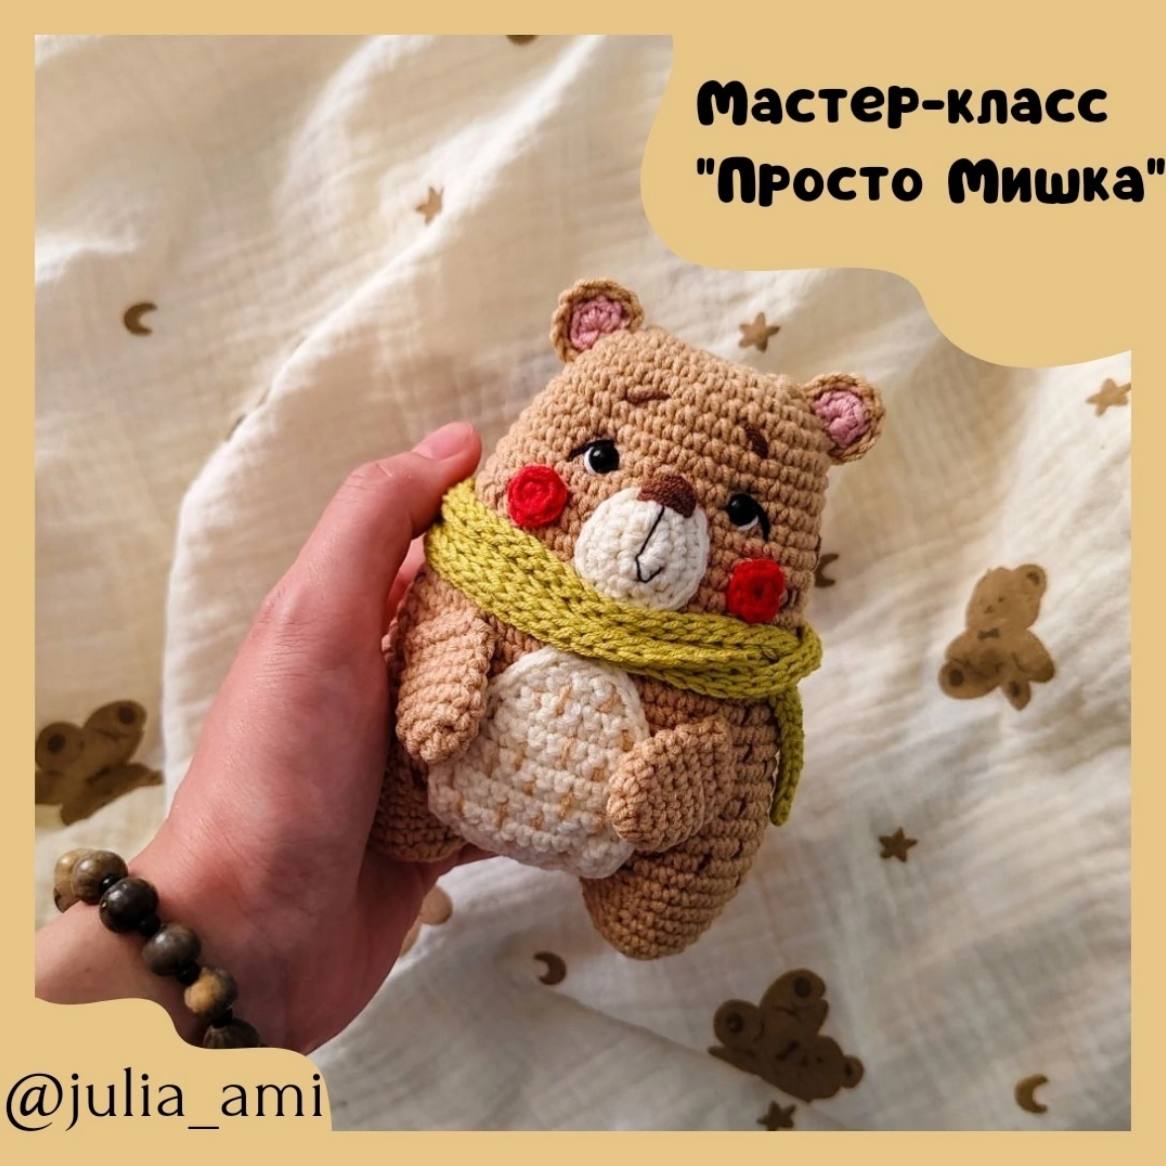
There is nothing quite like the charm of a handmade stuffed animal. Whether you are looking for a special gift for a newborn or a cozy project to unwind with on a rainy afternoon, this knitted teddy bear is the perfect choice. With its sweet expression and vintage-inspired look, this little bear is designed to be a lifelong friend.
This tutorial is written for beginners and intermediate knitters. We will be working primarily in the round, which means you can create a seamless toy without the need for bulky sewing later on. Grab your needles, find your favorite cozy yarn, and let’s get started!
Materials & Abbreviations
To ensure your bear turns out plump and professional, it is important to use a tight gauge. Choose a yarn that creates a dense fabric so the stuffing doesn’t peek through.
Materials Needed
- Yarn: Approximately 200-250 yards of DK or sport-weight yarn (wool, cotton, or a blend) in brown for the bear. For the outfit, you will need two contrasting colors of your choice.
- Knitting Needles: US 0 or US 1 (2.5mm – 2.75mm) double-pointed needles (DPNs) or a long circular needle for the Magic Loop method.
- Safety Eyes: Two 6mm to 7mm beads or safety eyes.
- Buttons: Six small buttons (approximately 0.3 inches / 7-10mm).
- Other Tools: Fiberfill stuffing, a long tapestry needle, scissors, and a 2mm crochet hook for the hat detailing.
- Embroidery Thread: Dark brown thread for the nose and eyebrows.
Abbreviations (US Terms)
- K: Knit
- P: Purl
- K2tog: Knit two stitches together (left-leaning decrease)
- SSK: Slip, slip, knit (right-leaning decrease)
- M1L: Make one left (increase)
- M1R: Make one right (increase)
- K3tog: Knit three stitches together
- Yo: Yarn over
- St(s): Stitch(es)
- St st: Stockinette stitch (knit every round when working in the round)
Step-by-Step Instructions
The Arms (Make 2)
Cast on 16 stitches and join to work in the round, leaving a long tail for sewing.
- Rounds 1-15: K all stitches (16 sts).
- Round 16: SSK, K5, M1L, K2, M1R, K5, K2tog (16 sts).
- Rounds 17-19: K all stitches (16 sts).
- Rounds 20-31: Repeat Rounds 16-19 three more times (16 sts).
- Round 32: K7, M1L, K2, M1R, K7 (18 sts).
- Round 33: K all stitches (18 sts).
- Round 34: K8, M1L, K2, M1R, K8 (20 sts).
- Round 35: K all stitches (20 sts).
- Round 36: K9, M1L, K2, M1R, K9 (22 sts).
- Rounds 37-41: K all stitches (22 sts).
- Round 42: SSK 11 times (11 sts).
Do not bind off. Cut the yarn, leaving a 8-inch tail. Thread the tail through the remaining stitches and pull tight to close. Stuff only the “paw” area of the arm; leave the rest empty for better posing.
The Legs (Make 2)
Cast on 22 stitches and join for working in the round.
- Rounds 1-15: K all stitches (22 sts).
- Round 16: K1, M1R, K7, K2tog, K2, SSK, K7, M1L, K1 (22 sts).
- Rounds 17-19: K all stitches (22 sts).
- Rounds 20-31: Repeat Rounds 16-19 three more times (22 sts).
- Rounds 32-33: K all stitches (22 sts).
- Round 34: K3, M1L, K2, M1L, K1, M1R, K2, M1R, K6, M1L, K2, M1L, K1, M1R, K2, M1R, K3 (30 sts).
- Round 35: K all stitches (30 sts).
- Round 36: K4, (M1L, K1) 5 times, M1R, (K1, M1R) 4 times, K17 (40 sts).
- Round 37: K all stitches (40 sts).
- Round 38: K7, (M1L, K3) 2 times, M1L, K1, M1R, (K3, M1R) 2 times, K20 (46 sts).
- Rounds 39-51: K all stitches (46 sts).
- Round 52: (K21, SSK) 2 times (44 sts).
- Round 53: K all stitches (44 sts).
- Round 54: (K1, SSK, K1) 11 times (33 sts).
- Round 55: K all stitches (33 sts).
- Round 56: (K1, SSK) 11 times (22 sts).
- Round 57: K all stitches (22 sts).
- Round 58: SSK 11 times (11 sts).
- Round 59: K all stitches (11 sts).
Thread the yarn through the remaining stitches and pull tight. Stuff the foot firmly, but use very little stuffing from the ankle up to the hip to maintain the natural curve of the leg.
The Body
Cast on 12 stitches and join to work in the round. Place a marker at the start of the round (this will be the center of the back).
- Round 1: K all stitches (12 sts).
- Round 2: (K1, M1L) 12 times (24 sts).
- Round 3: K all stitches (24 sts).
- Round 4: (K1, M1L, K1) 12 times (36 sts).
- Round 5: K all stitches (36 sts).
- Round 6: (K3, M1L) 12 times (48 sts).
- Round 7: K all stitches (48 sts).
- Round 8: (K2, M1L, K2) 12 times (60 sts).
- Round 9: K all stitches (60 sts).
- Round 10: (K5, M1L) 12 times (72 sts).
- Rounds 11-19: K all stitches (72 sts).
- Round 20 (Joining Legs): K13, K10 (across the first leg), K26, K10 (across the second leg), K13 (72 sts).
- Rounds 21-31: K all stitches (72 sts).
- Round 32: (K5, SSK, K5) 6 times (66 sts).
- Round 33: K all stitches (66 sts).
- Round 34: K9, (K5, SSK, K5) 4 times, K9 (62 sts).
- Round 35: K all stitches (62 sts).
- Round 36: K11, (K4, SSK, K4) 4 times, K11 (58 sts).
- Round 37: K all stitches (58 sts).
- Round 38: K9, (K4, SSK, K4) 4 times, K9 (54 sts).
- Round 39: K all stitches (54 sts).
- Round 40: K11, (K3, SSK, K3) 4 times, K11 (50 sts).
- Round 41: K all stitches (50 sts).
- Round 42: K9, (K3, SSK, K3) 4 times, K9 (46 sts).
- Round 43: K all stitches (46 sts).
- Round 44: K11, (K2, SSK, K2) 4 times, K11 (42 sts).
- Round 45: K all stitches (42 sts).
- Round 46: (K5, SSK) 6 times (36 sts).
- Round 47 (Joining Arms): K6, K7 (across the first arm), K10, K7 (across the second arm), K6 (36 sts).
- Rounds 48-49: K all stitches (36 sts).
- Round 50: (K1, SSK) 12 times (24 sts).
- Round 51: K all stitches (24 sts).
- Round 52: SSK 12 times (12 sts).
- Round 53: K all stitches (12 sts).
Stuff the body firmly as you go, ensuring there are no gaps at the base.
The Head
Continue knitting from the body without cutting the yarn.
- Round 1: (K1, M1L) 12 times (24 sts).
- Round 2: K all stitches (24 sts).
- Round 3: (K1, M1L, K1) 12 times (36 sts).
- Round 4: K all stitches (36 sts).
- Round 5: (K3, M1L) 12 times (48 sts).
- Round 6: K all stitches (48 sts).
- Round 7: K12, (K1, M1L, K1) 12 times, K12 (60 sts).
- Round 8: K all stitches (60 sts).
- Round 9: K15, (K1, M1L, K1) 15 times, K15 (75 sts).
- Rounds 10-11: K all stitches (75 sts).
- Round 12: K36, place marker for eye, K3, place marker, K36 (75 sts).
- Rounds 13-22: K all stitches (75 sts).
- Round 23: K35, place marker for mouth, K5, place marker, K35 (75 sts).
- Round 24: K all stitches (75 sts).
- Round 25: K15, K2tog 11 times, K1, SSK 11 times, K15 (53 sts).
- Round 26: K all stitches (53 sts).
- Round 27: K23, K2tog, K3tog, SSK, K23 (49 sts).
- Rounds 28-38: K all stitches (49 sts).
- Round 39: (K5, SSK) 7 times (42 sts).
- Round 40: K all stitches (42 sts).
- Round 41: (K2, SSK, K2) 7 times (35 sts).
- Round 42: K all stitches (35 sts).
- Round 43: (K3, SSK) 7 times (28 sts).
- Round 44: K all stitches (28 sts).
- Round 45: (K1, SSK, K1) 7 times (21 sts).
- Round 46: K all stitches (21 sts).
- Round 47: (K1, SSK) 7 times (14 sts).
- Round 48: K all stitches (14 sts).
Stuff the head firmly, especially the neck area. Close the top using a tapestry needle and weave in ends.
The Ears, Mouth, and Tail
Ears (Make 2): Cast on 10. R1: K all. R2: (K1, M1L) 10 times (20 sts). R3: K all. R4: (K1, M1L, K1) 10 times (30 sts). R5-9: K all. R10: SSK 15 times (15 sts). R11: K all. Close and fold in half before sewing to the head.
Mouth: Cast on 10. R1-2: K all. R3: SSK 5 times (5 sts). R4: K all. Close and sew to the face.
Tail: Cast on 6. R1: K all. R2: (K1, M1L) 6 times (12 sts). R3-8: K all. Close and stuff lightly.
Finishing
Now it is time to bring your bear to life! Follow these steps for a professional finish:
- Eyes: Position the safety eyes slightly above the mouth marker. Pull them tight so they sit deep in the face for a “cute” look.
- Face Details: Use your dark brown embroidery thread to stitch a small triangular nose and two short, curved lines for eyebrows to give your bear an expressive face.
- Assembly: Sew the ears symmetrically on top of the head and attach the tail to the lower back.
- The Outfit: If you are making the hat and pants, use the provided stitch counts and remember to use a crochet hook for the hat’s drawstring for a tidy finish.
Tips for Success
- Tight Tension: When knitting amigurumi (toys), tension is key. If you see gaps, try dropping down a needle size.
- Stuffing Technique: Use small clumps of fiberfill rather than one large piece to avoid lumpy limbs.
- Marker Usage: Always use stitch markers for the start of your rounds. It is very easy to lose your place in a sea of stockinette stitch!
- Blocking: While not always necessary for toys, gently steaming the finished clothes can help them lay flat and look more tailored.